How to enable Windows Recall

Configurare noua (How To)

Situatie

Solutie

1. Open Windows Settings
There are two ways to enable Windows Recall. The first is to opt in as soon as you boot up your PC, which will turn on the feature once you log in. Alternatively, you can also enable Recall by heading into Windows Settings.Once you’re logged in, open Settings. You can find the Settings app by typing in “Settings” in the search box along the taskbar.

2. Got to Privacy & Security > Recall & Snapshots
Next, head into Privacy & security by selecting it in the sidebar.
3. Turn on Snapshots
Once here, all you need to do is toggle the Save snapshot switch. Now, Windows Recall will be switched on. If you haven’t already, your PC will ask you to sign up to Windows Hello, which is essential to use the Recall feature. You can use facial recognition or a PIN, and these will be used every time you open the Recall app.
4. Open Recall

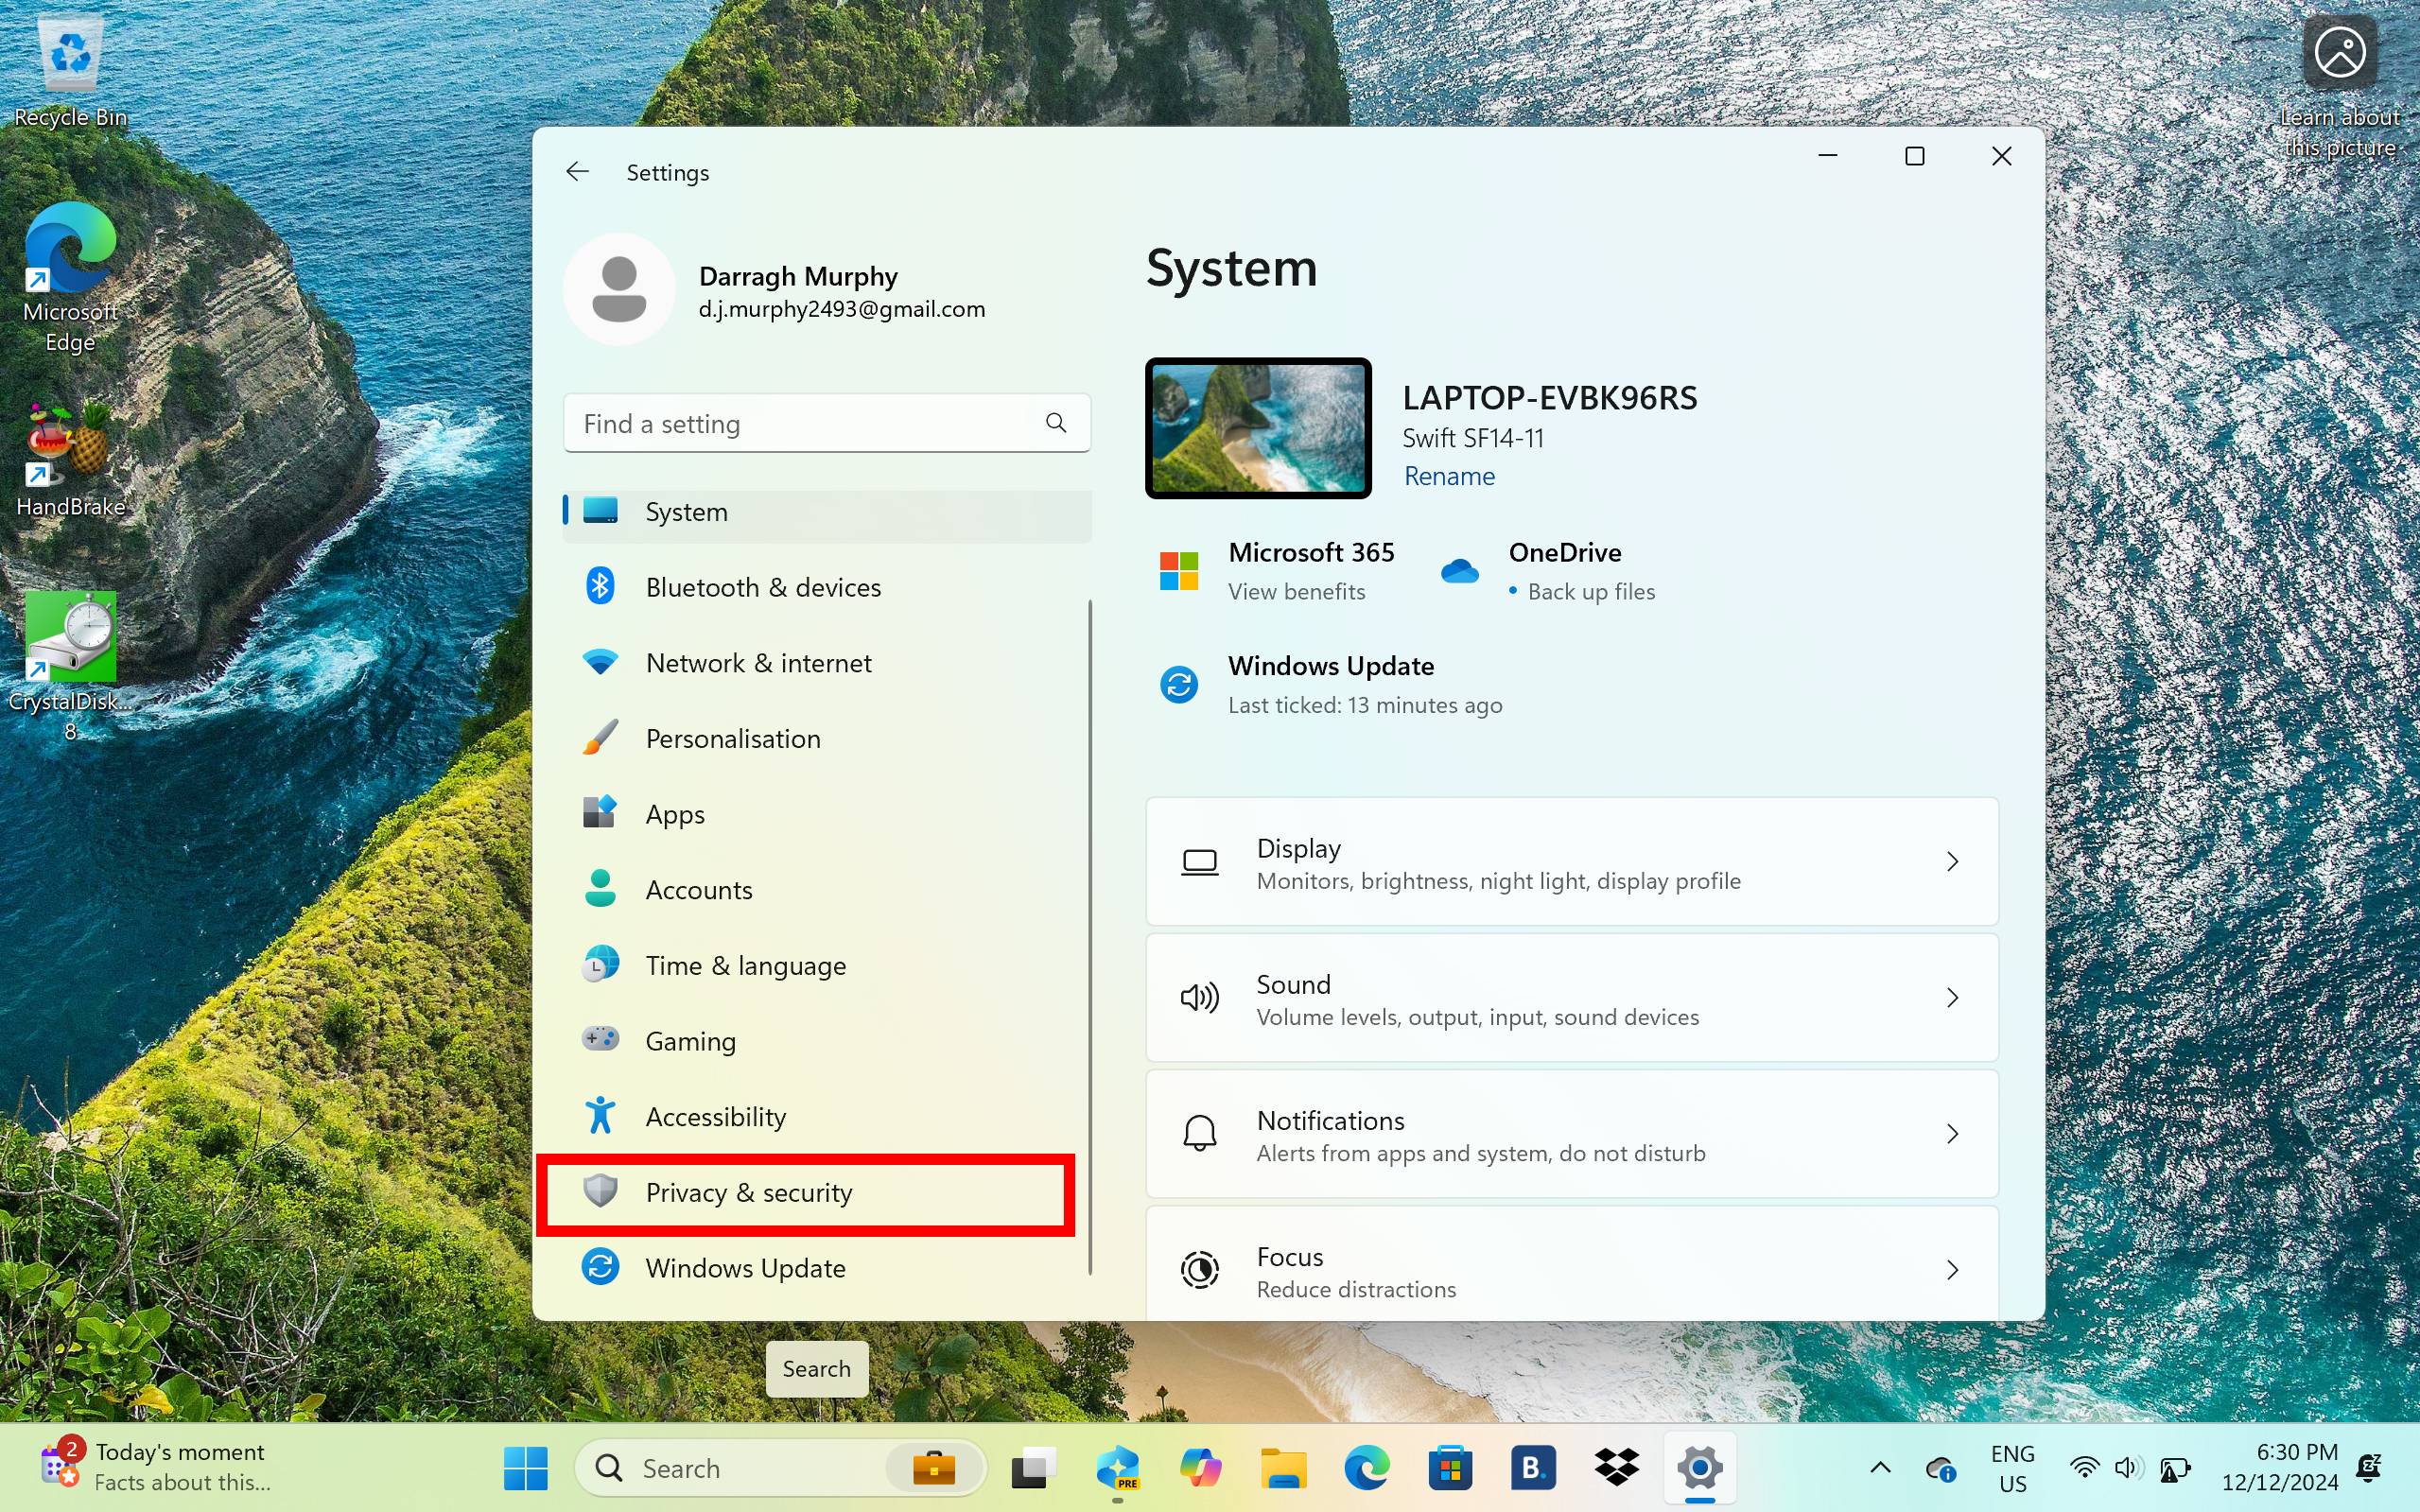
Now that it’s switched on, you can click on the Recall icon along the taskbar to open the app.

5. Search with Recall

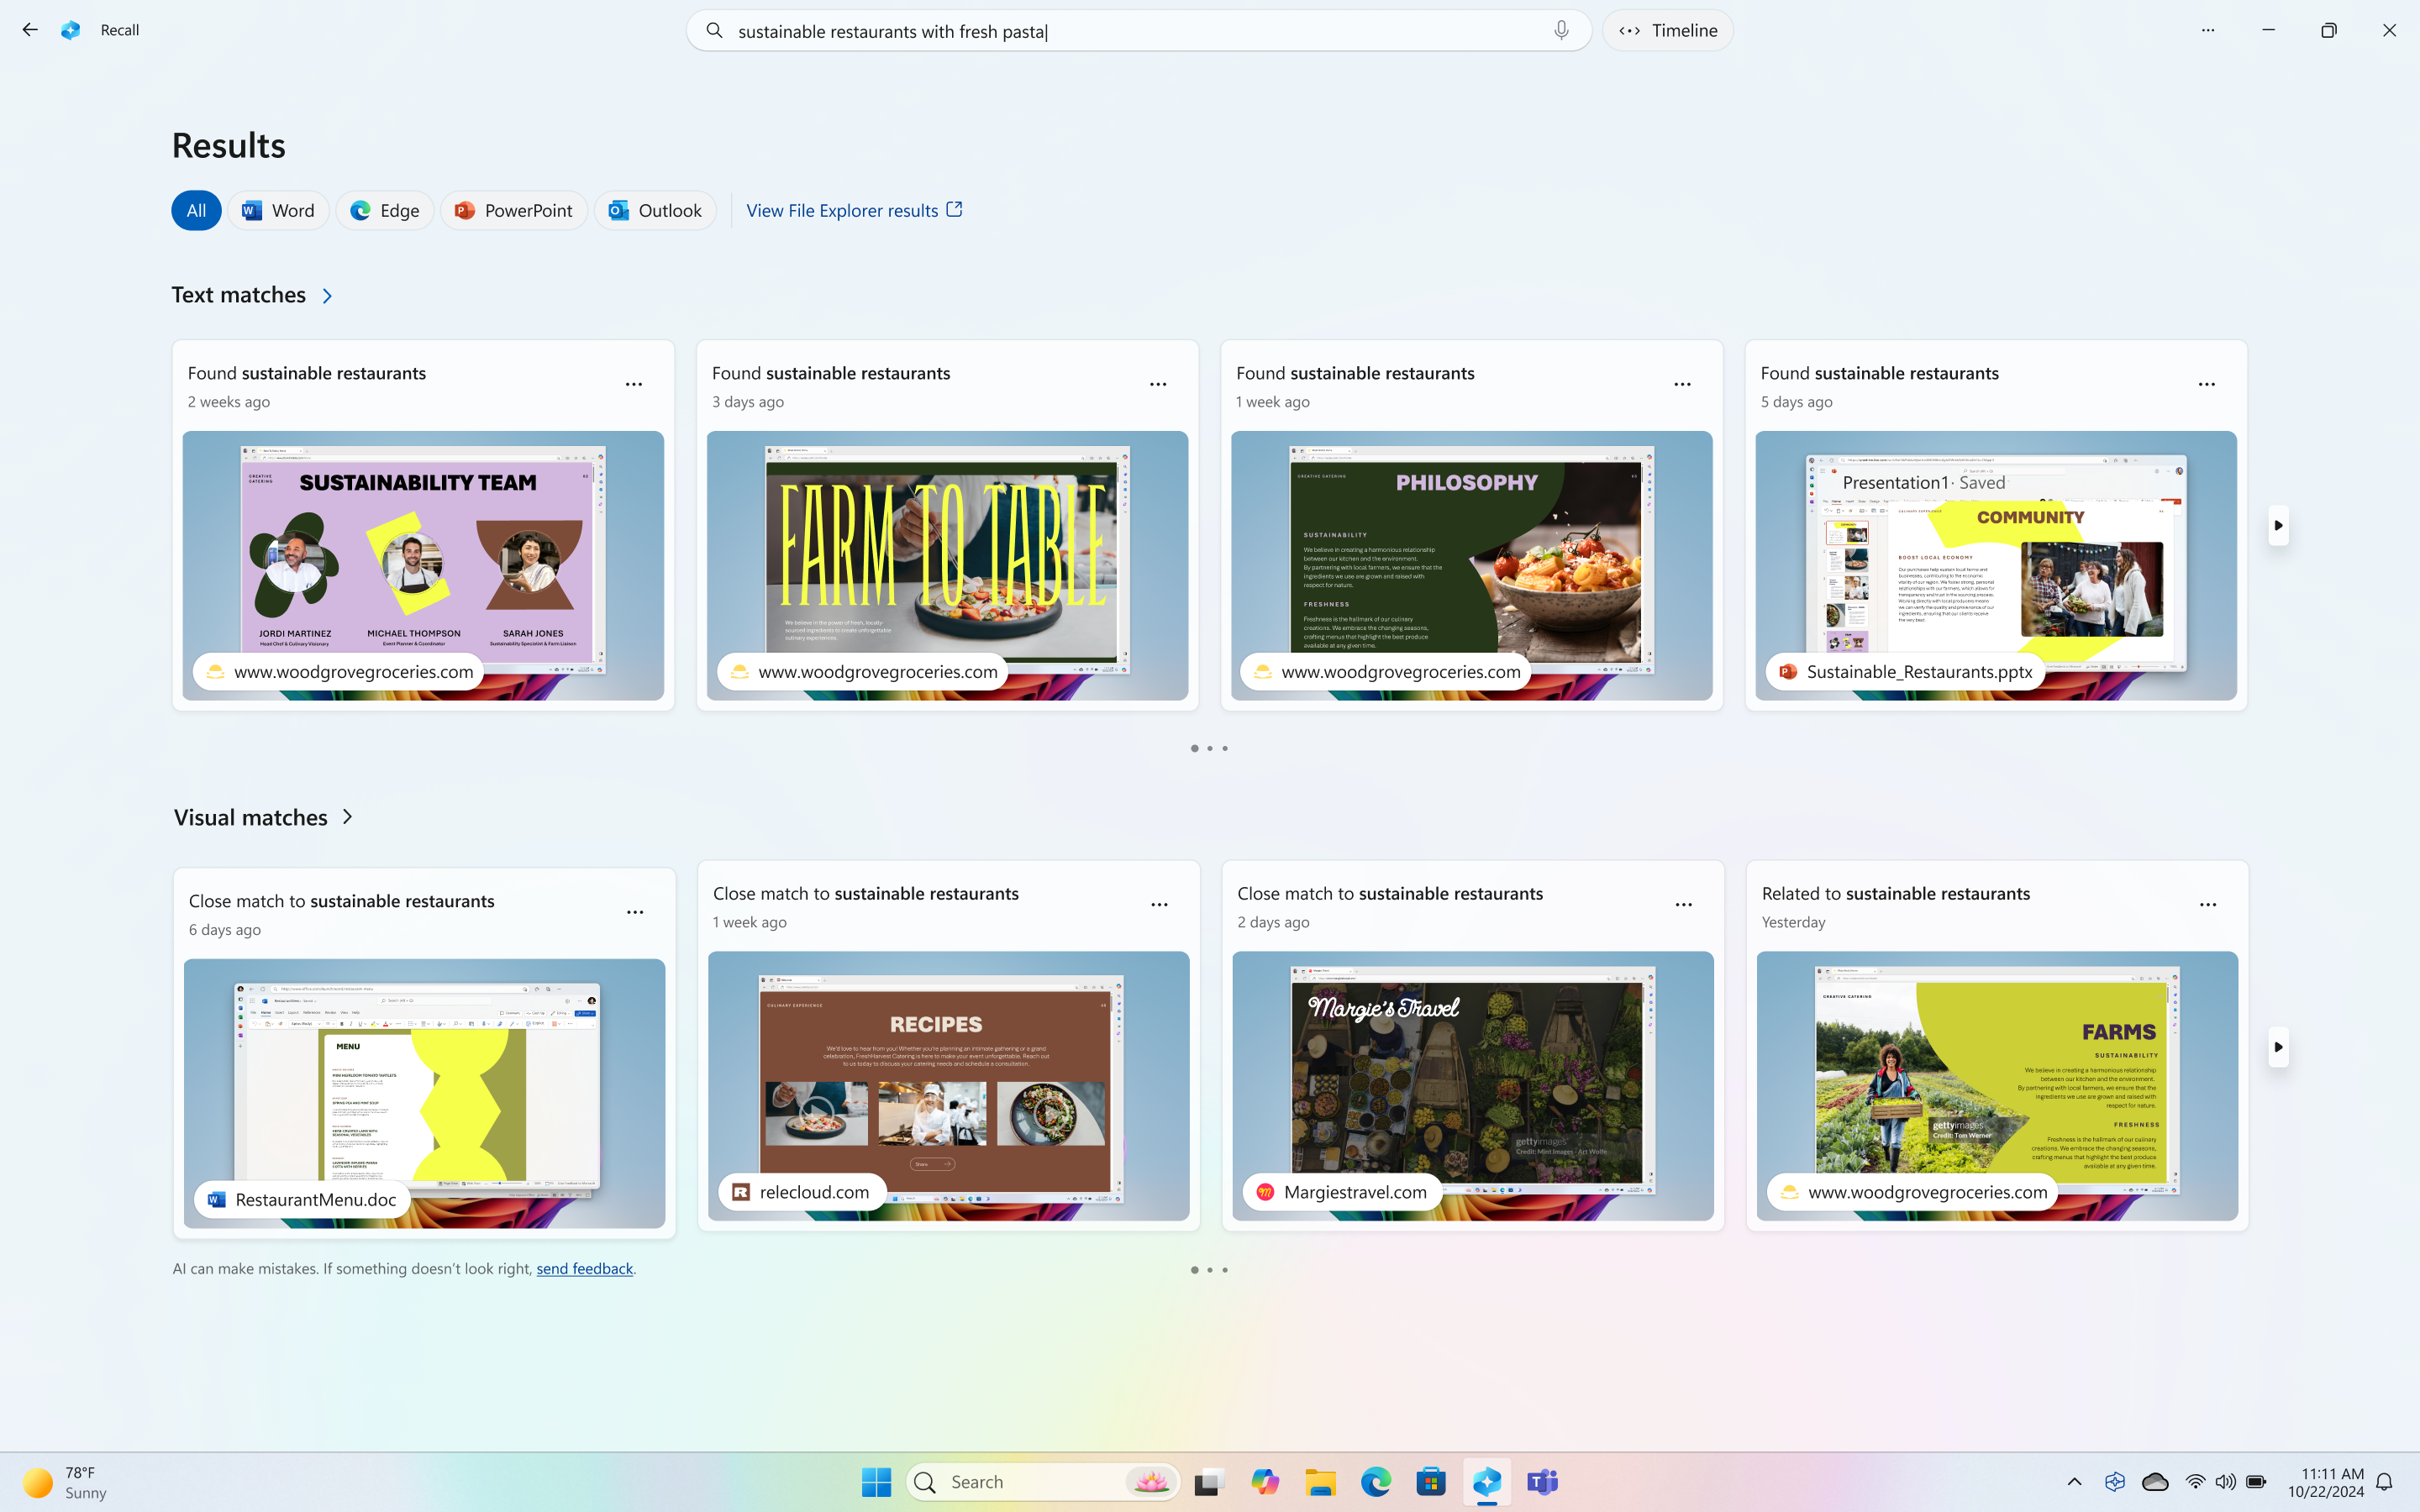
You can search for anything you remember doing on your PC that Windows Recall has taken snapshots of by typing in keywords or terms in the search box. The feature will then bring up snapshots that relate to the words searched, which can include websites you previously visited and more.

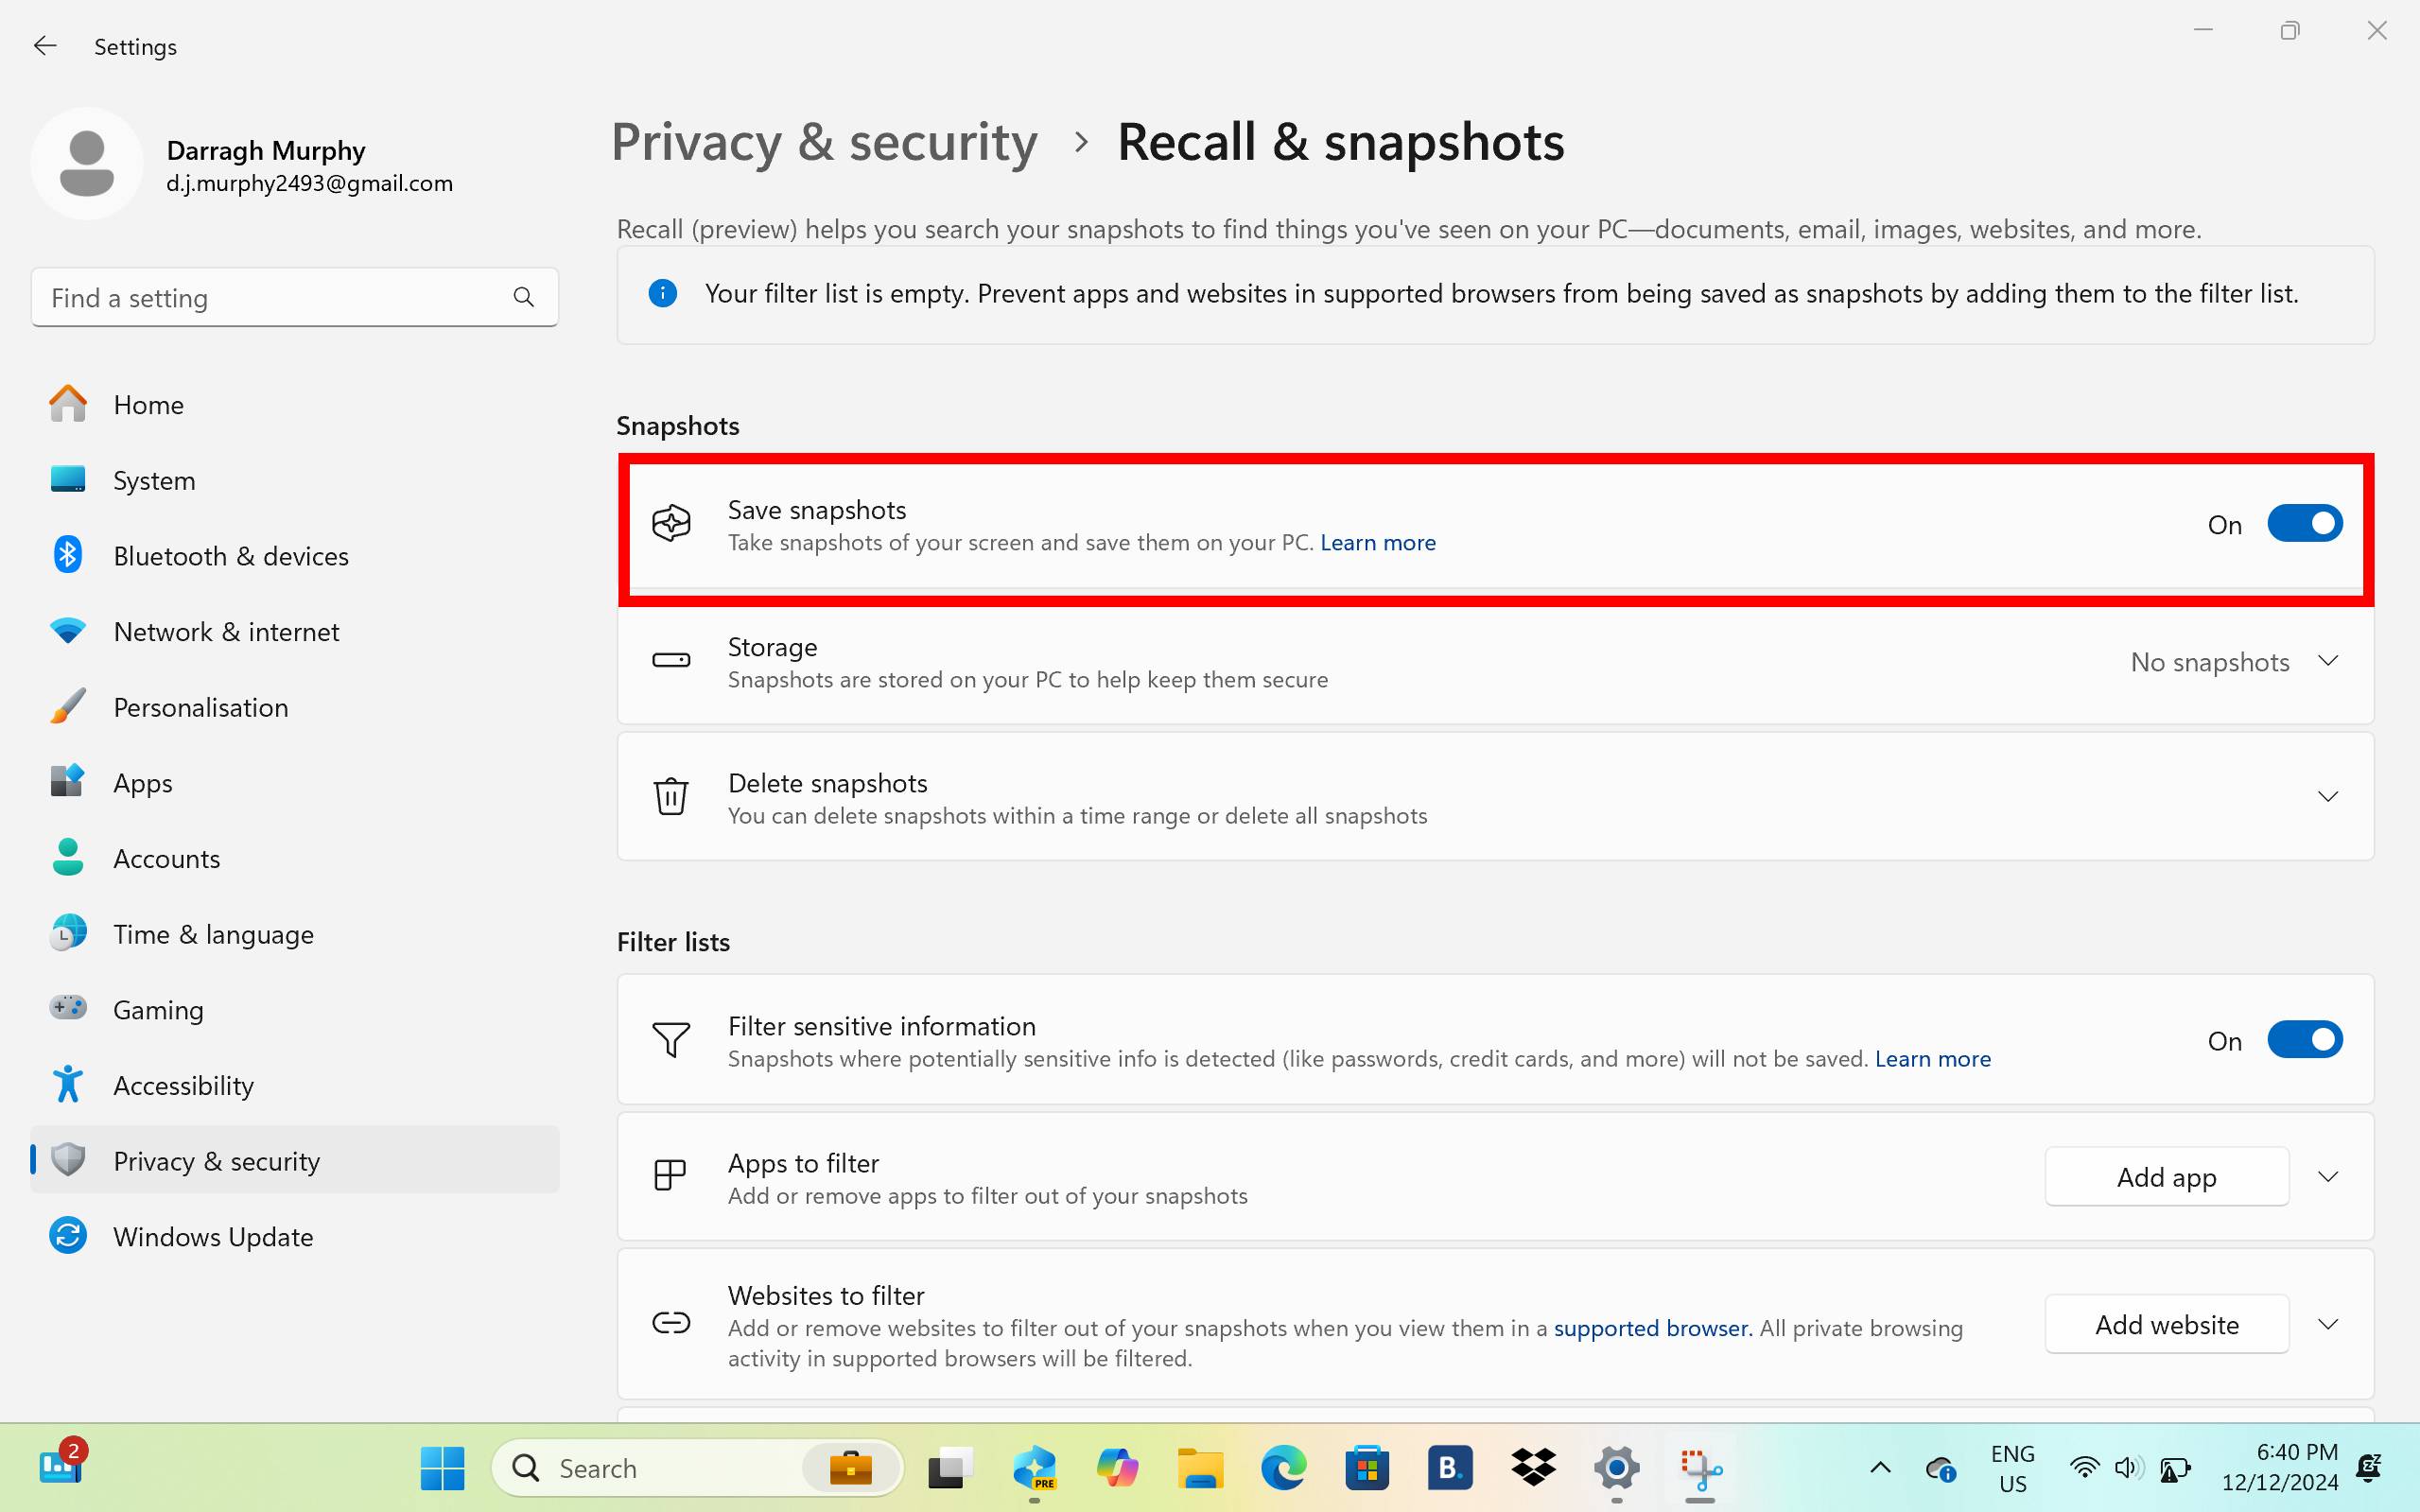
There you have it. Since Recall can take snapshots of everything you do, you’ll be able to block or filter specific websites you don’t want to be seen. Well, not everything, as we’ve recently seen Recall capturing credit card and Social Security numbers despite the sensitive information filter being switched on to block it out.

Microsoft has also confirmed that every time you open or use Recall, it will need to confirm your identity via Windows Hello. This can be done through your face, fingerprint, or PIN.

Tip solutie

Permanent

Voteaza

(2 din 4 persoane apreciaza acest articol)

Despre Autor

Leave A Comment?