Situatie
Solutie
1. Troubleshoot Windows Network Diagnostic
The first step to repairing the “DNS server isn’t responding” error is running network diagnostics. This will also help detect any other issues on the network.
- Open Control Panel – Network and Internet – Network and Sharing Center.
- Click on Troubleshoot problems option under Change your networking settings.
- Select Additional Troubleshooters – Internet Connections – Run the troubleshooter.

2. Change DNS Servers
By default, Windows will use the DNS server set on your router. If that DNS server has any issues, Google’s public DNS servers will be more helpful. This is how you do it.
- Click Windows key + R to start the Run interface where you input ncpa.cpl followed by Enter.
- Right-click your Internet connection on the Network connection window and select Properties.
- Double-click ‘Internet Protocol Version 4 (TCP/IPV4)’ in the Networking tab.
- Select the ‘Use the following DNS server addresses‘ option under the General tab.
- In the ‘Preferred DNS Server’ field, enter ‘8.8.8.8’, and in the ‘Alternate DNS Server’ field, enter ‘8.8.4.4’.
3. Flush and Renew DNS Cache
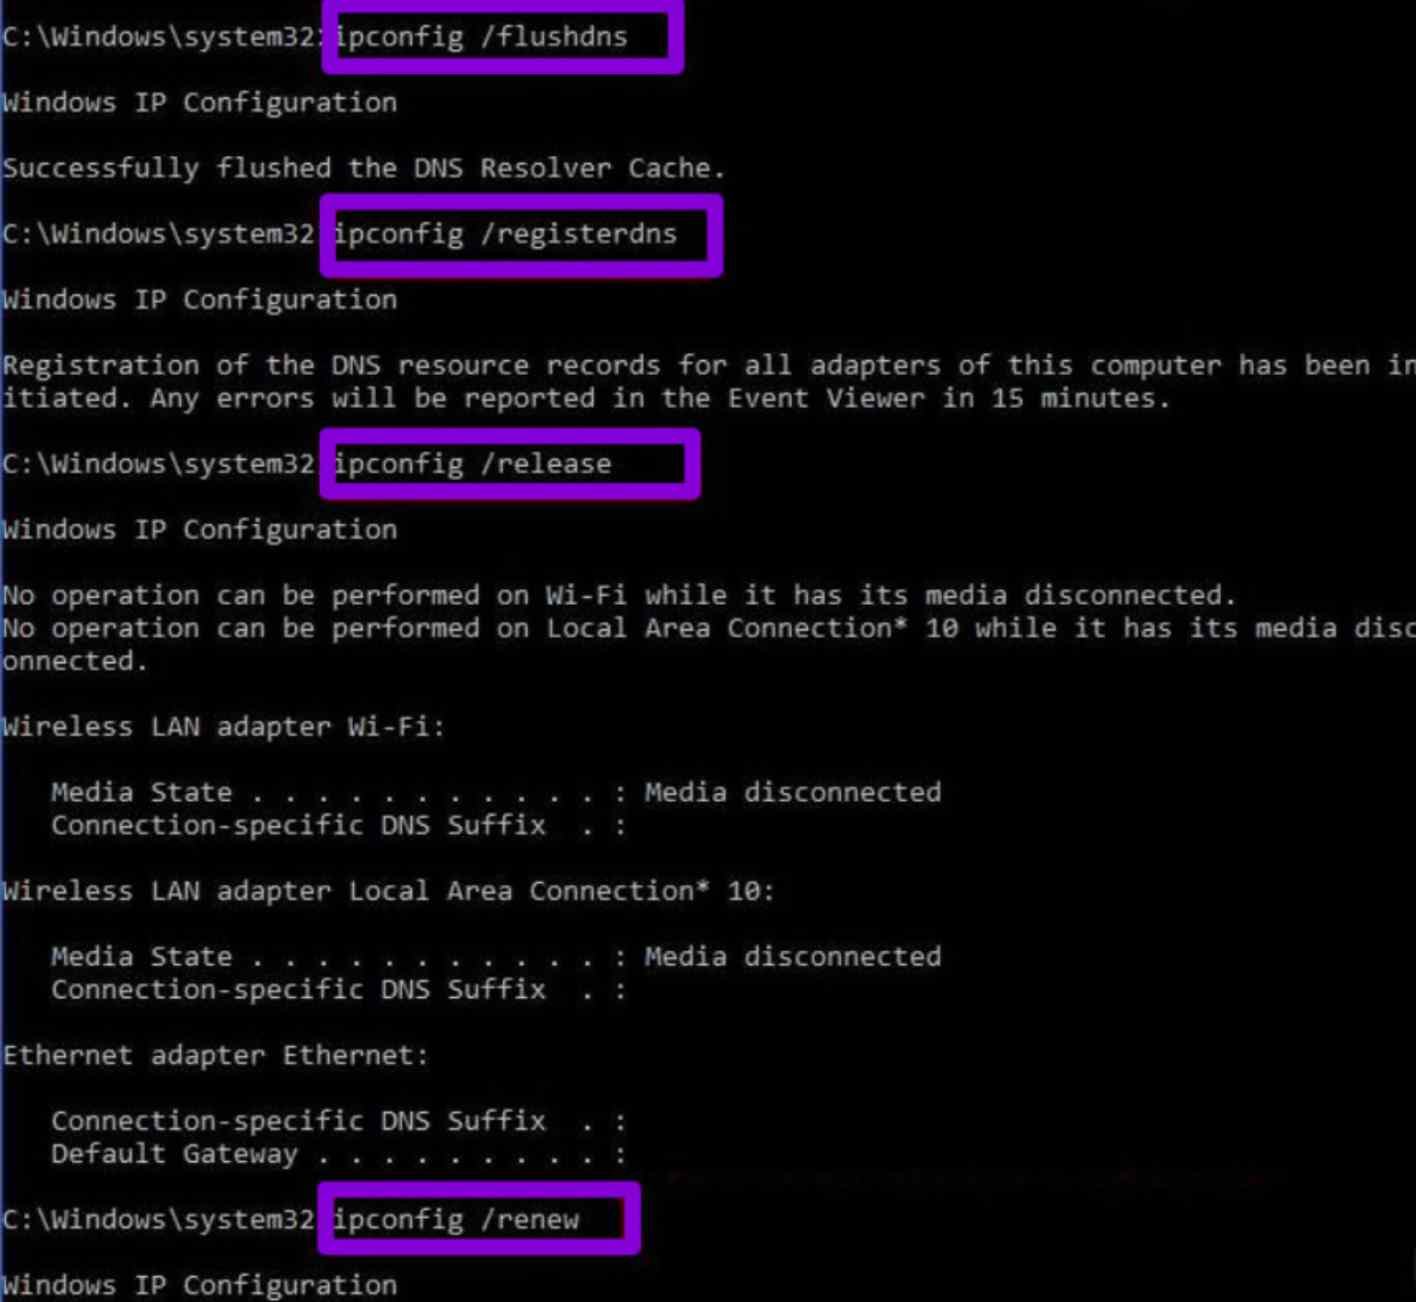
If the problems you’re experiencing with DNS are due to a corrupt DNS cache or incorrect settings, you might be able to resolve them by flushing and renewing your DNS.
- Press the Windows key + S to open the search menu, type in cmd, and click on Run as administrator.
- From here, run the following commands:
-
- ipconfig /flushdns
- ipconfig /registerdns
- ipconfig /release
- Run every command separately in your console, hitting Enter after each one.

4. Disable Firewall/Antivirus
Although antivirus and firewall programs assist in protecting your device from malicious software, they can also affect your internet connection adversely. Try deactivating your antivirus and firewall programs to see if they’re the source of the “DNS server is not responding” error.
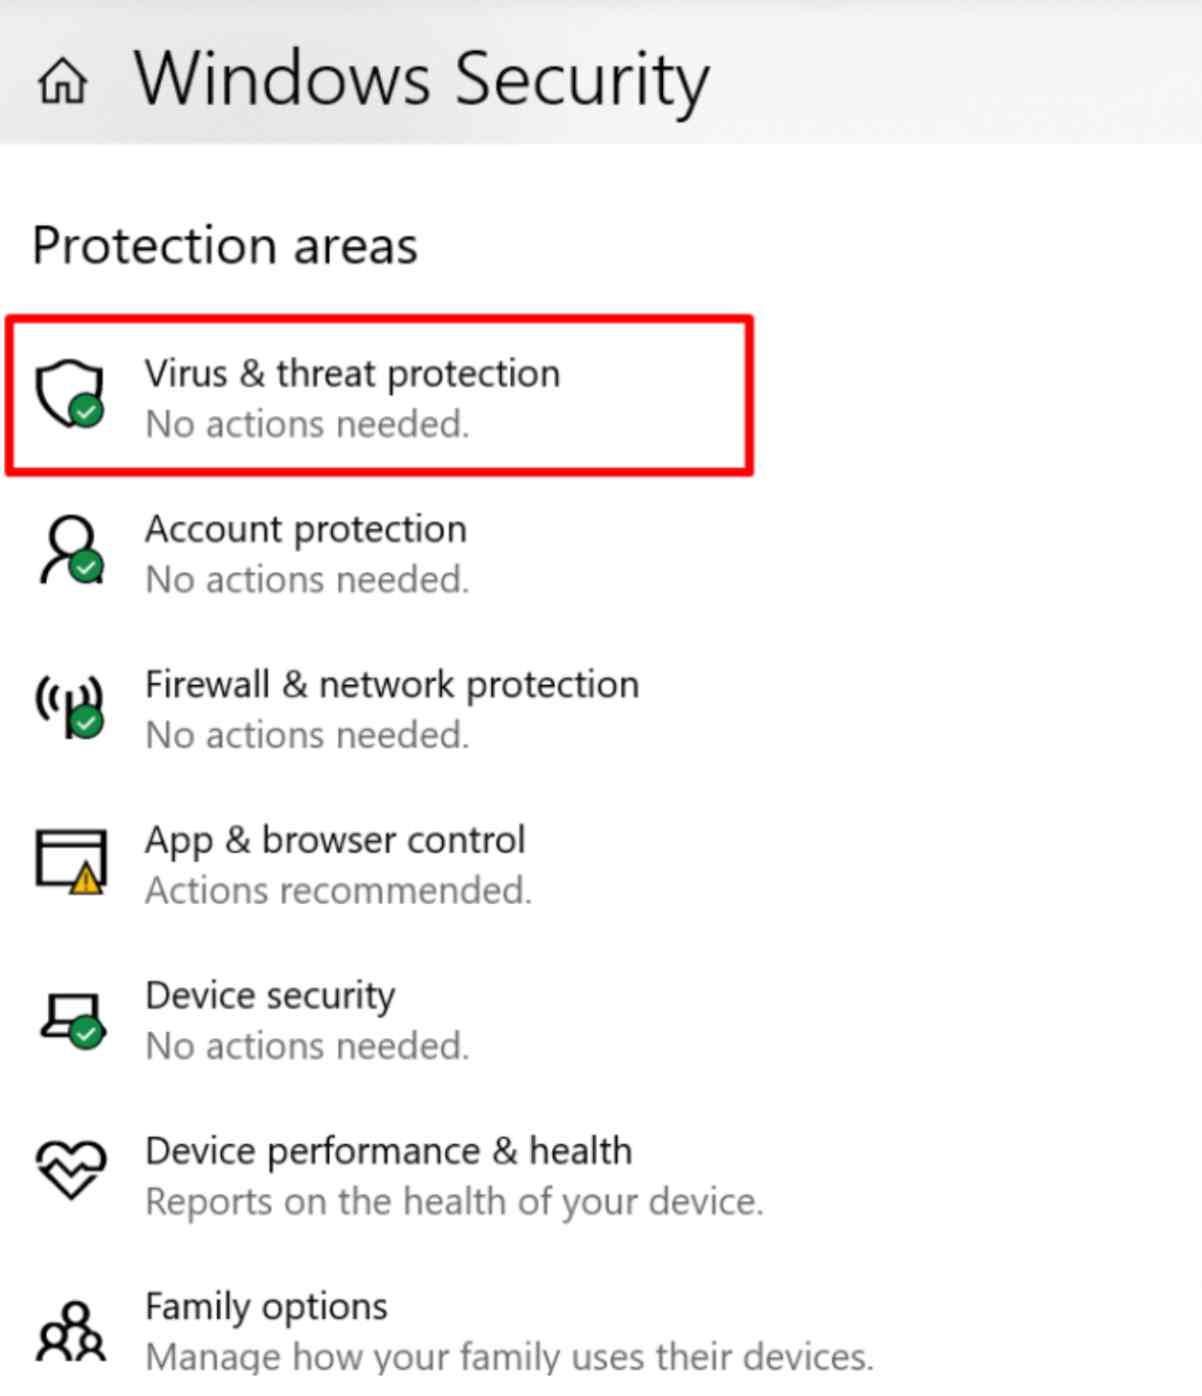
- Choose the Start menu to locate the antivirus and firewall settings on Windows.
- Click Settings – Update & Security – Windows Security – Virus & threat protection.

5. Disable IPv6
IPv6 is the internet protocol’s latest version that identifies both devices on the internet and those on the local network. The “DNS server is not responding” issue can also occur with IPv6.
This is how you disable IPv6 on Windows:
- Right-click on the active connection to access your network connections and click on Properties.
- Select the ‘Networking’ tab. Choose the box next to ‘Internet Protocol Version 6 (TCP/IPv6)’.


Leave A Comment?