Situatie
File Explorer can sometimes act weird, crash, or become unresponsive.
Solutie
Restart the File Explorer Process
When File Explorer freezes up or malfunctions, first, force the process to end and then restart. This gives it a fresh start, which will fix a bunch of minor problems.
- To do that, launch Task Manager by pressing Ctrl+Shift+Esc.
- From the left sidebar, select “Processes”.
- On the right pane, find the process that says Windows Explorer, right-click it, and choose “Restart”.
- File Explorer will close and re-open.
File Explorer caches various items to make your experience smoother and faster. Sometimes, this cache becomes corrupted, causing various nondescript problems. In this case, clearing the saved cache will probably fix the issue.
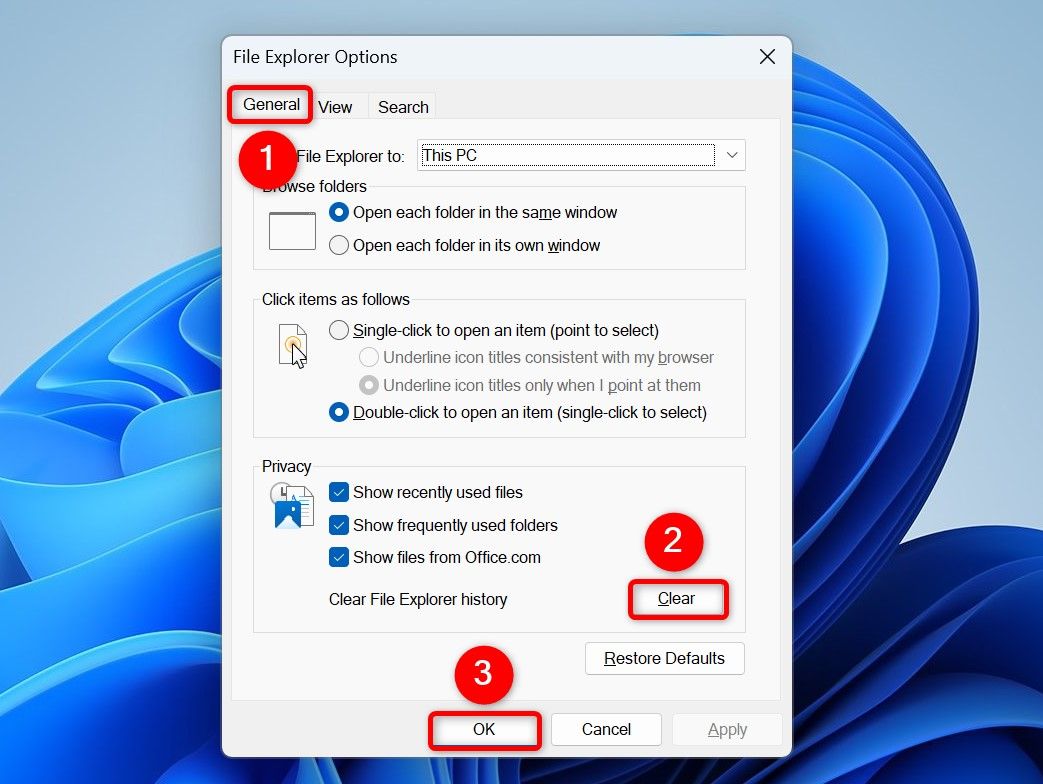
Launch Windows Search (press Windows+S), type File Explorer Options, and choose the item with that name. In the File Explorer Options window, open the “General” tab if you aren’t already there. In the Privacy section, click the “Clear” button.
You won’t get a notification but know that the cache is cleared. Close the window by clicking “OK.” Then, launch File Explorer as usual, and it should work as expected.
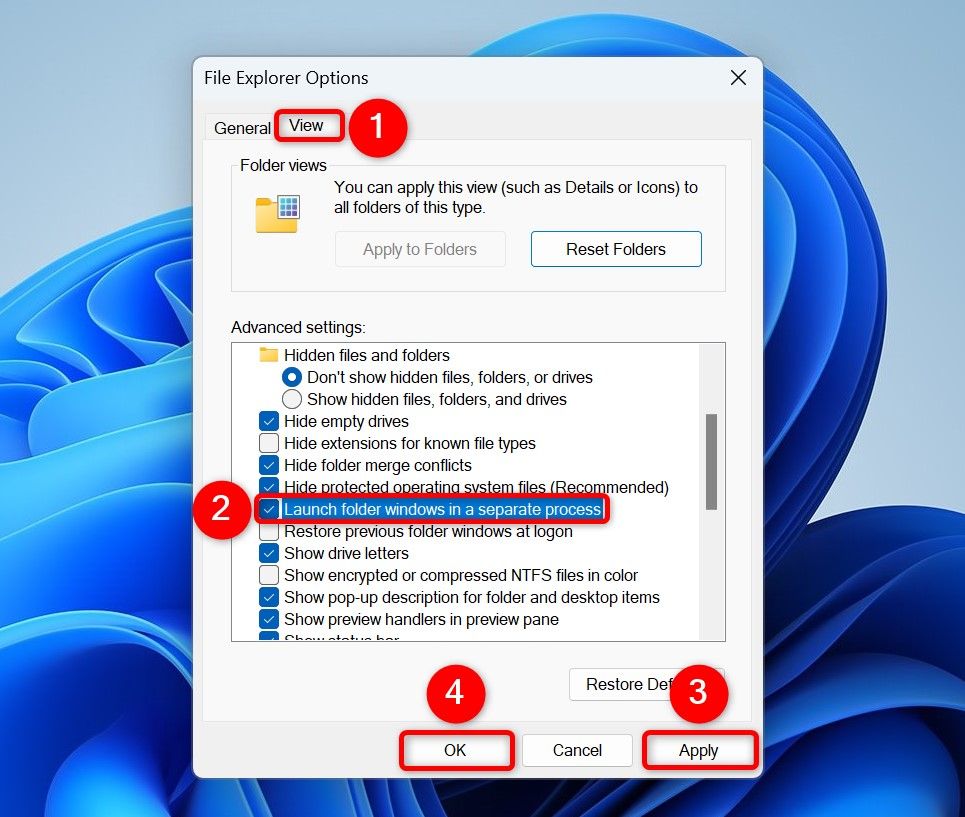
You can toggle on an option so that File Explorer launches each folder window in a separate process. This way, if a specific window has an issue, that issue won’t affect other open windows.
To do that, open Windows Search, type File Explorer Options, and select the item with that name. On the File Explorer Options window, access the “View” tab. In the Advanced Settings section, turn on the “Launch Folder Windows in a Separate Process” option. Then, select “Apply” followed by “OK.”
Open File Explorer and the issue should be fixed.
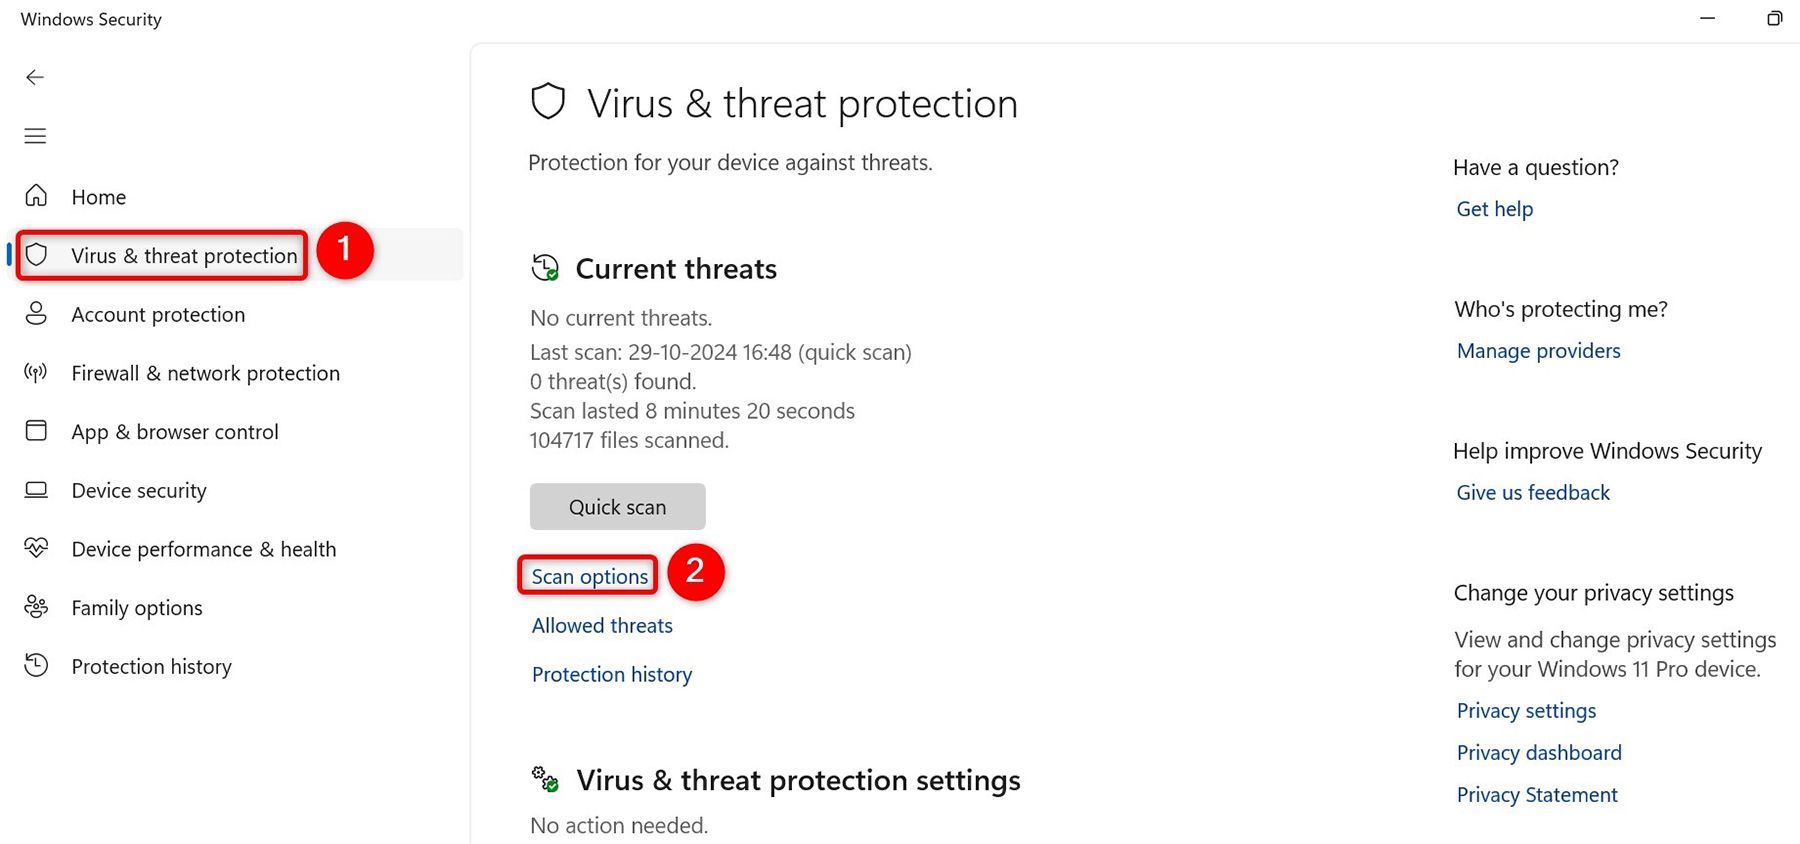
It’s possible File Explorer is acting weird because your PC is infected with a virus or malware. In this case, run a full virus scan to remove any threats from your computer.You can use an antivirus of your choice or the built-in Microsoft Defender Antivirus to run a scan. To use the latter, open Windows Search, type Windows Security, and launch the app. From the left sidebar, select “Virus & Threat Protection.” On the right pane, choose “Scan Options.”
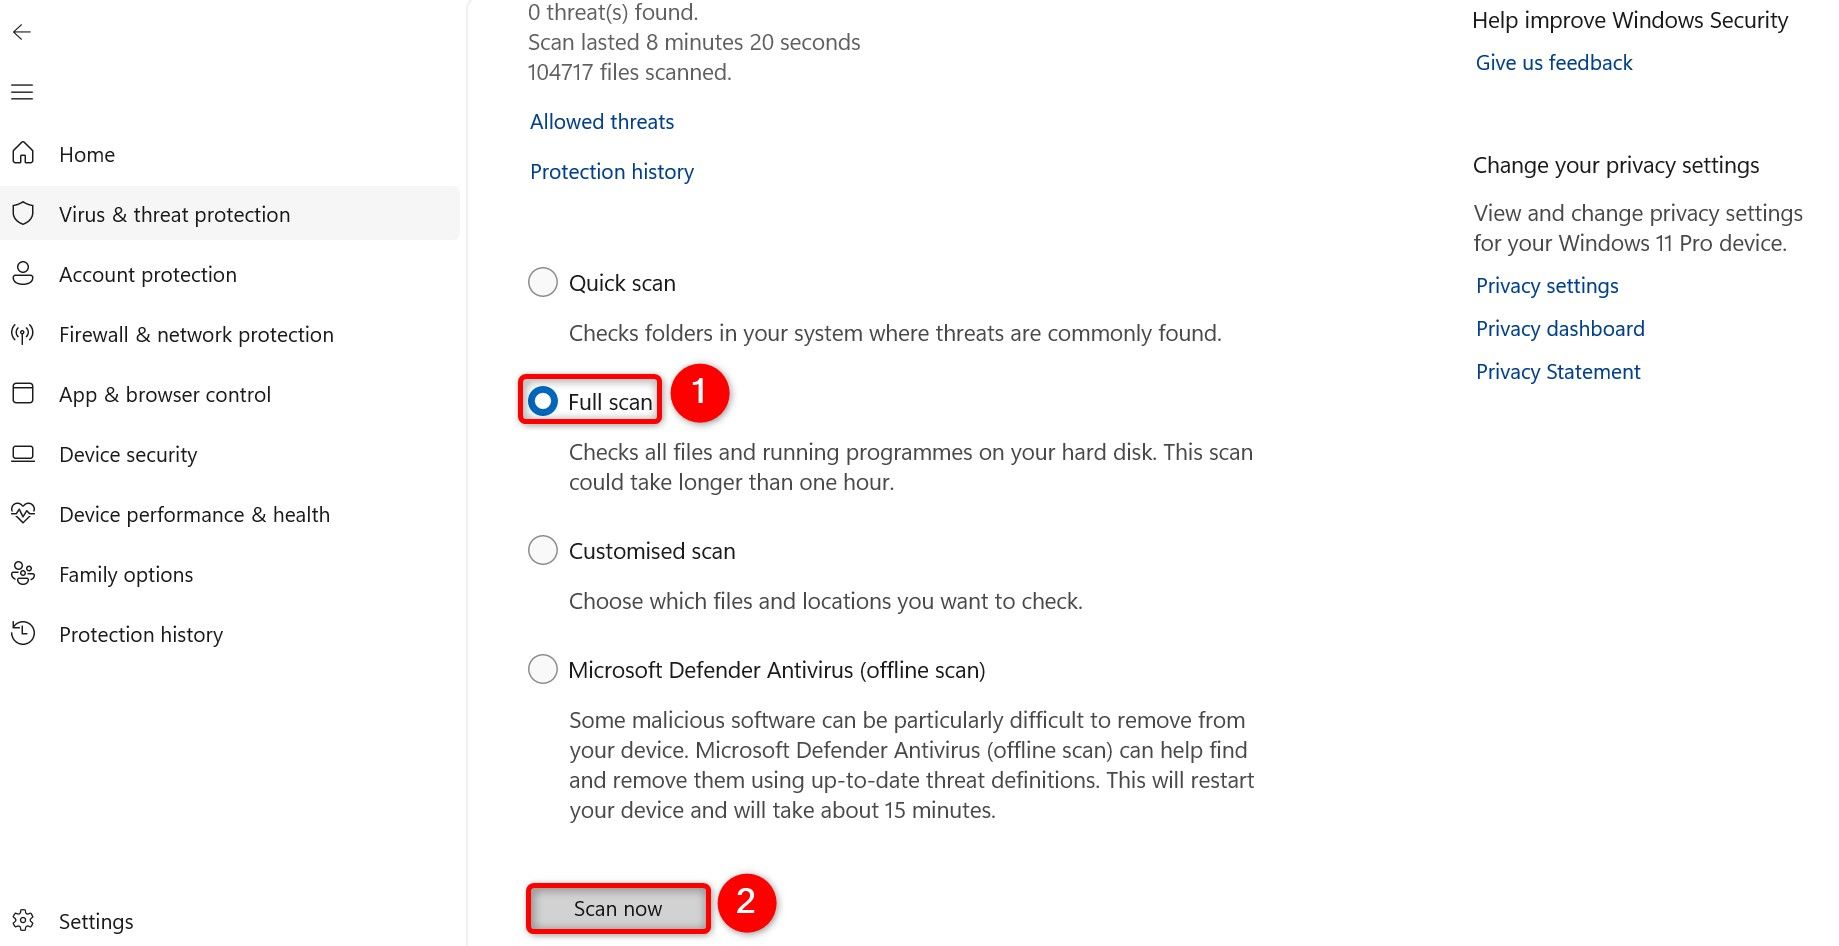
On the following page, select “Full Scan” and choose “Scan Now”
Wait for Windows Security to fully and thoroughly scan your PC and remove any threats. This can take several minutes, or longer, depending on how much storage your PC has. Once the scan is complete, restart your Windows 11 PC.
Update Windows
One reason File Explorer may be having issues is a software bug—they’re not super common, but it has happened. Windows system updates often resolve such problems, so update your PC to fix such issues.
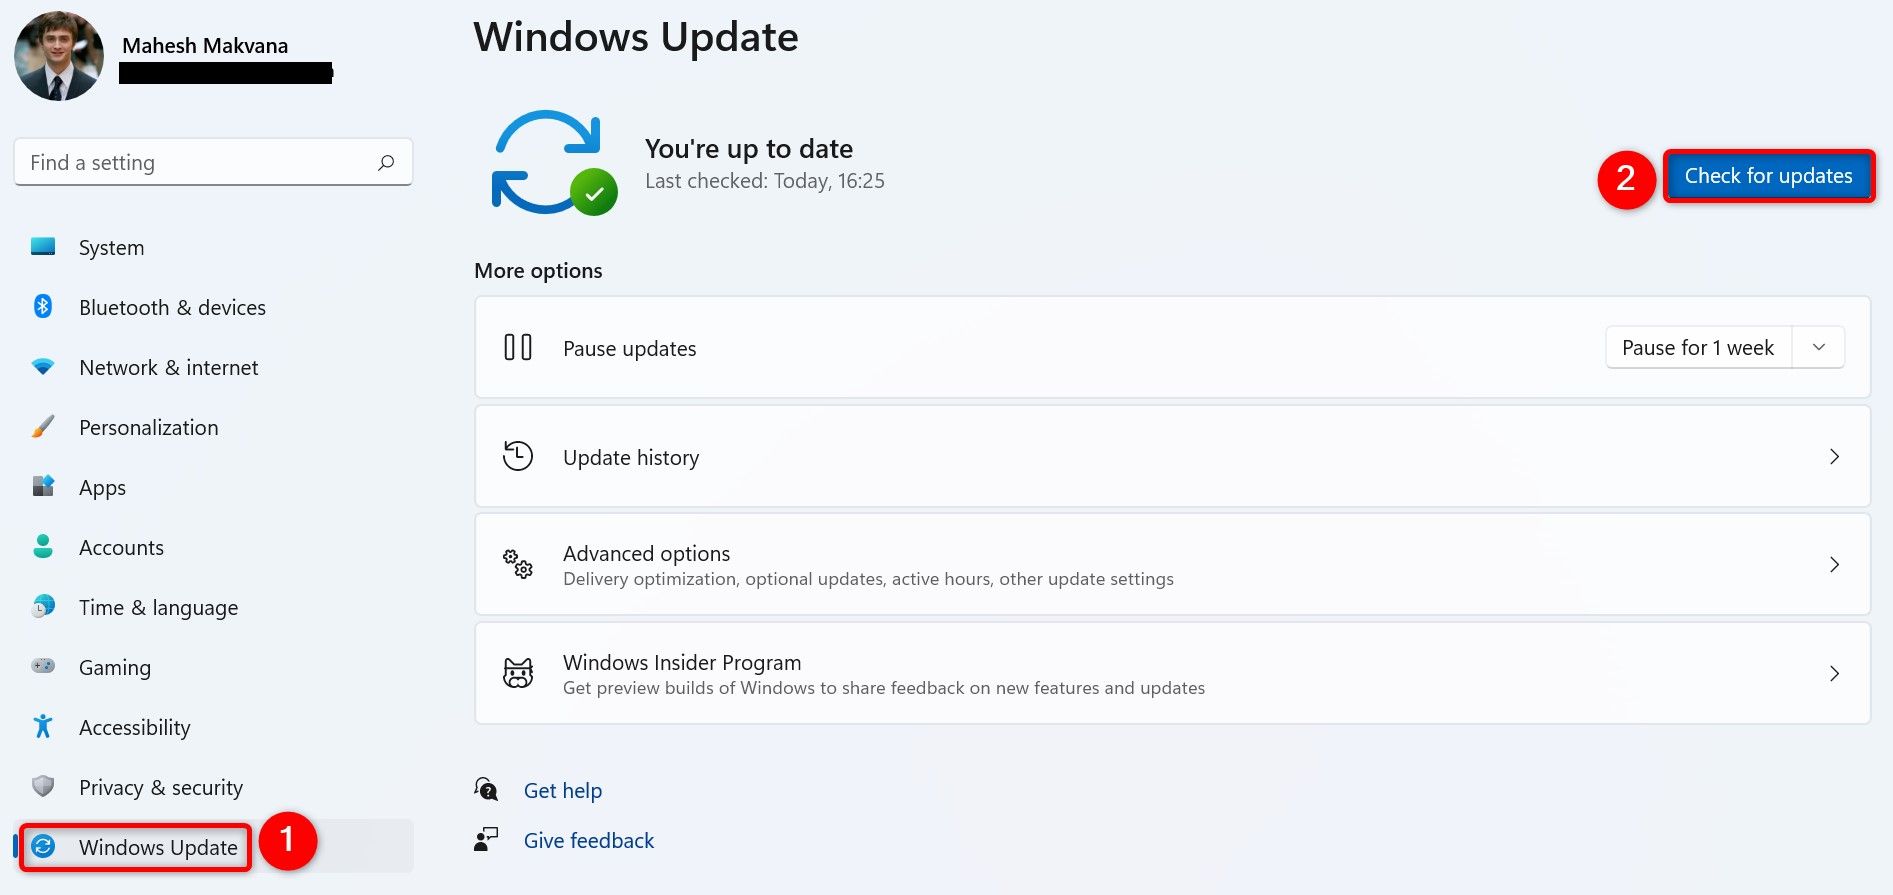
To do that, open Settings by pressing Windows+i, then, from the left sidebar, select “Windows Update”. On the right pane, at the top, click “Check for Updates”.
Wait for Windows to find the latest updates. Download and install the available updates, then reboot your PC.
It’s possible the current user account has a problem, causing issues with File Explorer. In this case, switch to a different account on your PC and see if the problem persists. If you don’t already have a different account, it’s easy to create local user accounts on Windows 11.
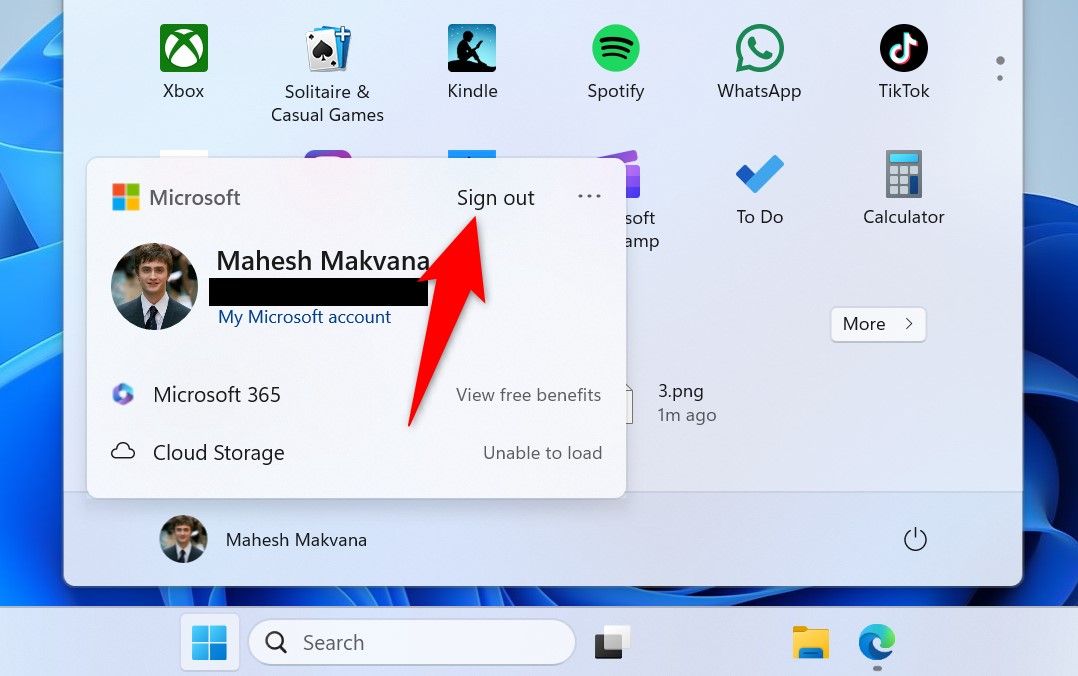
Once you have an additional account set up, log out of your current account. Do that by opening the Start Menu, clicking your account name, and selecting “Sign Out” in the top-right corner.
Choose the account to log in to and sign in to the account. Then, launch File Explorer and see how it works. If you don’t notice any issues, your previous account likely had issues. In this case, you can try fixing problems with your account, or transfer all your files to a new account.
Windows 11 offers a clean boot mode where you can disable all non-essential services and use your PC. This allows you to find out if a specific third-party item is causing the problem. Once you find such an item, you can disable or remove it.
To enter clean boot mode, open Run by pressing Windows+R. Type the following in the open box and select “OK” or press Enter: msconfig
In the System Configuration window that opens, access the “Services” tab. At the bottom of the service list, enable the “Hide All Microsoft Services” option. Then, choose “Disable All.” This turns off all the non-Microsoft services for when you enter clean boot mode.
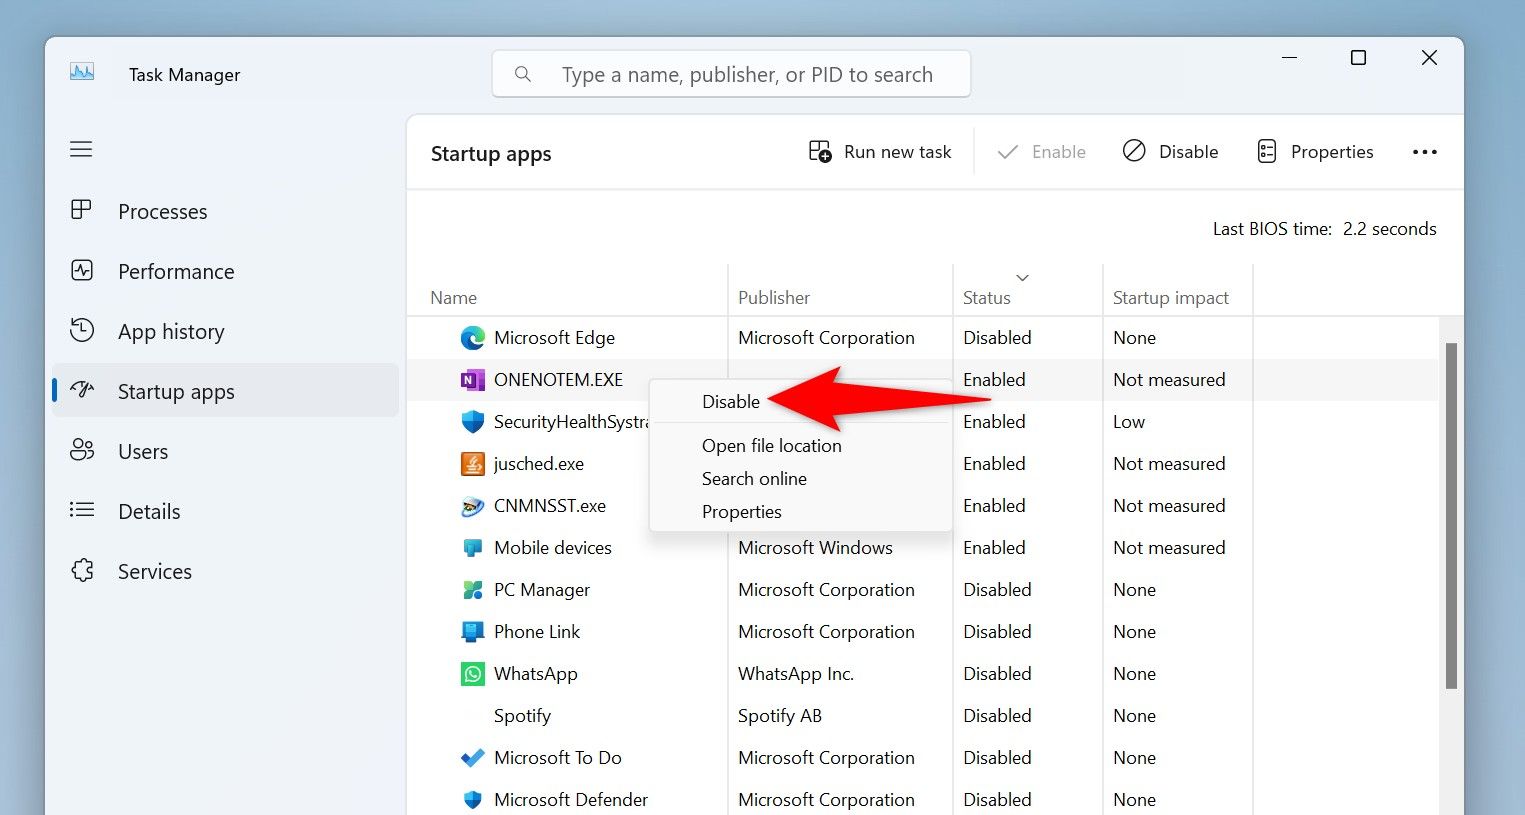
Open the “Startup” tab and click “Open Task Manager.” In Task Manager, right-click each app whose Status column says “Enabled” and choose “Disable.” This turns off all the startup apps. Then, quit Task Manager.
Back on the System Configuration window, click “OK.” Restart your computer, and you’ll enter clean boot mode. If File Explorer works fine in this mode, one or more of the services you disabled were the culprit. In this case, enable one service at a time to find the culprit, then remove the app that’s responsible for that service from your PC.

Leave A Comment?