Situatie
Solutie
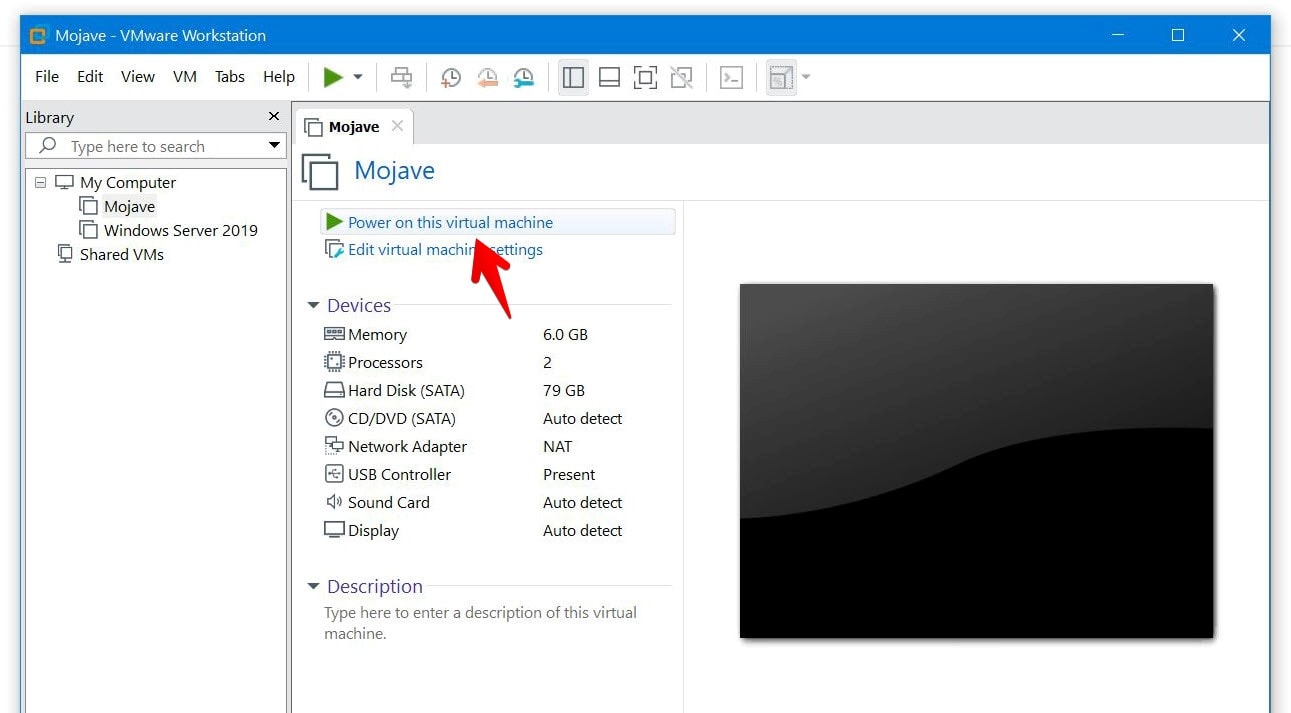
All the usual installing steps are important, but you need to perform some more steps in addition to them. The nice thing is, it’s all done from the vmx file. There are two ways you do get it done. The first way you could do it is from the VMware with the wizard. The other way you could do is from the vmx file. We’ll move with the easier one. This is simple as we have covered you with every step with shots.
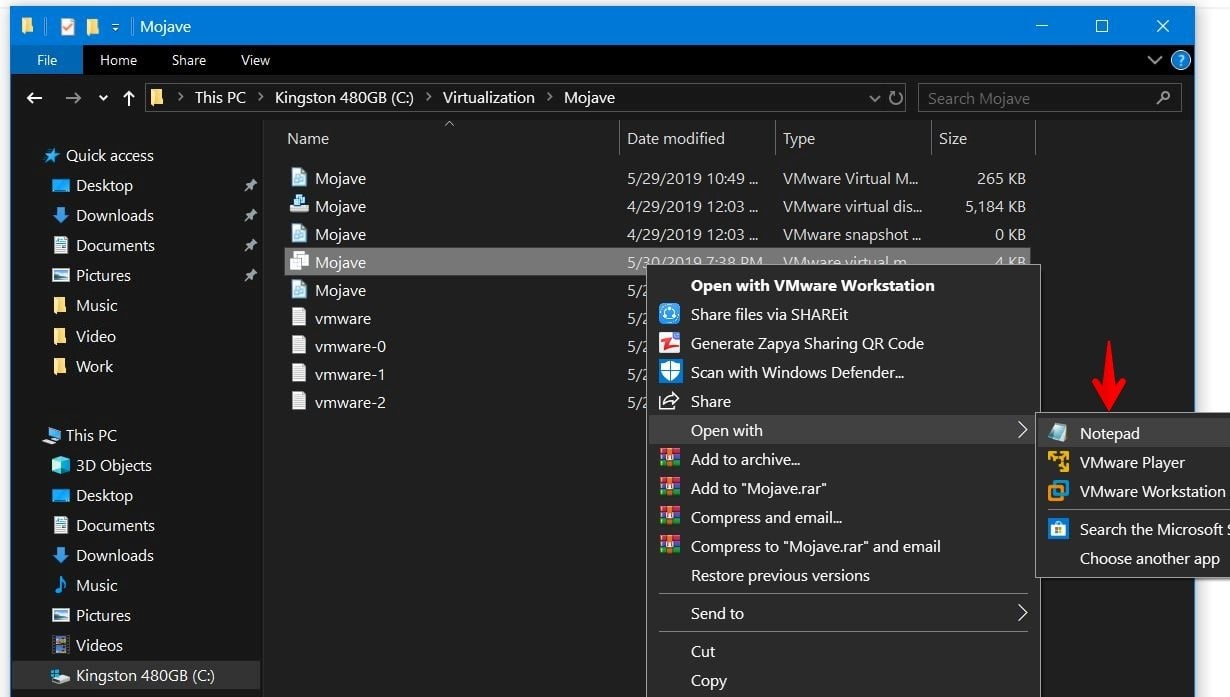
Go ahead and navigate to the virtual machine files. Now right click on the .vmx file and select Open with and choose Notepad.
When the file opened, change the version number to 10. It will change the virtual machine hardware compatibility to 10.
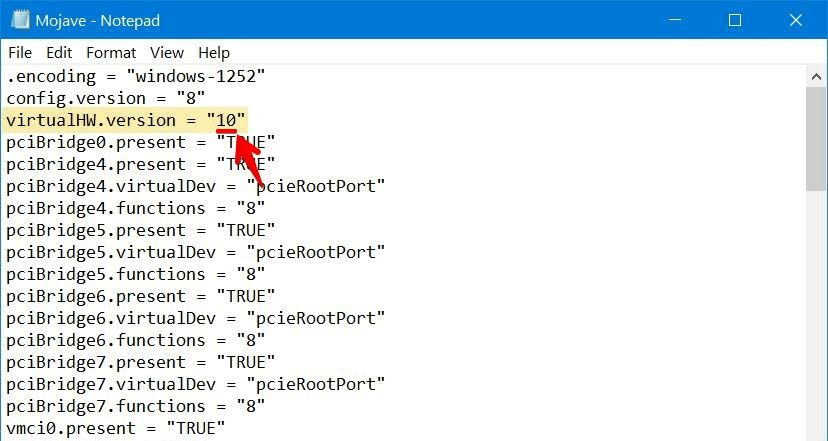
If you miss changing the hardware compatibility of the machine from VMware, you’ll likely encounter this problem.
Add the Config Key for the Virtual Machine
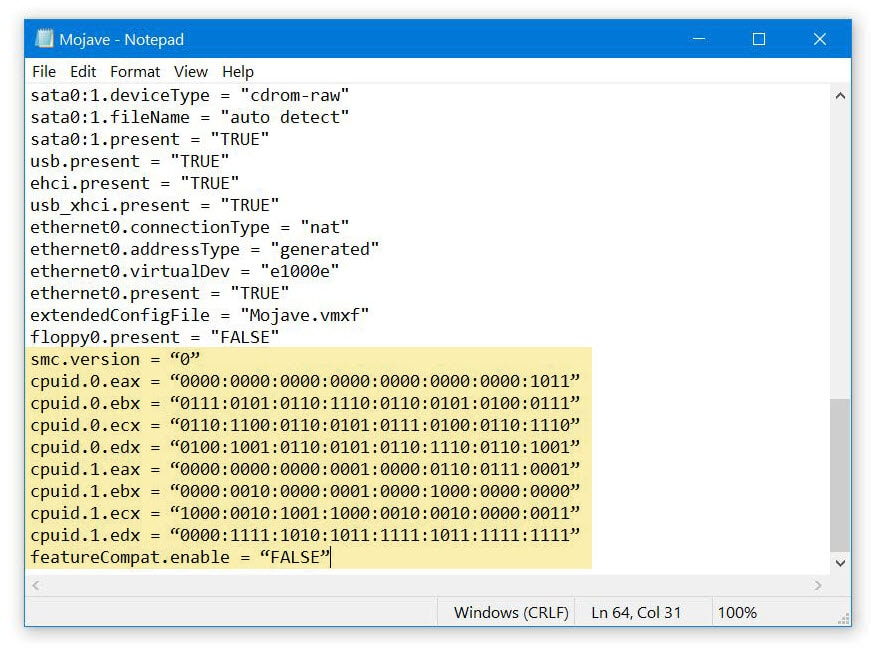
Now without closing the .vmx file, copy the following code and paste it at the end of all lines. If you’ve the config key smc.version = 0 already there, you may remove it and paste this in place of it. It should look like this.
cpuid.0.eax = “0000:0000:0000:0000:0000:0000:0000:1011”
cpuid.0.ebx = “0111:0101:0110:1110:0110:0101:0100:0111”
cpuid.0.ecx = “0110:1100:0110:0101:0111:0100:0110:1110”
cpuid.0.edx = “0100:1001:0110:0101:0110:1110:0110:1001”
cpuid.1.eax = “0000:0000:0000:0001:0000:0110:0111:0001”
cpuid.1.ebx = “0000:0010:0000:0001:0000:1000:0000:0000”
cpuid.1.ecx = “1000:0010:1001:1000:0010:0010:0000:0011”
cpuid.1.edx = “0000:1111:1010:1011:1111:1011:1111:1111”
featureCompat.enable = “FALSE”
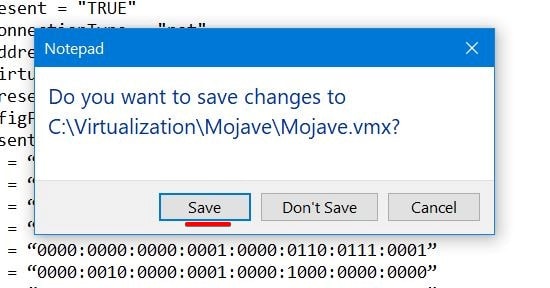
When you’re done with it, simply save it.
Leave A Comment?