Situatie
There are mainly two methods you can use to fix this issue, depending on the main two reasons for this error message appearing. Before you begin, make sure to restart your PC.
Solutie
Pasi de urmat
Setup Paging File Properly
One of the main causes of this error message popping up is misconfigured virtual memory settings. You may have misconfigured settings if you have encountered this error after changing virtual memory settings or when trying to change the paging files’ location. If you have never touched the virtual memory settings, you should still check it, as some other settings or software may have done it.
Here’s how you can check and set up your virtual memory settings:
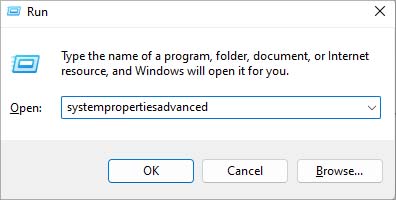
- Access the Run dialog box by pressing Windows + R button.
- Enter
systempropertiesadvancedto open System Properties.
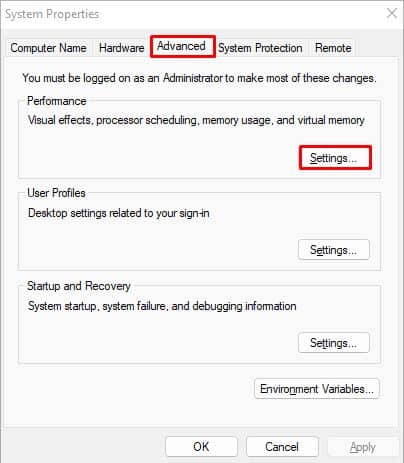
- In Advanced, click on Settings under Performance.
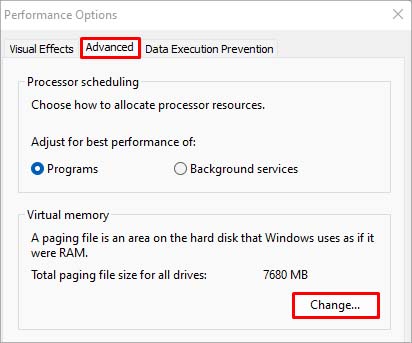
- Go to the Advanced header and click on Change.
- Deselect Automatically manage paging files size for all drives.
- Make sure the paging files are in the drive Windows OS is in.
- Make sure to select the System managed size option in the paging file size. (Only set it to No paging file if you have a lot of RAM and your computer won’t need Virtual memory.)
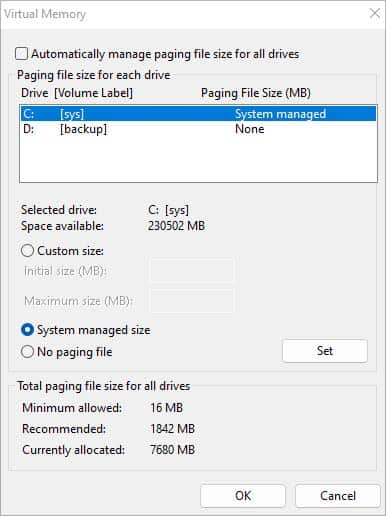
- You can also set it as Custom size, but it is best to leave it to Windows.
- If you set custom size, set the Initial size as the recommended amount in the bottom, and the Maximum size as either 1.5 times, 2 times, or 4 times the amount of your RAM.
- Note that the paging file size is set in megabytes, not gigabytes. About one thousand MB equals one GB.
- If you do not want any customization, select the Automatically manage paging files size for all drives option again.
- Check if the error message still appears.
Moving your paging files to another drive is not practical anymore, and it is best left to the system default. However, if you still want to change the paging file location, the best place for it is an SSD (if you have one) or less frequently used drives.
To fix this issue, you can delete your previous page file and your computer will automatically create a new one. Here’s how you can do so:
- Press Windows + R hotkey to launch the Run box.
- Enter
systempropertiesadvancedto open System Properties.

- Go to the Advanced Header and click on Settings under Performance.
- In the newly opened window, navigate to Advanced > Change.
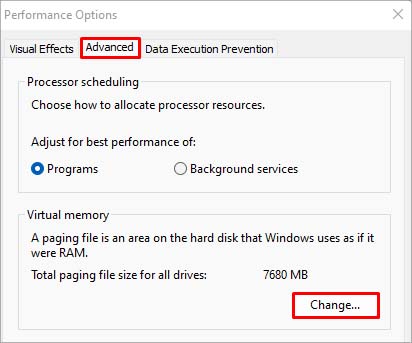
- Deselect Automatically manage paging files size for all drives option.
- Select Custom size and set
0, 0in both values.
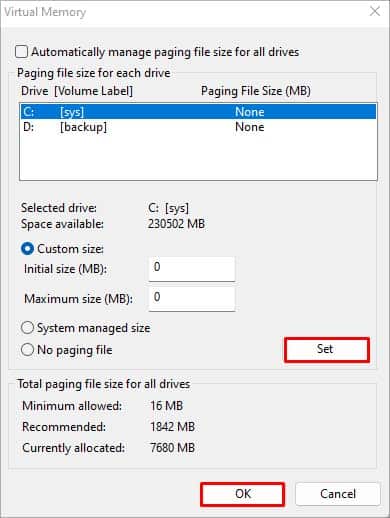
- Click OK and restart your PC.
- After your computer restarts, open File Manager.
- Click on the three vertical dots (…) in the top right and select Options.
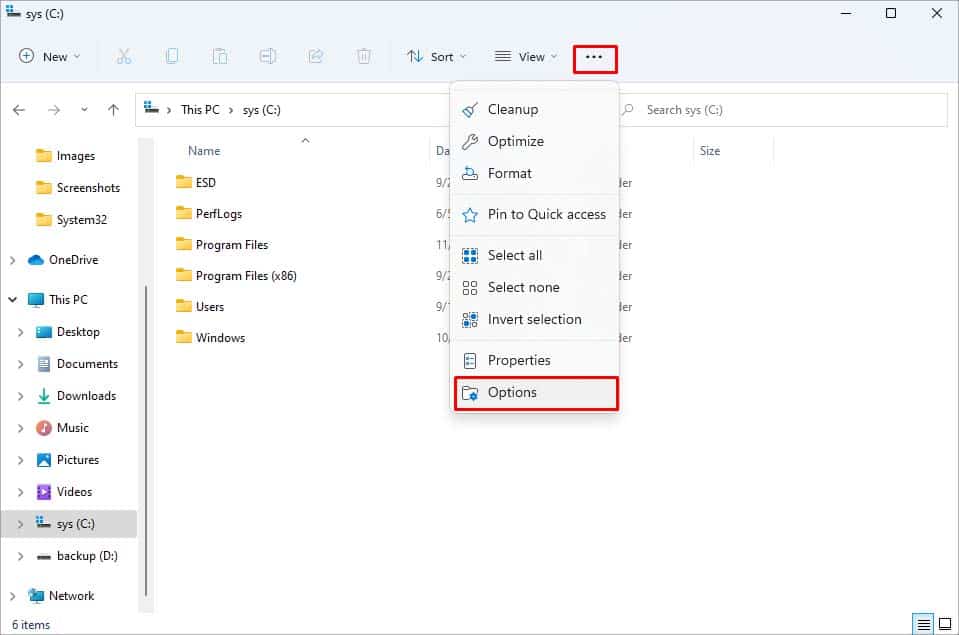
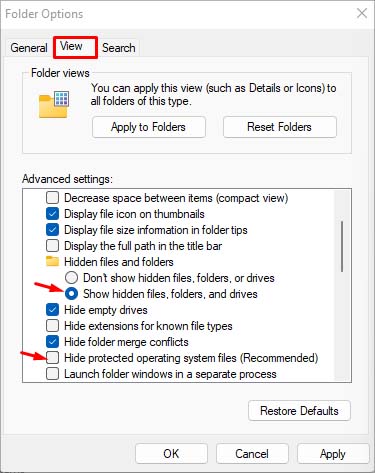
- Go to View header, and make sure Show hidden files, folders, and drives option is selected and Hide protected operating system files is deselected.
- In File manager, go to the drive where the pagefile is located and search
pagefile.sys
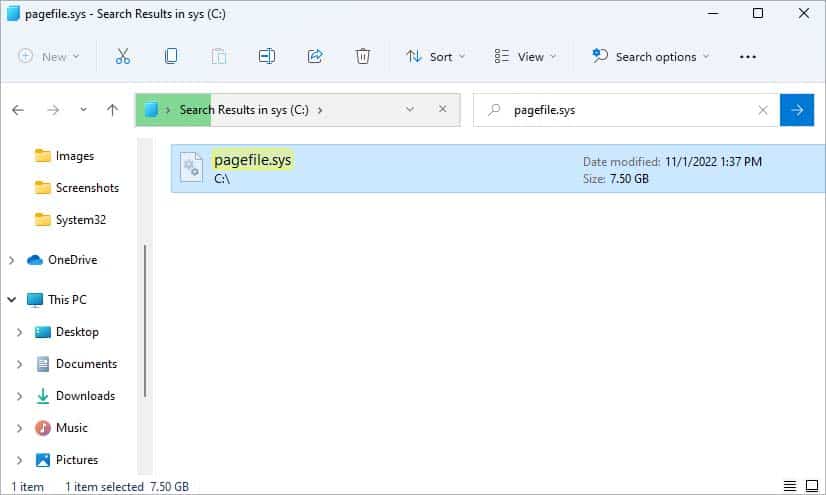
- Select the file and hit the Del key to delete it.
- Go back to Virtual Memory Settings. (Steps 1-5)
- Set the paging file size as System managed size. (Make sure the paging file is in the default drive.)
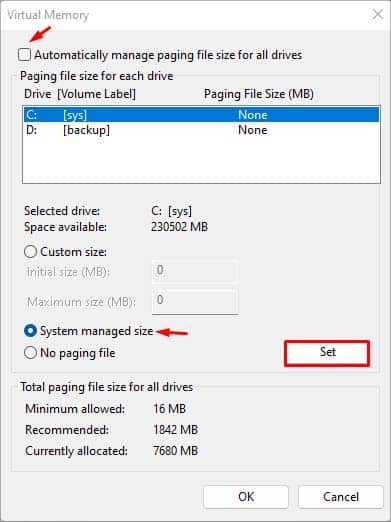
- Select Automatically manage paging files size for all drives option.
- Click Ok to close the dialog box.
- Restart your PC.

Leave A Comment?