Situatie
What is the Android Debug Bridge (ADB)?
ADB is a tool provided by Google for developers to debug and test their software on Android phones. It provides access to certain features that aren’t available to regular users, and since anyone can technically use ADB, you have a way to use these advanced features even if you’re not a developer. The internal structure of ADB is based on the classic client-server architecture. There are three components that make up the entire process.
-The client, i.e. the PC/Mac/Chromebook you have connected to your Android device. We are sending commands to our device from the computer through the USB cable or wirelessly.
-A daemon (known as “adbd”) that runs commands on an Android phone. The daemon runs as a background process on each device.
-A server that manages communication between the client and the daemon. The server runs as a background process on the computer.
Because there are three pieces that make up ADB (the client, the daemon, and the server), certain pieces need to be up and running in the first place. If you have freshly booted the computer (and you don’t have it set up to start the daemon on boot), then you will need it to be running before any communication can be sent to the target Android device.
Most of the best phones on the market run Android, and it’s preferred by many for being a more open operating system than Apple’s iOS. However, there are many things on Android that are also hidden from the average user. Thankfully, many of these capabilities can be accessed by using the Android Debug Bridge (ADB).
Solutie
How to set up ADB on your phone
Preparing to communicate with your computer
Setting up ADB requires some preparation on both the Android phone and the PC you want to use. For starters, follow these steps on your phone:
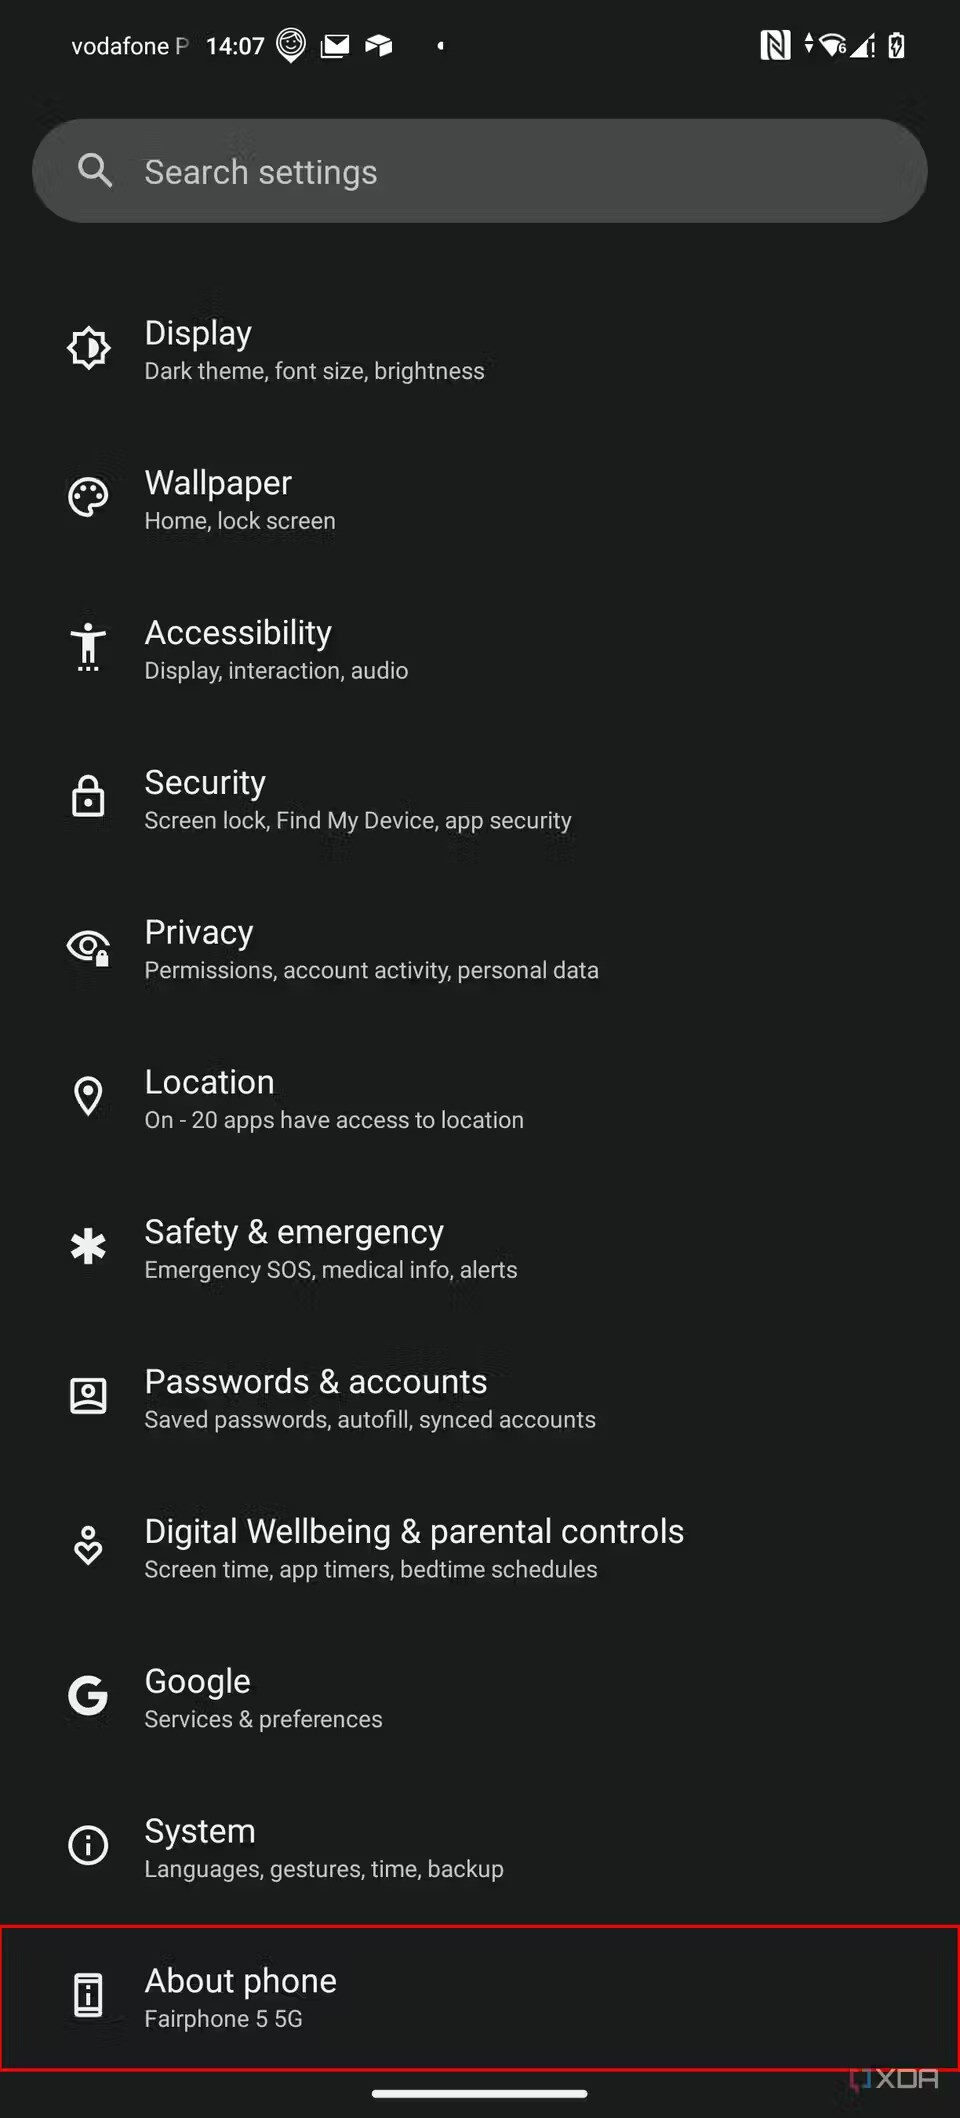
1.Launch the Settings application on your phone.
2.Tap the About phone option generally near the bottom of the list.
3.Then tap the Build number option seven times to enable Developer Mode. You will see a toast message when it is done.
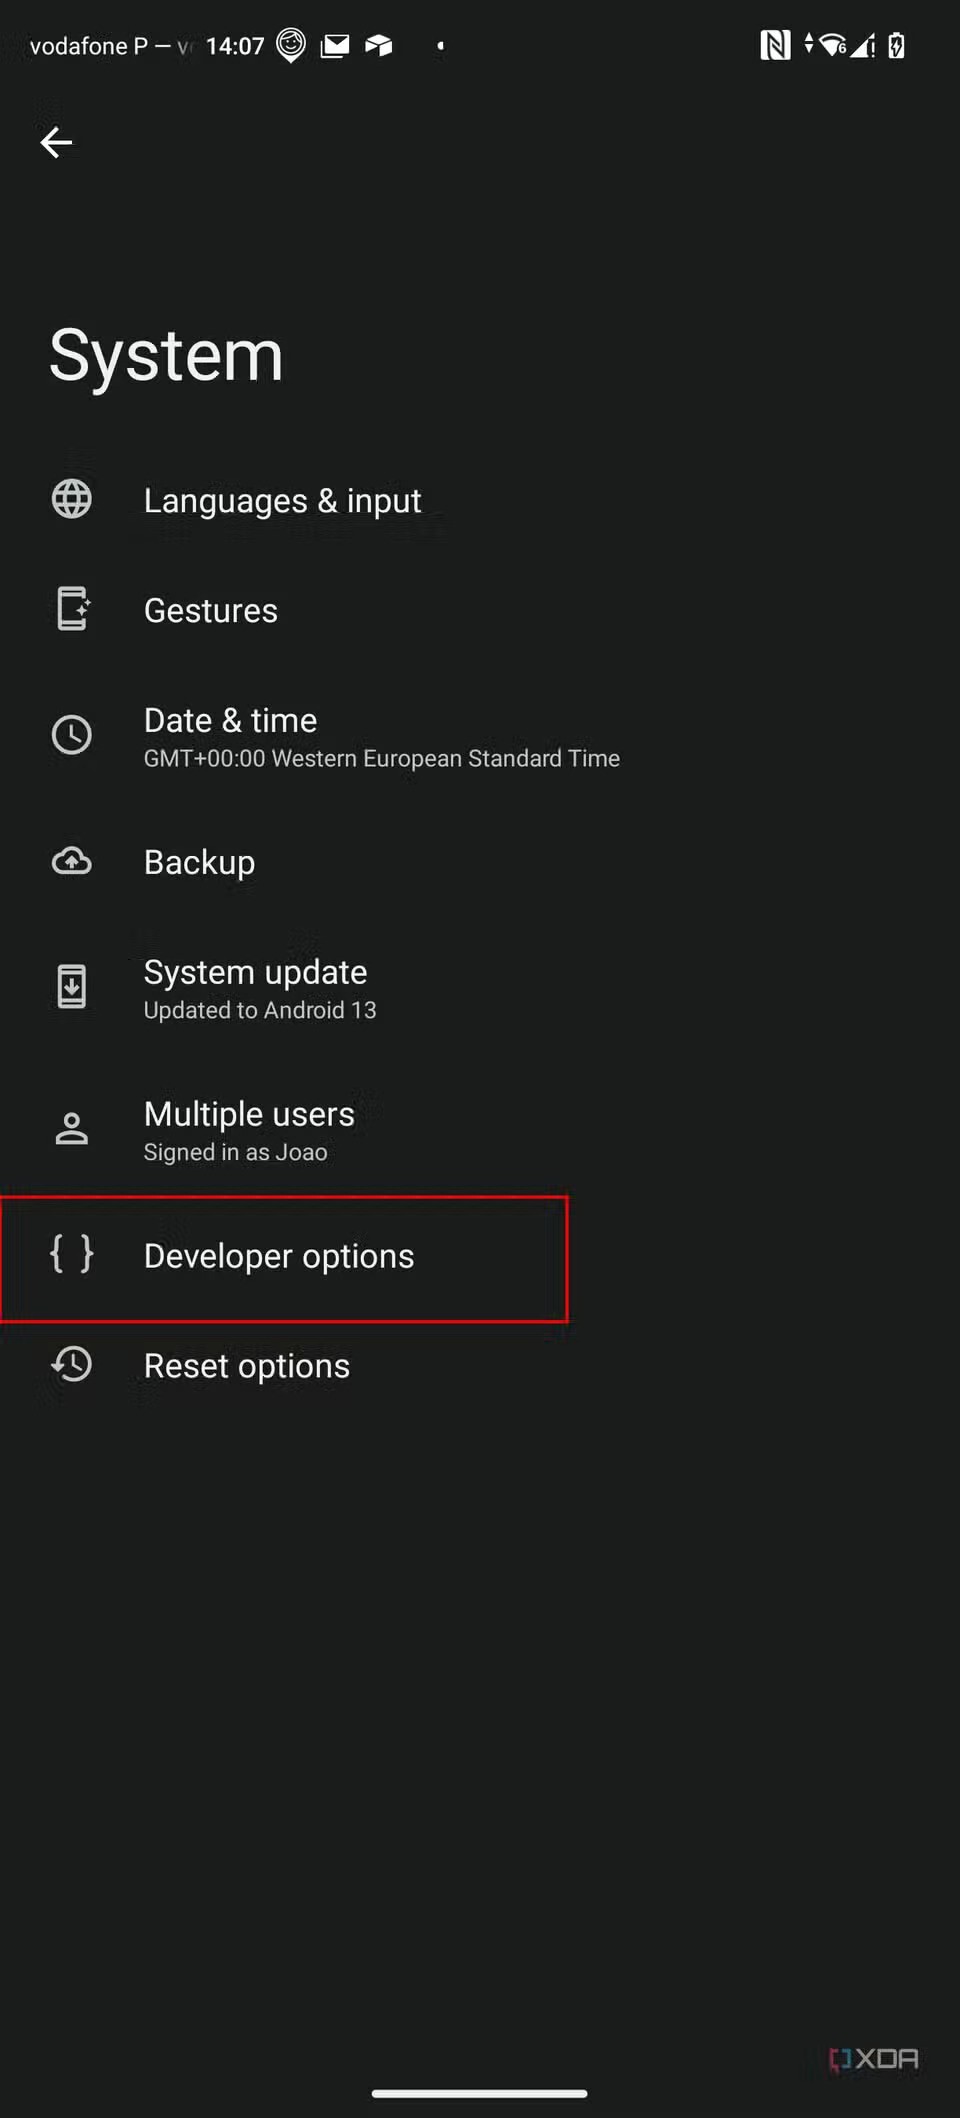
4.Now go back to the main Settings screen, and you should see a new Developer options menu you can access.
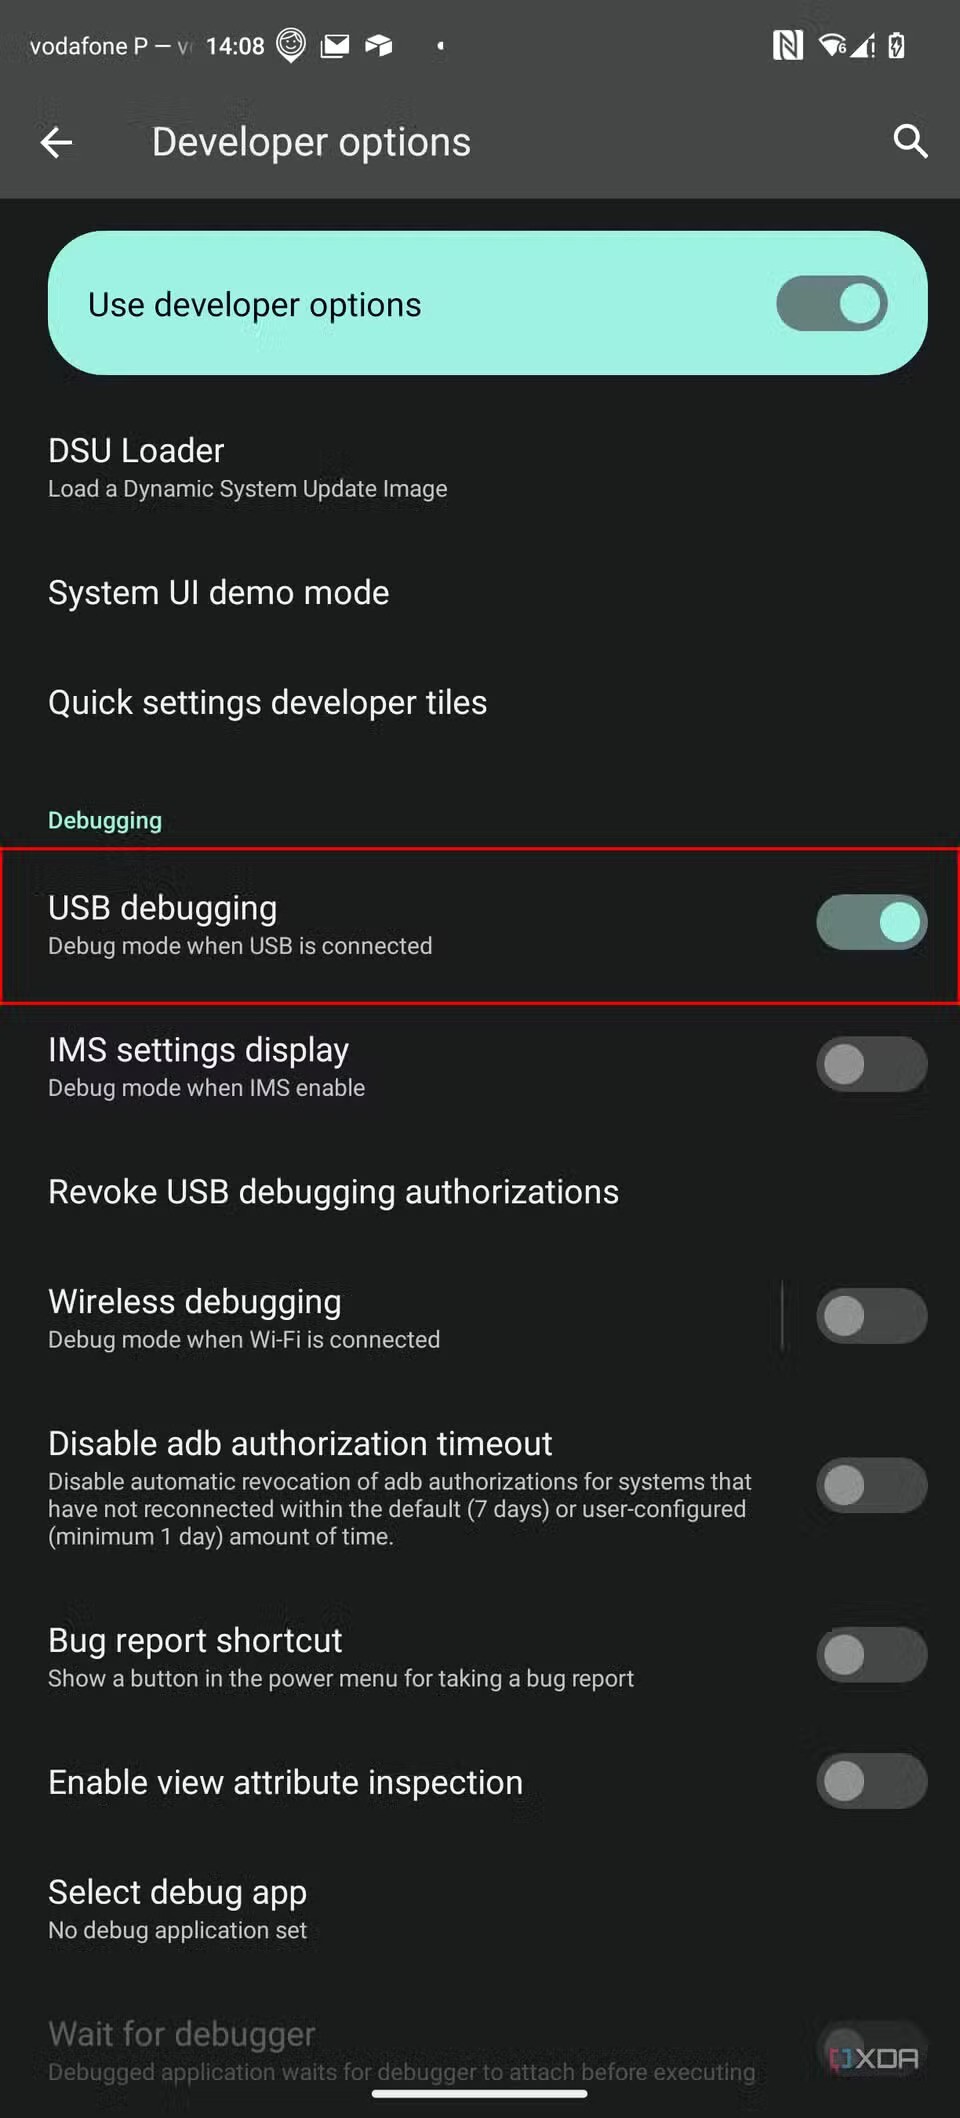
5.Go in there and enable the USB debugging option.

For now, you’re done with the process on the phone. Next up, you will need to scroll below and follow the rest of the instructions for your particular operating system.
How to set up ADB on Linux
1. Download the Android SDK Platform Tools ZIP file for Linux.
2 .Extract the ZIP to an easily accessible location (like the Desktop, for example).
3. Open a Terminal window.
4. Browse to the extracted folder using the following command, replacing path/to/extracted/folder with the folder where you extracted the ZIP file to: cd /path/to/extracted/folder/
For example:cd /home/XDA/Desktop/platform-tools/
5. Connect your device to your Linux machine with your USB cable. Change the connection mode to file transfer (MTP) mode. This is not always necessary for every device, but it’s recommended, so you don’t run into any issues.
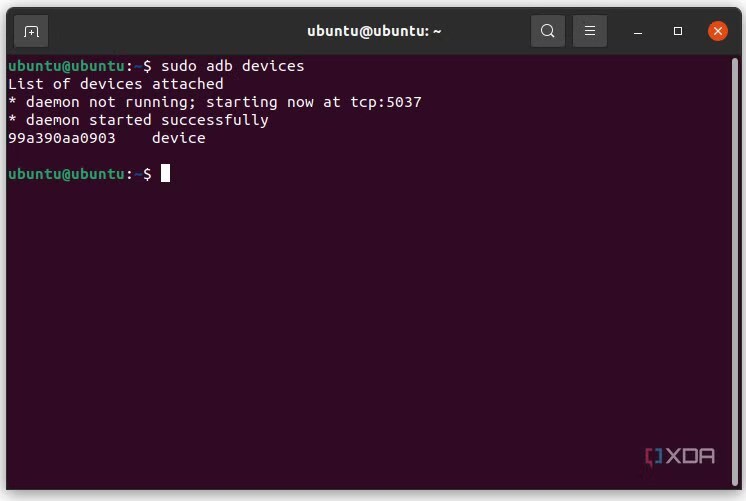
6. Once the Terminal is in the same folder your ADB tools are in, you can execute the following command to launch the ADB daemon: ./adb devices
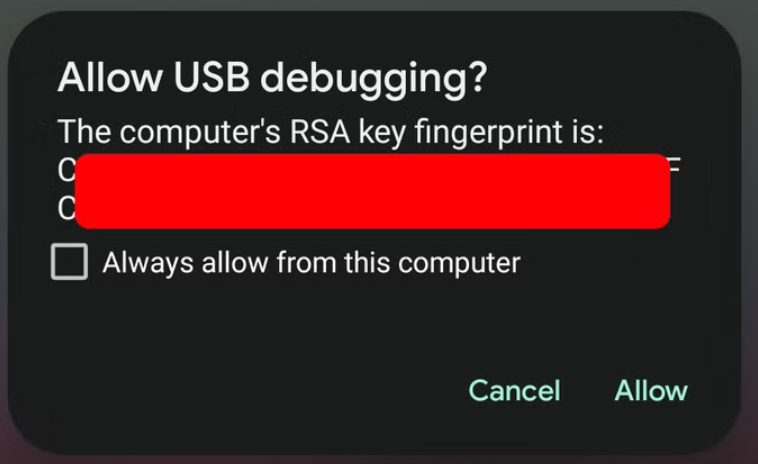
7. Back on your Android device, you’ll see a prompt asking you to allow USB debugging. Go ahead and grant it.
8. Finally, re-enter the command from step 6. If everything was successful, you should now see your device’s serial number in the Terminal window output.
Leave A Comment?