Situatie
You can use different methods to set up a VPN connection. You can either use any VPN application available on the Internet or an in-built VPN feature available on Windows 11.
Solutie
Pasi de urmat
You can set up a VPN connection manually from Windows Settings. Follow these steps:
- Open Settings and navigate the Network and Internet tab on the left pane.
- Click on VPN and then Add VPN button.
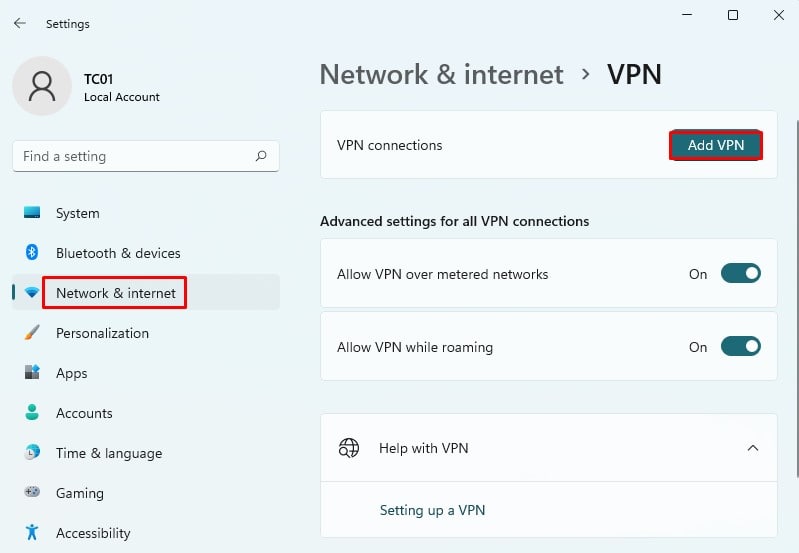
- A new Add a VPN Connection popup will appear. Now you need to enter the details of your VPN connection.
- Select Windows(built-in) under VPN provider.
- Give your connection a name in the Connection name field. You can give it any name.
- In the Server name or address field, enter the VPN server’s address.
- Specify your VPN type, if there is any. Else leave it. It is automatic by default.
- Under Type of sign-in info, provide the username and password or any other authentication type if you got any. It is optional information to enter.
- Click Save.
- Finally, the newly added VPN will be shown under VPN connections. Click on Connect button, and you are done.

From Network and Sharing Center
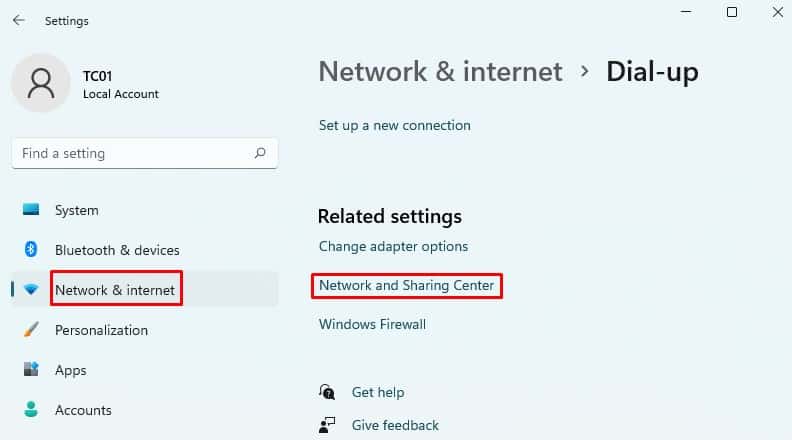
- Open Settings > Network & Internet > Dial-up > Network and Sharing Center.
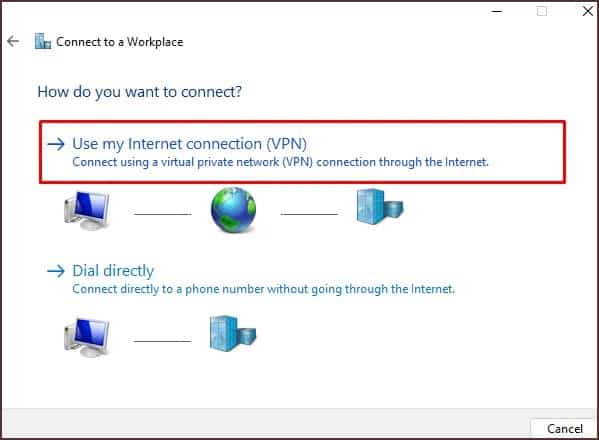
- A new window will pop up. Click on Connect to a workplace option and click on Next. Then click on Use my Internet connection (VPN) option.
- Fill in the Internet address and destination name in the respective fields. It is provided to you by your network administrator. Click Create.
- After you click Create, you will see Change adapter options available in the left menu.
- Right-click on the VPN profile you just created and click on Properties.
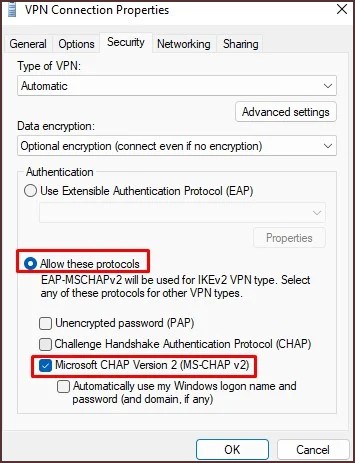
- Click on the Security tab, select the type of VPN and check the option Microsoft CHAP version 2 (MS-CHAP v2). Before checking this option, be sure to check the option Allow these protocols.
- In the Networking tab, click the TCP/IPV4 option and open its Properties.
- In the new popup window, enter your preferred DNS server under Use the following DNS server addresses.
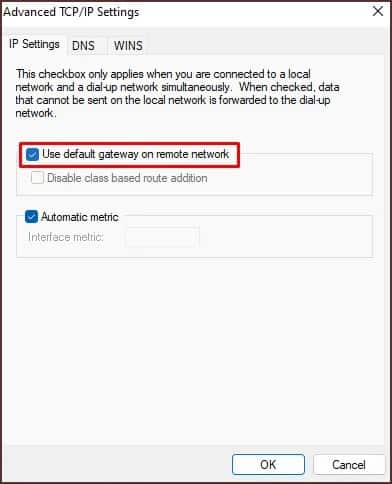
- Click the Advanced button and check the Use default gateway on remote network option.
- Save the settings. Now you are done with setting up the VPN in Windows 11.
Leave A Comment?