Situatie
Solutie
Second, since the process turns off automatic updates for your device drivers, you’ll have to keep an eye on those drivers and see when updates are available. You’ll then have to manually find and install the available driver updates. Make sure to create a system restore point before making the following changes. This makes it easier to undo the changes if something goes wrong.
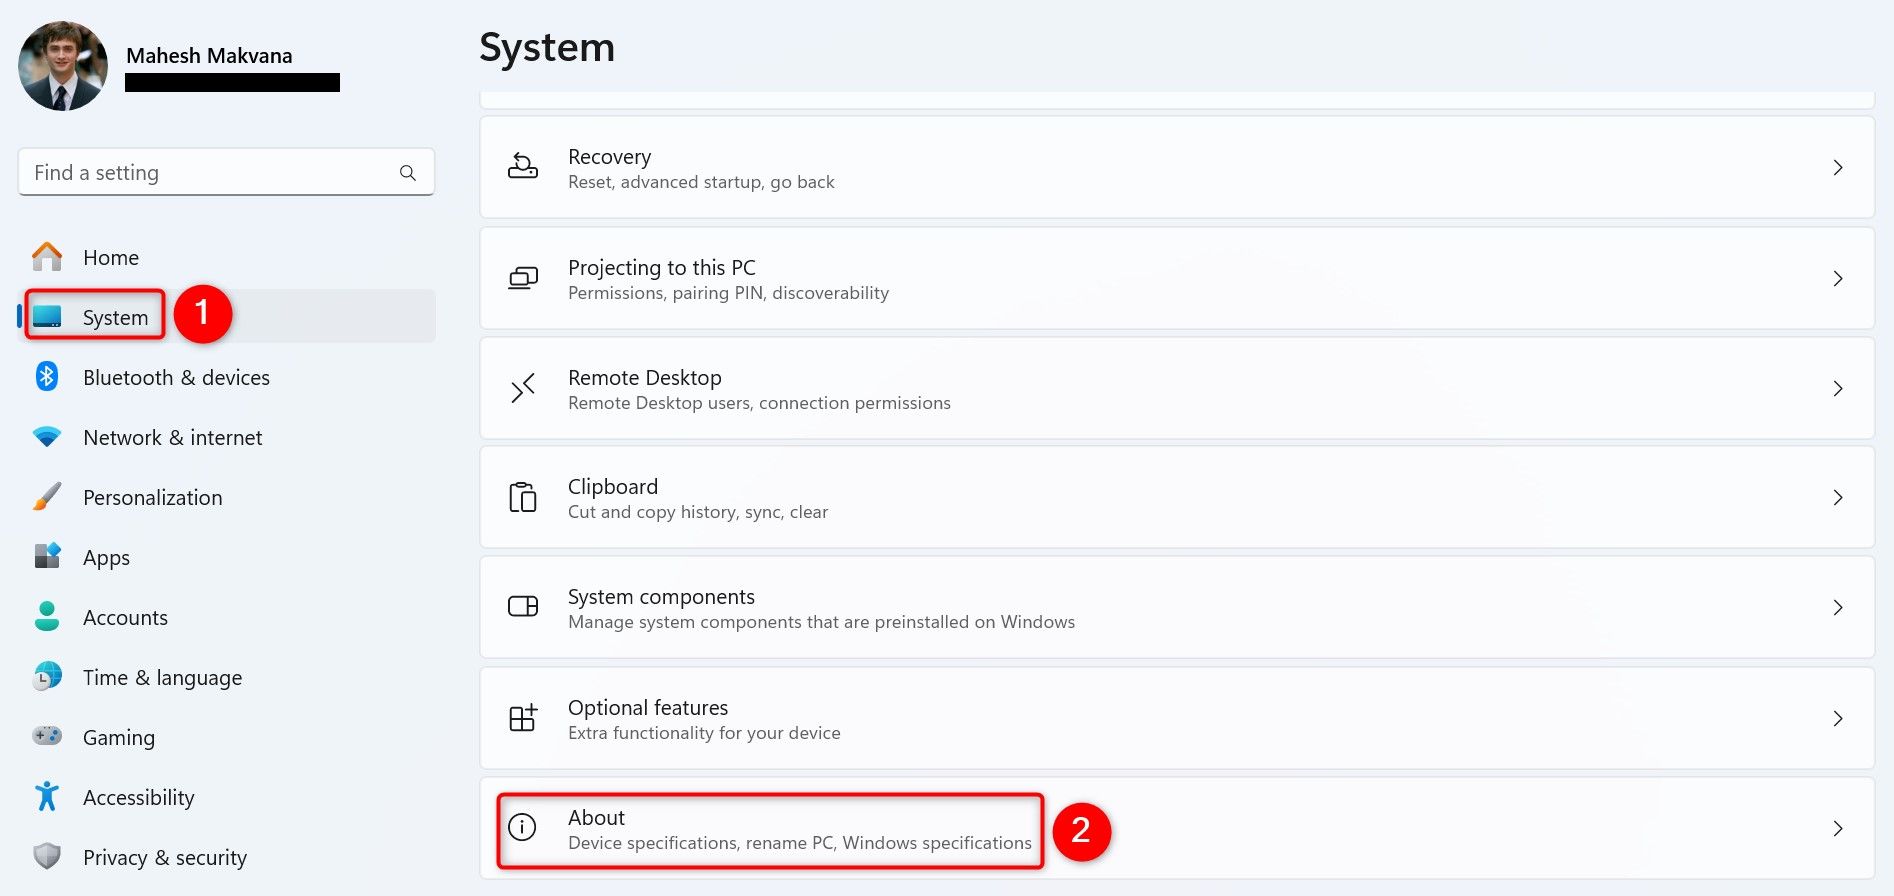
One way to prevent Windows 11 from automatically installing device drivers is by toggling an option in Settings. To do that, launch Settings by pressing Windows+i. From the left sidebar, choose “System.” On the right pane, at the bottom, select “About”.
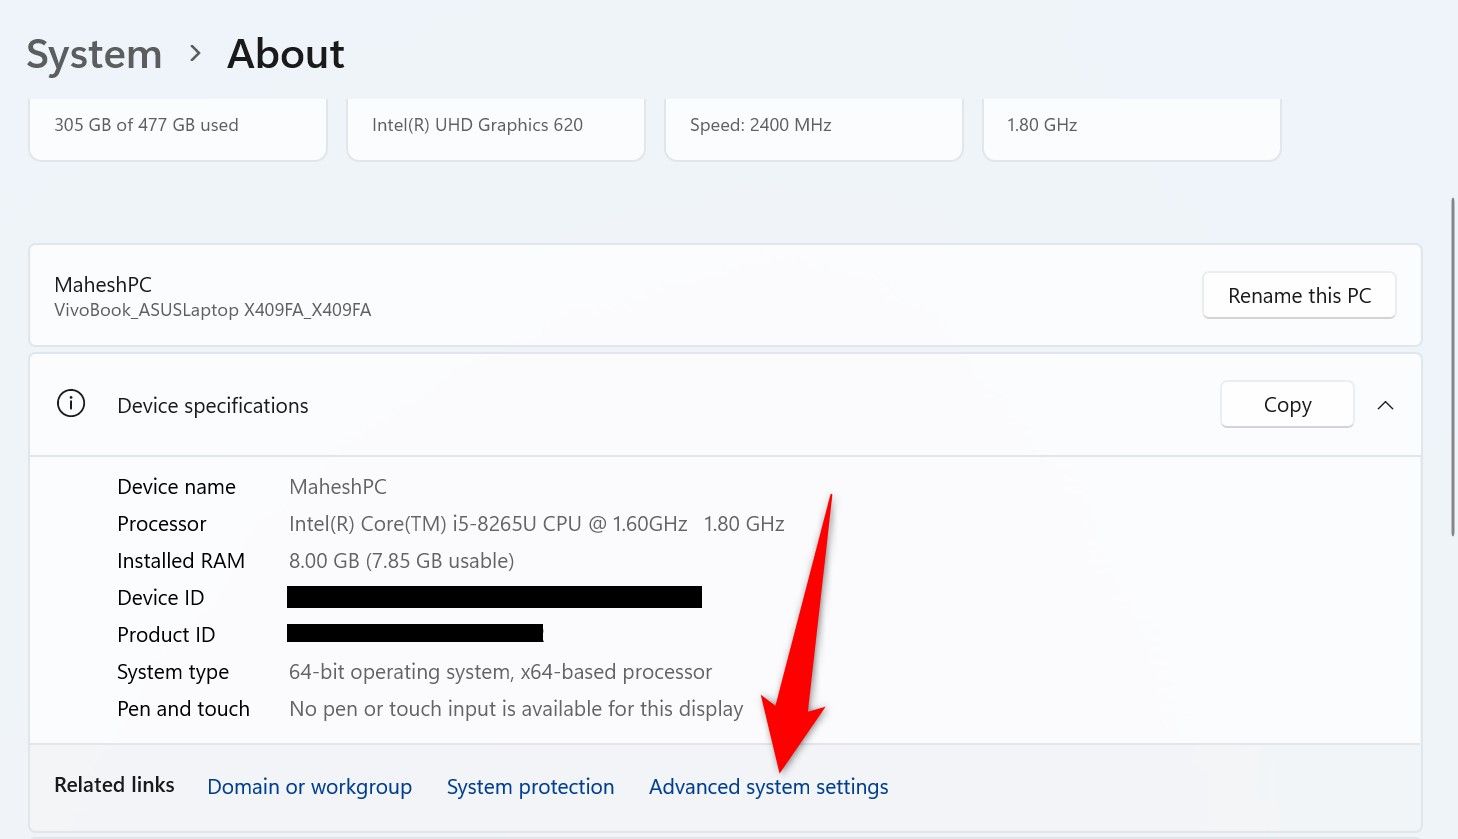
Select “Device Specifications.” In the expanded section, choose “Advanced System Settings”.
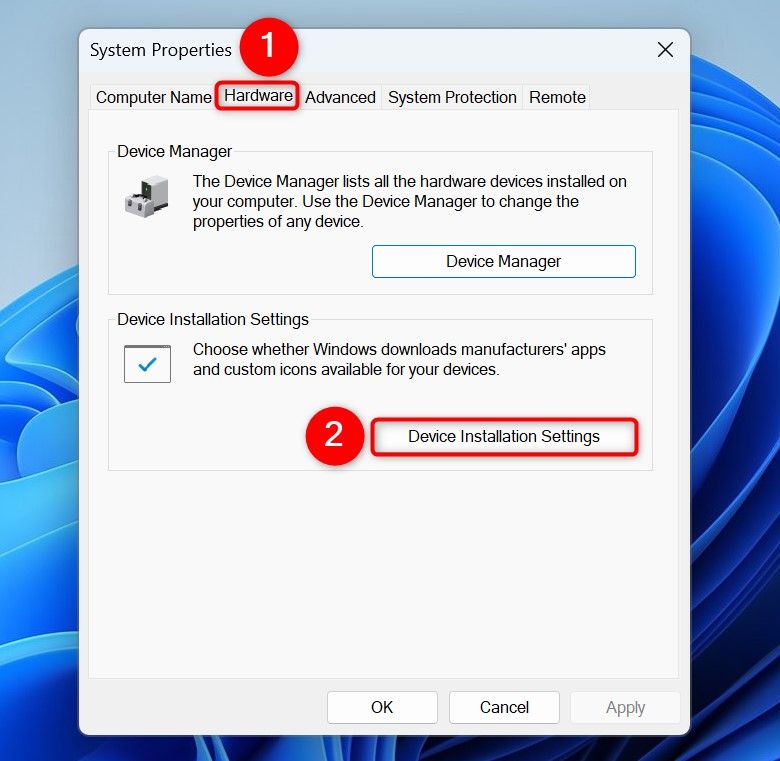
On the open window, open the “Hardware” tab and choose “Device Installation Settings”.
On the window that opens, select “No (Your Device Might Not Work as Expected).” Then, click “Save Changes”.
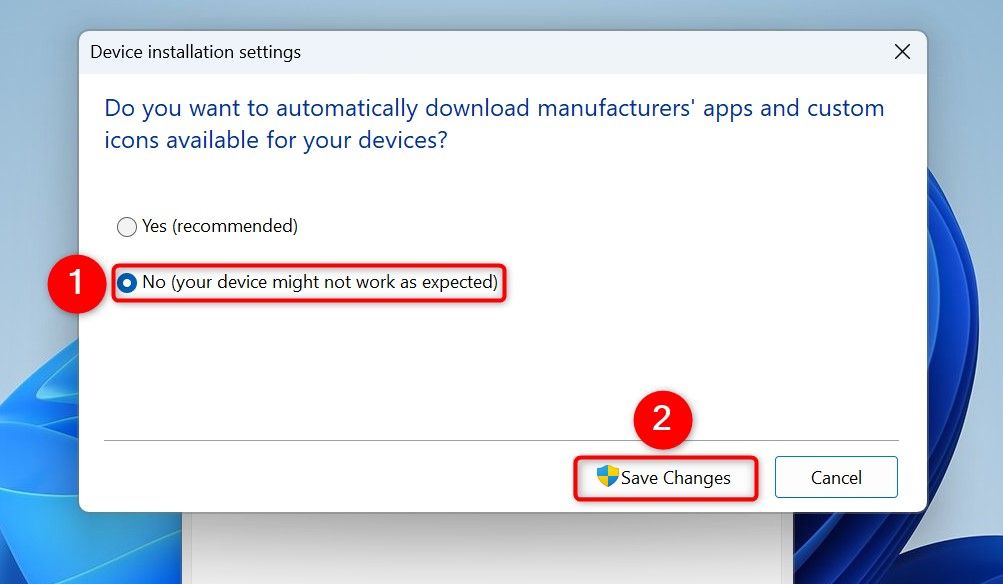
In the future, you can re-enable auto-installation of device drivers by choosing “Yes (Recommended)” and clicking “Save Changes”.
Use Local Group Policy Editor to Prevent Automatic Device Driver Updates
Another way to tell Windows 11 not to deliver driver updates via Windows Update is by changing an option in Local Group Policy Editor. Note that you only have access to this utility if you’re running Windows 11’s Pro, Enterprise, or Education edition. If you’re on the Home edition, use one of the other methods.
To begin, launch Run by pressing Windows+R. In the open box, type the following and select “OK” or press Enter:
gpedit.msc
On the window that opens, using the options in the left sidebar, navigate to the following path:
Computer Configuration > Administrative Templates > Windows Components > Windows Update > Manage Updates Offered From Windows Update
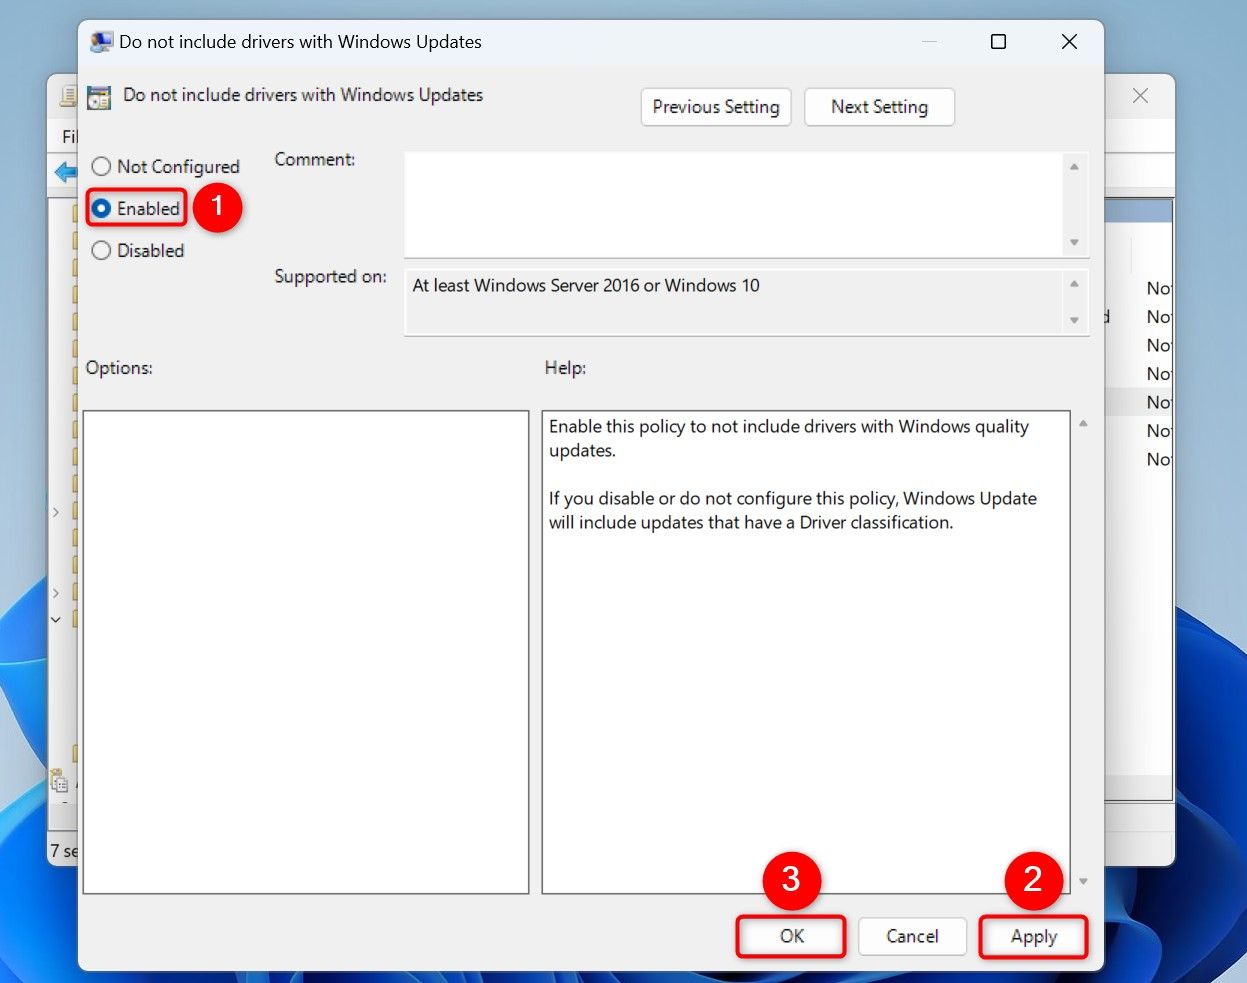
In the future, to undo your change, choose “Not Configured” and select “Apply” followed by “OK”.
On Windows 11’s Home (and other editions), you can tweak a registry value to prevent your device drivers from being updated via Windows Update. Make sure to back up your registry before you make any changes to it.
To start, launch Run by pressing Windows+R. In the open box, type the following and select “OK” or press Enter:
regedit
In the User Account Control prompt, select “Yes.”
In Registry Editor, navigate to the following path. If you don’t see the last bit which is WindowsUpdate, right-click the bit before that which is “Windows” and choose New > Key. Type WindowsUpdate as the name and press Enter.
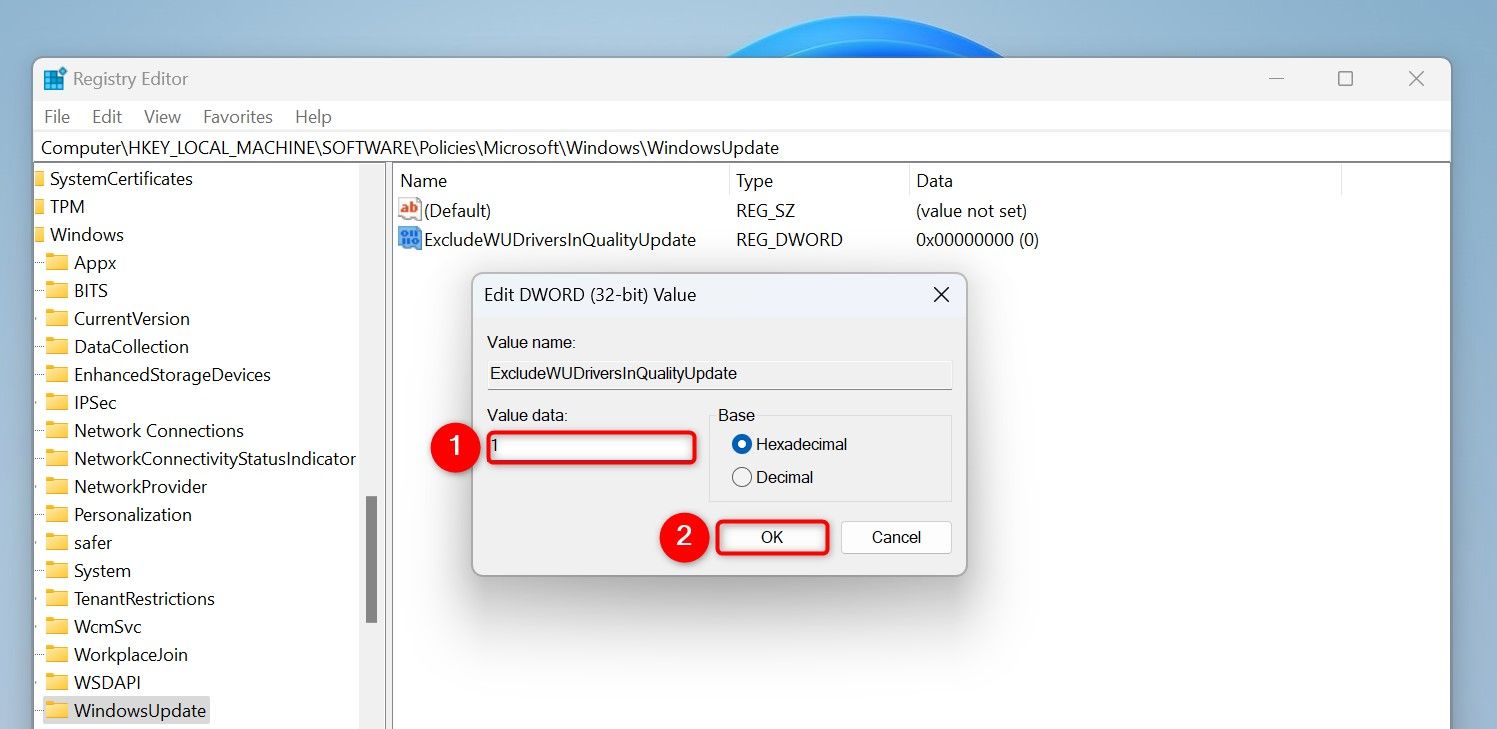
HKEY_LOCAL_MACHINE\SOFTWARE\Policies\Microsoft\Windows\WindowsUpdate
On the right pane, right-click anywhere blank and choose New > DWORD (32-Bit) Value. Type ExcludeWUDriversInQualityUpdate as the name and press Enter. Double-click the newly created item, select the “Value Data” field, type 1, and choose “OK”.
Close Registry Editor and reboot your Windows 11 PC. This brings your change into effect.
In the future, to undo your change, right-click the “ExcludeWUDriversInQualityUpdate” item that you created and choose “Delete.” Alternatively, double-click the “ExcludeWUDriversInQualityUpdate” item, select the “Value Data” field, type 0, and click “OK.” Make sure to restart your computer for the change to go into effect.
Tip: Roll Back a faulty updated Driver
If Windows 11 has already installed a faulty driver update, you can roll it back using a built-in feature. This allows you to go back to the previous driver version so that your devices continue to work as usual.
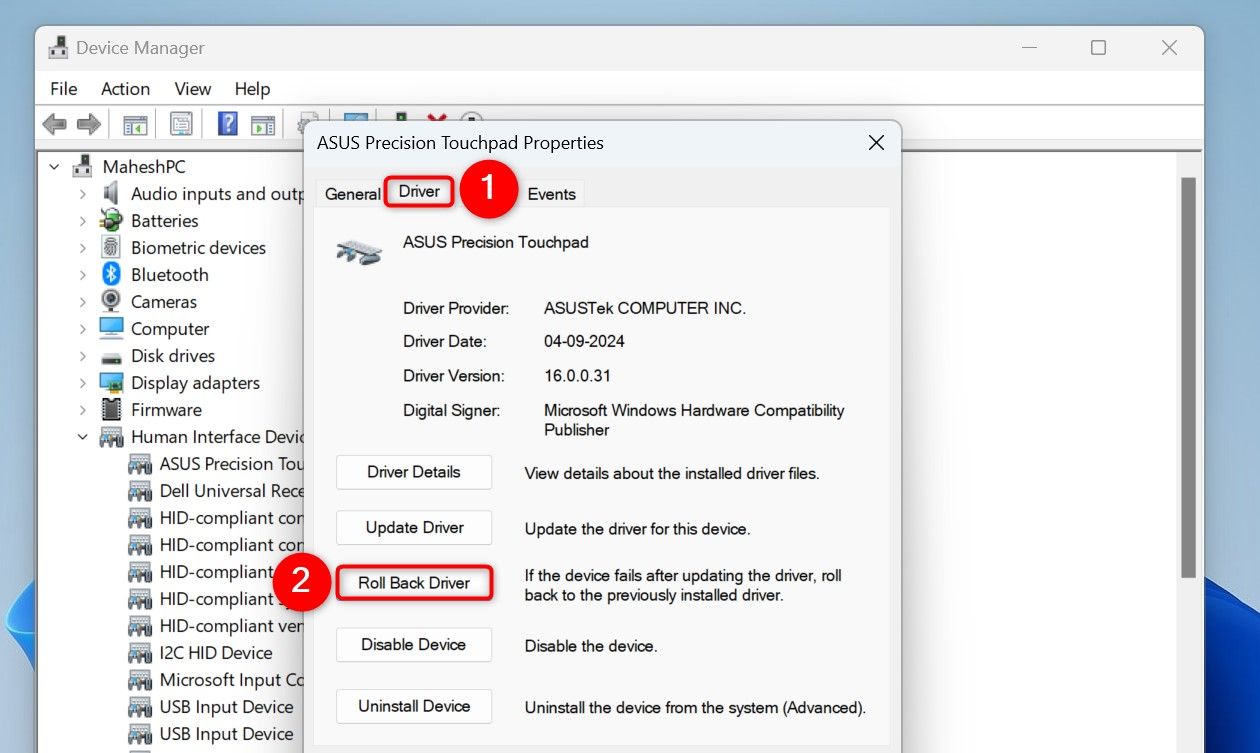
To do that, access Windows Search (press Windows+S), type Device Manager, and launch the utility. On the Device Manager window, expand the section for your specific device. Then, right-click your device and choose “Properties”.
On the Properties window, access the “Driver” tab. Here, click the “Roll Back Driver” button. If this button is grayed out, it means Windows hasn’t recently installed any update for this driver.
Leave A Comment?