Situatie
How to Enable Telnet on Windows 10?
Windows computers, by default, disable Telnet because of security reasons. So, the first step in using Telnet is to enable the Telnet client.
For this, open the Command Prompt and type the following command to see if Telnet is enabled:
C: telnet
You can see that the system doesn’t recognize the command because Telnet is not enabled at the moment. You can choose from two methods for enabling Telnet on your Windows machine.
Method 1: Enable Telnet Through The GUI
Follow these steps to enable Telnet via the GUI:
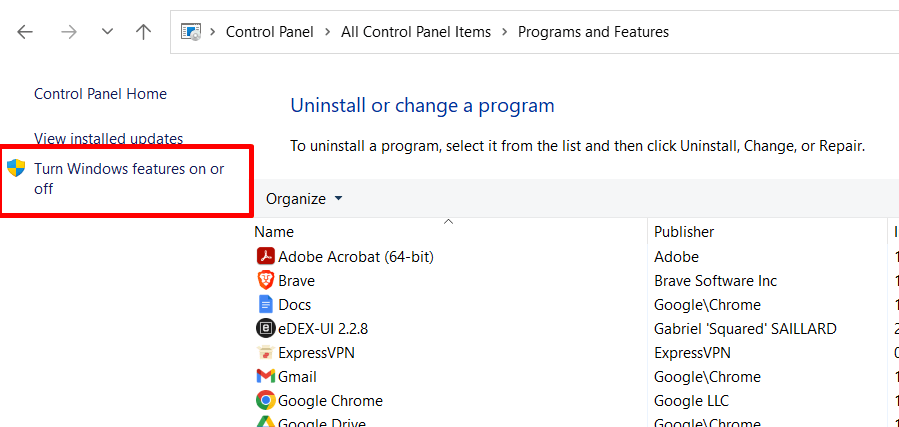
1. Access the Control Panel’s Programs and Features section:

2. Select the option to turn Windows features on or off.

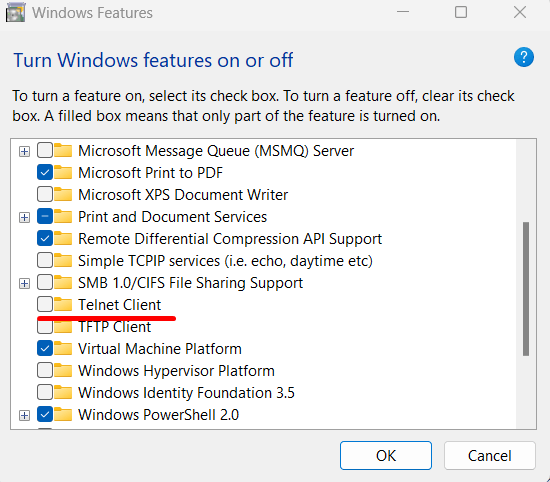
3. To install the feature, find the Telnet Client option on the list, select it, and then click OK.

4. Click Close when Windows completes the process.
5. Launch the Microsoft Telnet Client by typing telnet in the Command Prompt:

6. Enter quit to end the Telnet session.
Method 2: Use the Command Prompt to Enable Telnet
You should follow these steps if you wish to enable Telnet through the GUI:
- Launch the Command Prompt and run the following command:
C: pkgmgr /iu:"TelnetClient"

2. Now relaunch the Command Prompt and enter telnet to launch the Microsoft Telnet Client.
3. Once you see the Microsoft Telnet> prompt, enter quit to exit.
How to Test Open Ports Using Telnet in Windows
When working with remote systems, you often need to check for open ports that allow incoming Telnet connection. For this, use the following Telnet command:
Microsoft Telnet> telnet <address> <port number>
Here, addresses can be symbolic (domain) or numerical (IP addresses). For instance, use the following command to create a Telnet connection to the RedSwitches website:
Microsoft Telnet> telnet www.redswitches.com 23
This command can result in one of the following three scenarios:
The command throws an error, indicating that the network port 23 is not open for connections.

The command results in a blank screen showing that port 23 is open.

Leave A Comment?