To turn off sync:
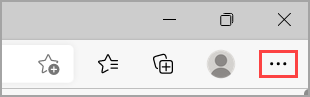
- Select Settings and more
- Go to Settings > Profiles > Sync and select Turn off sync.
To clear your browsing data in Microsoft Edge:
- Select Settings and more > Settings > Privacy, search, and services
- Under Delete browsing data > Clear browsing data now, select Choose what to clear
- Under Time range, choose a time range from the drop-down menu
- Choose the types of browsing data you want to clear (see the table below for descriptions).For example, you may want to remove browsing history and cookies but keep passwords and form fill data.
- Select Clear now.
Clear browsing data stored in the cloud (if you’ve turned on sync or personalization)
To manage and delete data saved in the Microsoft cloud, see the privacy dashboard. On the privacy dashboard you can view or delete your data. Data that you delete on the privacy dashboard won’t be deleted from your device.
Browsing data you can delete in Microsoft Edge
| Types of info | What will be deleted | Where it’s stored |
|---|---|---|
| Browsing history | The URLs of sites you’ve visited, and the dates and times of each visit. | On your device (or, if sync is turned on, across your synced devices) |
| Download history | The list of files you’ve downloaded from the web. This only deletes the list, not the actual files that you’ve downloaded. | On your device |
| Cookies and other site data | Information and data that websites store on your device to remember your preferences, such as sign-in info, your location, or media licenses. | On your device |
| Cached images and files | Copies of pages, images, and other media content stored on your device. The browser uses these copies to load content faster the next time you visit those sites. | On your device |
| Passwords | Site passwords that you’ve saved. | On your device (or, if sync is turned on, across your synced devices) |
| Autofill form data (includes forms and cards) | Info that you’ve entered into forms, such as your email, credit card, or a shipping address. | On your device (or, if sync is turned on, across your synced devices) |
| Site permissions | Go to Settings and more > Settings > Cookies and site permissions to see a list for each website, including location, cookies, pop-ups, and media autoplay. | On your device |
| All data from the previous version of Microsoft Edge | All data including history, favorites, passwords, and more from the legacy version of Microsoft Edge. | On your device (or, if sync is turned on, across your synced devices) |
| Media Foundation data | Includes licenses, certificates, keys, and more. Data is cleared after you restart the Microsoft Edge browser. | On your device (or, if sync is turned on, across your synced devices) |