Situatie
Solutie
The Quick Machine Recovery feature is available on all devices that have the Windows 11 24H2 KB5062660 or later update installed. It is enabled by default on the Windows Home versions. Windows Pro users and IT admins get the exclusive benefit of manually enabling and customizing this feature as per their needs.
To access this feature, open the Settings app, select “Recovery,” and then choose “Quick Machine Recovery.” You will find a toggle to enable or disable this feature. There is also a drop-down menu to choose the time after which the feature checks for a solution again—by default, it is set to 30 minutes.
All that said, it’s kind of hard to deliberately create a situation where Windows fails to boot three consecutive times and the Quick Machine Recovery feature comes into action. However, there’s a test mode through which you can check (though I do not recommend doing this) how this feature actually functions.
reagentc.exe /SetRecoveryTestmode
reagentc.exe /BootToRe
Then, close the Command Prompt window and restart your computer. Instead of booting into Windows, your computer will enter the recovery environment and attempt to connect to the internet through an Ethernet connection. If your computer isn’t connected via Ethernet, WinRE will try to connect to the internet through a preconfigured Wi-Fi connection.
Next, your computer’s diagnostic data will be sent to Microsoft, where it will be evaluated. If an issue is found and a fix is available on the Microsoft servers, your computer will automatically download and install it. However, if no fix is available, your computer will remain in WinRE and will check for a fix again after the set time, which is 30 minutes by default. If you don’t want to wait, you can press the Enter key to access the Advanced Options window, from where you can take other steps, such as uninstalling updates or restoring your system.
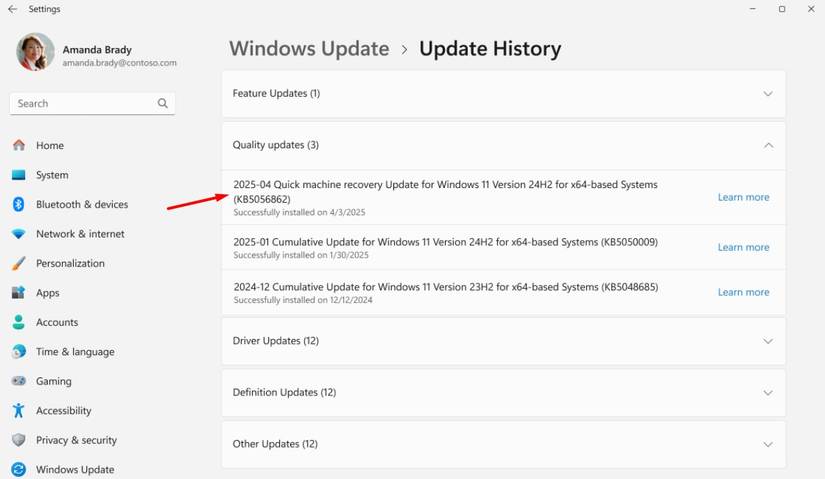
You will be able to see the fix that the Quick Machine Recovery feature has added to your computer by heading to Settings > Windows Update > Update History.
Once you have tested the Quick Machine Recovery feature, you need to exit test mode; otherwise, your computer will keep entering WinRE on every boot. To do this, open the Command Prompt as an administrator again and execute the following command. This command will completely turn off WinRE on your computer.
reagentc.exe /DisableThen, execute the following command to enable WinRE and ensure your computer can use the Quick Machine Recovery feature whenever the need arises.
reagentc.exe /EnableThe Quick Machine Recovery feature is definitely more advanced than the Startup Repair feature. However, there are a few areas that Microsoft needs to address before we can consider the Quick Recovery feature foolproof against boot failure.
Leave A Comment?