Situatie
We all know that feeling of getting a new PC and wanting to get straight into things. I remember the old days, spending hours transferring my files and trying to replicate my settings. Among the many ways to transfer your data nowadays, Windows Backup offers a simple and reliable solution.
Solutie
Pasi de urmat
Step 1: Sign in to Your Microsoft Account
Microsoft uses its cloud storage to hold your data during the transfer process, so you need to sign in to your Microsoft account.
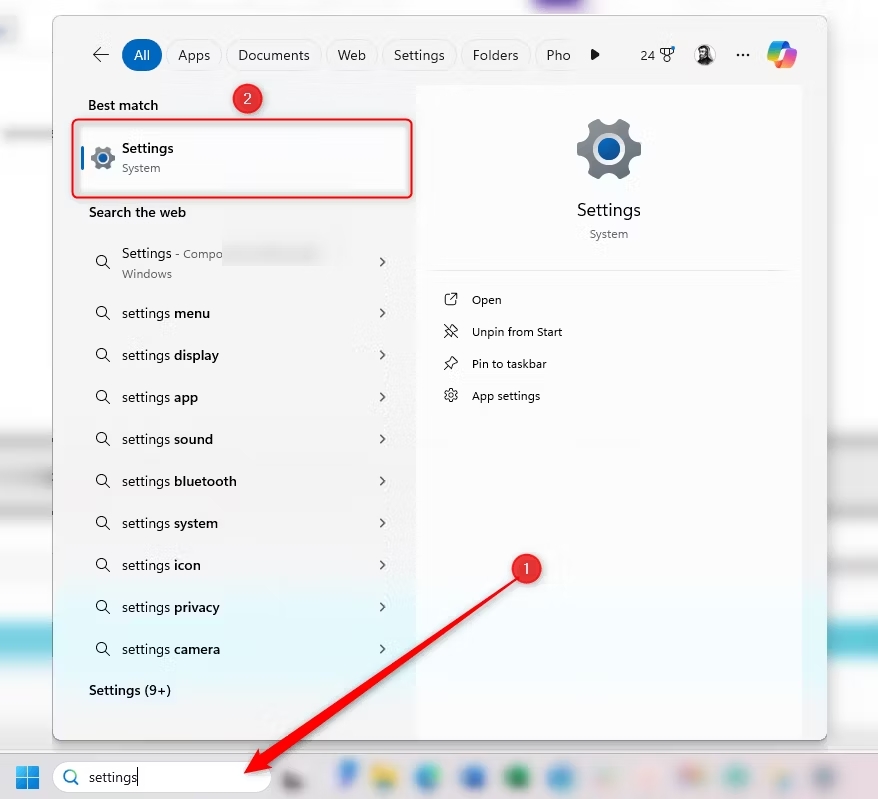
To sign in, in the search box on your taskbar, type Settings, and click the “Settings” option.
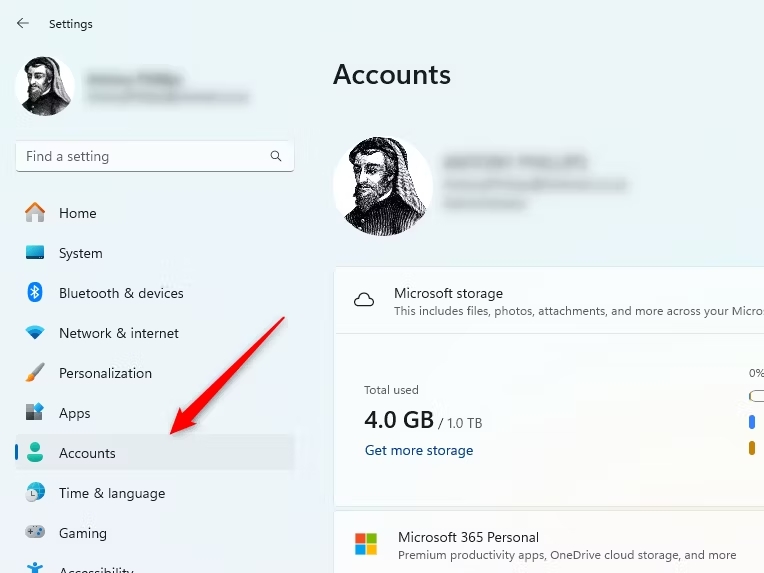
Then, click “Accounts” and follow the on-screen instructions to sign in.
Step 2: Manage Your Backup Settings
Once you’ve signed in to your Microsoft account, there are two different ways to transfer your data from your old computer to your new one—OneDrive Backup and Windows Backup.
OneDrive or Windows Backup?
Which option you choose will depend on what you use your computer for. If you only want to transfer your Documents, Pictures, Desktop, Music, and Video folders to your new PC, OneDrive backup will do the trick.
The benefit of using OneDrive Backup is that it automatically backs up these folders to your OneDrive account whenever you make changes (as long as you’ve signed in and activated those folders), so you know that they’ll be up-to-date when you set up your new PC. And because you’re only backing up a few folders, it’ll take less time than using Windows Backup.
The drawback—and it’s a big one—is that it doesn’t let you transfer your apps, your settings, or your credentials, so you’ll have to set these up again on your new computer. Also, bear in mind that you’re limited to 5GB of storage if you have a free Microsoft account.
Use Windows Backup
So, we recommend you use Windows Backup to make the transfer, as this lets you copy more things—from your folders (the same ones that OneDrive would have backed up) to your personal settings and preferences—to your new computer.
To open Windows Backup, type Backup into your taskbar search box, and click “Windows Backup.”
In the Windows Backup dialog box, you’ll see the different things you can include in your transfer. Click the drop-down arrows next to each section to choose which folders, apps, settings, and credentials you want to transfer to your new computer.
You can also see an estimate of how much storage you’ll need to perform the backup in the bottom left-hand corner of the window. Free Microsoft accounts come with just 5GB of folder storage, so if you need to back up more than that, you must purchase more storage through a different Microsoft plan. Alternatively, you could perform a manual backup to an external hard drive, or use a third-party storage solution. However, you cannot use an external storage device or a third-party cloud service with Windows Backup.
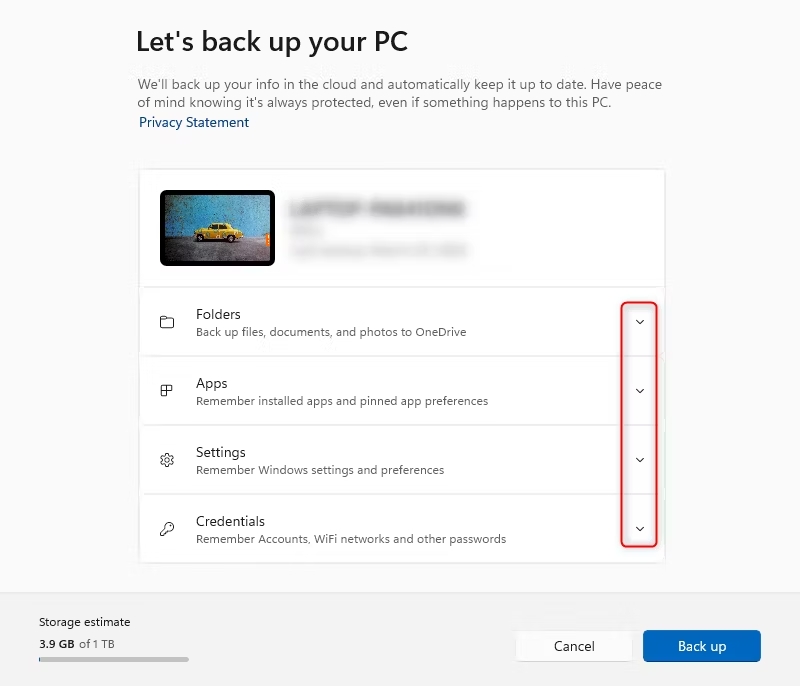
- The Folders option backs up the same folders that are automatically stored in your OneDrive sync—your Documents, Pictures, Desktop, Music, and Videos folders. These folders likely contain everything you want to move, but if you have important folders elsewhere, be sure to add them to your OneDrive folder manually, or use an alternative storage solution.
- The Apps option will transfer all the apps you have installed on your old computer to your new computer.
- The Settings option will let you copy your accessibility settings, any elements you have personalized on your old PC, your language and dictionary preferences, and any other settings you’ve adjusted.
- The Credentials drop-down will help you to transfer your account details, Wi-Fi networks, and passwords.
Step 3: Backup Your Old PC
Now that you’ve told Windows what you want to mirror on your new PC, you’re ready to perform the backup. To do this, click “Back Up”
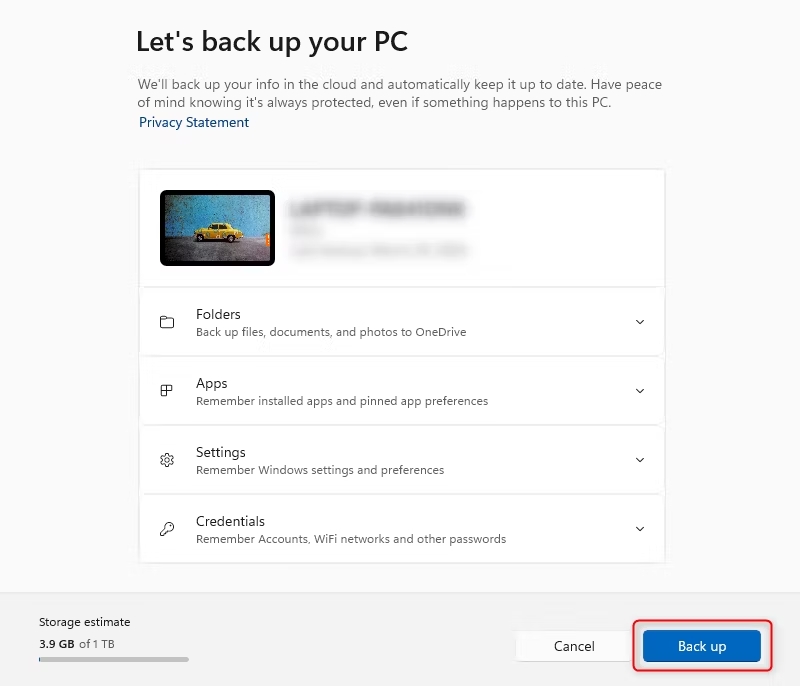
Depending on which options you’ve selected, this might take some time, but you can carry on with other tasks while this is happening. Just try to avoid making changes to any of the folders, apps, settings, or credentials you’ve chosen to back up during this process.
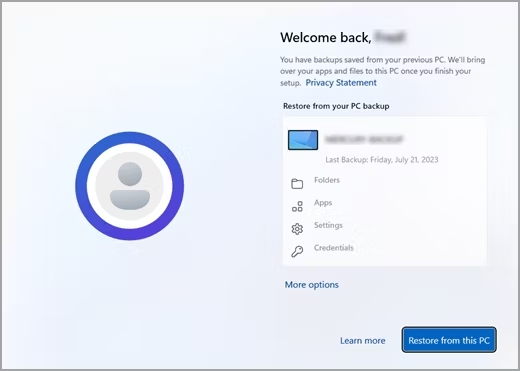
Step 4: Restore to Your New PC
When setting up your new computer, when prompted, login with the same Microsoft account you used to create your backup on your old computer. You will then be able to select your old PC’s details, which includes the backup you performed, and click “Restore From This PC”
Once you have finished setting up your new PC, you’ll see the folders, apps, settings, and credentials you selected in the previous step have been transferred. Most apps will automatically reinstall when you open them for the first time—but you might need to reinstall one or two manually.
Leave A Comment?