Situatie
Before jumping into the topic directly, let’s have a small intro about the technologies we are going to use. As the name suggests, we will be using FastAPI, a Python language framework.
Solutie
Pasi de urmat
You can install the library using
pip install fastapi-mail
Creating the Project
Import the required libraries to send an email
from fastapi import FastAPI
from fastapi_mail import FastMail, MessageSchema,ConnectionConfig
from starlette.requests import Request
from starlette.responses import JSONResponse
from pydantic import EmailStr, BaseModel
from typing import List
app = FastAPI()
Now create a pedantic class to take email as input.
pedantic is a module that helps us to write validations to the inputs/requests.
class EmailSchema(BaseModel):
   email: List[EmailStr]
Setup the configuration to send an email using ConnectionConfig
conf = ConnectionConfig(
   MAIL_USERNAME=from_,
   MAIL_PASSWORD="************",
   MAIL_PORT=587,
   MAIL_SERVER="smtp.gmail.com",
   MAIL_TLS=True,
   MAIL_SSL=False
)
For the MAIL_SERVER argument,
- if you would like to use Gmail you can give “smtp.gmail.com” as input.
- If you would like to use outlook as the sender, you can give “smtp.office365.com” as input. Let’s set up the Message Schema. It contains the arguments like what to send and whom to send.
message = MessageSchema(
       subject="Fastapi-Mail module",
       recipients=email.dict().get("email"),  # List of recipients, as many as you can pass
       body=template,
       subtype="html"
       )
After defining the configuration and MessageSchema,
we can send the email.
fm = FastMail(conf)
await fm.send_message(message)
start the application using
uvicorn main:app --reload
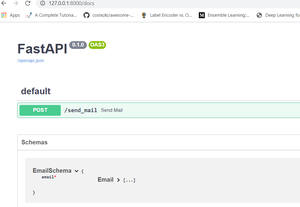
After the successful start of the server, use the following link to lookout the list of APIs. In our case, we will have only a sending mail API(a POST request) when you can give input directly from the docs page itself.
http://127.0.0.1:8000/docs


Leave A Comment?