Situatie
For far too long, I struggled to find the perfect image without a distracting background for my PowerPoint slides. I used to think I needed complicated software to fix it, but I eventually discovered a tool that’s built into the software itself: Remove Background.
Solutie
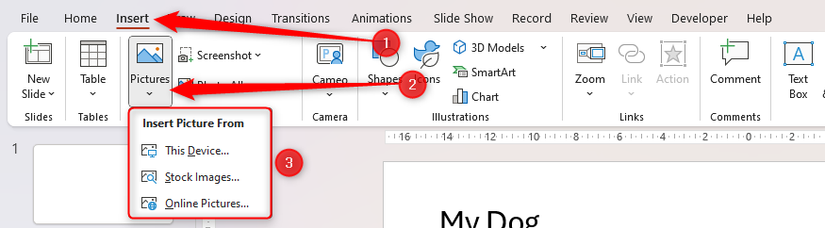
The “Remove Background” tool works on all images in PowerPoint, regardless of whether it’s one pasted onto a slide, uploaded from a PC’s storage, selected from Microsoft’s stock gallery, or inserted from an online source. You can access the latter three options by opening the “Insert” tab on the ribbon and clicking “Pictures”.
Step 1: Crop first
Before I even think about removing the background, I always take a moment to crop the picture to get rid of any blank spaces or unnecessary elements around the edges. Taking this step gives the tool a cleaner, smaller area to work with, reducing the number of manual adjustments later on.
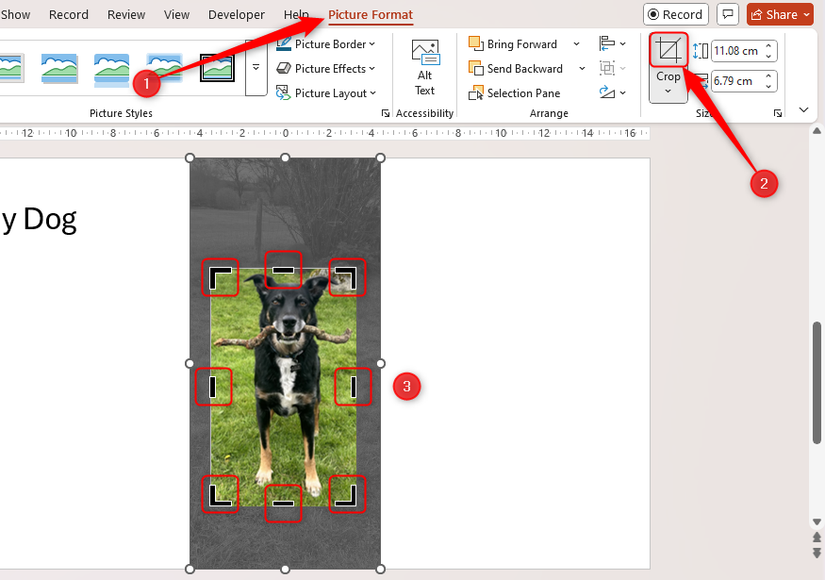
To do this, first, I select the image, click “Crop” in the Picture Format tab, and click and drag the handles. Next, I click outside the picture area to confirm.
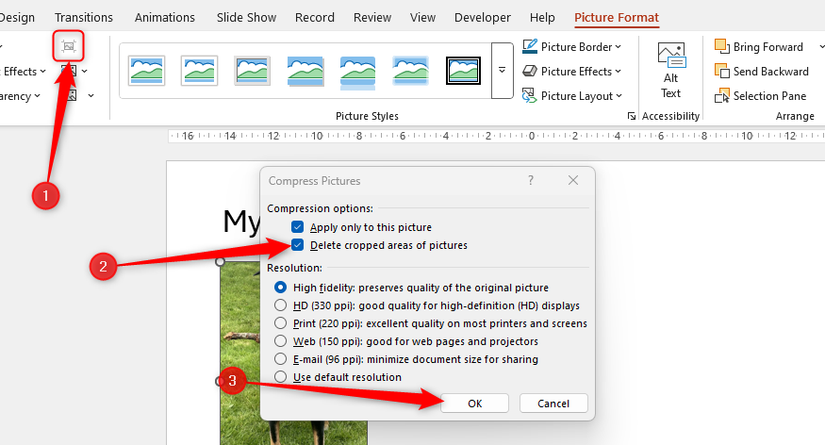
Then, to remove the cropped area from the file entirely, with the picture selected, I’ll click the “Compress Pictures” icon in the Picture Format tab, and in the dialog box, ensure “Delete Cropped Areas Of Pictures” is checked. Then, I’ll click “OK”.
Step 2: Activate the tool
Now, I’m ready to start the background removal process. I’ll select the picture again, and in the Picture Format tab, I’ll click “Remove Background”.
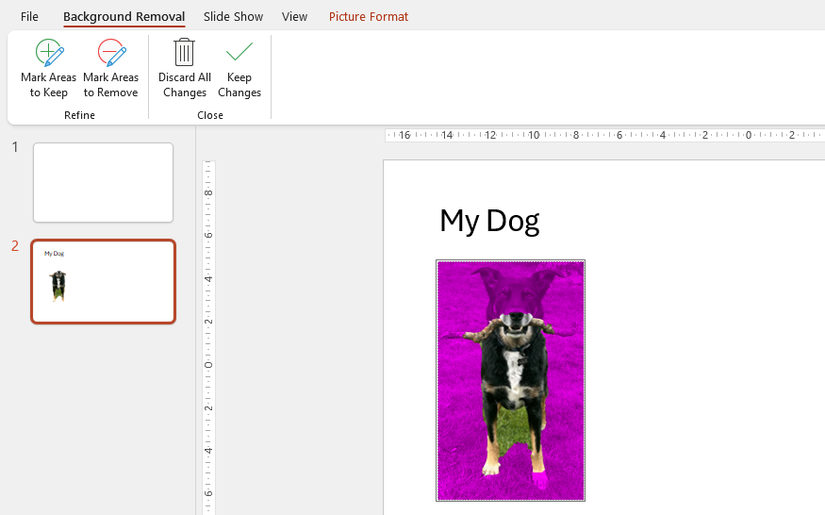
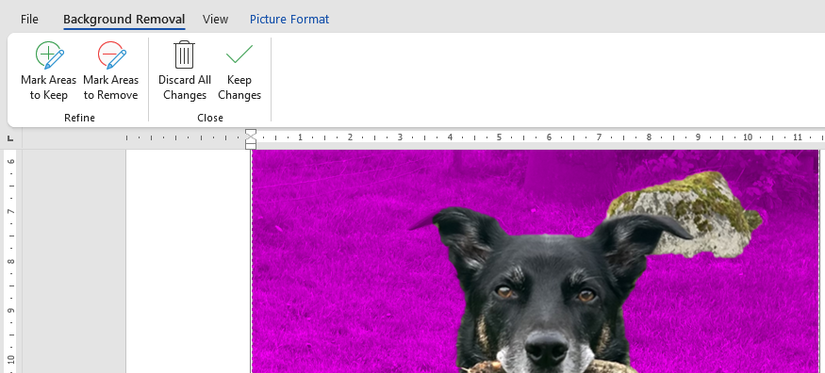
As soon as I do this, PowerPoint gets to work, and I can see the parts it initially identifies as the background highlighted in purple.
Step 3: Refine the selection
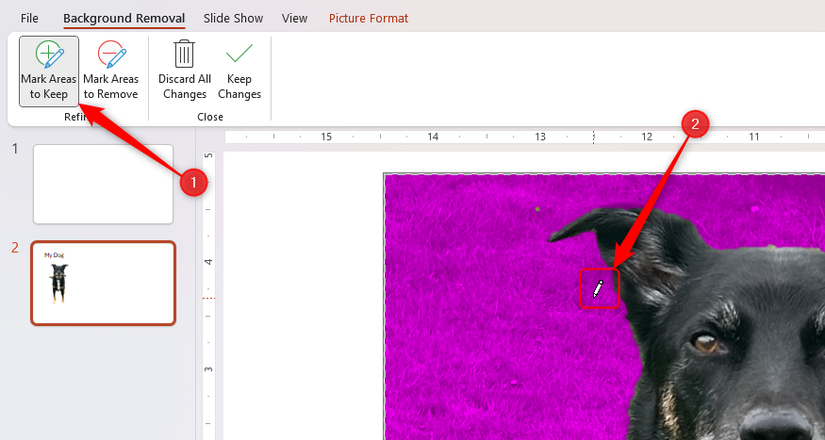
If I’m happy with which parts of the picture are set to be removed, I can simply go ahead and click “Keep Changes” in the Background Removal tab. However, at times, PowerPoint’s background recognition might not work perfectly. In my example above, the tool failed to identify part of the background, so I’ll need to click “Mark Areas To Remove” and use the freehand pen to tell PowerPoint where the rest of the background is. Each time I click, the image updates accordingly.
For far too long, I struggled to find the perfect image without a distracting background for my PowerPoint slides. I used to think I needed complicated software to fix it, but I eventually discovered a tool that’s built into the software itself: Remove Background.
The “Remove Background” tool works on all images in PowerPoint, regardless of whether it’s one pasted onto a slide, uploaded from a PC’s storage, selected from Microsoft’s stock gallery, or inserted from an online source. You can access the latter three options by opening the “Insert” tab on the ribbon and clicking “Pictures”.
Step 1: Crop first
Before I even think about removing the background, I always take a moment to crop the picture to get rid of any blank spaces or unnecessary elements around the edges. Taking this step gives the tool a cleaner, smaller area to work with, reducing the number of manual adjustments later on.
To do this, first, I select the image, click “Crop” in the Picture Format tab, and click and drag the handles. Next, I click outside the picture area to confirm.
Then, to remove the cropped area from the file entirely, with the picture selected, I’ll click the “Compress Pictures” icon in the Picture Format tab, and in the dialog box, ensure “Delete Cropped Areas Of Pictures” is checked. Then, I’ll click “OK”.
Step 2: Activate the tool
Now, I’m ready to start the background removal process. I’ll select the picture again, and in the Picture Format tab, I’ll click “Remove Background”.
As soon as I do this, PowerPoint gets to work, and I can see the parts it initially identifies as the background highlighted in purple.
Step 3: Refine the selection
If I’m happy with which parts of the picture are set to be removed, I can simply go ahead and click “Keep Changes” in the Background Removal tab. However, at times, PowerPoint’s background recognition might not work perfectly. In my example above, the tool failed to identify part of the background, so I’ll need to click “Mark Areas To Remove” and use the freehand pen to tell PowerPoint where the rest of the background is. Each time I click, the image updates accordingly.
For more accurate placement of the correction pen, zoom in on the image using the Zoom tool in the bottom-right corner of the PowerPoint window or by holding Ctrl while scrolling up on your mouse scroll wheel. Also, rather than drawing long lines when making areas to remove or keep, use short, precise strokes or dots. Even though this may take longer in the short term, you’ll get the finished product much more quickly.
On the other hand, the tool sometimes accidentally marks areas to remove that I want to keep. To fix this, I need to click “Mark Areas To Keep” and then use the pen to tell PowerPoint to restore that part of the image.
If, at any point, PowerPoint incorrectly removes or keeps the wrong part after I select an area, I can simply press Ctrl+Z to undo the change. That said, I don’t have to be perfectly accurate with the areas I identify for removal—the process is satisfyingly intuitive.
Step 4: Finalize and save
Once I’m happy with how the picture looks after making these refinements, I can click “Keep Changes”.
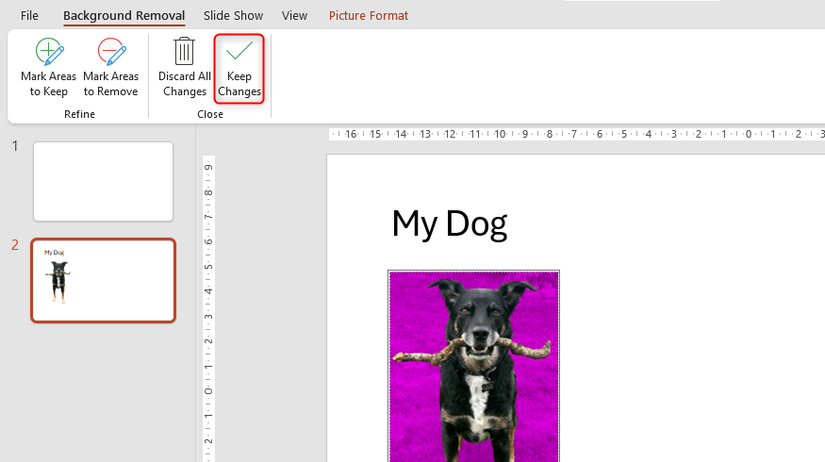
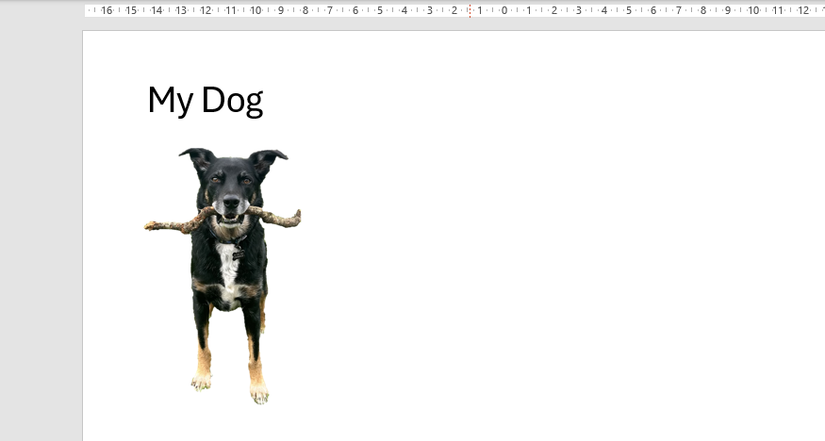
Now, the picture’s background is removed.
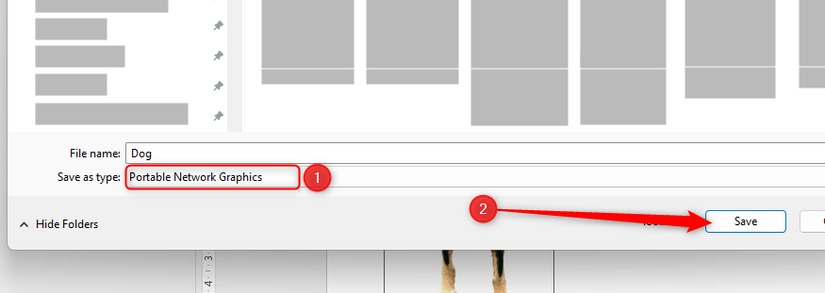
As well as copying and pasting the newly formatted picture into other slides or programs, I can also save it as a PNG for long-term use. To do this, first, I right-click the image and select “Save As Picture”.

Then, in the Save As Type drop-down menu of the Save As window, I can select “Portable Network Graphic” to preserve the picture’s transparency. Then, I’ll click “Save”.
Removing picture backgrounds in Word and Excel
This handy tool isn’t limited to just Microsoft PowerPoint—I can also remove picture backgrounds in Microsoft Word in exactly the same way.
Extra steps in Microsoft Excel
However, in Microsoft Excel, the Remove Background tool only works with pictures placed over cells (floating images). If your spreadsheet contains an in-cell image, you need to convert it first. There are two ways to convert the picture to a floating image:
- Right-click the cell containing the picture, hover over “Picture In Cell,” and click “Place Over Cells.”
- Right-click the picture and select “Place In Cell.”
- Select the picture and click the icon.
After creating professional, background-free pictures in my PowerPoint presentation, I use some other tools the program offers to add animations. One of my favorites is the Morph transition, which lets me create cinematic presentations by making images appear to move, resize, and transform seamlessly from slide to slide.
Leave A Comment?