Situatie
If you’ve ever run into the problem of Windows trying to open up a file in entirely the wrong application, you’re not alone. Although you can get around it using the “Open With” command, there is a way to make sure you don’t have to do that every time: Learn how to change file associations.
If you aren’t sure which file type you want to change the association of, right-click your desired file and click Properties from the resulting menu. Look for Type of File at the top of the window. The three-letter designation next to that is its file type. You can do it on an individual file type basis or change all of them from one location.
Solutie
Pasi de urmat
Changing one file type – The quickest method to change a single file type is to do it from that Open With menu we mentioned. If you want to change more than one file type at a time, skip to the next section.
Step 1: Right-click on a file of the type you wish to change the association for.
Step 2: Select Open With from the resulting menu.

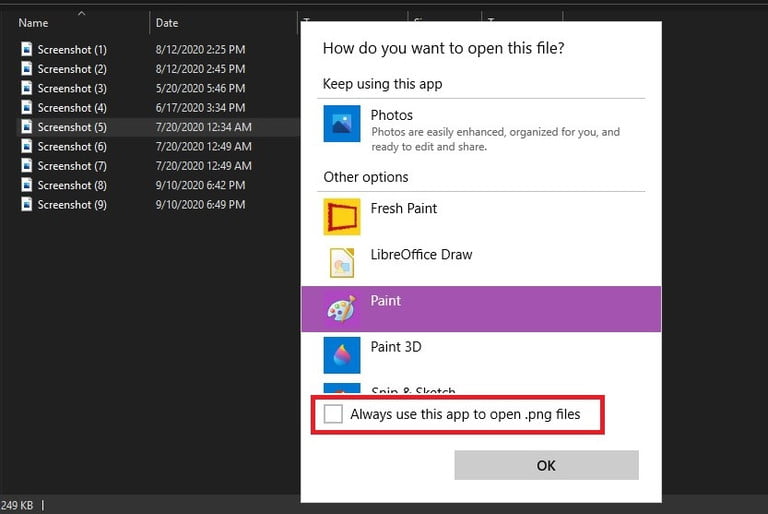
Step 3: Windows will then offer you an app or a list of apps that can act as the default for that file type. If you see the one you want, select it, and Windows will open that file in the app you’ve chosen.
If you don’t see your preferred app, then from the menu that appears when you select Open With, either search for one by selecting the Search the Microsoft Store option or click Choose Another App for an expanded list of already-installed applications.
Step 4: When you’ve found the app you want, and it has been selected, simply click the gray OK button. You can also tick the box labeled Always Use This App to Open [Type of File] Files before you hit the OK button if you want that app to open all files of that type going forward.
Changing any and all
If you want to change a few different file types — or even all of them — then the Settings menu is the best place to go.
Step 1: Press the Windows + X keys and click Settings from the resulting menu.
Alternatively, search for Settings in the Windows search bar and click the relevant result.
Step 2: Select Apps from the list of options.
Step 3: Click Default Apps from the left-hand menu.
Step 4: Scroll down if needed, and click Choose Default Apps by File Type.
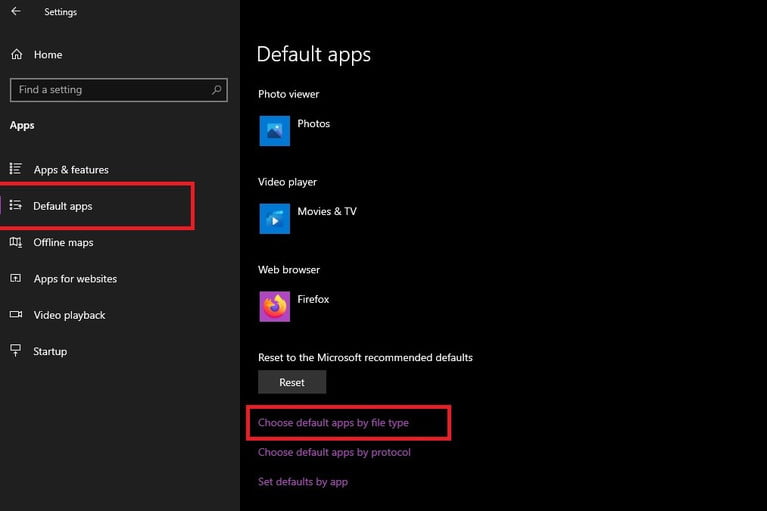
You’ll then be presented with a list of all of the file types Windows 10 supports, with their associated applications on the right-hand side. If a file type doesn’t have a particular application set up to handle it, there will be a gray plus sign (+) icon instead.
Step 5: Scroll through the list to find the file type that you want to change the file association for. Click the application or Plus icon to its right.
Step 6: Choose your preferred application from the list that appears, and click its corresponding icon.

Leave A Comment?