Situatie
Highly regarded in the networking crowd as one of the best modern alternatives to OpenVPN, WireGuard combines rock-solid performance with a simple UI and tip-top security provisions. As with any other self-hosted service, there are a couple of ways you can create and run WireGuard in Proxmox, though we’ll keep things simple by choosing the ultra-easy Proxmox VE Helper Script created by developer tteck.
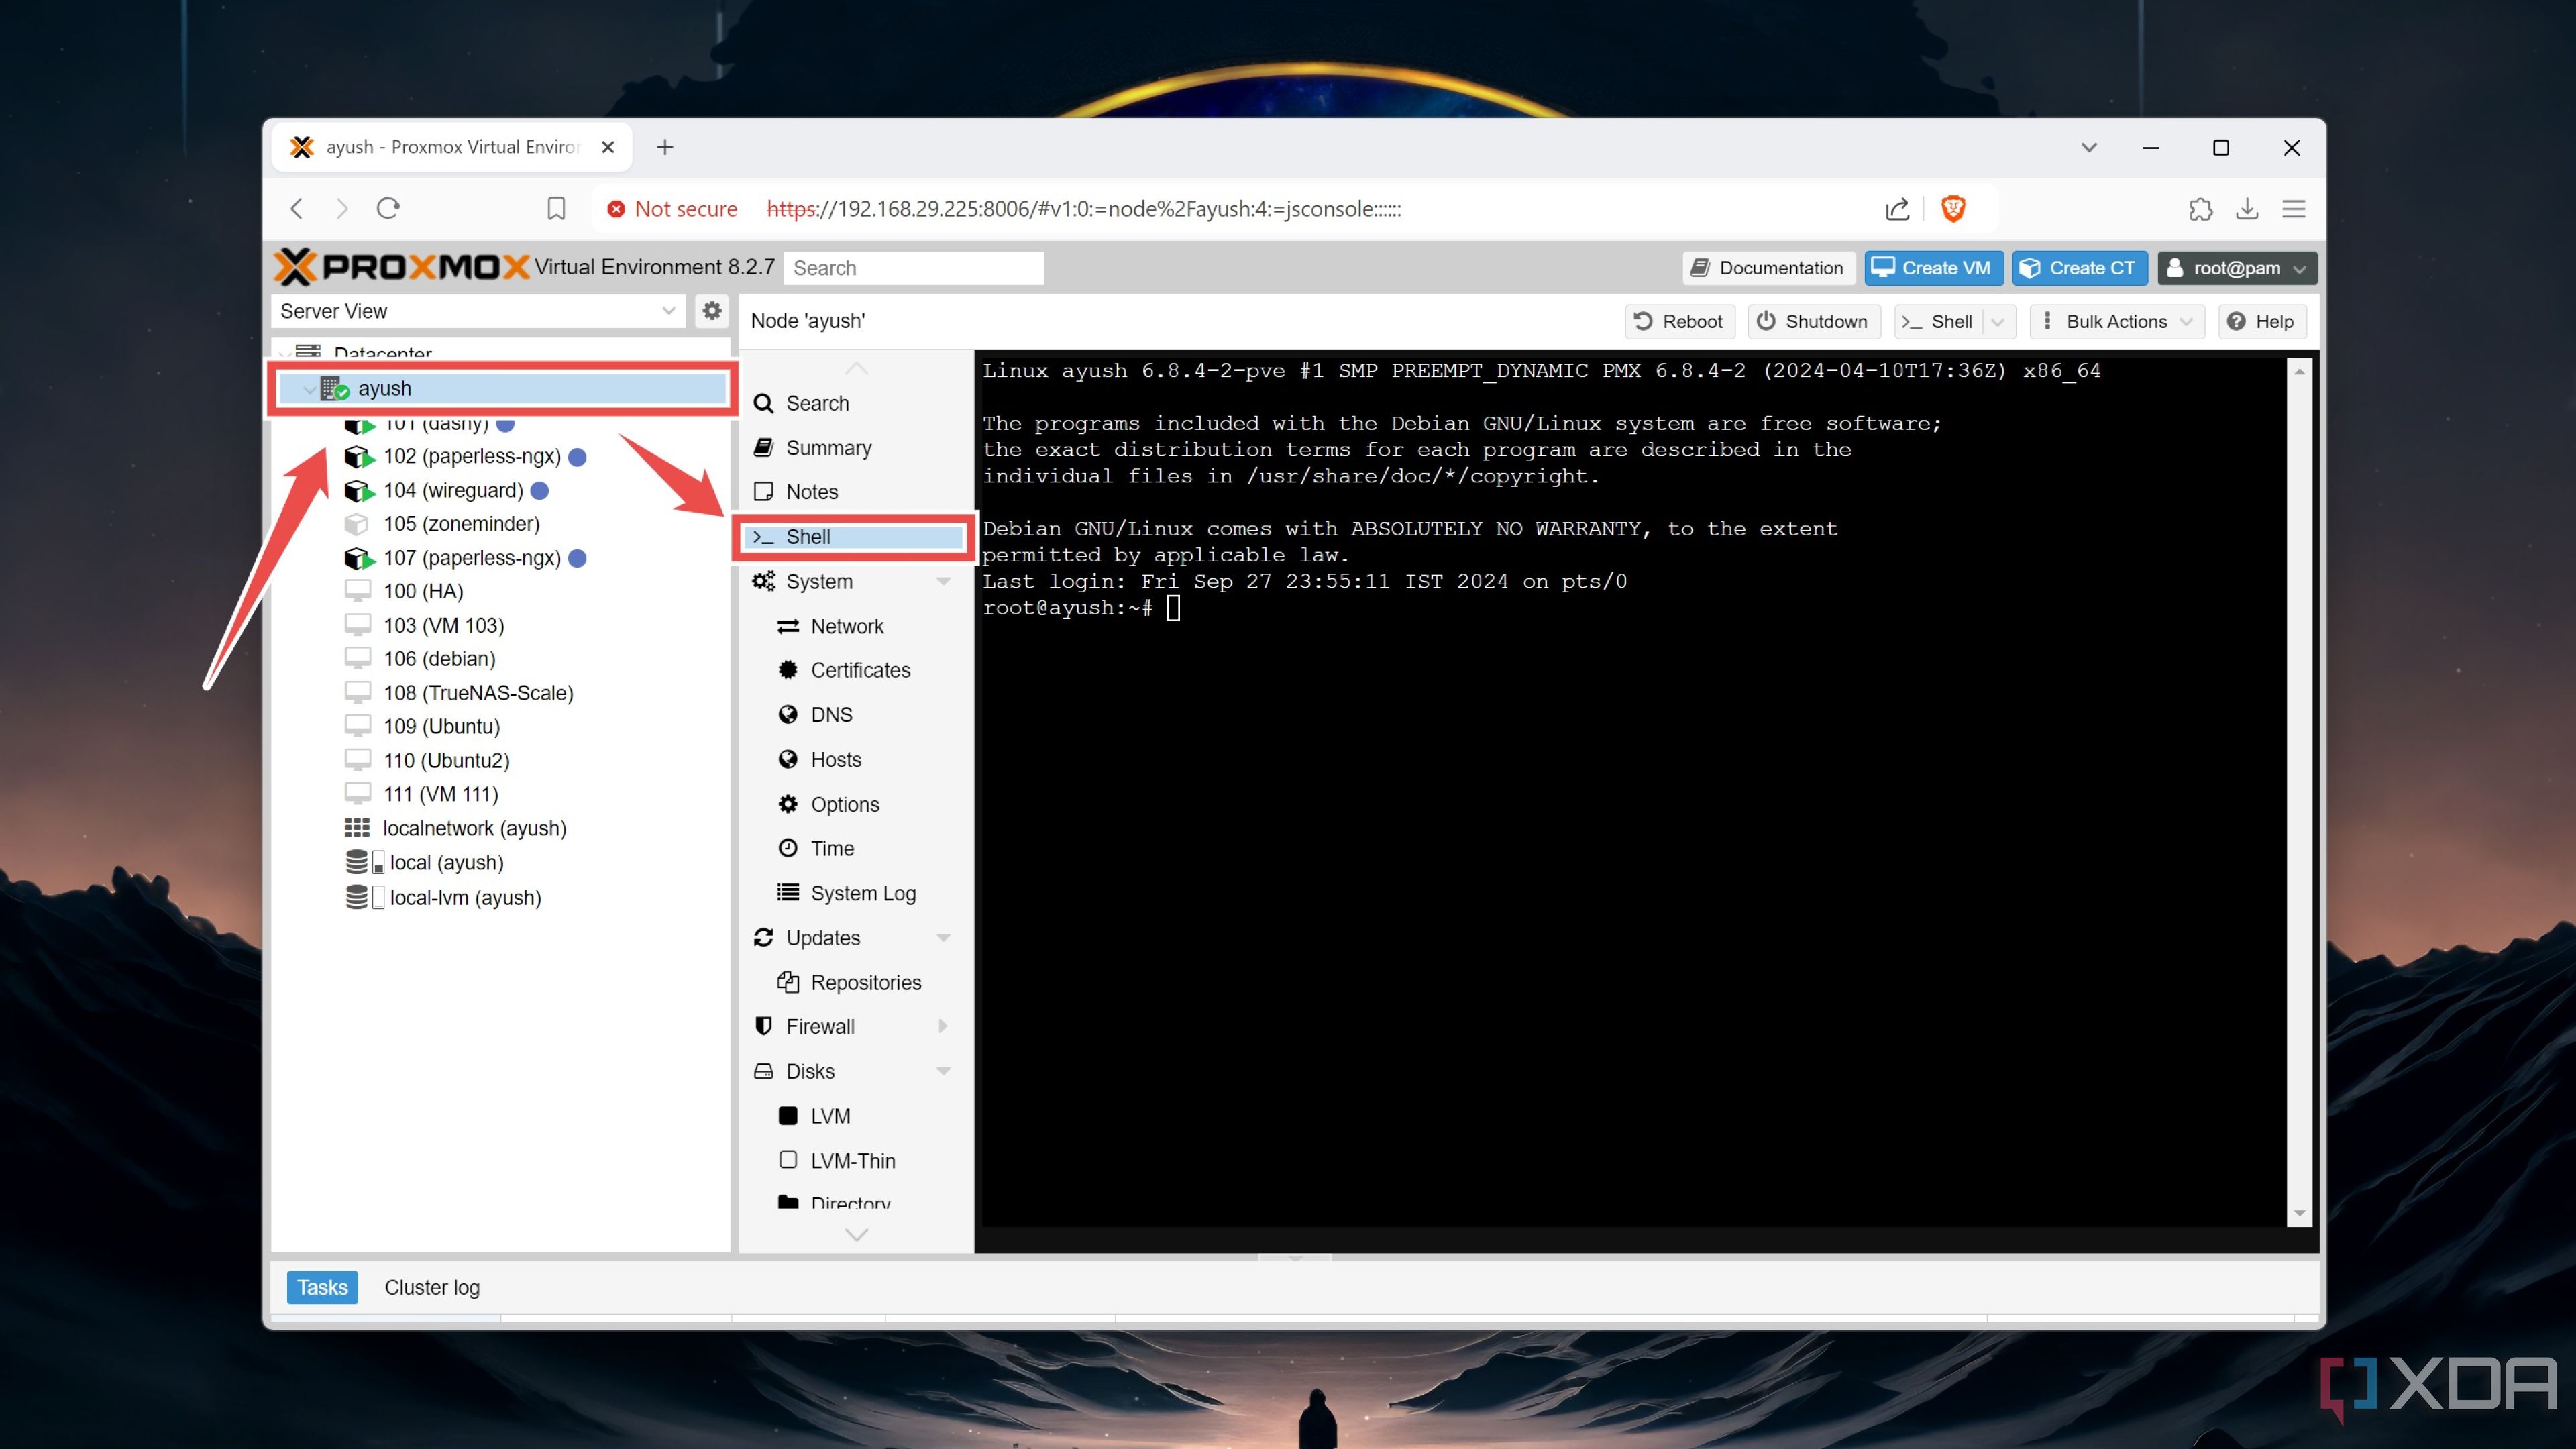
- Select your Proxmox node and navigate to its Shell tab.
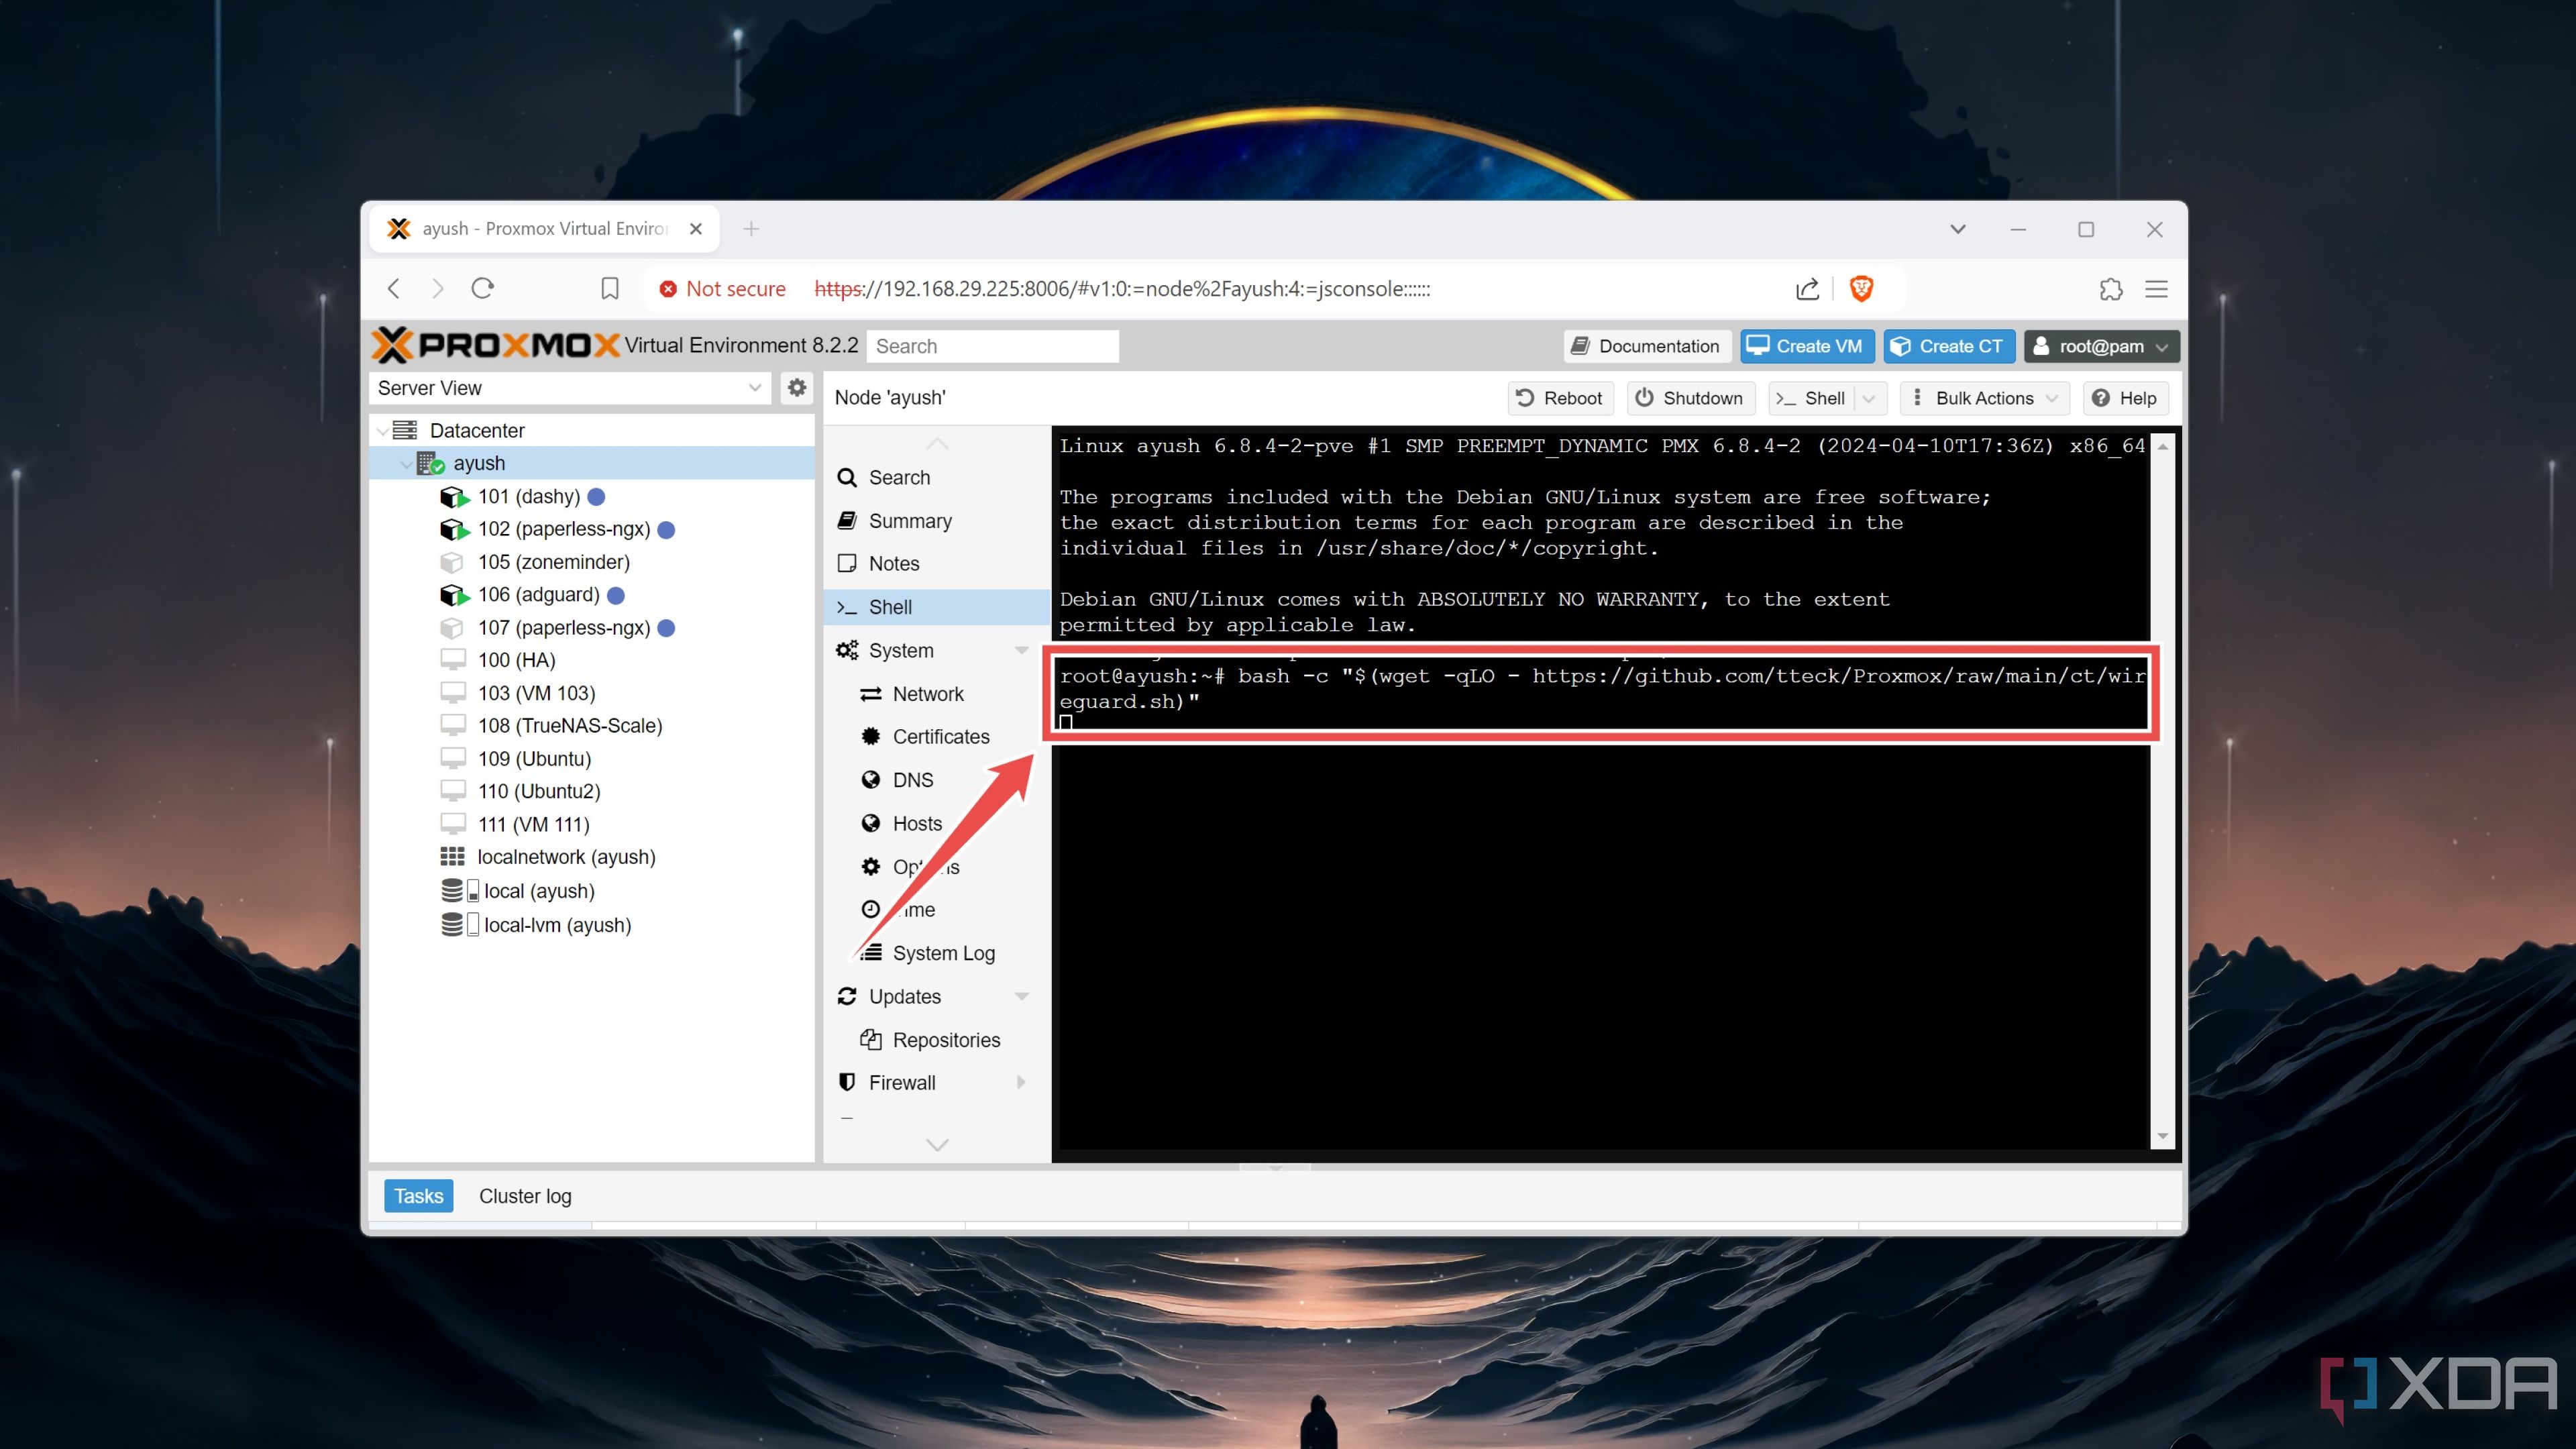
- Paste the following command into the Shell and tap the Enter key.
bash -c "$(wget -qLO - https://github.com/tteck/Proxmox/raw/main/ct/wireguard.sh)"
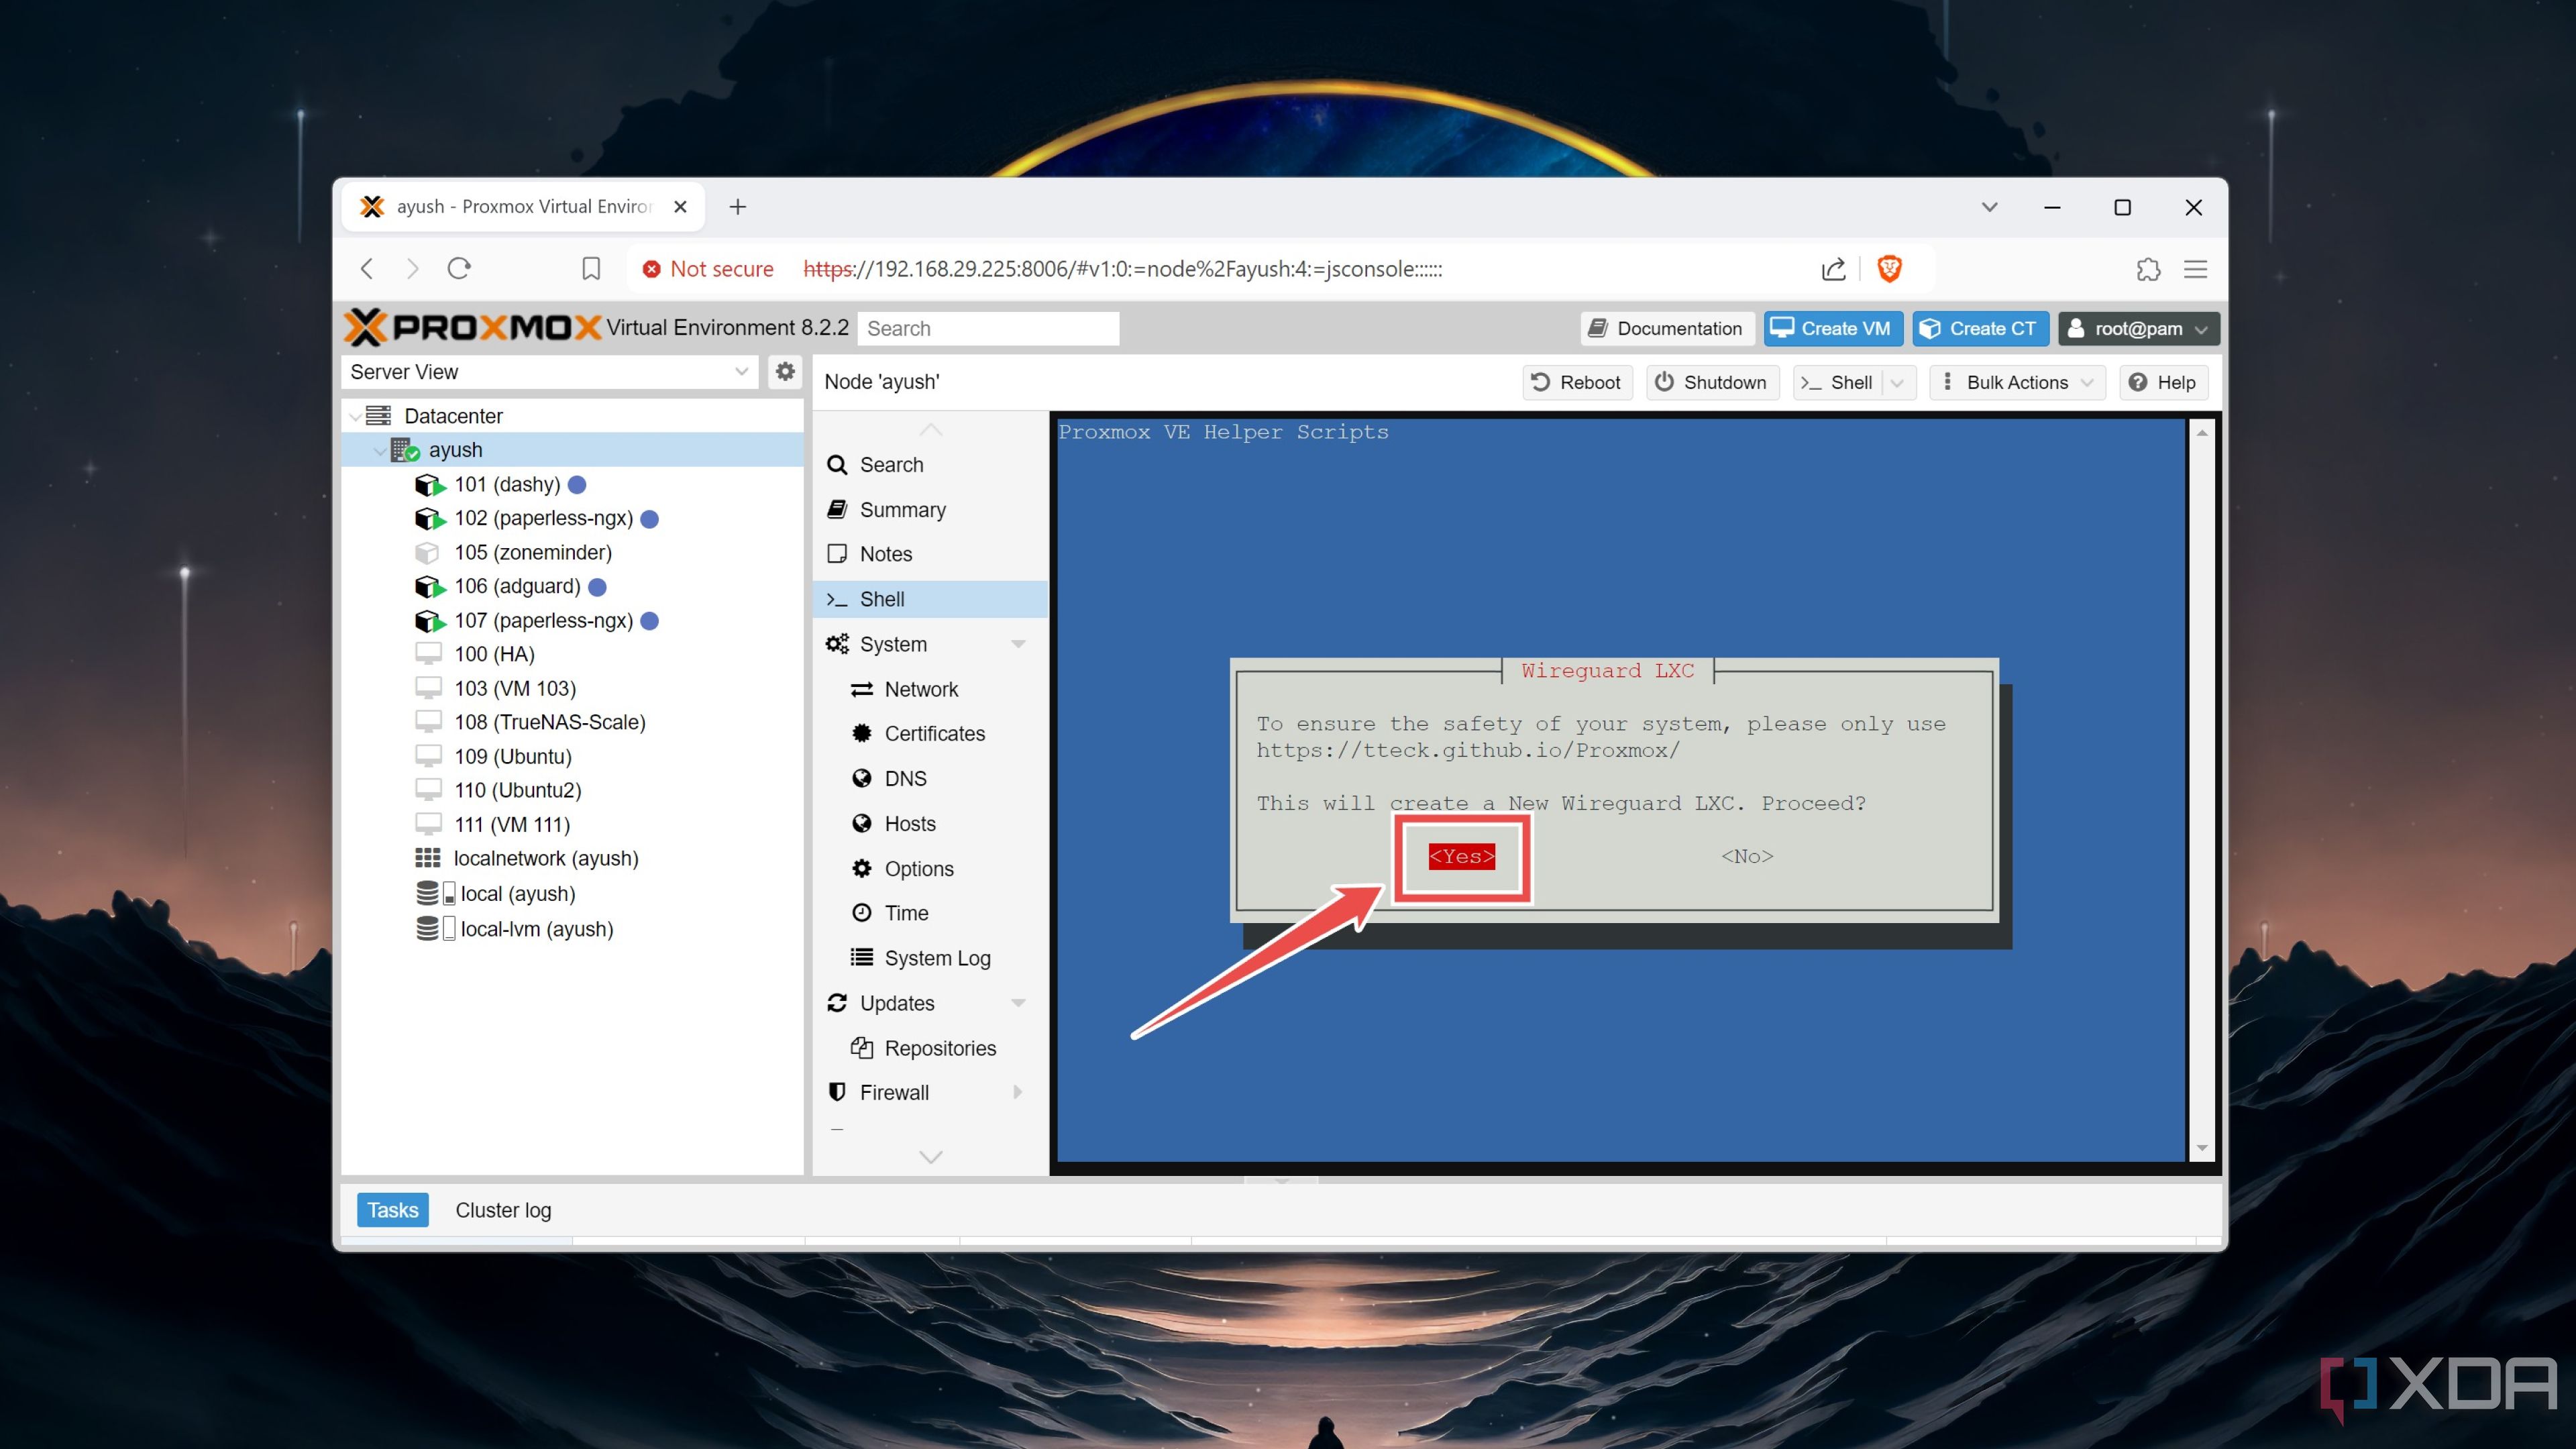
- Choose Yes when Proxmox asks for your approval to create an LXC container for WireGuard.
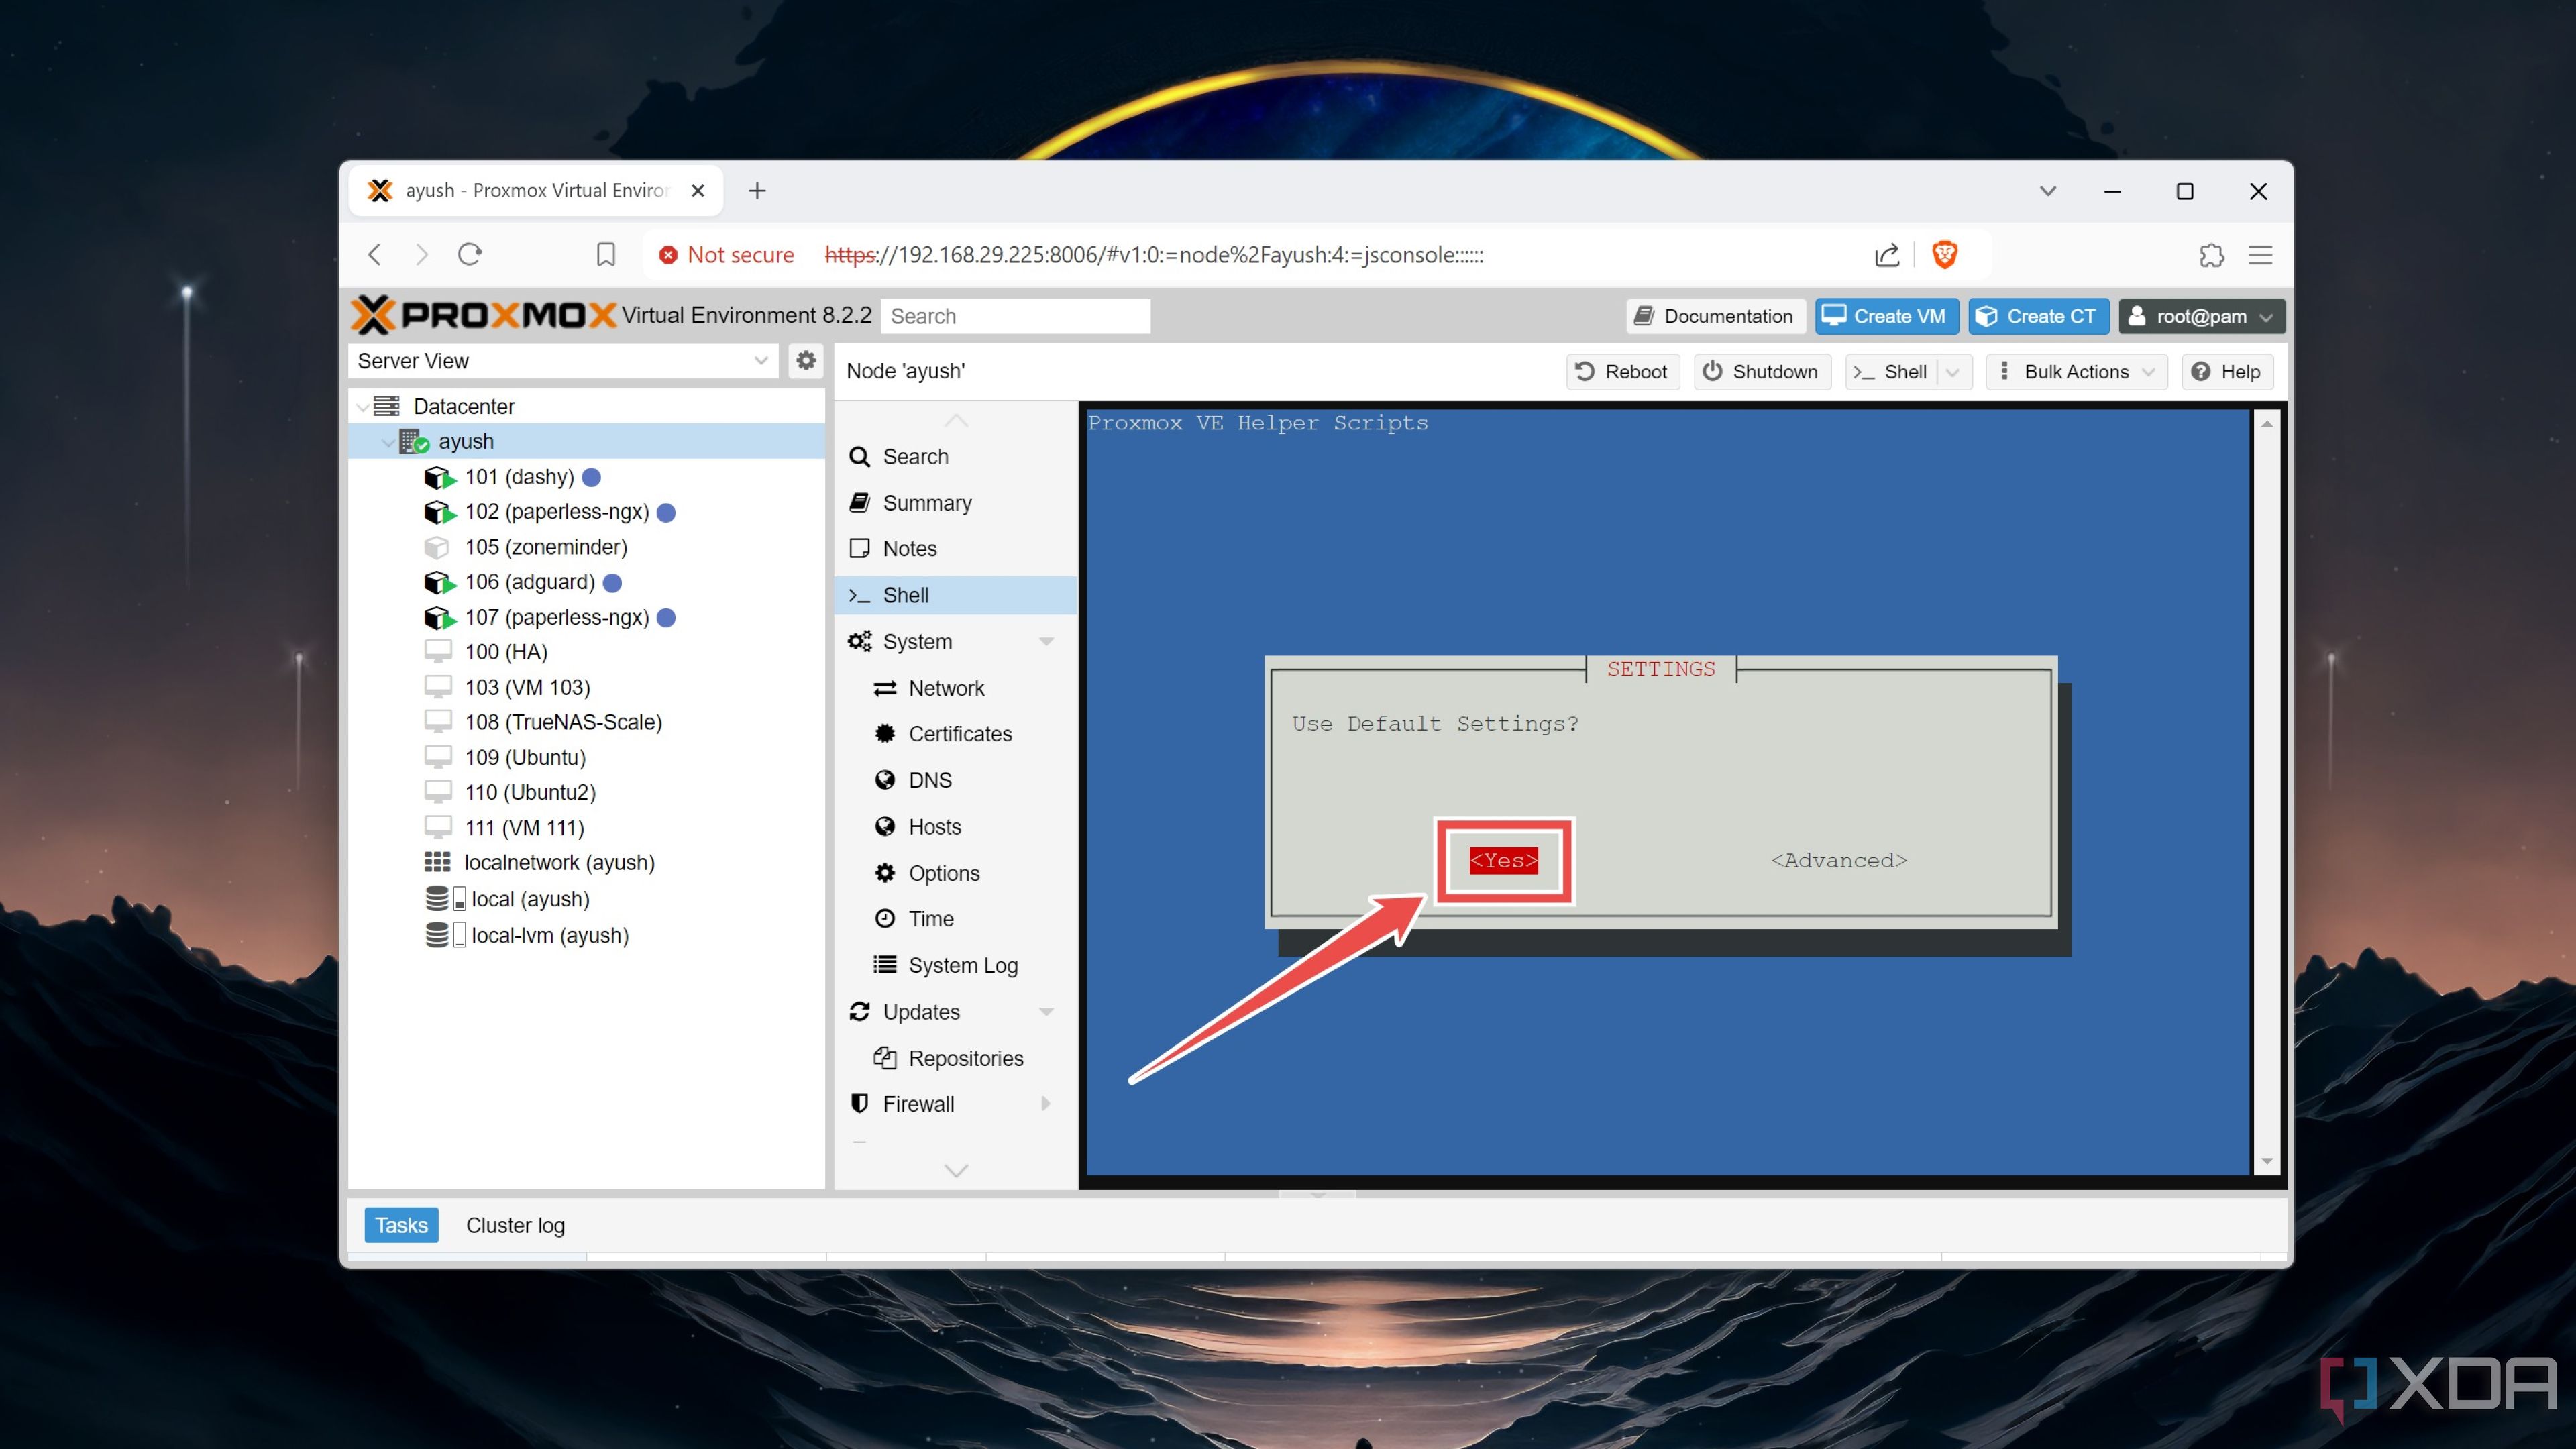
- Pick Yes when you’re prompted to use the Default Settings.
If you encounter network issues when running the script, you can run the apt update and apt dist-upgrade commands in the script. Alternatively, you can try setting the IPv4 and Gateway addresses in the Advanced installation mode instead of going with the Default Settings.
- Wait for Proxmox to create and deploy the WireGuard container.
Configuring the WireGuard container
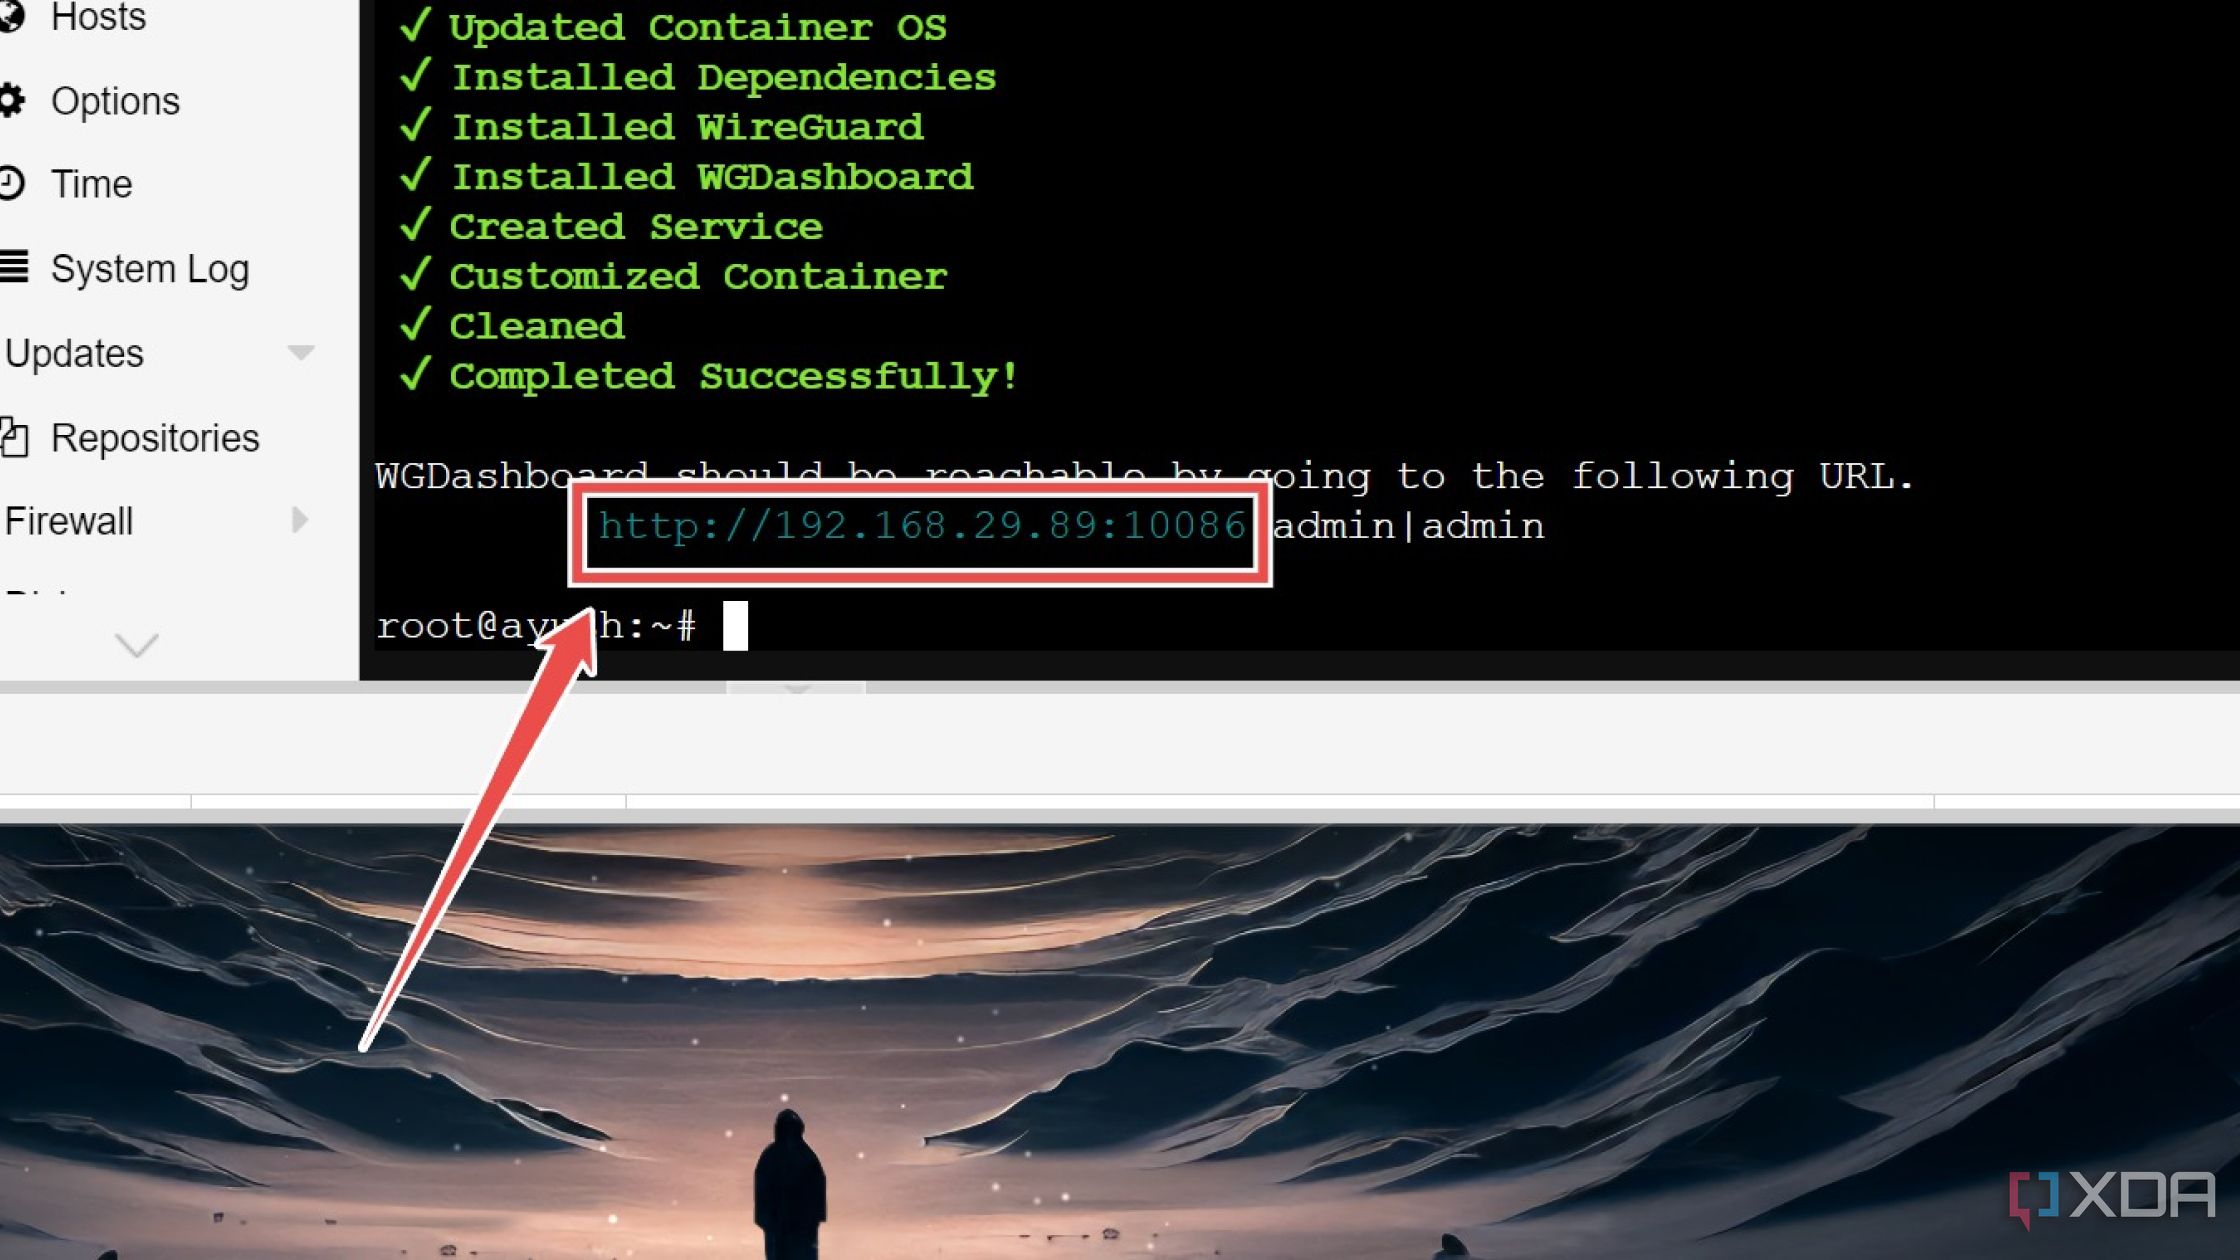
Since the WireGuard script installs the WGDashboard GUI, you can create a private VPN server without messing around with terminal commands.
- Open the URL generated by the WireGuard script on your web browser.
- Type admin as the Username and Password.
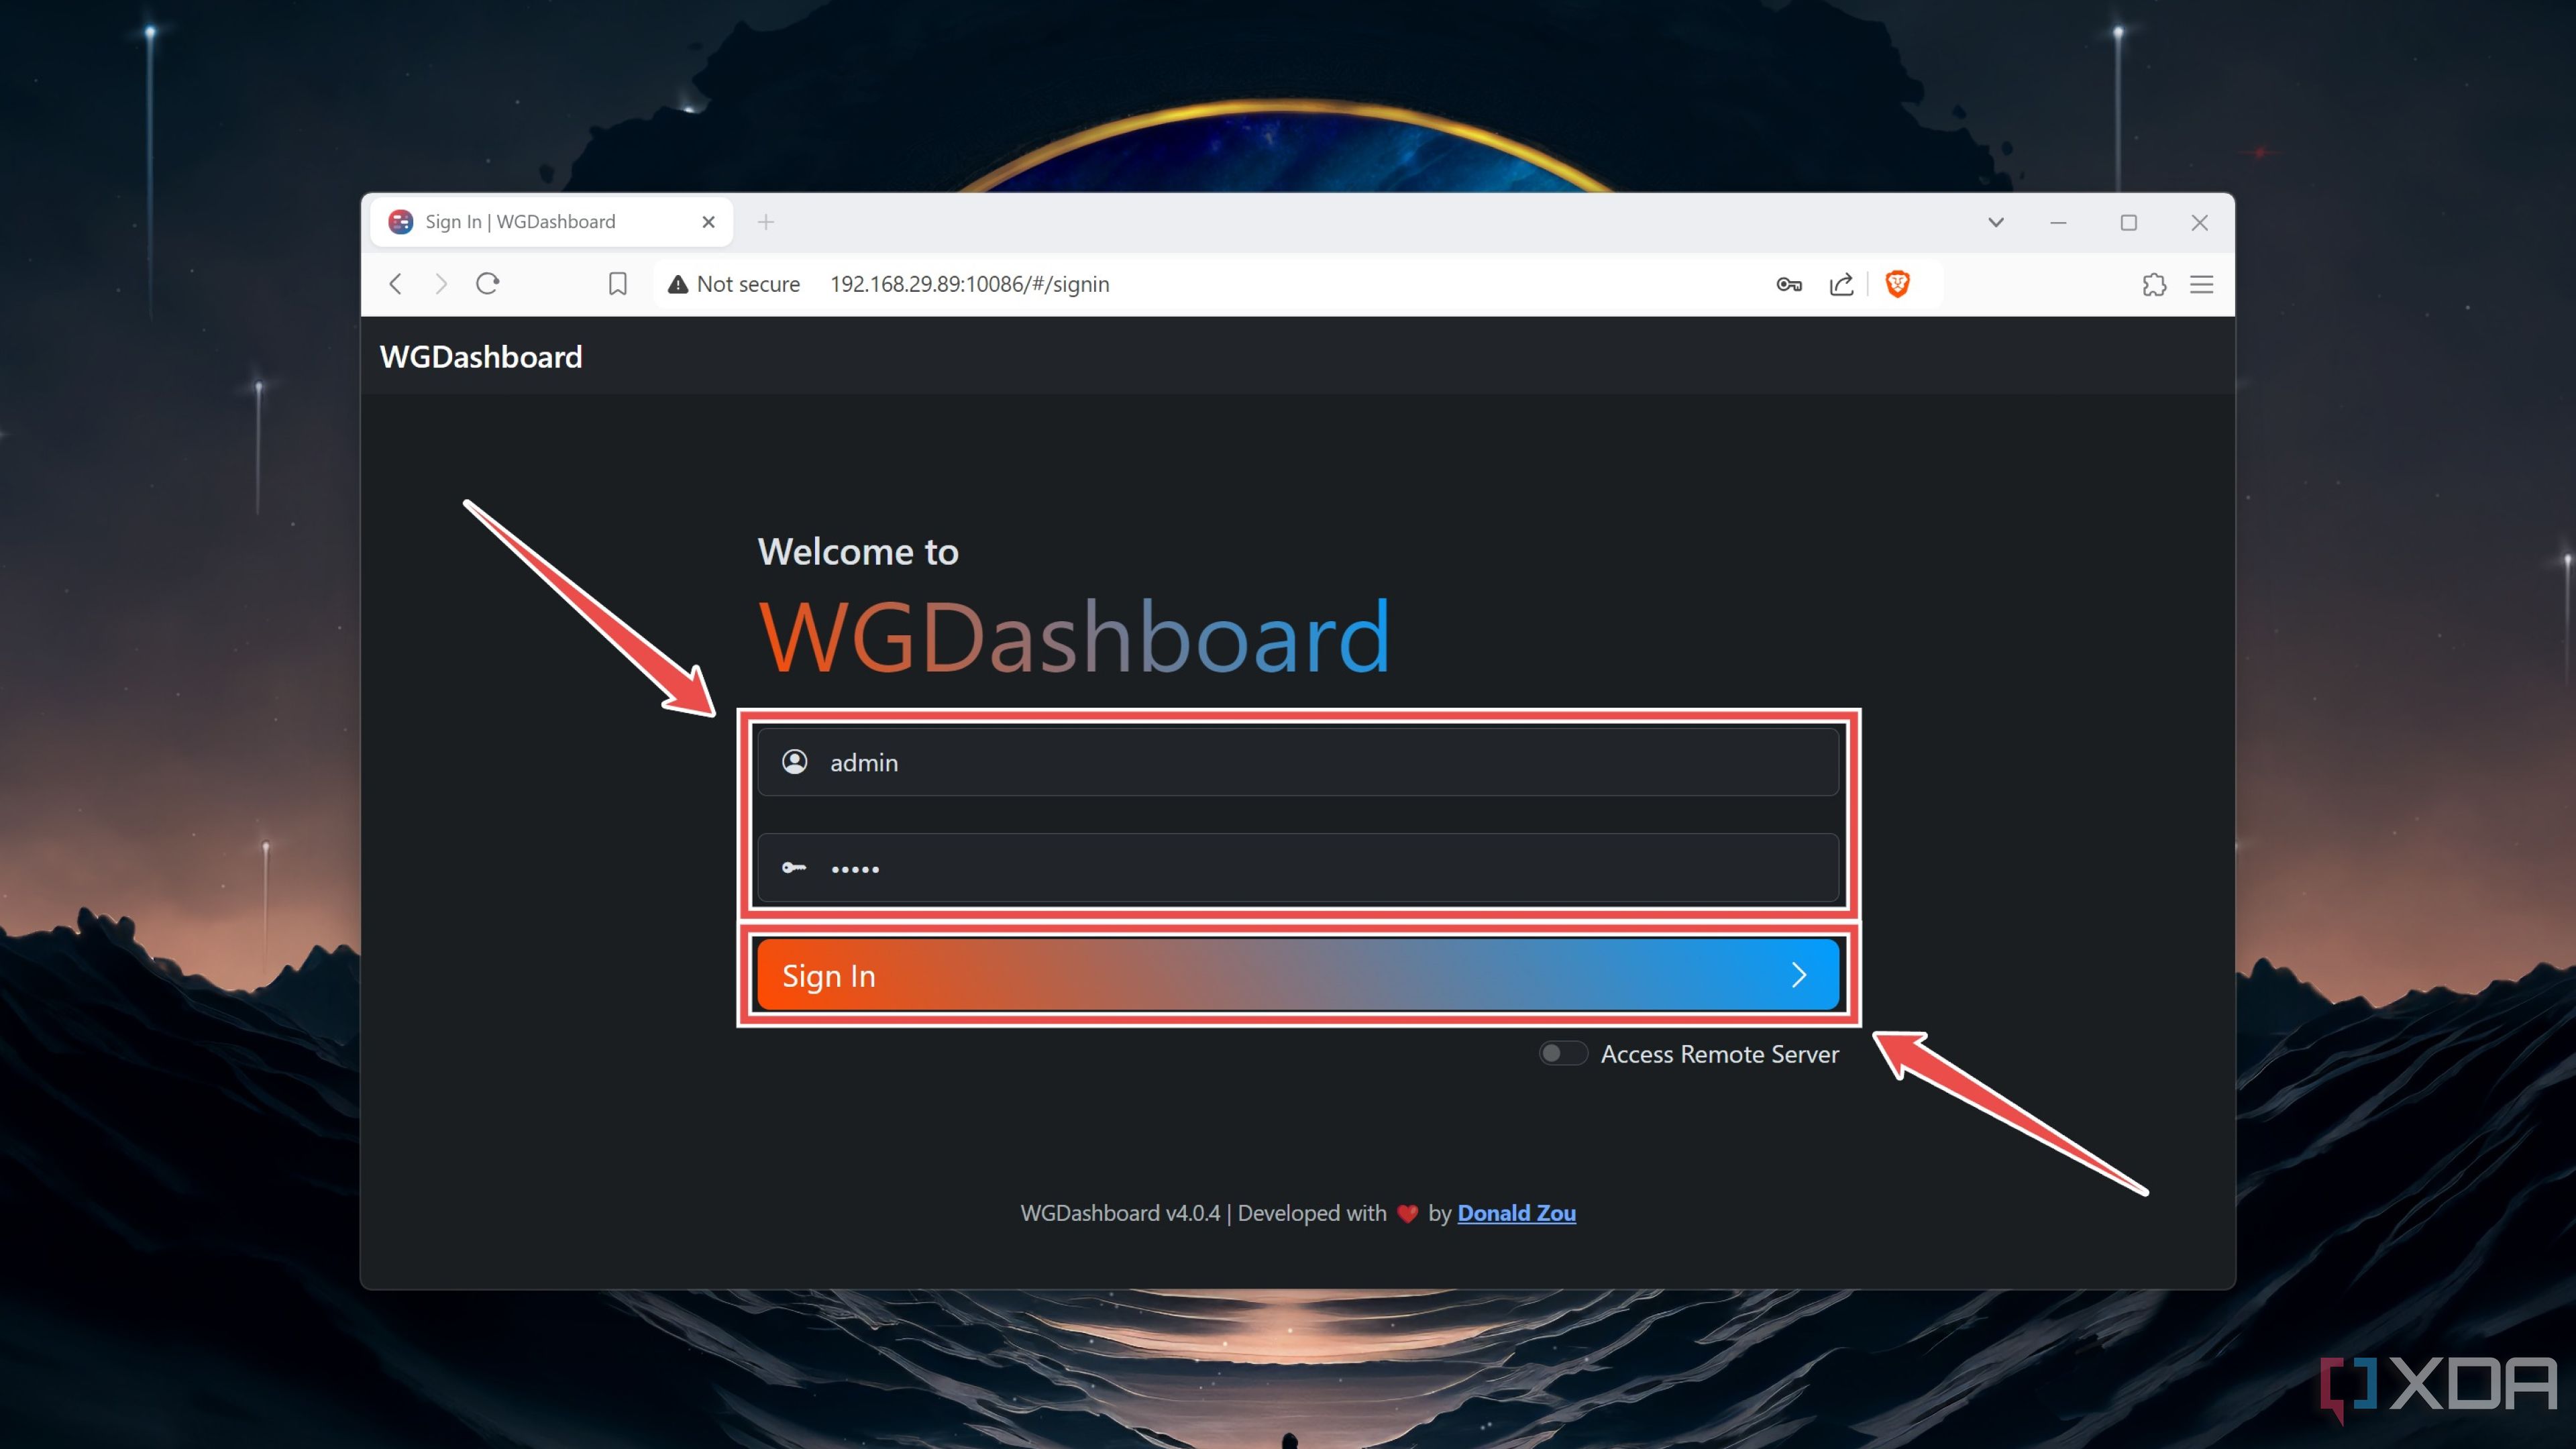
- Create a new Username and Password for the WireGuard container before tapping Next.

- (Optional) If you want extra security, you can set up 2FA using your favorite authenticator app.
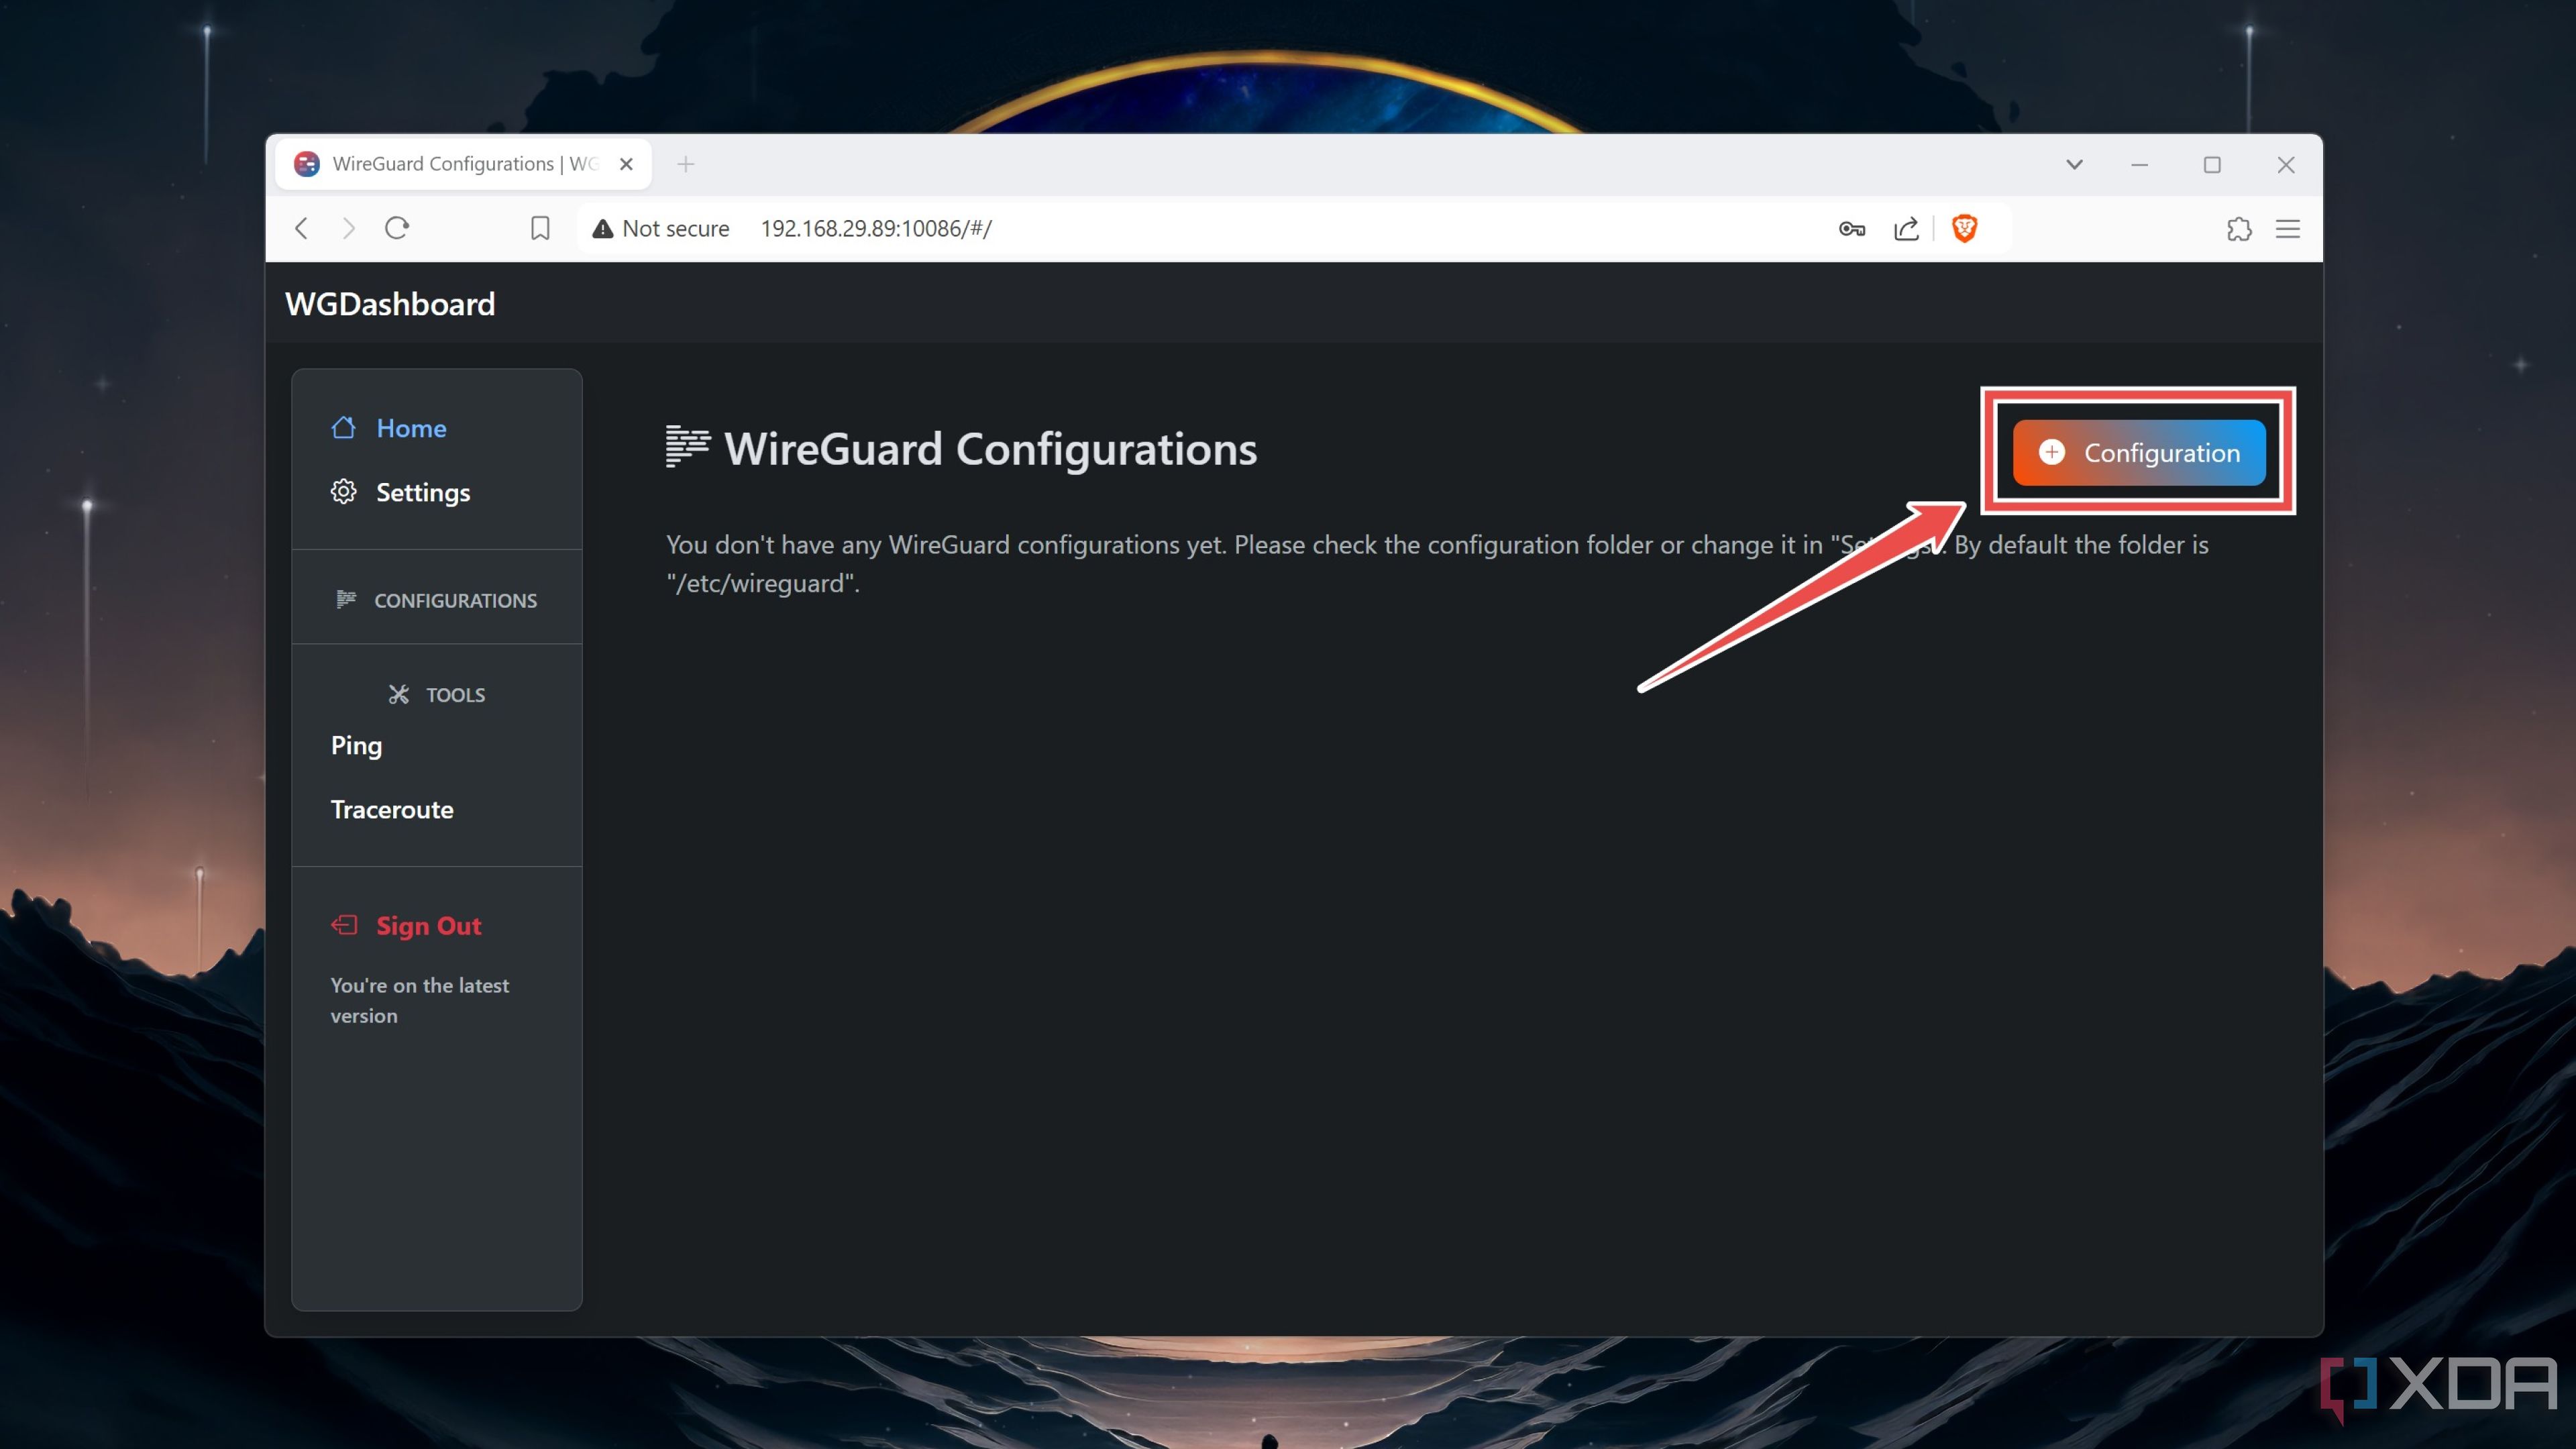
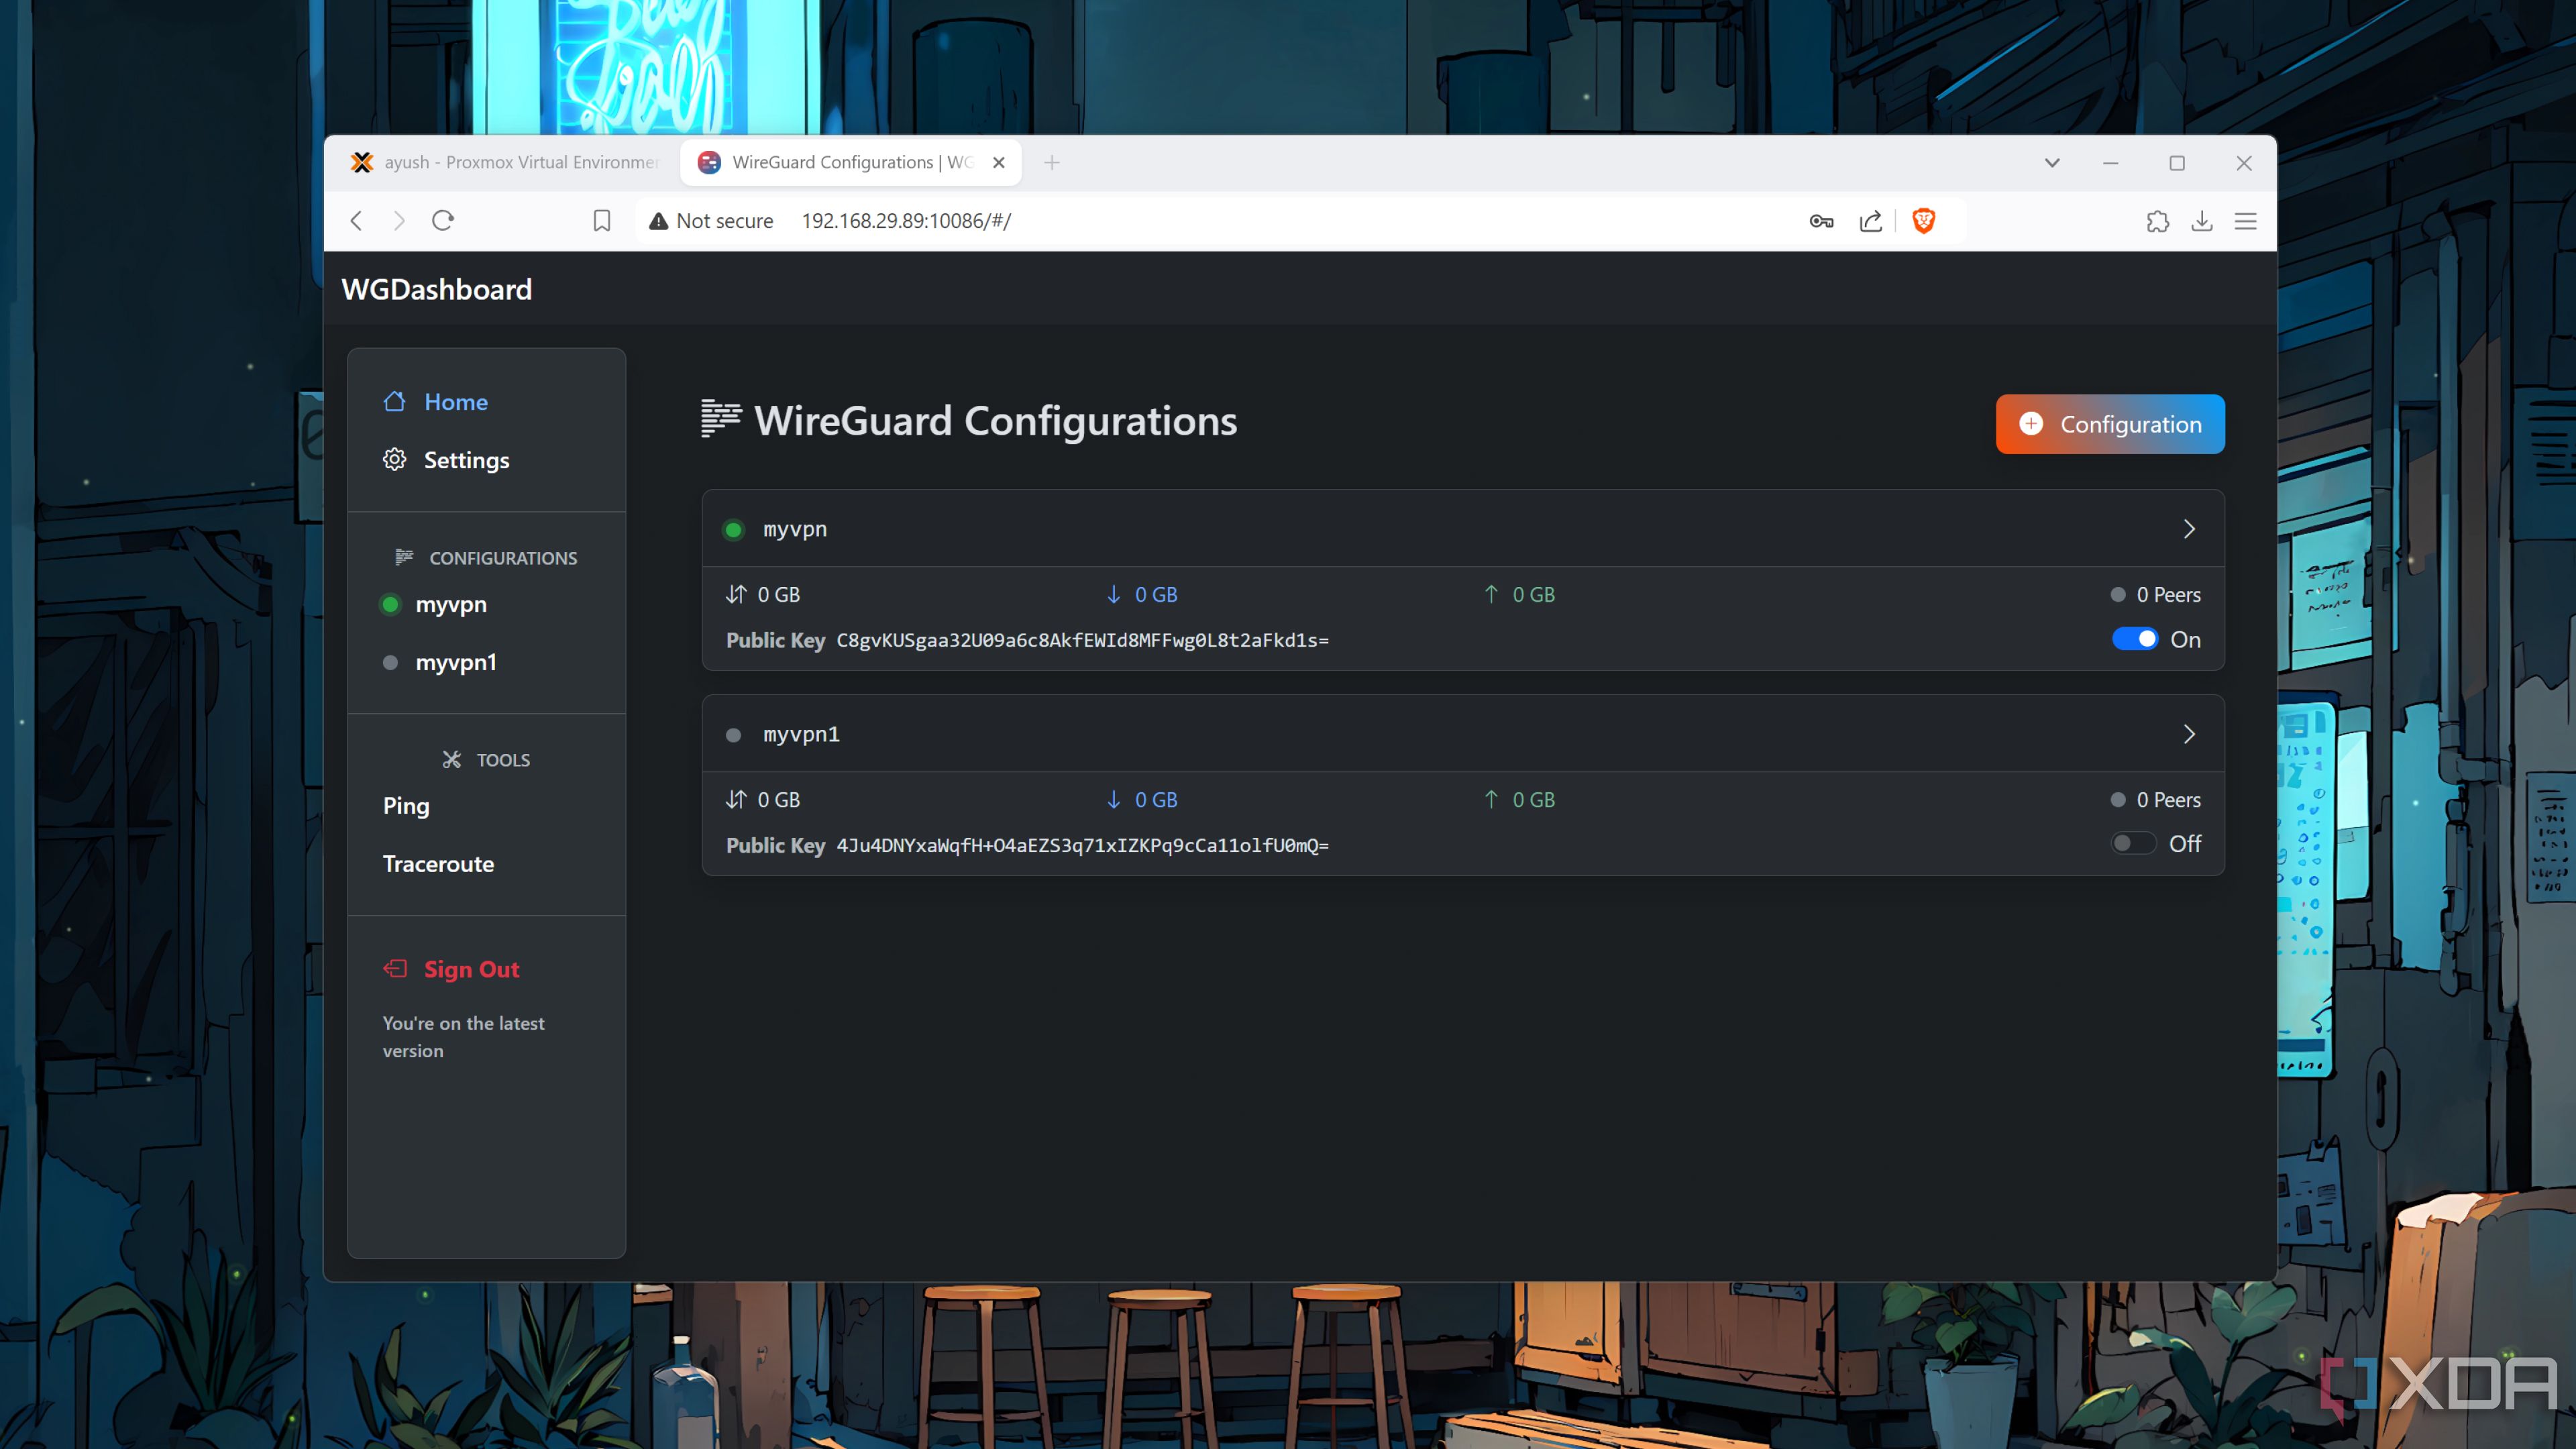
- Press the Configuration button inside the WGDashboard.
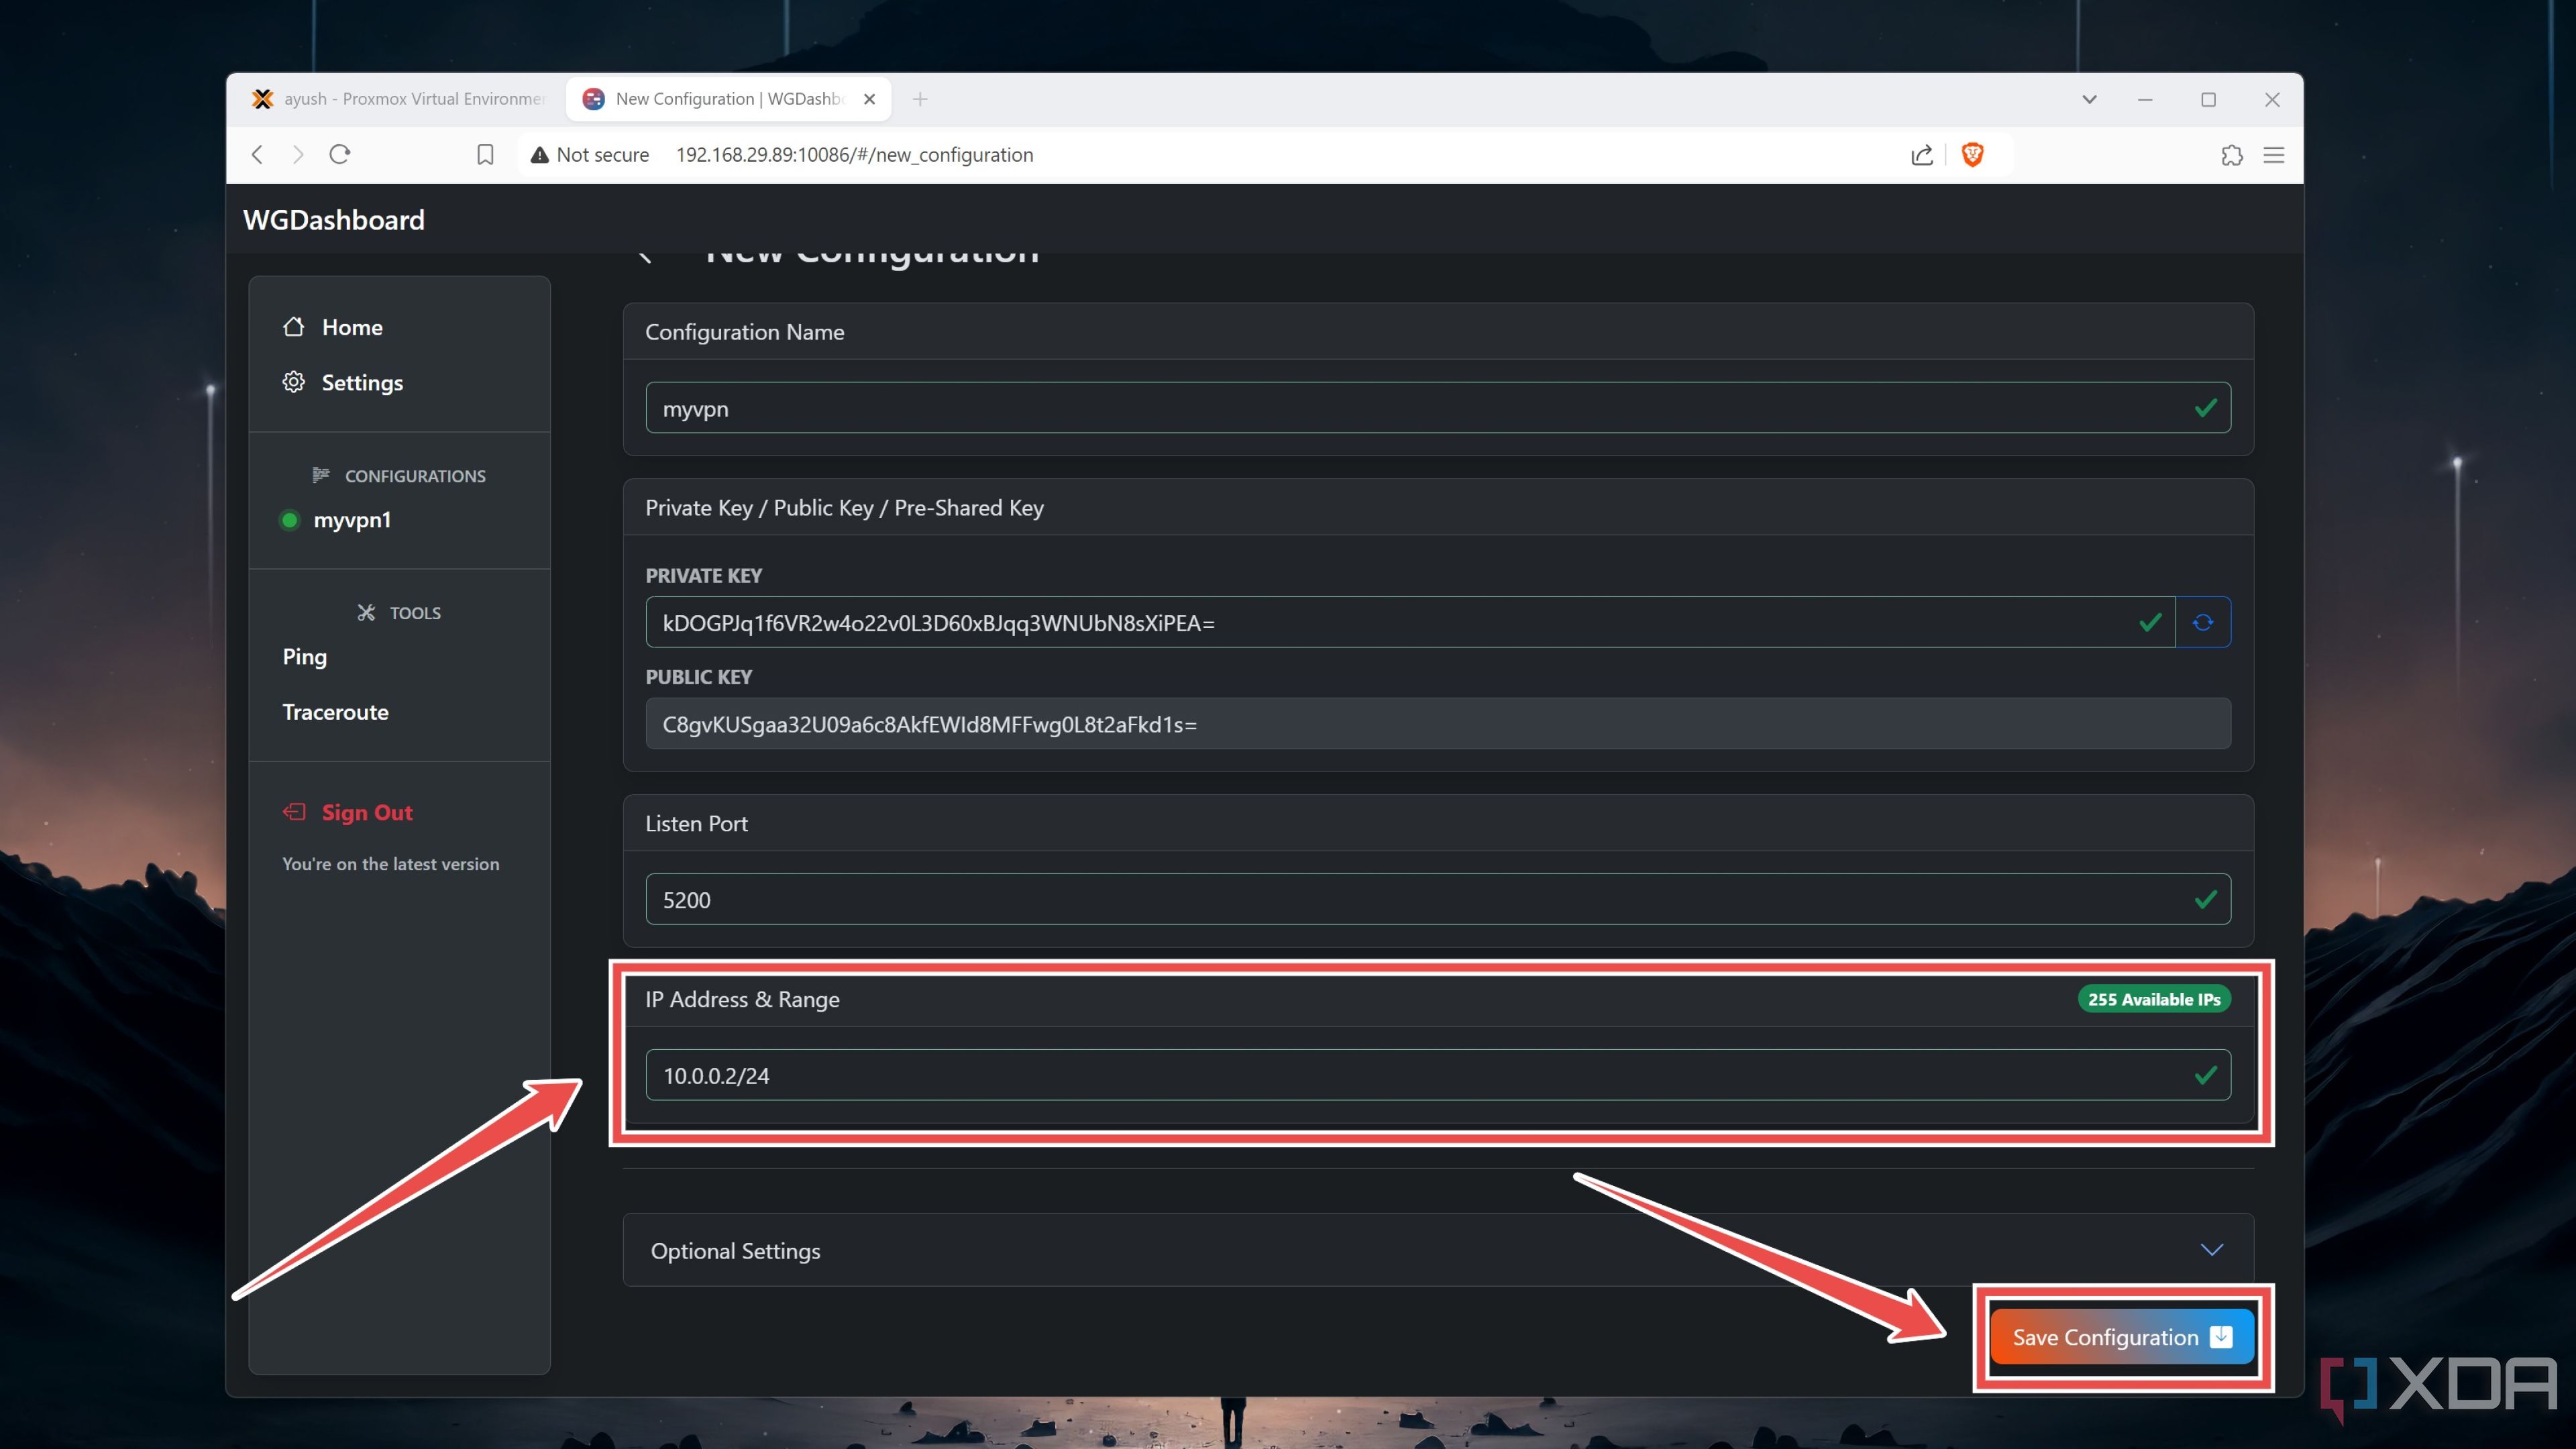
- Pick a Name for your WireGuard VPN config and choose the Listen port for the tunnel.
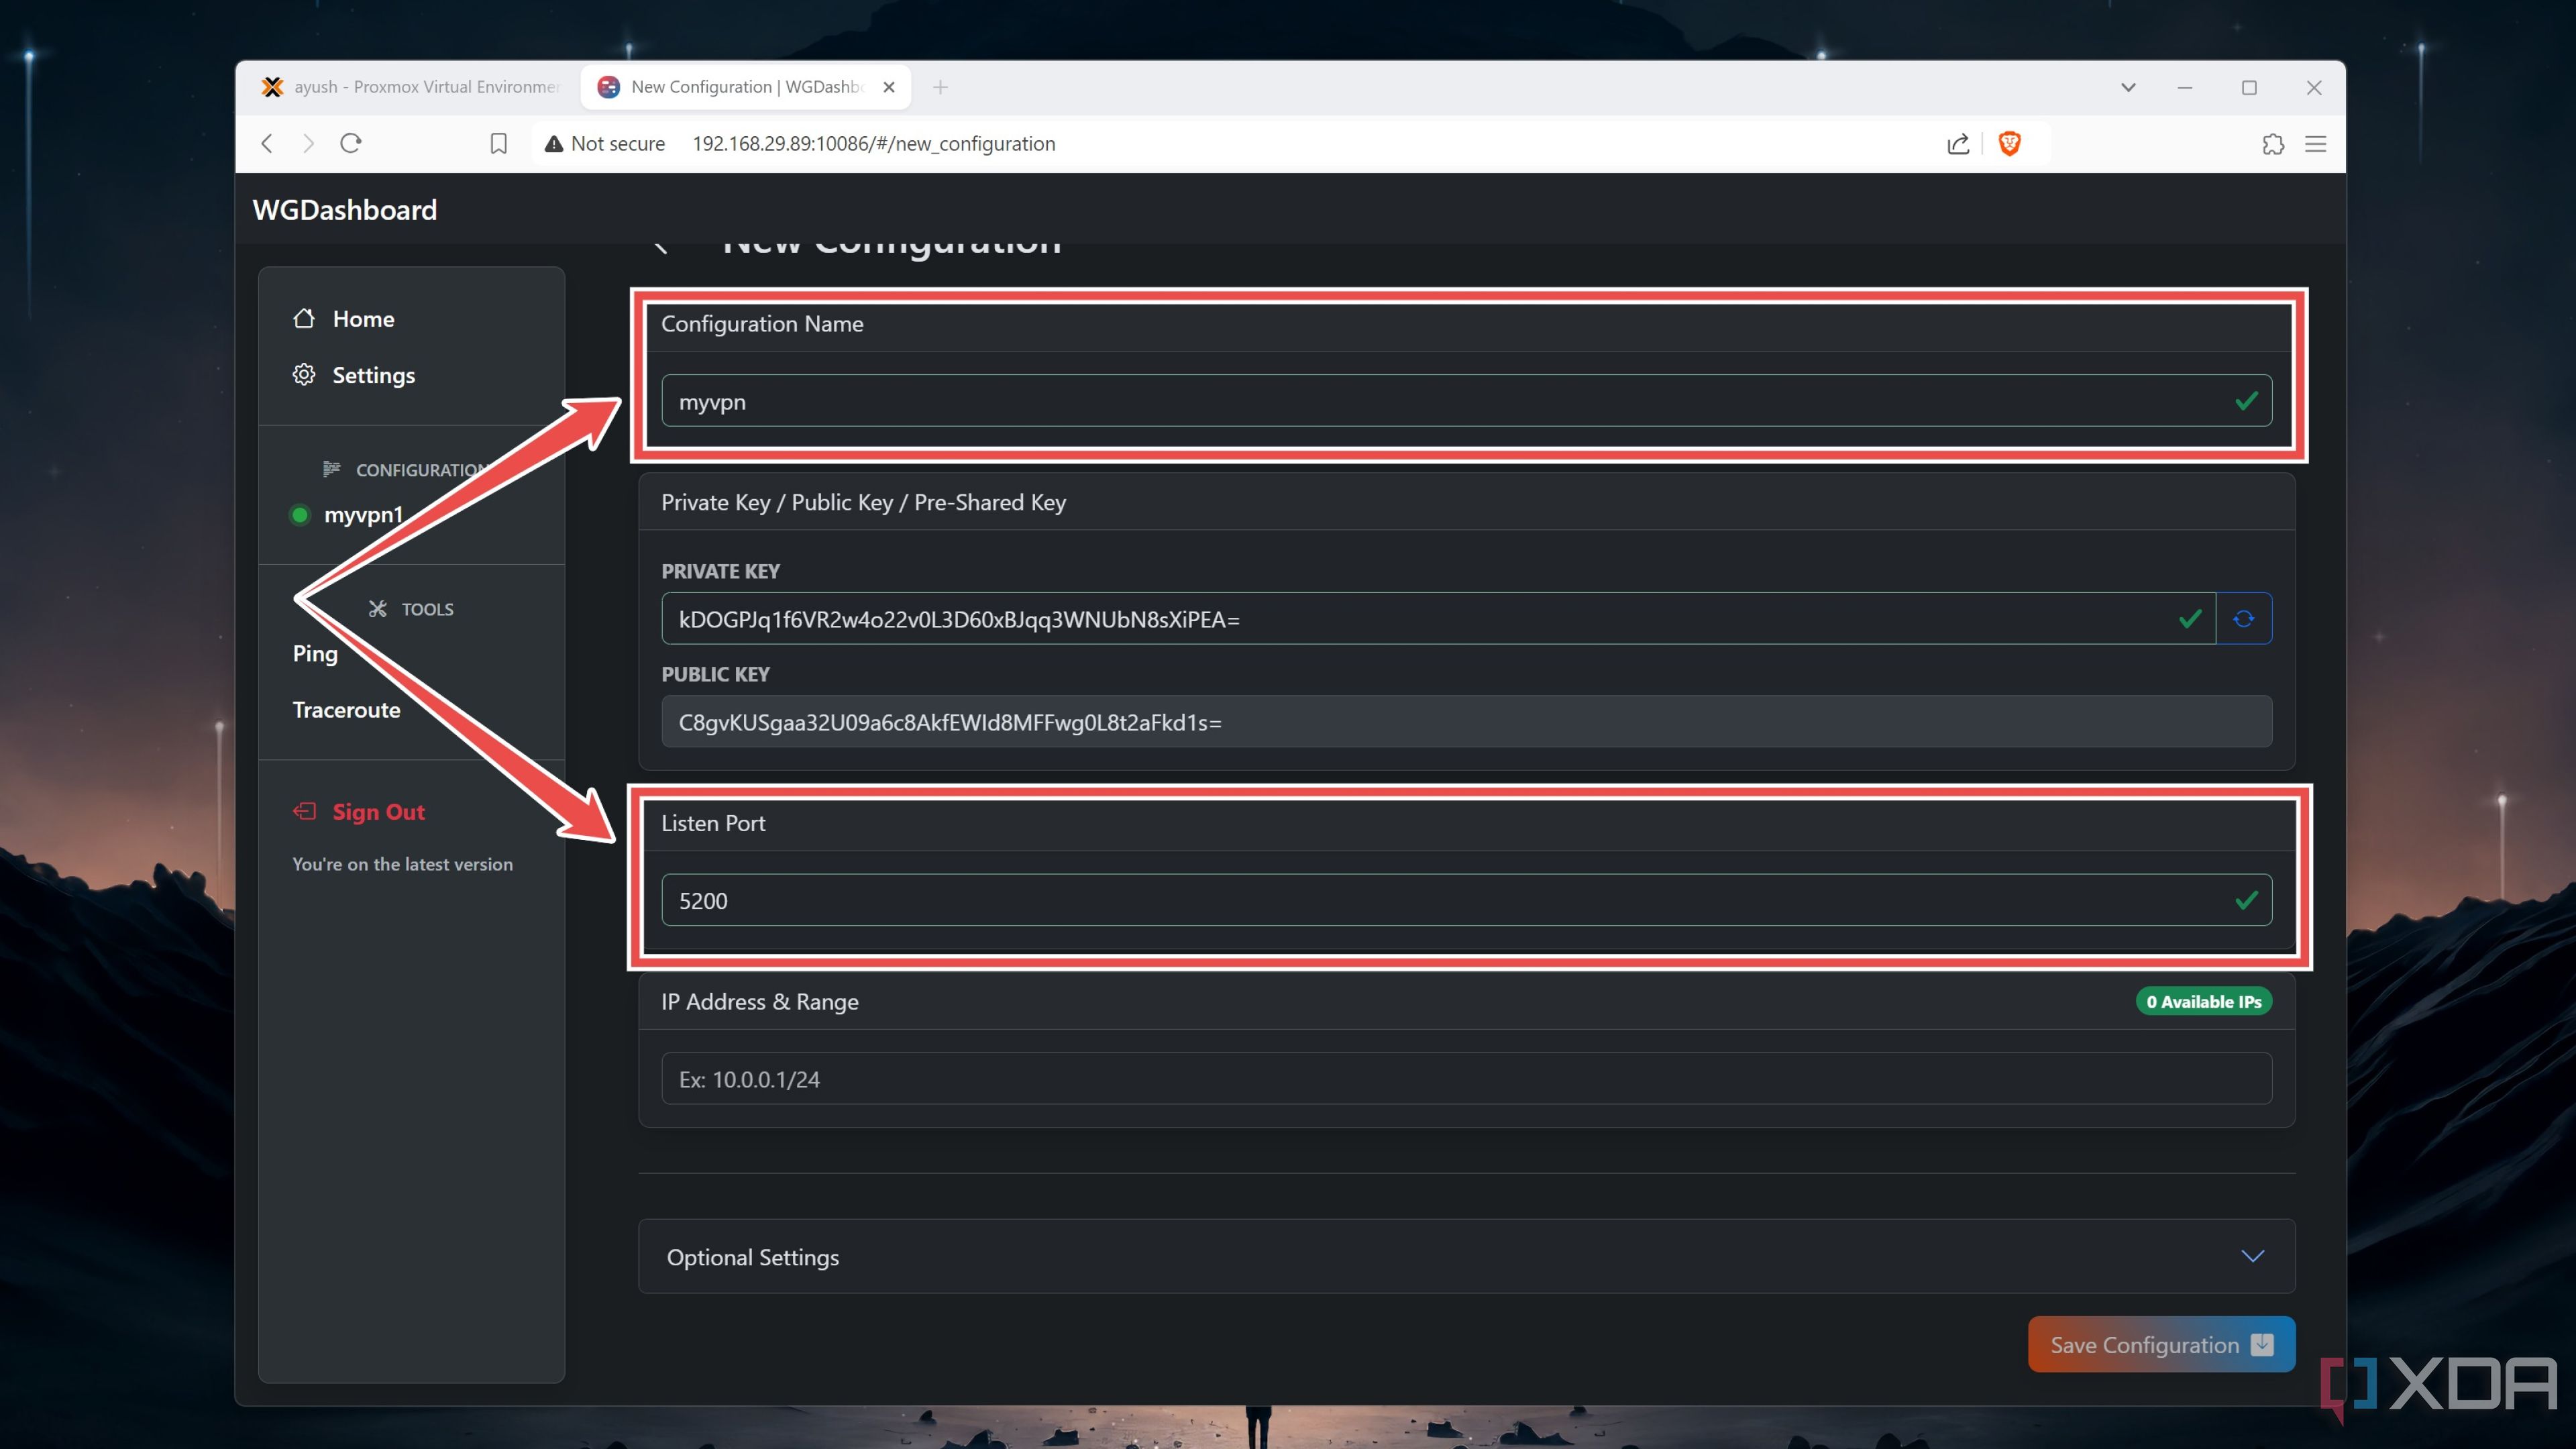
- Enter your preferred IP address & Range and click on Save Configuration.
Connecting clients to your WireGuard VPN
With the WireGuard configuration properly set up, it’s time to pair some clients with the VPN server.
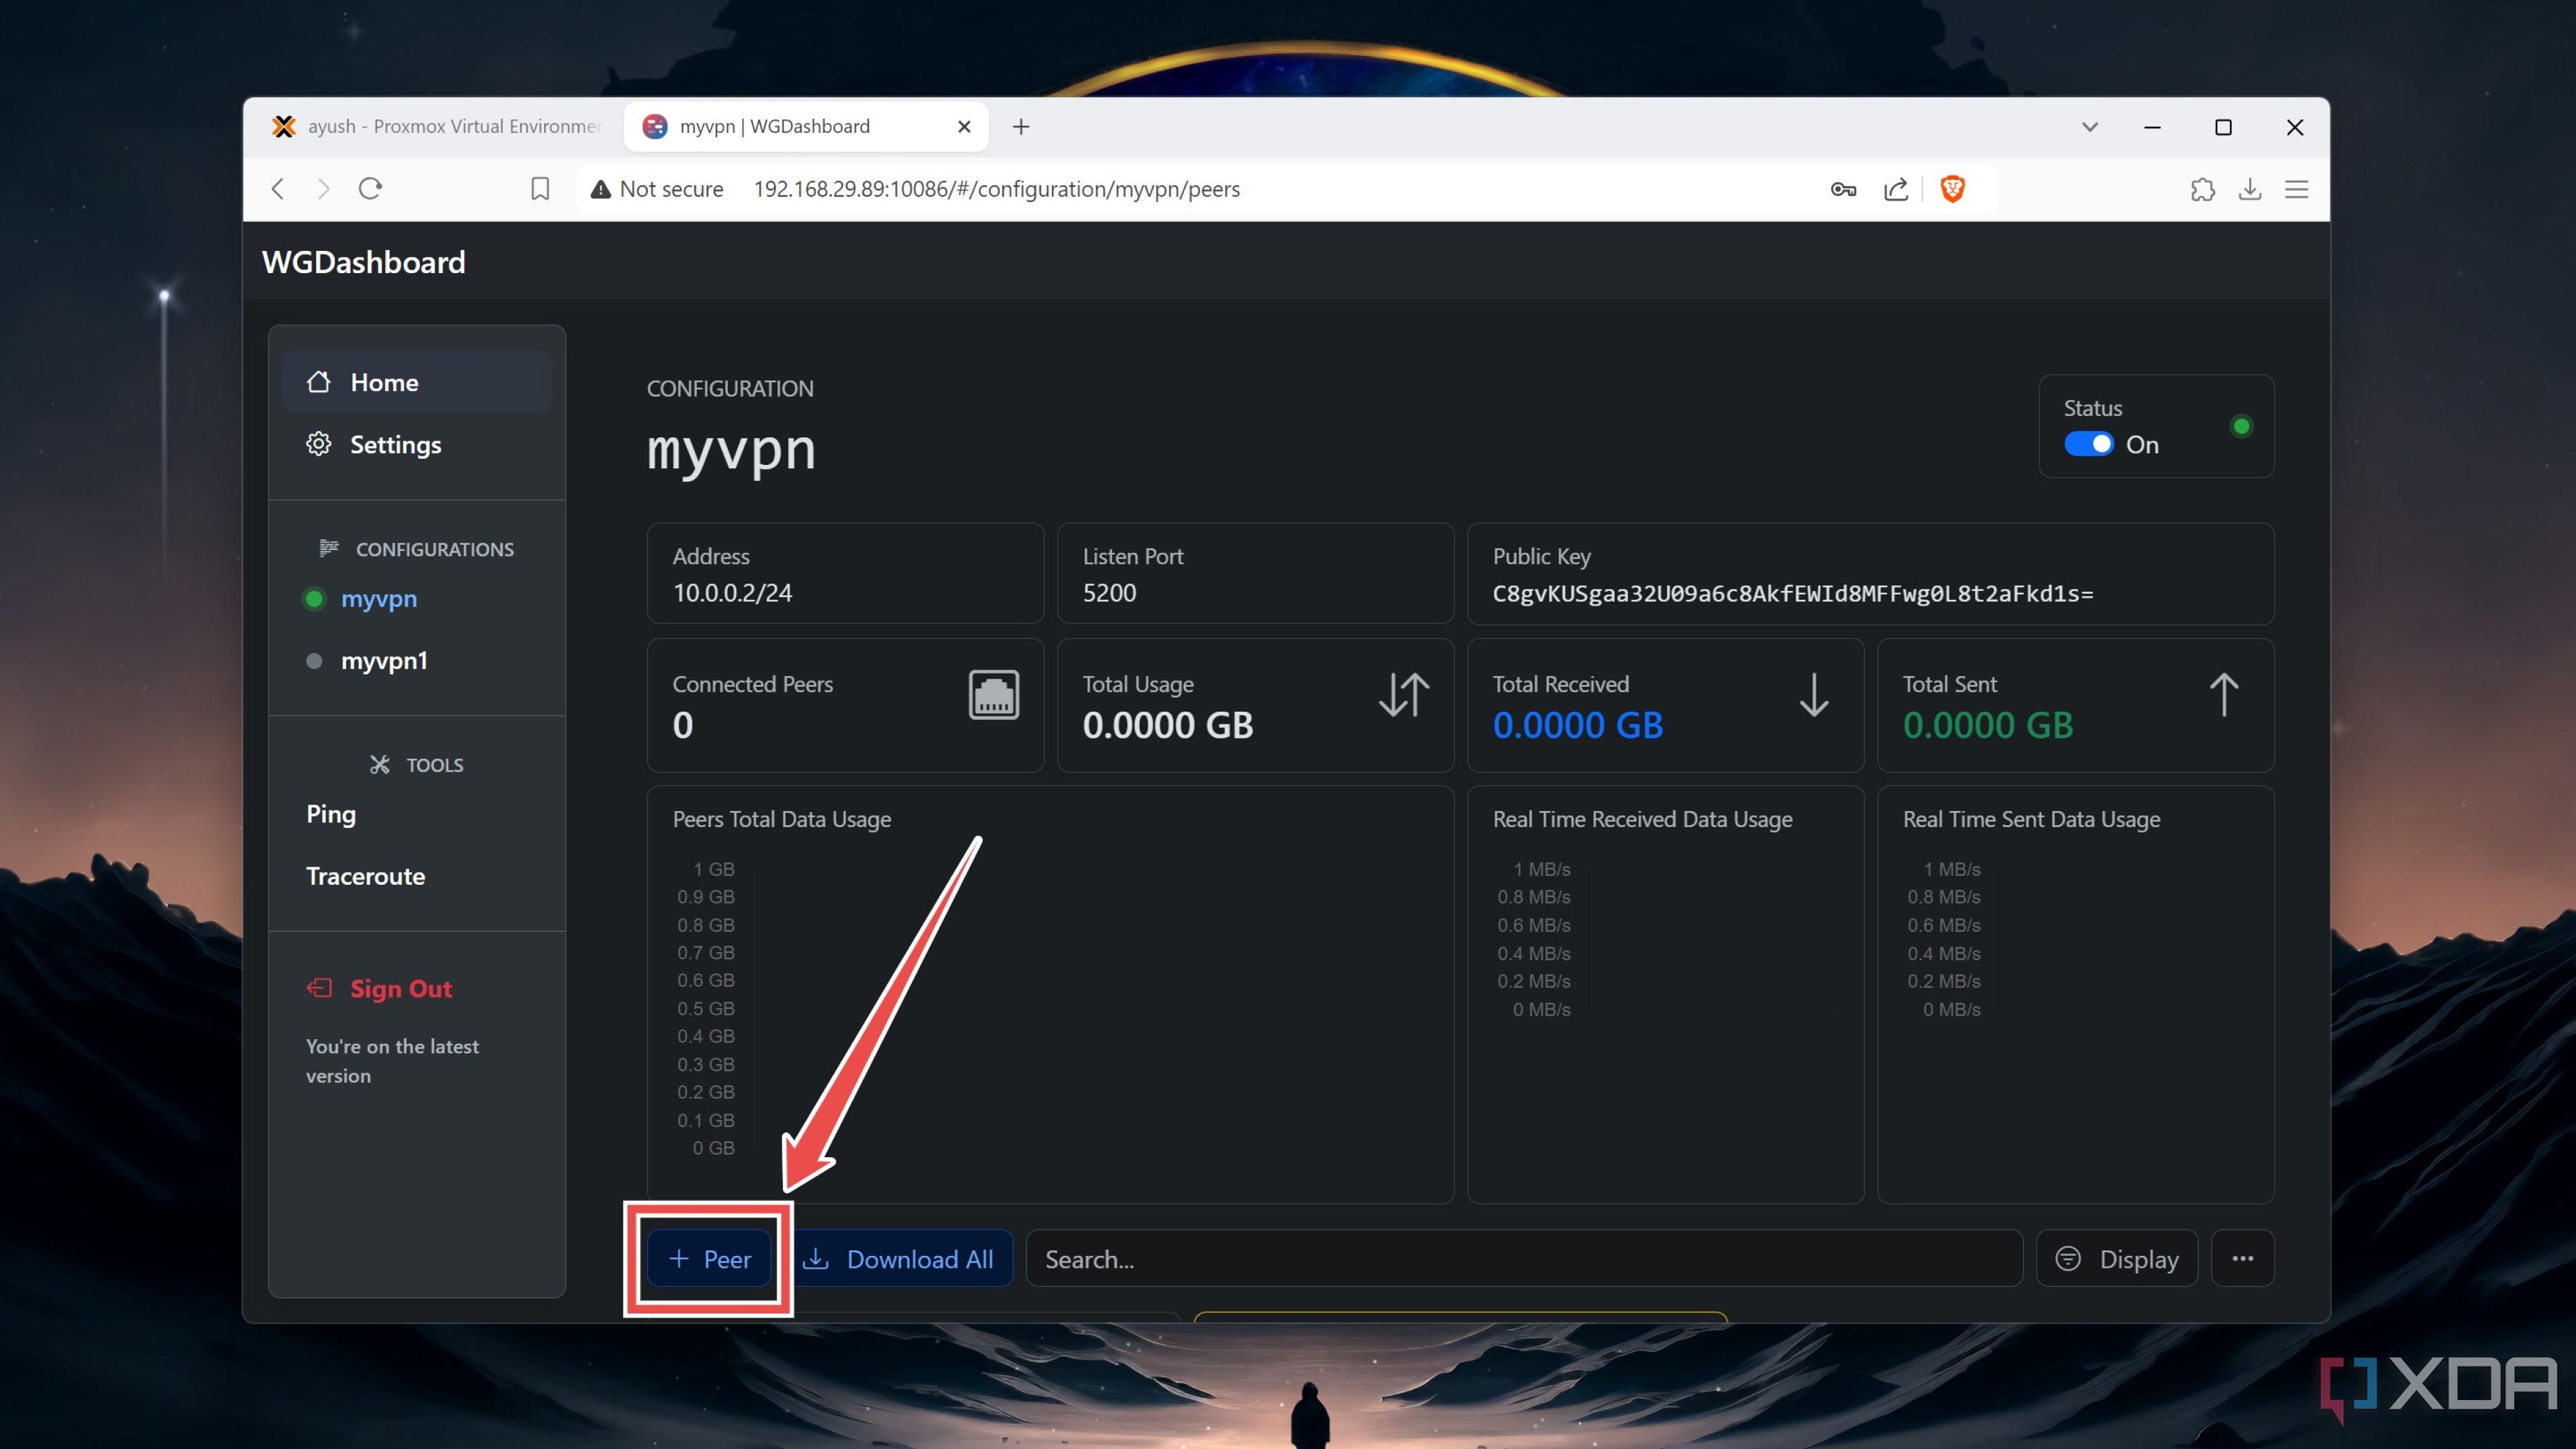
- Tap the Arrow button next to your freshly created WireGuard configuration.

- Click on the + Peer icon.
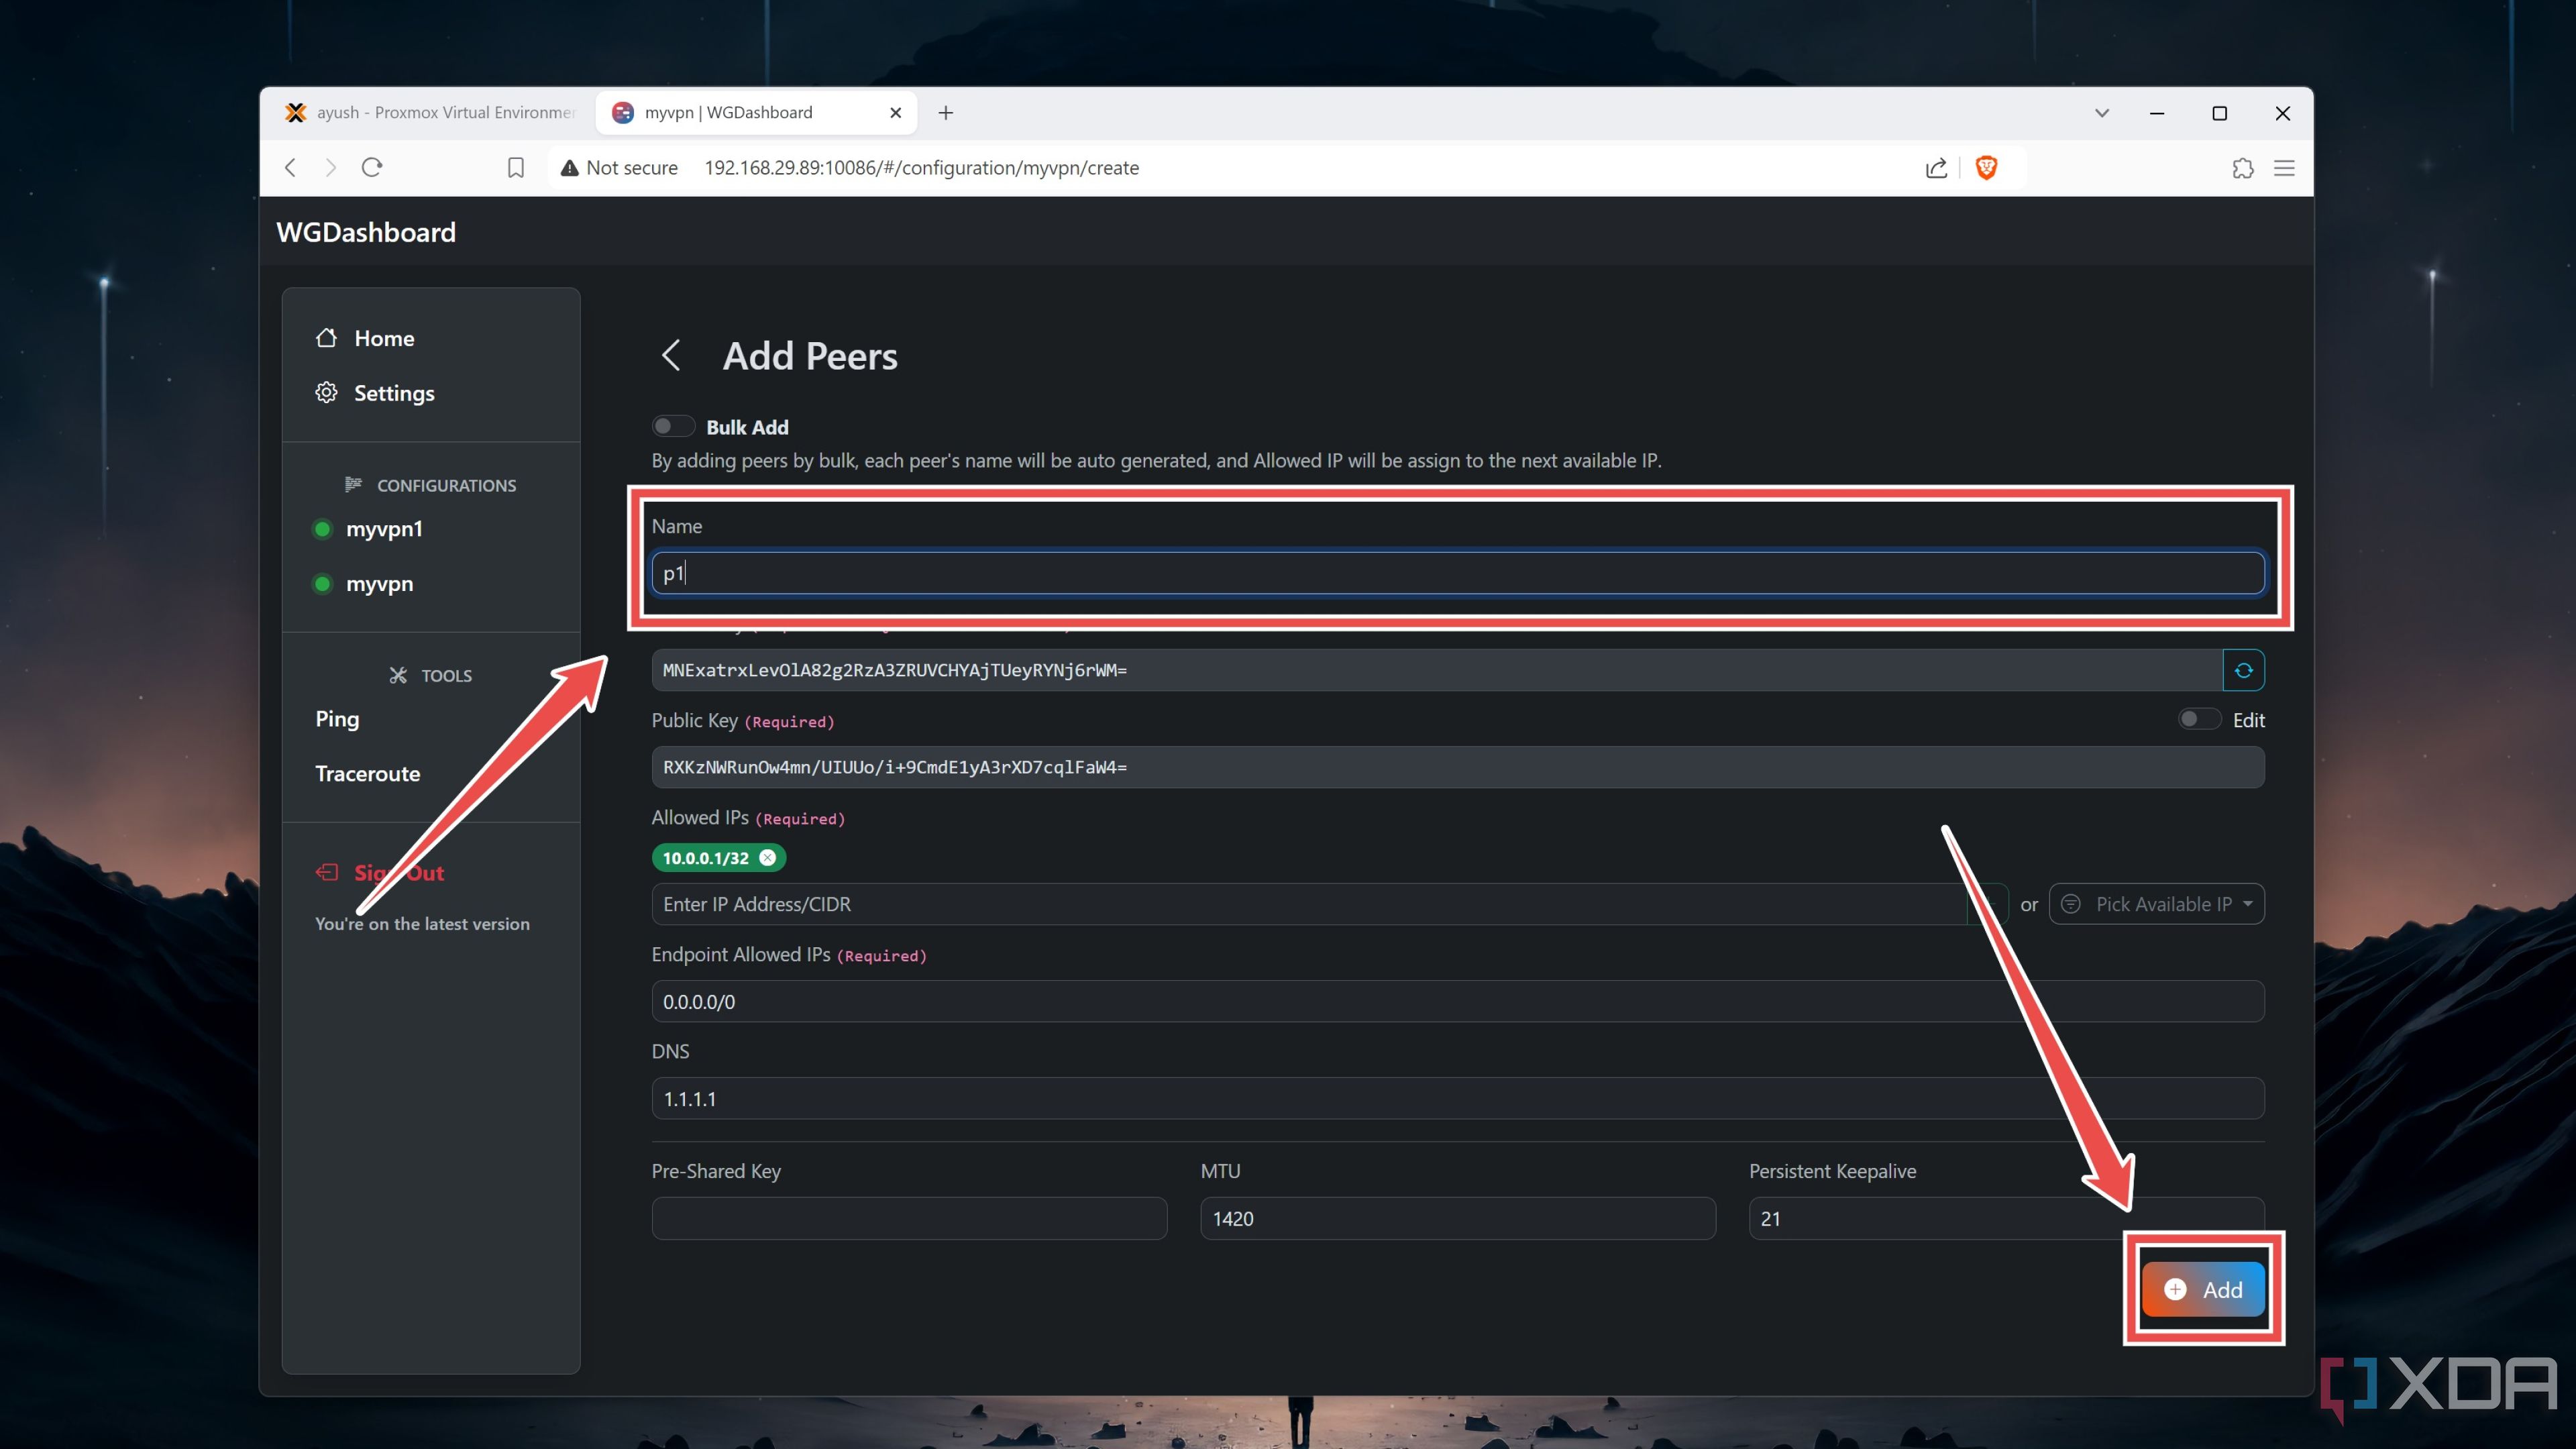
- Simply enter a Name for the new Peer and hit Add while leaving the other settings at their default values.
- Download the official WireGuard app on the platform of your choice.
- Switch to the client device and tap the + icon inside the WireGuard application.
- Head back to the WireGuard web GUI and open the Triple Dot menu next to the Peer.
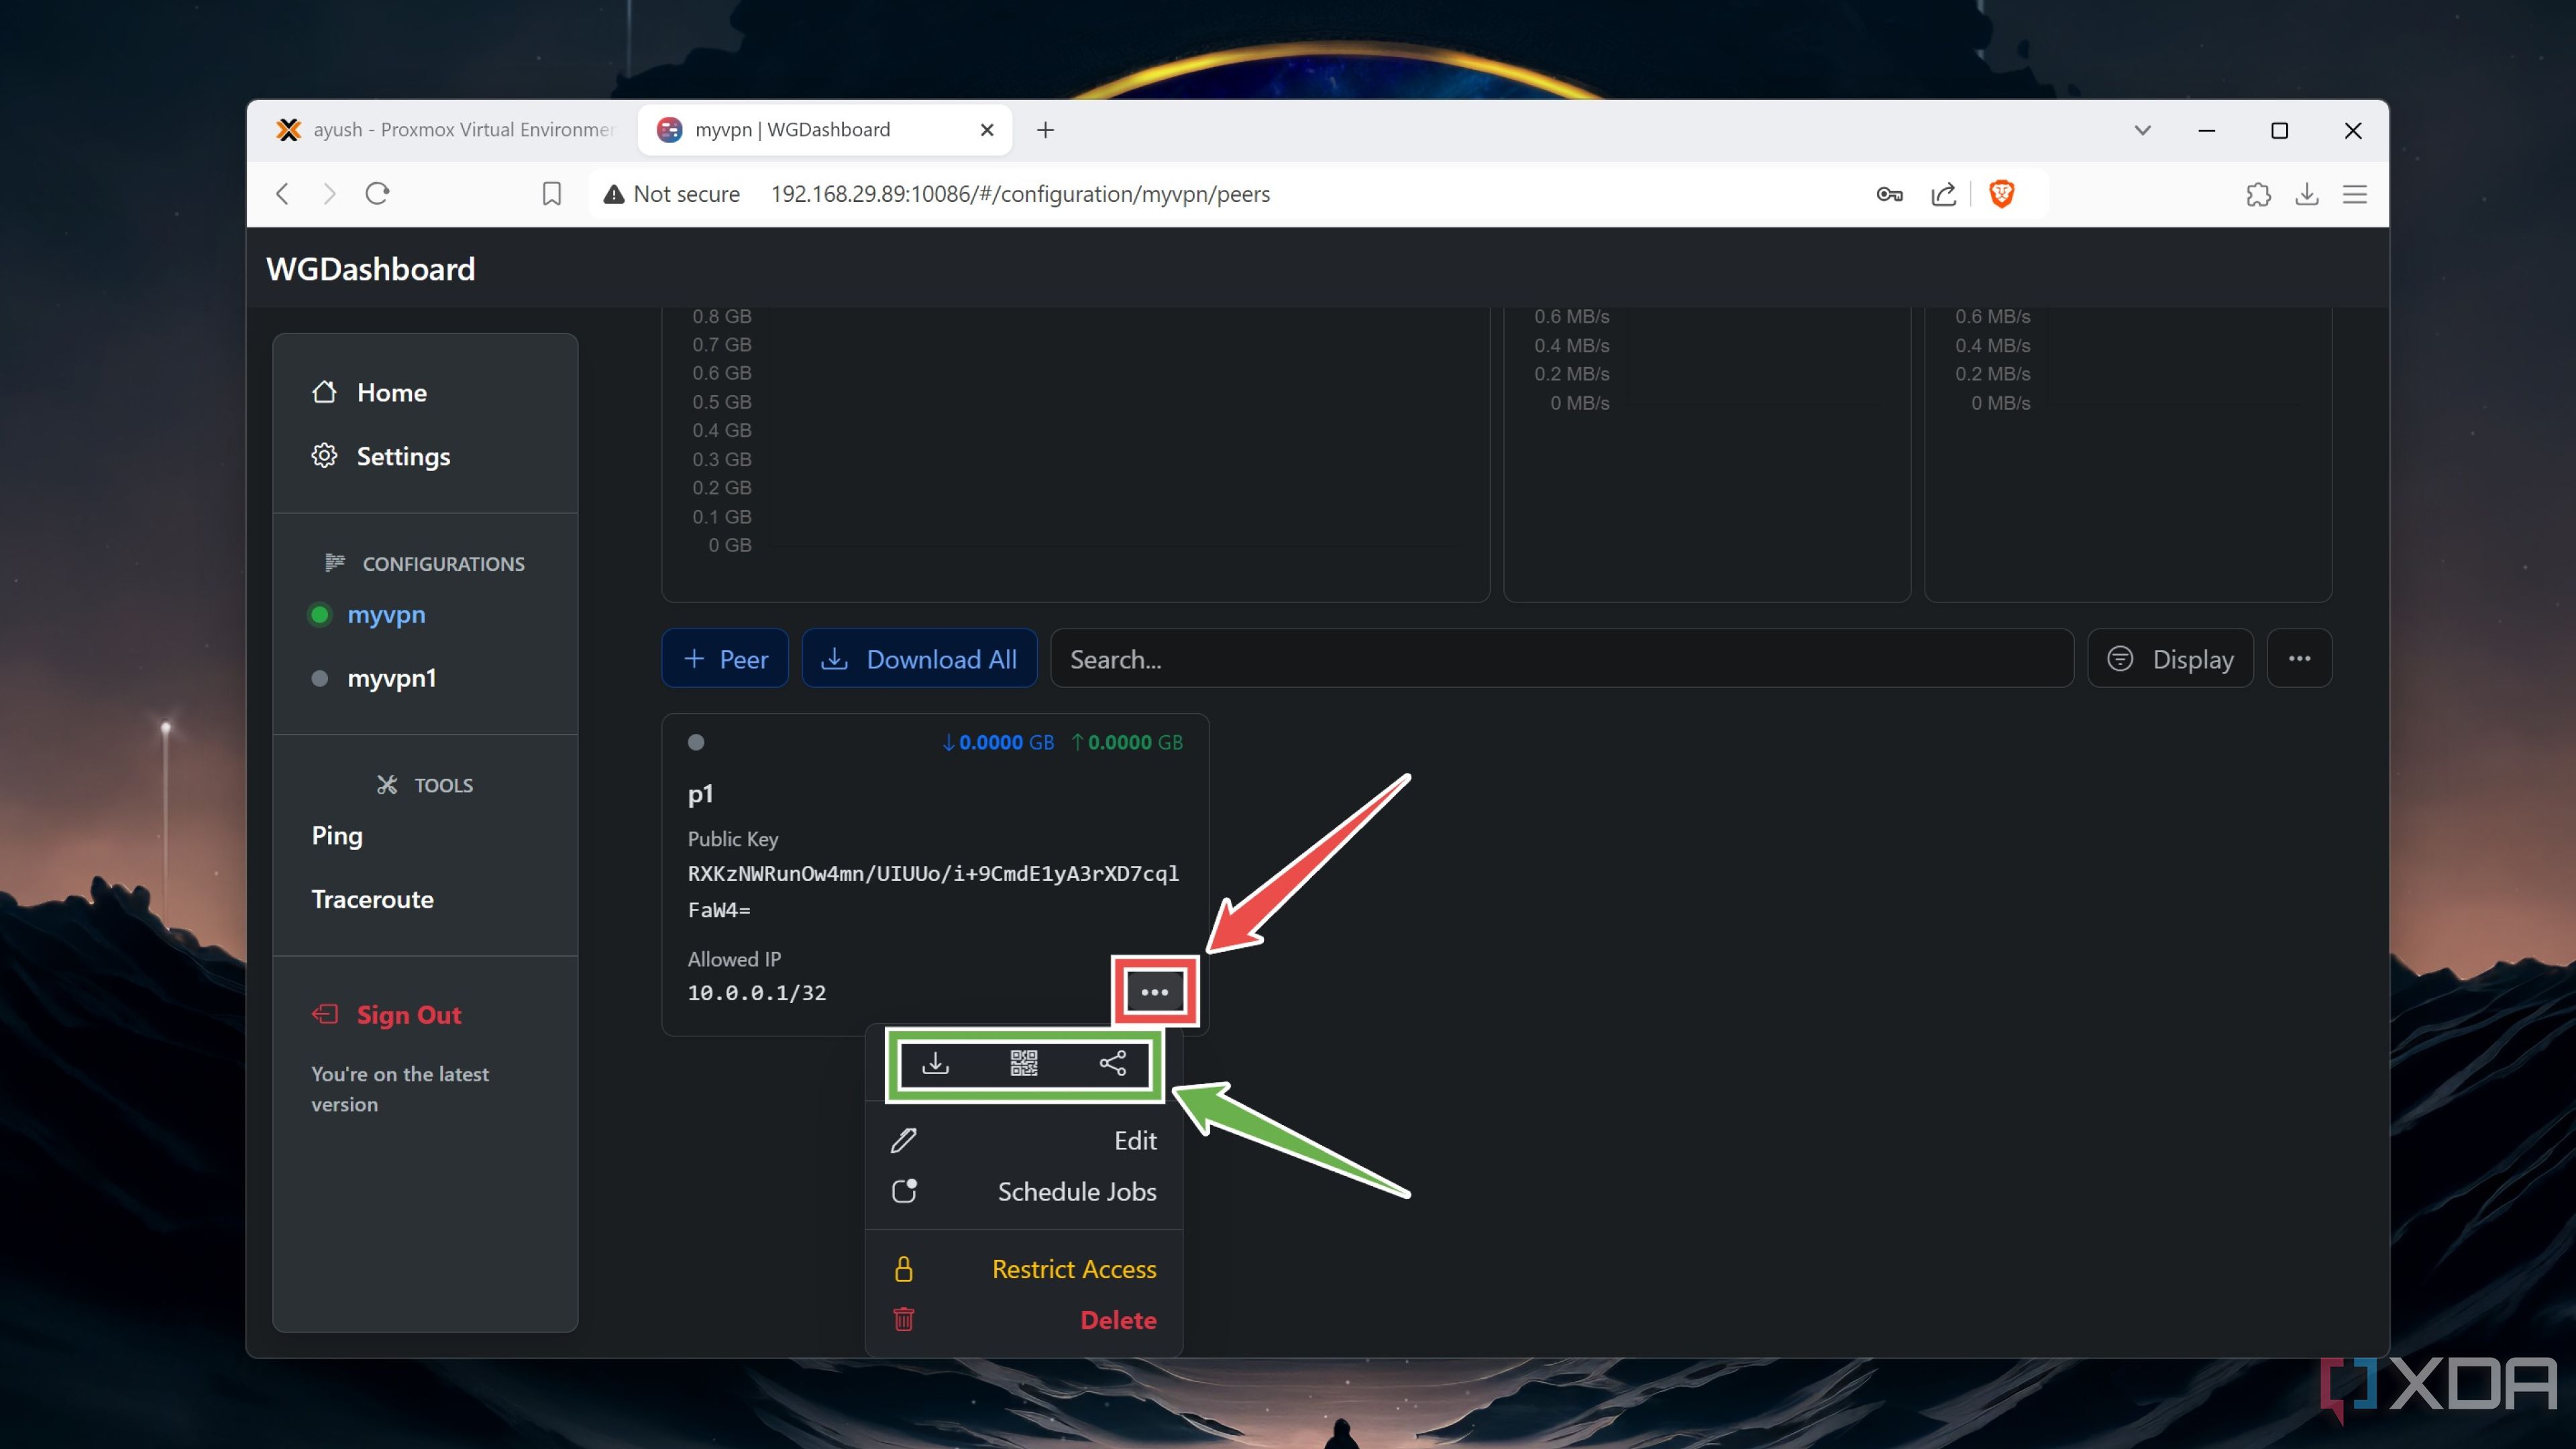
- Depending on the client device, you can either use the QR code, .conf file, or join link to connect to the WireGuard VPN.
Maintaining your online privacy with a self-hosted WireGuard container
If you followed everything correctly, you should be able to connect to the VPN from all your local devices. To take this project to the next level, you can combine the WireGuard VPN with an ad-blocking Pi-Hole container and enjoy an ad-free experience while surfing the web anonymously. However, you’ll need to set up port-forwarding on your router to access the VPN server from external networks. For a truly anonymous experience, you’ll have to configure the WireGuard container to route all the traffic through a third-party VPN provider, preferably one that has servers in different countries if you want the added benefits of location-spoofing.
Besides WireGuard, there are a bunch of other projects you can host on your Proxmox server, including the document organization tool Paperless-ngx, private cloud CasaOS, and Network Video Recorder ZoneMinder. Alternatively, you might want to check out some insane project ideas if you want to build fun things using your Proxmox machine.
Leave A Comment?