How to compile and install Linux Kernel 5.16.9 from source code.

How to compile and install Linux Kernel 5.16.9

The procedure to build (compile) and install the latest Linux kernel from source is as follows:

  1. Grab the latest kernel from kernel.org
  2. Verify kernel
  3. Untar the kernel tarball
  4. Copy existing Linux kernel config file
  5. Compile and build Linux kernel 5.16.9
  6. Install Linux kernel and modules (drivers)
  7. Update Grub configuration
  8. Reboot the system

Step 1. Get the latest Linux kernel source code

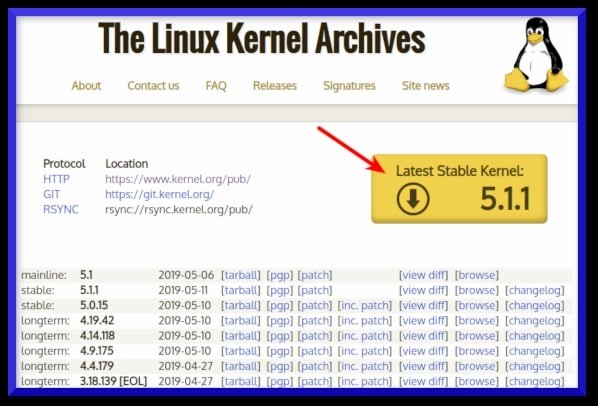
Visit the official project site and download the latest source code. Click on the big yellow button that read as “Latest Stable Kernel“:

The filename would be linux-x.y.z.tar.xz, where x.y.z is actual Linux kernel version number. For example file linux-5.16.9.tar.xz represents Linux kernel version 5.16.9. Use the wget command to download Linux kernel source code:
$ wget https://cdn.kernel.org/pub/linux/kernel/v5.x/linux-5.16.9.tar.xz

Step 2. Extract tar.xz file

You really don’t have to extract the source code in /usr/src. You can extract the source code in your $HOME directory or any other directory using the following unzx command or xz command:
$ unxz -v linux-5.16.9.tar.xz
OR
$ xz -d -v linux-5.16.9.tar.xz

Verify Linux kernel tartball with pgp

First grab the PGP signature for linux-5.16.9.tar:
$ wget https://cdn.kernel.org/pub/linux/kernel/v5.x/linux-5.16.9.tar.sign
Try to verify it:
$ gpg --verify linux-5.16.9.tar.sign
Sample outputs:

gpg: assuming signed data in 'linux-5.16.9.tar'
gpg: Signature made Sun 12 Aug 2018 04:00:28 PM CDT
gpg:                using RSA key 79BE3E4300411886
gpg: Can't check signature: No public key

Grab the public key from the PGP keyserver in order to verify the signature i.e. RSA key ID 79BE3E4300411886 (from the above outputs):
$ gpg --recv-keys 79BE3E4300411886
Sample outputs:

gpg: key 79BE3E4300411886: 7 duplicate signatures removed
gpg: key 79BE3E4300411886: 172 signatures not checked due to missing keys
gpg: /home/vivek/.gnupg/trustdb.gpg: trustdb created
gpg: key 79BE3E4300411886: public key "Linus Torvalds <torvalds@kernel.org>" imported
gpg: no ultimately trusted keys found
gpg: Total number processed: 1
gpg:               imported: 1

Now verify gpg key again with the gpg command:
$ gpg --verify linux-5.16.9.tar.sign
Sample outputs:

gpg: assuming signed data in 'linux-5.16.9.tar'
gpg: Signature made Sun 12 Aug 2018 04:00:28 PM CDT
gpg:                using RSA key 79BE3E4300411886
gpg: Good signature from "Linus Torvalds <torvalds@kernel.org>" [unknown]
gpg:                 aka "Linus Torvalds <torvalds@linux-foundation.org>" [unknown]
gpg: WARNING: This key is not certified with a trusted signature!
gpg:          There is no indication that the signature belongs to the owner.
Primary key fingerprint: ABAF 11C6 5A29 70B1 30AB  E3C4 79BE 3E43 0041 1886

If you do not get “BAD signature” output from the “gpg –verify” command, untar/extract the Linux kernel tarball using the tar command, enter:
$ tar xvf linux-5.16.9.tar

Step 3. Configure the Linux kernel features and modules

Before start building the kernel, one must configure Linux kernel features. You must also specify which kernel modules (drivers) needed for your system. The task can be overwhelming for a new user. I suggest that you copy existing config file using the cp command:
$ cd linux-5.16.9
$ cp -v /boot/config-$(uname -r) .config

Sample outputs:

'/boot/config-4.15.0-30-generic' -> '.config'
Step 4. Install the required compilers and other tools

You must have development tools such as GCC compilers and related tools installed to compile the Linux kernel.

How to install GCC and development tools on a Debian/Ubuntu Linux

Type the following apt command or apt-get command to install the same:
$ sudo apt-get install build-essential libncurses-dev bison flex libssl-dev libelf-dev

How to install GCC and development tools on a CentOS/RHEL/Oracle/Scientific Linux

Try yum command:
$ sudo yum group install "Development Tools"
OR
$ sudo yum groupinstall "Development Tools"
Additional packages too:
$ sudo yum install ncurses-devel bison flex elfutils-libelf-devel openssl-devel

How to install GCC and development tools on a Fedora Linux

Run the following dnf command:
$ sudo dnf group install "Development Tools"
$ sudo dnf install ncurses-devel bison flex elfutils-libelf-devel openssl-devel

Step 5. Configuring the kernel

Now you can start the kernel configuration by typing any one of the following command in source code directory:

  • make menuconfig – Text based color menus, radiolists & dialogs. This option also useful on remote server if you wanna compile kernel remotely.
  • make xconfig – X windows (Qt) based configuration tool, works best under KDE desktop
  • make gconfig – X windows (Gtk) based configuration tool, works best under Gnome Dekstop.

For example, run make menuconfig command launches following screen:
$ make menuconfig
How to compile and install Linux Kernel 5.16.9

Start compiling and tocreate a compressed kernel image, enter:
$ make
To speed up compile time, pass the -j as follows:
## use 4 core/thread ##
$ make -j 4
## get thread or cpu core count using nproc command ##
$ make -j $(nproc)

Compiling and building the Linux kernel going take a significant amount of time. The build time depends upon your system’s resources such as available CPU core and the current system load. So have some patience.

Install the Linux kernel modules

$ sudo make modules_install

Install the Linux kernel

So far we have compiled the Linux kernel and installed kernel modules. It is time to install the kernel itself:
$ sudo make install

It will install three files into /boot directory as well as modification to your kernel grub configuration file:

  • initramfs-5.16.9.img
  • System.map-5.16.9
  • vmlinuz-5.16.9

Step 6. Update grub config

You need to modify Grub 2 boot loader configurations. Type the following command at a shell prompt as per your Linux distro:

CentOS/RHEL/Oracle/Scientific and Fedora Linux

$ sudo grub2-mkconfig -o /boot/grub2/grub.cfg
$ sudo grubby --set-default /boot/vmlinuz-5.16.9

You can confirm the details with the following commands:
grubby --info=ALL | more
grubby --default-index
grubby --default-kernel

Debian/Ubuntu Linux

The following commands are optional as make install does everything for your but included here for historical reasons only:
$ sudo update-initramfs -c -k 5.16.9
$ sudo update-grub

How to build and install the latest Linux kernel from source code

You have compiled a Linux kernel. The process takes some time, however now you have a custom Linux kernel for your system. Let us reboot the system.

Just issue the reboot command or shutdown command:
# reboot
Verify new Linux kernel version after reboot:
$ uname -mrs
Sample outputs:

Linux 5.16.9 x86_64
[mai mult...]

Remove Microsoft Office license from computer.

  • Open command prompt as administrator
  •  Copy/run this command to determine what license key you want to remove

cscript “%ProgramFiles%\Microsoft Office\Office16\ospp.vbs” /dstatus

  • If you see an error, try this command

cscript “%ProgramFiles(x86)%\Microsoft Office\Office16\ospp.vbs” /dstatus

Note: “Office16” is the codename of Office 2016. If you are using Office 2010/2013, replace “Office16” with “Office14” or “Office15”

  • Copy and run these commands to remove the license. Note: replace “7CFGB” with the last 5 characters of your product key

cscript “%ProgramFiles%\Microsoft Office\Office16\ospp.vbs” /unpkey:7CFGB

  • If you see an error, try this command

cscript “%ProgramFiles(x86)%\Microsoft Office\Office16\ospp.vbs” /unpkey:7CFGB

[mai mult...]

How to Install GlassFish JAVA Application Server on Ubuntu 22.04

Glassfish is a free and open-source server used for deploying Java-based applications. It allows developers to develop enterprise applications that are convenient and scalable. The glassfish project is started by Sun Microsystem and is now sponsored by Oracle Corporation. It comes under two free software licenses Common Development and Distribution License and GNU General Public License.

Prerequisites

  • A server running Ubuntu 22.04.
  • A valid domain name pointed with your server IP.
  • A root password is configured on the server.
Install Java JDK

Glassfish is a Java-based application. So you will need to install Java JDK on your server. You can install it by running the following command:

apt-get install default-jdk unzip -y

Once the Java is installed, verify the Java version using the following command:

java --version

You will get the Java version in the following output:

openjdk 11.0.15 2022-04-19
OpenJDK Runtime Environment (build 11.0.15+10-Ubuntu-0ubuntu0.22.04.1)
OpenJDK 64-Bit Server VM (build 11.0.15+10-Ubuntu-0ubuntu0.22.04.1, mixed mode, sharing)
  • Download Glassfish Server

First, you will need to download the Glassfish from their official download page. You can download it with the following command:

wget https://download.eclipse.org/ee4j/glassfish/glassfish-6.1.0.zip

Once the download is completed, unzip the downloaded file to the /opt directory:

unzip glassfish-6.1.0.zip -d /opt/
  • Create a Systemd Service File for Glassfish

Next, you will need to create a systemd service file to manage the Glassfish service. You can create it with the following command:

nano /usr/lib/systemd/system/glassfish.service

Add the following lines:

[Unit]
Description = GlassFish Server v6.1.0
After = syslog.target network.target

[Service]
User = root
ExecStart = /usr/bin/java -jar /opt/glassfish6/glassfish/lib/client/appserver-cli.jar start-domain
ExecStop = /usr/bin/java -jar /opt/glassfish6/glassfish/lib/client/appserver-cli.jar stop-domain
ExecReload = /usr/bin/java -jar /opt/glassfish6/glassfish/lib/client/appserver-cli.jar restart-domain
Type = forking

[Install]
WantedBy = multi-user.target

Save and close the file then reload the systemd daemon to apply the changes.

systemctl daemon-reload

Next, start the Glassfish service and enable it to start at system reboot:

systemctl start glassfish
systemctl enable glassfish

You can also check the status of the Glassfish service with the following command:

systemctl status glassfish

You should see the following output:

? glassfish.service - GlassFish Server v6.1.0
     Loaded: loaded (/lib/systemd/system/glassfish.service; disabled; vendor preset: enabled)
     Active: active (running) since Thu 2022-05-12 15:39:16 UTC; 4s ago
    Process: 5313 ExecStart=/usr/bin/java -jar /opt/glassfish6/glassfish/lib/client/appserver-cli.jar start-domain (code=exited, status=0/SUC>
   Main PID: 5326 (java)
      Tasks: 92 (limit: 2292)
     Memory: 289.3M
        CPU: 12.563s
     CGroup: /system.slice/glassfish.service
             ??5326 /usr/lib/jvm/java-11-openjdk-amd64/bin/java -cp /opt/glassfish6/glassfish/modules/glassfish.jar -XX:+UnlockDiagnosticVMOp>

May 12 15:39:04 ubuntu systemd[1]: Starting GlassFish Server v6.1.0...
May 12 15:39:16 ubuntu java[5313]: Waiting for domain1 to start ..........
May 12 15:39:16 ubuntu java[5313]: Successfully started the domain : domain1
May 12 15:39:16 ubuntu java[5313]: domain  Location: /opt/glassfish6/glassfish/domains/domain1
May 12 15:39:16 ubuntu java[5313]: Log File: /opt/glassfish6/glassfish/domains/domain1/logs/server.log
May 12 15:39:16 ubuntu java[5313]: Admin Port: 4848
May 12 15:39:16 ubuntu java[5313]: Command start-domain executed successfully.
May 12 15:39:16 ubuntu systemd[1]: Started GlassFish Server v6.1.0.
  • Set password for Glassfish and Enable Secure Login

By default, Glassfish administrative user has no password. So you will need to set it first. You can set it using the following command:

/opt/glassfish6/bin/asadmin --port 4848 change-admin-password

You will be asked to provide the username:

Enter admin user name [default: admin]>admin

Provide admin as a username and press the Enter key. You will be asked to provide a password:

Enter the admin password> 

Just press the Enter key without typing anything. You will be asked to set a new password:

Enter the new admin password> 
Enter the new admin password again> 

Provide your new password and press the Enter key to set the password.

Command change-admin-password executed successfully.

Next, you will also need to enable a secure login. You can enable it with the following command:

/opt/glassfish6/bin/asadmin --port 4848 enable-secure-admin

You will be asked to provide an admin user and password to enable the secure login.

Enter admin user name>  admin
Enter admin password for user "admin"> 
You must restart all running servers for the change in secure admin to take effect.
Command enable-secure-admin executed successfully.

Next, restart the Glassfish service to apply the changes:

systemctl restart glassfish
  • Configure Nginx as a Reverse Proxy for Glassfish

Next, you will need to install and configure the Nginx as a reverse proxy for Glassfish. First, install the Nginx server with the following command:

apt-get install nginx -y

Once Nginx is installed, create an Nginx virtual host configuration file:

nano /etc/nginx/conf.d/glassfish.conf

Add the following configuration:

upstream glassfish {
  server 127.0.0.1:8080 weight=100 max_fails=5 fail_timeout=5;
}

server {
  listen          80;
  server_name     glassfish.example.com;

  location / {
        proxy_set_header X-Forwarded-Host $host;
        proxy_set_header X-Forwarded-Server $host;
        proxy_set_header X-Forwarded-For $proxy_add_x_forwarded_for;
        proxy_pass http://glassfish/hello/;
  }
}

Save and close the file when you are finished then verify the Nginx for any syntax configuration error with the following command:

nginx -t

If everything is fine, you will get the following output:

nginx: the configuration file /etc/nginx/nginx.conf syntax is ok
nginx: configuration file /etc/nginx/nginx.conf test is successful

Next, restart the Nginx service to apply the changes:

systemctl restart nginx

You can also check the status of the Nginx with the following command:

systemctl status nginx

You should see the following output:

? nginx.service - A high performance web server and a reverse proxy server
     Loaded: loaded (/lib/systemd/system/nginx.service; enabled; vendor preset: enabled)
     Active: active (running) since Thu 2022-05-12 16:09:38 UTC; 6s ago
       Docs: man:nginx(8)
    Process: 5687 ExecStartPre=/usr/sbin/nginx -t -q -g daemon on; master_process on; (code=exited, status=0/SUCCESS)
    Process: 5689 ExecStart=/usr/sbin/nginx -g daemon on; master_process on; (code=exited, status=0/SUCCESS)
   Main PID: 5690 (nginx)
      Tasks: 2 (limit: 2292)
     Memory: 2.6M
        CPU: 39ms
     CGroup: /system.slice/nginx.service
             ??5690 "nginx: master process /usr/sbin/nginx -g daemon on; master_process on;"
             ??5691 "nginx: worker process" "" "" "" "" "" "" "" "" "" "" "" "" "" "" "" "" "" "" "" "" "" "" "" "" "" "" ""

May 12 16:09:38 ubuntu systemd[1]: Starting A high performance web server and a reverse proxy server...
May 12 16:09:38 ubuntu systemd[1]: Started A high performance web server and a reverse proxy server.
  • Configure UFW Firewall

For security reasons, it is recommended to install and configure the UFW firewall in your system. First, install the UFW firewall with the following command:

apt install ufw -y

Once the UFW firewall is installed, allow all required ports and services using the following command:

ufw allow 'Nginx Full'
ufw allow OpenSSH
ufw allow 4848/tcp
ufw allow 8080/tcp

Next, enable to UFW firewall to start after the system reboot:

ufw enable

You can now check the status of the UFW firewall with the following command:

ufw status

You will get the following output:

Status: active

To                         Action      From
--                         ------      ----
OpenSSH                    ALLOW       Anywhere                  
Nginx Full                 ALLOW       Anywhere                  
8080/tcp                   ALLOW       Anywhere                  
4848/tcp                   ALLOW       Anywhere                  
OpenSSH (v6)               ALLOW       Anywhere (v6)             
Nginx Full (v6)            ALLOW       Anywhere (v6)             
8080/tcp (v6)              ALLOW       Anywhere (v6)             
4848/tcp (v6)              ALLOW       Anywhere (v6)             
  • Access Glassfish Web Interface

You can now access Glassfish using the URL http://glassfish.example.com. You should see the following page:

To access the Glassfish admin interface type the URL https://your-server-ip:4848. You will be redirected to the Glassfish login page:

Provide your admin username, password, and click on the Login button. You should see the Glassfish dashboard on the following page:

Click on the server in the left pane. You should see the general information page.

Here, you can start, stop and monitor the Glassfish server. Click on the Nodes in the left pane. You should see the Glassfish node on the following page.

Click on the Applications in the left pane. You should see all your deployed applications on the following page.

[mai mult...]

How to Install SFTPGo on Ubuntu 22.04

SFTPGo is a free, open source, fully featured and highly configurable SFTP server with optional HTTP/S, FTP/S and WebDAV support. Several storage backends are supported: local filesystem, encrypted local filesystem, S3 (compatible) Object Storage, Google Cloud Storage, Azure Blob Storage, other SFTP servers. SFTPGo is available for many Operating Systems including Linux, Windows, macOS, FreeBSD.

Prerequisites

  • An Ubuntu server 22.04.
  • A non-root user with sudo privileges.

Setup UFW Firewall

For security reasons, it is recommended to install and configure the UFW firewall in your system. First, install the UFW firewall with the following command:

sudo apt install ufw -y

SFTPGo uses the following TCP ports with the default configuration:

  • 2022 for the SFTP service.
  • 8080 for the web admin user interfaces.

We also need to allow the OpenSSH port for server administration. Allow all required ports using the following commands:

sudo ufw allow OpenSSH
sudo ufw allow 2022/tcp
sudo ufw allow 8080/tcp

Next, enable the UFW firewall to start after the system reboot:

sudo ufw enable

Check the status:

sudo ufw status

You will get the following output:

Status: active

To Action From
-- ------ ----
OpenSSH ALLOW Anywhere 
2022/tcp ALLOW Anywhere 
8080/tcp ALLOW Anywhere 
OpenSSH (v6) ALLOW Anywhere (v6) 
2022/tcp (v6) ALLOW Anywhere (v6) 
8080/tcp (v6) ALLOW Anywhere (v6)

Installing SFTPGo on Ubuntu 22.04

You can install SFTPGo from its PPA.

Start by adding the PPA:

sudo add-apt-repository ppa:sftpgo/sftpgo
sudo apt update

Next install SFTPGo:

sudo apt install sftpgo

After installation SFTPGo should already be running with default configuration and configured to start automatically at boot, check its status using the following command:

systemctl status sftpgo
Complete SFTPGo Installation

Now, open your web browser and access the SFTPGo installation wizard using the URL: “http://<your server ip/hostname:8080>/”. You will be redirected to the following page:

Provide your admin username and password and click on the “Create Admin” button. The newly created admin will be automatically logged in, so you can create your SFTPGo users.

[mai mult...]

How to Stop Octo Malware From Remotely Accessing Your Android

There’s a new strain of malware floating around the internet, and it’s looking to control your Android device. Once installed, “Octo,” as it’s colloquially called, can both remotely see your screen and control your device, all without you knowing.

What is Octo?

Many hackers attempt to break into your accounts from their personal devices, by phishing for your login information, as well as your MFA codes. However, Octo allows bad actors to remotely access your Android phone, in what’s called on-device fraud (ODF). ODF is extremely dangerous, since the activity isn’t happening from somewhere else in the world, but from the device your accounts and networks expect it to.

How does Octo work?

Octo takes over Android’s MediaProjection function in order to stream your smartphone’s activity remotely. While it’s not a perfect livestream (the video runs about 1 frame per second), it’s plenty fast for hackers to see what they’re doing on your device. In order to actually do anything, though, they’ll next use Octo to take over AccessibilityService.

You won’t see any of this happening, however, because Octo employs a black overlay on your screen, in addition to silencing any notifications you may receive: From your perspective, your phone appears shut off, but to hackers, it’s open season on your Android device.

From here, hackers can perform an assortment of tasks remotely on your device, including taps, gestures, entering text, pasting text, long-clicks, and scrolling, among other commands. On top of that, a hacker doesn’t even need to do these things themself: Rather, they can simply “tell” the malware what they want it to do, and the malware will perform tasks automatically. You can imagine, then, the potential scale of fraud is widened considerably, since it doesn’t require a human to sit there and go through the steps one-by-one.

How does Octo get on your Android phone?

Like many malware infections, compromised apps are a major vehicle for installation. According to ThreatFabric, the app “Fast Cleaner” was found to contain Octo in addition to other malware types, and was downloaded over 50,000 times before Google removed it from the Play Store. The app primarily targeted users of European banks, and installed Octo by convincing the users to install a “browser update.” Other affected apps include a screen recorder called “Pocket Screencaster,” as well as suite of fake banking apps designed to trick users of the real banks into downloading them.

The secret to steering clear of Octo, then, is to employ excellent cybersecurity practices on your Android device at all times. Never download an app from the Play Store without thoroughly vetting it first. While Google’s rejection system is certainly better than it used to be, compromised apps make it through all the time.

Next, be extremely wary of apps that ask you to download a separate app, or to install an update from their link, not the Play Store. Legitimate apps want you to use their app, not to follow a sketchy link to download some other app. Similarly, your apps will receive updates from the Play Store, not the app’s proprietary update site. These methods are classic malware installation tactics, and you can avoid them by simply being thoughtful about the actions you take on Android.

If you’re concerned you might have installed malware, you can use a trusted service like MalwareBytes to scan your device for malicious software. If you need to go nuclear, a factory-reset can wipe out any malware and install a fresh version of Android on your phone. As long as you are mindful about the apps and links you interact with on your devices, however, you should be well on your way to avoiding Octo and other malware like it.

[mai mult...]

How to Watch Ad-Free YouTube Videos on Android

YouTube is gradually becoming an “adtube” and there is nothing funny about it. By encouraging the popular bloggers to uncontrollably monetize their efforts, the platform got its video ads out of hand. I’m not here to moralize or to teach advertisers how to do their business. What we can change is the number of ads we see while watching our favorite YouTube shows. With that, I will announce several solutions:

  1. YouTube Premium. Yes, it costs $11.99/month, but it removes ads on all your devices. Your TV, PC, Android smartphone, everywhere. And it gives you access to features like background playback and picture-in-picture.
  2. NewPipe it’s a free, and open-source player for YouTube. It’s lightweight, but it offers the features you care most about: No ads, background playback, and picture-in-picture. NewPipe is the app I have personally used over the past couple of years. NewPipe isn’t available on the Play Store. But you can directly download the APK installer from their website, or you can find the app on the F-Droid app store (an alternate to Google Play Store, which hosts free and open source apps).

  3. SkyTube is another free and open-source third-party YouTube app, just like NewPipe. It also offers the basic features you’ll want, including no ads, and background payback.

    The only real downside is that this is a view-only app. You can’t sign in to your YouTube account, so there’s no sync feature. The app has its own feature for channel subscriptions and bookmarks.

  4. uBlock Origin add-on for Firefox one clear reason for using Firefox over Google Chrome on Android is its huge gallery of free add-ons. And they’ll come really handy here. If you install the uBlock Origin add-on, you’ll get an ad-free YouTube experience in the browser. Go to Menu Add-ons > and enable uBlock Origin. The downside? No features like offline downloads.

  5. Brave browser the app comes with an ad-blocking feature by default, and as long as you have enabled the Shields Up feature for the YouTube site, you should be good to go.

Before ending this topic I want to mention YouTube Vanced app.

The popular Vanced YouTube app is being discontinued, after a legal threat from Google. The creators of Vanced have revealed the project will be shut down in the coming days, with download links set to be removed. While the app will continue to work for anyone who currently has it installed on Android, without any future updates it’s likely to stop working at some point soon. The Vanced owners say they’ve had to discontinue the project “due to legal reasons.”

If you have Vanced installed right now, it will continue working for the foreseeable future.

[mai mult...]

How to Convert Linux Installation Packages to Other Formats

Laptop screen showing a terminal prompt.

  • Linux Packaging Systems

In order to allow their users to install software, Linux distributions need a software packaging system. If the distribution is a fork of another established distribution, it’ll usually stick with the packaging system of the older distribution.

Traditionally, application developers had to either package their application in every format that they chose to support or to work with the maintainers of the different Linux distributions and pass the packaging steps over to them. The latter introduces delays in getting new releases into the hands of the users, the former gives the developers a lot of extra work.

The Snap and Flatpak projects try to deliver the Holy Grail of package distribution: package your application once, and install it on any Linux distribution. Of course, there may or may not be a Snap or Flatpak for the application you’re after.

You can remove packaging systems from the equation completely, just as long as you are comfortable with cloning a Git repository and building an application from the source code. But not everybody is. And not all applications—even on Linux—are open source, so you can’t build everything from source anyway.

The maintainers of some distributions are great at getting packages for other platforms and repackaging them for their own package management system, including closed-source applications. But there will always be cases where an application offers a DEB or an RPM—the big two formats—and everyone else needs to figure it out for themselves.

Programs like alien exist to solve the problem of converting a package file from another distribution to the version you need on your Linux computer. That’s fine in theory, but how successful are they?

  • The alien Experiment

The proof of the pudding is in the eating.

We took three different RPMs and used alien to convert them to DEBs. We then tried to install the freshly-created DEBs on Ubuntu.

In all of our test cases, there was a DEB available for download too, so what we were doing was actually redundant. But we thought the test applications—Microsoft Edge browser, the Atom editor, and Slack—would be a good test of alien‘s capabilities so we ignored the off-the-shelf DEBs.

  • Installing alien

Installing alien was simple on Ubuntu, Fedora, and Manjaro.

On Ubuntu you can use this command:

sudo apt install alien

Installing alien on Ubuntu

On Fedora, you need to type:

sudo dnf install alien

Installing alien on Fedora

On Manjaro, the alien package is in the Arch User Repository. This means pacman won’t be able to see it, so we need to use an AUR helper program like yay. The package name is slightly different too.

yay -S alien_package_converter

Installing alien on Manjaro

  • Using alien

To use alien you specify the file you want to convert, and the format you want to convert to. It creates a file with the same filename—usually—and with the extension of the format you asked for.

Using alien to create a package causes alien to increment the version number of the package. If the package number is in the filename, the filename will be changed too.

These are the formats alien can convert from and into.

  • -d: Convert to a DEB file, for Debian, Ubuntu, and all the derivatives.
  • -r: Convert to an RPM file, for RedHat, CentOS, and Fedora.
  • -t: Convert to a TAR.GZ archive file, for Arch and Arch-based systems like EndeavourOS and Manjaro.
  • -l: Convert to an LSB file, a Linux Standard Base file. This was another initiative to develop a cross-distribution package format.
  • -p: Convert to a PKG file, a format used by Solaris amongst others.
  • –to-slp: Convert to an SLP package, a format used by the discontinued Stampede Linux distribution.

The format option we’ll be using is -d (DEB) as we’re converting to a DEB file. We’ll also use the -c (scripts) option to convert any scripts contained in the package.

  • Microsoft Edge

We downloaded an RPM for Microsoft’s Edge browser, and ran the following command on it:

sudo alien -d -c microsoft-edge-beta-97.0.1072.54-1.x86_64.rpm

Converting the Edge RPM to a DEB file

Without the -c (scripts) option it didn’t create the DEB file, it reported an error. With the -c option, it did create the DEB.

The original RPM file and the newly created DEB file

Note the DEB filename contains 54-2, not 54-1.

Converting scripts is unlikely to end well. They may well be written for a particular situation or configuration unique to the genuine target platform of the original package file. Because of this, we didn’t have high hopes. Nevertheless, we tried to install the DEB with the dpkg program and the -i (install) option.

sudo dpkg -i microsoft-edge-beta_97.0.1072.54-2_amd64.deb

Failed installation with the newly created DEB file

It didn’t work.

We also tried double-clicking the DEB file and using the Ubuntu Software application to install the DEB. Interestingly, the Software application knew that the DEB had been created by alien.

Using the Ubuntu Software application to install the newly created DEB file

That didn’t work either. Just to make sure the Edge browser would actually install on Ubuntu, we installed the official Microsoft Edge DEB file.

sudo dpkg -i microsoft-edge-beta_97.0.1072.54-1_amd64.deb

Installation command for the official Microsoft Edge DEB file

That worked without an issue. You can see below Microsoft Edge running on Ubuntu.

Microsoft Edge running on Ubuntu

  • The Atom Editor

We downloaded the RPM install package for the popular Atom editor. We used the same alien command to convert it to a DEB.

sudo alien -d -c atom.x86_64.rpm

Converting the Atom RPM file to a DEB file

That created a DEB file without any warnings or errors. We installed it using the dpkg command with the -i (install) option.

sudo dpkg -i atom_1.58.0-1.1_amd64.deb

Installing Atom from the newly created DEB file

That worked perfectly.

Atom running on Ubuntu

  • Slack Business Messaging App

Finally, we tried converting the Slack RPM to a DEB.

sudo alien -d -c slack-4.23.0-0.1.fc21.x86_64.rpm

Converting the Slack RPM file to a DEB file

Again, this created a DEB with no warnings and no errors. We used this installation command:

sudo dpkg -i slack_4.23.0-1.1_amd64.deb

Installing Slack from the newly created DEB file

The installation worked flawlessly. Slack was up and running with no issues.

Slack running on Ubuntu

  • Mixed Results

A utility such as alien is inevitably fighting an uphill battle. The odds are stacked against it being able to work in every case, and this was borne out by our small amount of testing. Having said that, when it worked it was great.

[mai mult...]

How to Create a Table of Contents in Google Docs

Adding a table of contents to your document is a useful way to show readers each topic/chapter listed inside your file. When you create a table of contents in Google Docs, it automatically generates one and adds links that jump to each section they reference when clicked, allowing for quick access to specific parts of your document.

Place the insertion point in your document where you want the table of contents to go. Typically, tables of content appear after the initial title but before the introduction or body of your document.

Click “Insert,” point to “Table of Contents,” and then click on either of the two options provided. The first option is a plain-text table of contents with numbers on the right side. The second option doesn’t use page numbers, but instead inserts hyperlinks that jump to the noted section. The first is intended for documents you’ll print, the second for documents to be viewed online.

Note that in order to create an automatically generated table of contents that links to specific sections of your document, you must format each chapter—or title—using Google Docs’ built-in head styles. This lets Docs know how to populate the table add clickable links.

Each heading style is treated slightly differently in the table of contents. For example, the Heading 1 style denotes a top-level entry in the table of contents. Headings using the Heading 2 style are considered subsections and appear indented under the preceding Heading 1 style in the table. Heading 3 is a subsection of Heading 2, and so on.

If you change your headings (add, remove, or just modify the text), you can update your table of contents to reflect those changes by clicking the table of contents in the body of the document and then clicking the “Update Table of Contents” button (which looks like a Refresh button).

To delete a table of contents, right-click it and select “Delete Table of Contents.”

[mai mult...]

How to Use the Google Slides Presenter Toolbar

Redesigned Presenter Toolbar in Google Slides

When you’re presenting a slideshow, the last thing you should worry about is how to control it. With the Google Slides presenter toolbar, you can concentrate on your presentation, not the navigation.

  • Start the Slideshow

As a refresher, you can start your Google Slides presentation in a couple of different ways. After opening your slideshow, click View > Present from the menu, or use the Present drop-down in the upper-right corner and choose “Present From Beginning.”

Click Present, Present From Beginning

With your slideshow ready to go, move your cursor to the bottom-left corner of the screen, and you’ll see the presenter toolbar display.

Google Slides Presenter Toolbar Features

The presenter toolbar is transparent but brightens up when you place your cursor over it. This offers a nice, subtle appearance throughout your presentation.

Google Slides Presenter Toolbar

The two arrows let you advance forward or move back one slide at a time. If you click the slide number in the center, you can jump to a particular slide in the presentation. This puts you in complete control of the show. On the right side of the toolbar, you have the overflow menu (three dots). The features in this area allow you to do even more with your presentation.

  • Open Your Speaker Notes

If you like to use the speaker note feature for talking points during your presentation, you can open them by selecting “Open Speaker Notes” in the menu. You’ll get a separate window that you can control and close when you finish with it.

Speaker Notes window

  • Turn on the Laser Pointer

With the built-in red laser pointer, highlighting parts of a slide is a breeze. Click “Turn on the Laser Pointer” in the menu. You can click it again to turn off the laser pointer or use the “L” key on your keyboard for a quick shortcut.

Click Turn On Laser Pointer

  • Enable Auto-Play

If you prefer your slideshow to play on its own, select “Auto-Play” in the overflow menu. You’ll see a pop-out list of time intervals for each slide. Choose one and watch the show play automatically.

Choose AutoPlay in Google Slides

You can also hit “Loop” for the continuous playing of your slideshow. When the presentation reaches the last slide, it will restart from the beginning.

[mai mult...]

How to Create a Table of Contents in Google Slides

You might not think much about including a table of contents in a slideshow. But this can be a handy tool, especially for lengthy presentations. The nice thing about making a linked table of contents in Google Slides is that the application gives you a super simple way to do it.

  • Add and Set Up the Table of Contents Slide

Visit Google Slides, sign in, and open the presentation. You’ll start by adding a new slide and moving it to the start of the slideshow so that it’s at the beginning, just like the table of contents in a book or document.

You can select a slide that has the layout for the table of contents slide you want to add, or you can change the layout afterward. Just keep in mind that you’ll need a text box to add the text and links.

  • Go to the menu and choose either Insert or Slide and pick “New Slide.” Your slide is inserted below the active slide.

Select New Slide from the menu

If you choose to use a blank slide, you can then select Text Box in the toolbar, and click on your slide to insert the box.

Text box inserted on a slide

Once you have your slide and text box, you’ll move it to the beginning of the slideshow. Go to View in the menu and pick either “Show Filmstrip” to display slide thumbnails on the left or “Grid View” to display a grid of your slides.

Grid View and Show Filmstrip in the menu

Drag the table of contents slide to the start of the presentation so it becomes slide number 1. You can then return to your slide view by selecting the slide.

Drag the slide to move it

Create a Table of Contents in Google Slides

With your new slide ready to go, creating the table of contents in Google Slides is a breeze. You can use the slide titles or enter your own text and link it. Let’s look at both options for the one you prefer.

Option 1: Insert the Linked Slide Titles

Place your cursor inside the text box. Select either the Insert Link button in the toolbar or Insert > Link from the menu.

Use the Link button in the toolbar

When the link box appears, click “Slides in This Presentation” at the bottom. Select the first item in your table of contents.

Select the slide from the list

You’ll then see the slide number and title pop into the text box with a link to that slide. You can then adjust the text if you like. For instance, you may want to remove the slide number or edit the title.

Linked slide title

Continue the same process to add the remaining linked slide titles to your table of contents.

Option 2: Insert Text and Link It to the Slides

If you have slides without titles that you don’t plan to add or simply prefer to use different text in your table of contents, you can do this as well. Then, you’ll simply link the text to the corresponding slide.

Enter the text you want to use for the first table of contents item, then select it by dragging your cursor through it. Remember, you can select any text you like for the link; a sentence, phrase, or word.

Then click either the Insert Link button in the toolbar or Insert > Link from the menu.

With the text selected, use the Link button

When the link box appears, click “Slides in This Presentation” at the bottom or find a particular slide using the Search box.

Once you see the slide you want, select it. The link will apply to the text. To check it, click the linked text and you’ll see the pop-up window display the slide and link to it which you can click.

Linked text when clicked

  • Test Your Table of Contents

After you complete your table of contents, you can practice your presentation using the Slideshow button at the top of Google Slides. When you place your cursor over a link in the table, it transforms into a hand symbol. Click the link to go to the slide.

Table of contents in Google Slides

[mai mult...]