Cum dezactivați notificările de realizare Xbox pe Windows 10
Soluții pentru problemele tale IT

Reels is a new feature on Instagram that allows people to create 15-second videos á la Vine and TikTok. But is Instagram Reels just a TikTok clone? Easily-digestible, short video clips are certainly not new on social media. TikTok is the latest platform to use it, and it’s become incredibly popular. Now, Instagram has jumped on the bandwagon with Reels. Let’s take a look at how the two apps compare.
First and foremost, Reels is a video-creation tool. It’s a new mode you can access through the Instagram Stories camera. You can make a Reel from a single or series of clips, but it can only be a maximum of 15 seconds. Instagram expects most Reels to include multiple clips, though. There’s even a handy tool for aligning a new clip with the previous one to create a seamless transition.
Like an Instagram Story, there are a number of editing tools available for Reels. You can add music, adjust playback speed, and use Instagram’s existing library of augmented reality effects. Reels also has a timer and countdown for recording videos hands-free. After you record a clip, you can add stickers, text, and doodles.
Sharing a Reel is mostly the same as sharing anything else on Instagram. Accounts set to public can share Reels to a dedicated space in the “Explore” tab. Private accounts can simply share the Reel to their feed. You can also share a Reel as your Instagram Story.
Once you create a Reel, a new “Reels” tab will appear on your profile, and they’ll also appear in your main profile grid.
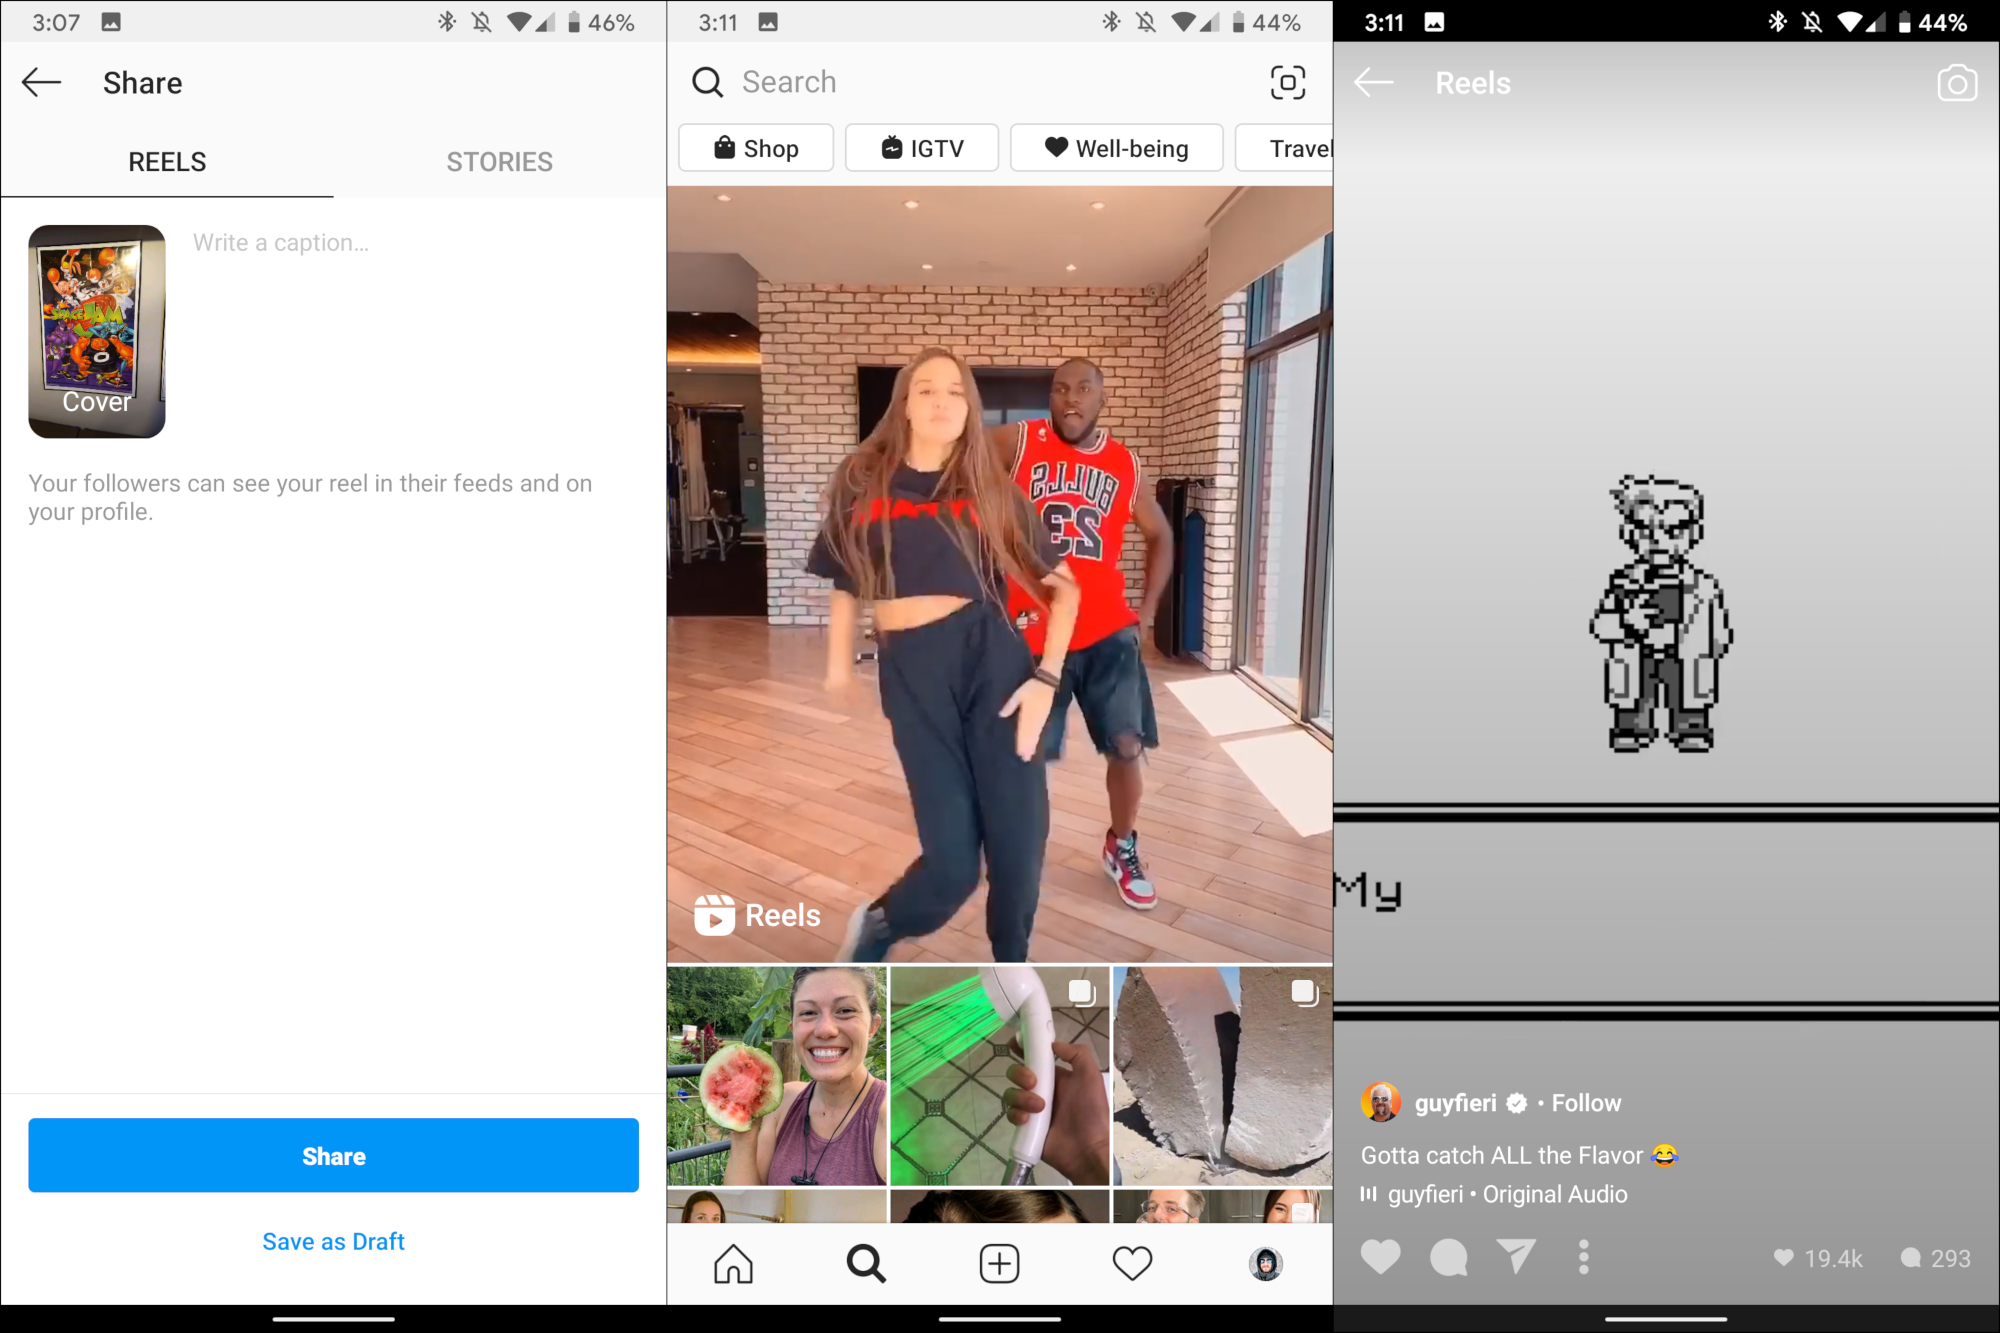
Again, Reels can also be posted to the public “Discover” tab, so you can browse through videos from accounts you might not follow. You can scroll through and Like, Comment, or Share the same as you would with any Instagram post.
You might think Reels sounds a lot like Instagram Stories. While both creation tools function similarly, they serve different purposes. Stories are intended to be more of a social feature that allow people to share short videos or photos, which are only visible for 24 hours. Reels are more about creation and entertainment.
[mai mult...]The following guide provides you with instructions on lowering the data usage of the popular messaging application WhatsApp.Created for Android devices, you can use the guide if you run WhatsApp on another mobile operating system as well.
Applications that you run regularly on your mobile devices can use a considerable amount of data when they are running.Many apps continue to run in the background once they have been started on a device. This is certainly true for most messaging applications, as they check regularly for new messages and other content to notify you the moment it is detected.
First thing you need to do is verify WhatsApp’s data usage on your device. How that is done depends largely on your device. On my Xiaomi Mi4c, I select Security > Data Usage to find out about the data usage of the app. You may find data usage in a different location on your device, for instance under Networks > Data Usage.
If you cannot find that option, or don’t have it, then you may need to install a third-party data tracking application. You can use My Data Manager for that for instance. I suggest you run it at least a week before you check WhatsApp’s data usage during that time.
Once you have the number, you need to decide whether it is too high, or acceptable. If you think it is too high, you can modify some WhatsApp settings to lower the application’s data usage.
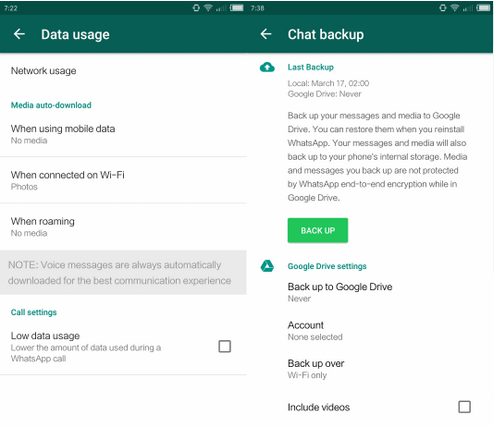
There you find the following options to lower WhatsApp’s data usage:
Configure media auto-download. You may configure this independently for mobile data, WiFi data, and roaming.
The default setting downloads photos when on mobile, all attachments when connected to a Wifi, and nothing at all when roaming.
To lower the usage, consider blocking all downloads from being processed automatically on mobile and / or on WiFi. The latter depends on whether the wireless networks that you connect the mobile device to are limited in regards to bandwidth.
Note that you may still download any attachment manually. WhatsApp displays a placeholder for attachments that have not been auto-downloaded by the app. A tap on the placeholder downloads the attachments to your device.
Low data usage. This setting enables the low data usage mode during WhatsApp calls. Please note that this goes hand in hand with a reduction in call quality. If you use WhatsApp for calls regularly, you may want to test the setting to see if you can live with the quality reduction, and whether reducing it has a big enough impact on the data usage of the app to make it worthwhile.
Chat Backup settings are another thing that you may want to check. While not configured by default to send data to a cloud provider, WhatsApp may be configured to do that.
Go to Menu > Settings > Chat > Chat Backup to get started. You find the “back up to Google Drive” option on the page. If it is enabled, consider disabling it as WhatsApp will transfer data to Google Drive regularly when it is enabled.
You may change other preferences there, for instance so that videos are not backed up to Google Drive, or the frequency of backups.
[mai mult...]WhatsApp added a new feature to its messaging applications that you may use to delete messages that you sent already using the client.
Messages that you sent up until now could not not be deleted by you after the fact. There was no grace period to undo the sending, and it seems that users requested such a feature which works similarly to how email providers like Gmail provide undo options for a short period of time after sending messages.
This changes with the new deleting messages for everyone functionality that is implemented in the most recent versions of the WhatsApp client for Android, iOS and Windows Phone.

The new feature has requirements that need to be met.
WhatsApp won’t notify you if the deleting of the message is not successful. It may still be deleted on the device that you are using, but it may not have been deleted on the recipients device. Also, recipients may still see the message before it is deleted.
So, how do you delete messages that you sent using WhatsApp?
The process is simple:
Deleted messages are marked as such in the conversation history along with the time they were deleted. There is no option to restore deleted messages however.
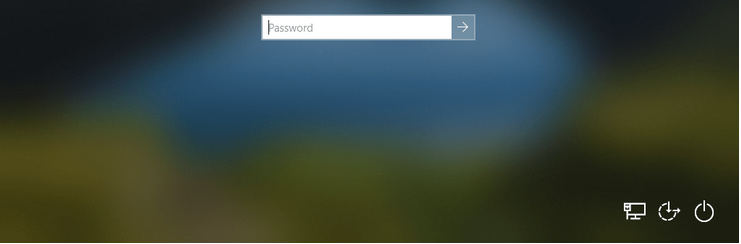
[mai mult...]When you sign-in to a Windows 10 device you may notice a rather odd behavior. The background image is displayed just fine when you start the device but as soon as you interact with the screen, it is blurred. The following guide helps you restore a clear logon background.
Microsoft probably thought it a good idea to put the focus on the sign-in form and the few icons that it displays on the screen. The change was introduced in Windows 10 version 1903 and is active by default in all recent versions of Microsoft’s operating system.
Windows 10 provides administrators with several options when it comes to disabling the lockscreen blur. The following guide walks you through all available options.
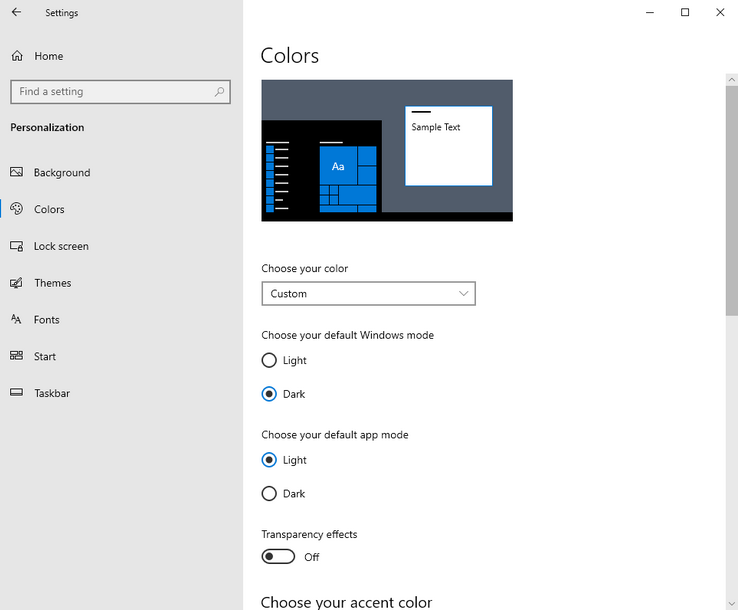
This is probably the easiest option as it requires no changes to the Windows Registry or Group Policy.
Note that this turns off all transparency effects on the system. Undo this by setting the value of Transparency effects to On.
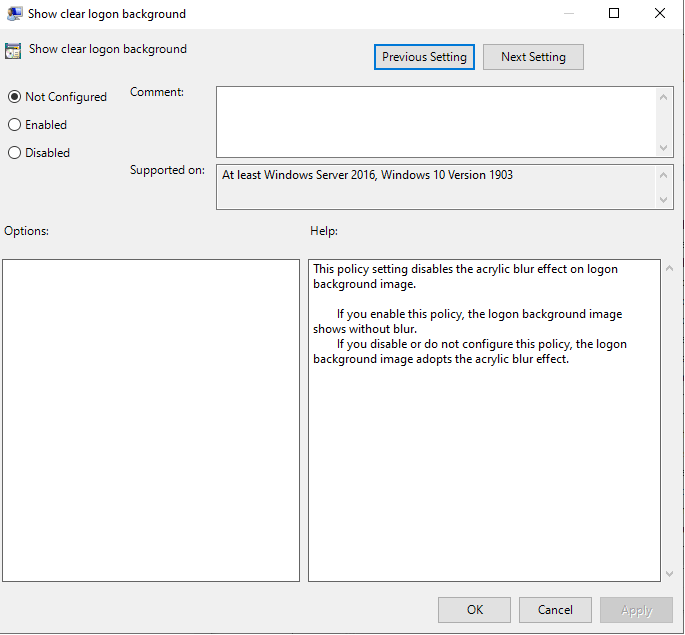
Microsoft added an option to the Group Policy that provides a narrower solution as it is designed to show a clear background.
Note that the Group Policy Editor is not part of Home versions of Windows 10.
The policy’s description:
This policy setting disables the acrylic blur effect on logon background image. If you enable this policy, the logon background image shows without blur. If you disable or do not configure this policy, the logon background image adopts the acrylic blur effect.
Undo this by setting the policy to Disabled or Not Configured.

You can also edit the Windows 10 Registry to force the system to display a clear background on the lockscreen. The option is useful to Home users as they cannot use the Group Policy to do that.
Undo this by setting the value of the Dword DisableAcrylicBackgroundOnLogon to 0, or by deleting the Dword.
All three options work but you may favor the second and third options as they change the lockscreen behavior only while the first disables all transparency effects on the system.
[mai mult...]Pentru o mai bună securizare a GitLab-ului putem sincroniza contul pentru a ne autentifica prin contul Google care poate avea activat şi configurat MFA.
[mai mult...]