Dezactivarea functionalitatii IPv6 pe toate placile de retea (Windows)
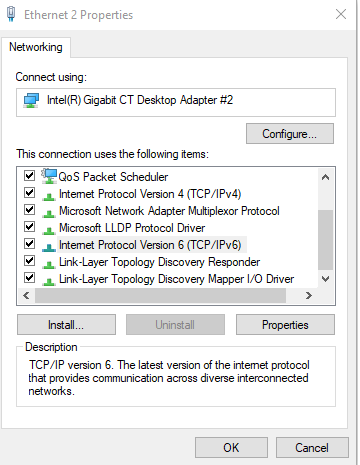
In anumite situatii vom avea nevoie sa dezactivam din functionalitatile accesibile in meniul Properties al unui dispozitiv tip Network Adapter.

Soluții pentru problemele tale IT

In anumite situatii vom avea nevoie sa dezactivam din functionalitatile accesibile in meniul Properties al unui dispozitiv tip Network Adapter.
Dorim să verificăm log-urile de sistem pentru a vedea ce erori au apărut.
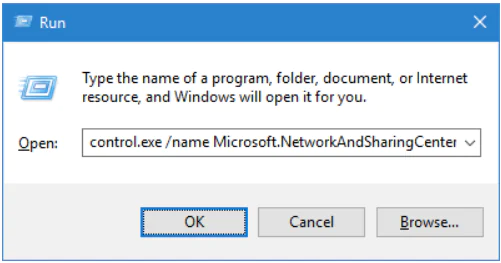
[mai mult...]In the search bar or in the Run, type control.exe /name Microsoft.NetworkAndSharingCenter and press the Enter key (or go to the Start menu ⇨ Settings ⇨ Network and Internet ⇨ Status ⇨ Adapter Settings).
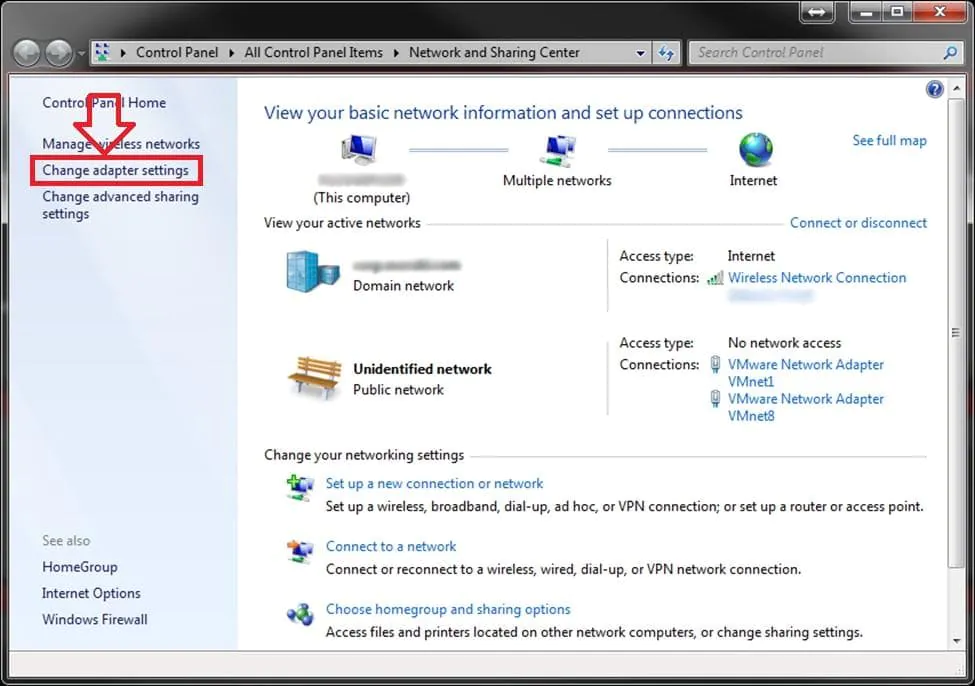
On the left side, click on “Change adapter settings“.
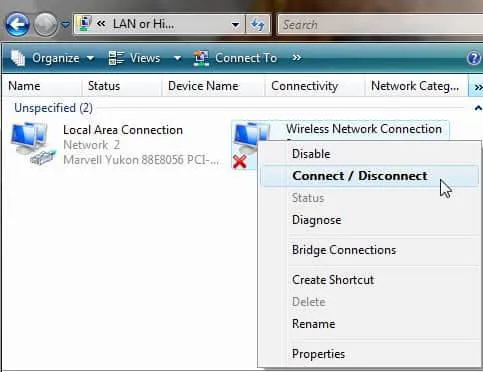
To disconnect the network connection: select the network adapter that you want to disconnect and click on “Disconnect the Network Device” (or right-click on the network connection and select Disconnect).
How to Enable Telnet on Windows 10?
Windows computers, by default, disable Telnet because of security reasons. So, the first step in using Telnet is to enable the Telnet client.
For this, open the Command Prompt and type the following command to see if Telnet is enabled:
C: telnet
You can see that the system doesn’t recognize the command because Telnet is not enabled at the moment. You can choose from two methods for enabling Telnet on your Windows machine.
Method 1: Enable Telnet Through The GUI
Follow these steps to enable Telnet via the GUI:
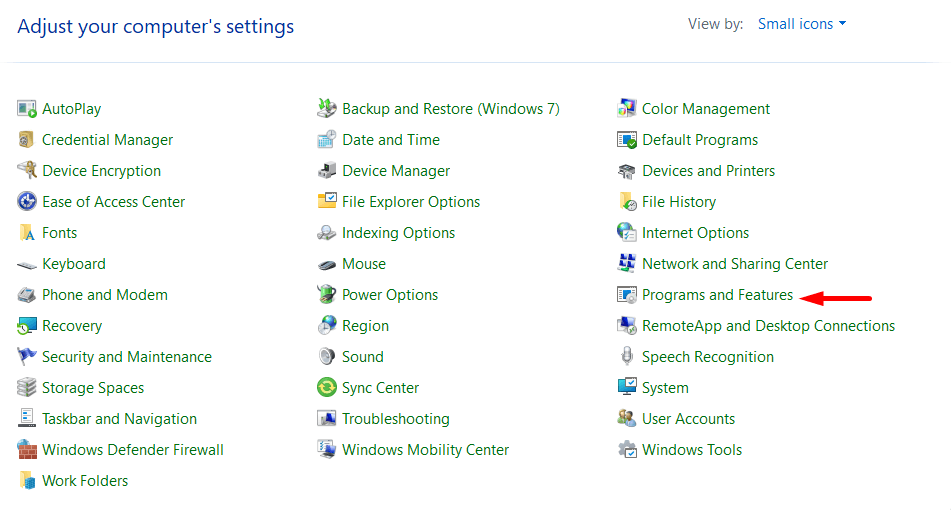
1. Access the Control Panel’s Programs and Features section:
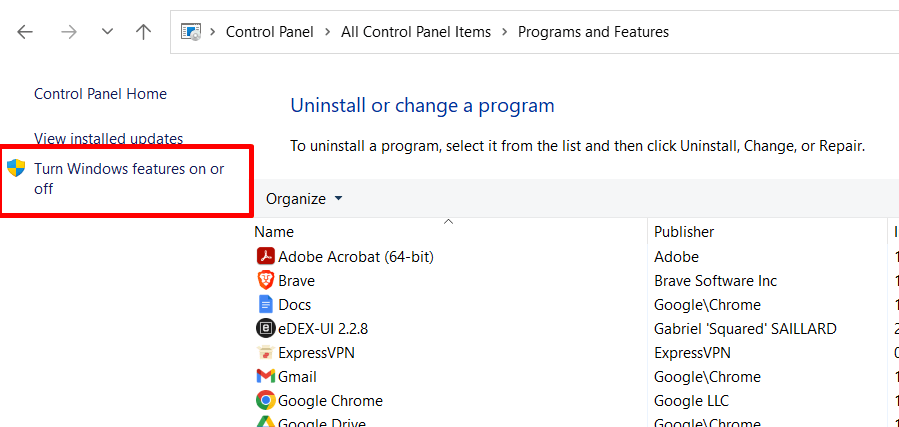
2. Select the option to turn Windows features on or off.
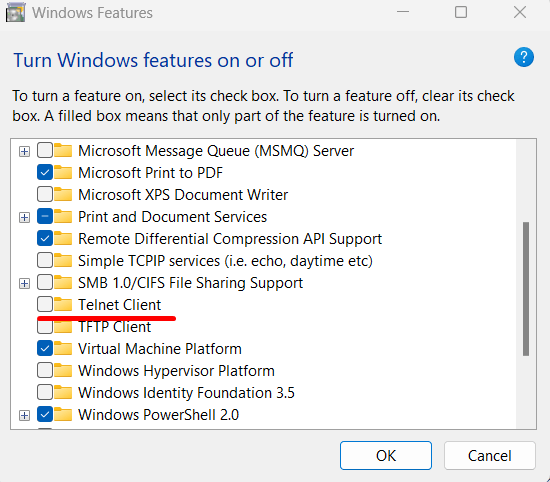
3. To install the feature, find the Telnet Client option on the list, select it, and then click OK.
4. Click Close when Windows completes the process.
5. Launch the Microsoft Telnet Client by typing telnet in the Command Prompt:
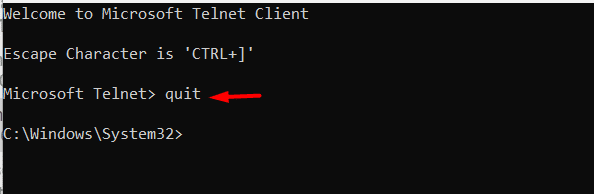
6. Enter quit to end the Telnet session.
Method 2: Use the Command Prompt to Enable Telnet
You should follow these steps if you wish to enable Telnet through the GUI:
C: pkgmgr /iu:"TelnetClient"
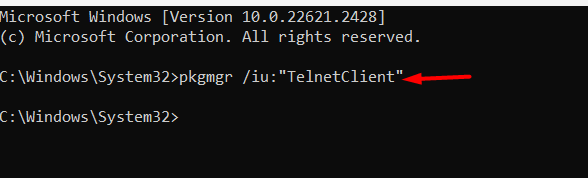
2. Now relaunch the Command Prompt and enter telnet to launch the Microsoft Telnet Client.
3. Once you see the Microsoft Telnet> prompt, enter quit to exit.
How to Test Open Ports Using Telnet in Windows
When working with remote systems, you often need to check for open ports that allow incoming Telnet connection. For this, use the following Telnet command:
Microsoft Telnet> telnet <address> <port number>
Here, addresses can be symbolic (domain) or numerical (IP addresses). For instance, use the following command to create a Telnet connection to the RedSwitches website:
Microsoft Telnet> telnet www.redswitches.com 23
This command can result in one of the following three scenarios:
The command throws an error, indicating that the network port 23 is not open for connections.

The command results in a blank screen showing that port 23 is open.
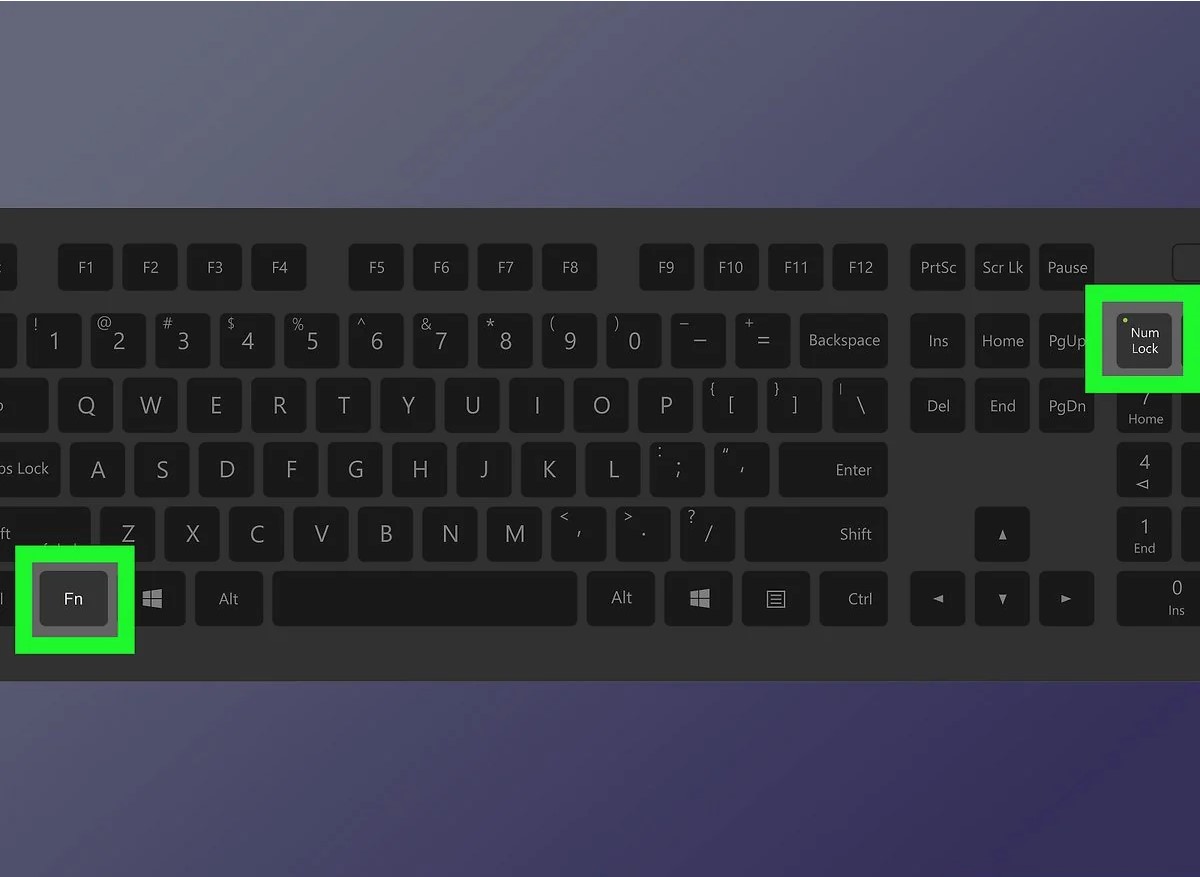
[mai mult...]The simplest way to turn off the Function keys is by pressing the Fn + Esc keys at the same time. This will disable the Function keys and you won’t need to use them. However, this is only a temporary solution and you will need to repeat this process every time you want to turn off the Function keys.
Using the BIOS
Another way to turn off the Function keys on Windows 10 is to access the BIOS. To do this, restart your PC and press the appropriate key during the bootup process to enter the BIOS. Once you’re in the BIOS, look for the “Function Key Behavior” option and select the “Disabled” option. This will turn off the Function keys permanently.
The Windows Mobility Center also allows you to turn off the Function keys. To access this, open the Start Menu and type “Windows Mobility Center”. Then, select the “Keyboard” option and toggle the “Function Key Lock” to the “Off” position. This will disable the Function keys on your PC.
Using a Third-Party Software
If you want a more permanent solution, you can use a third-party software like SharpKeys to turn off the Function keys. SharpKeys is a free software that allows you to customize your keyboard and remap keys. To use SharpKeys, download and install the software and then select the “Add” option to create a new mapping. Then, select the “Fn” key as the “From key” and select “Disabled” as the “To key”. This will disable the Function keys on your PC.
Using the Registry Editor
The Registry Editor is another way to turn off the Function keys. To access the Registry Editor, open the Start Menu and type “Regedit” in the search bar. Then, navigate to the following key: HKEY_LOCAL_MACHINE\SYSTEM\CurrentControlSet\Control\Keyboard Layout. Once you’re here, right-click on the key and select “New” > “DWORD (32-bit) Value”. Name this value “Scancode Map” and set the “Value data” to “00000000 000000 00 00 00 00 00 00 00”. This will turn off the Function keys on your PC.
Using Group Policy Editor
The Group Policy Editor is another way to turn off the Function keys. To access the Group Policy Editor, open the Start Menu and type “gpedit.msc” in the search bar. Then, navigate to the following location: Computer Configuration > Administrative Templates > Windows Components > Windows Mobility Center. Once you’re here, double-click on the “Function Key Lock” policy and select the “Disabled” option. This will turn off the Function keys on your PC.