Situatie
Solutie
Determining Which Windows Program Is Using a File Using Microsoft PowerToys (Easiest Method)
Microsoft PowerToys is a project to add community-sourced extra functionality to Windows 10 and 11. One of the most useful of these is File Locksmith, an interface specifically made for checking what programs are using a file.
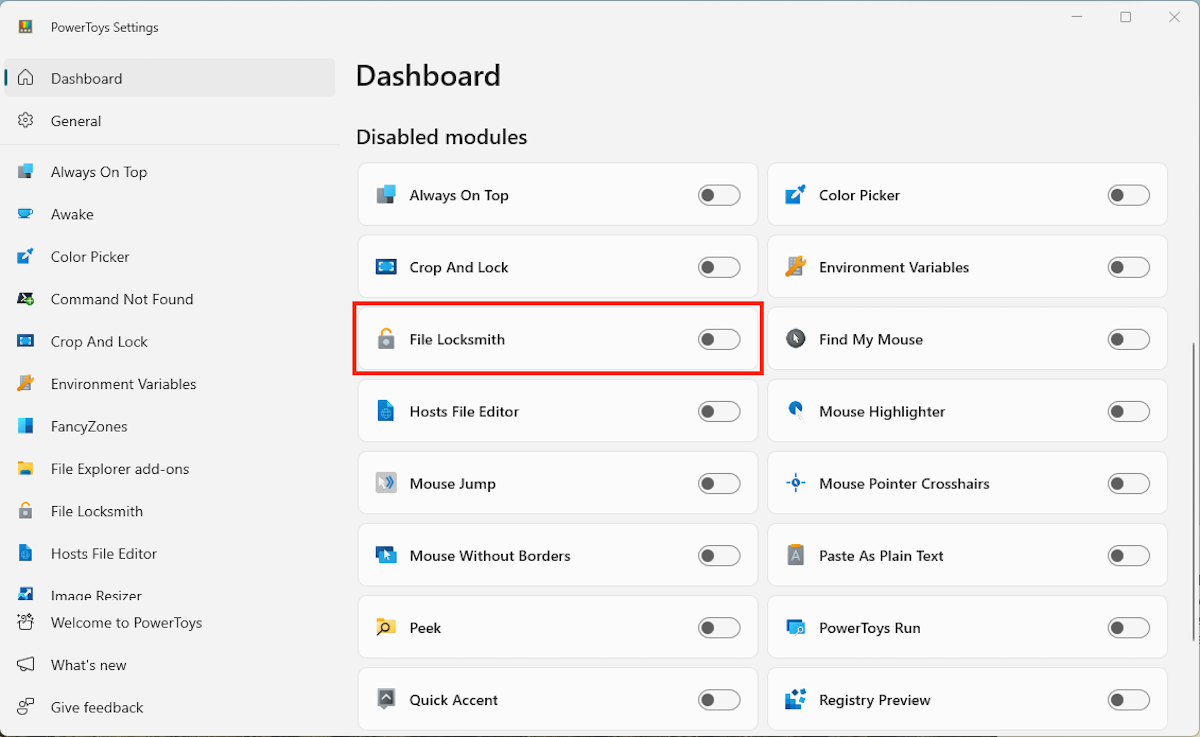
To use File Locksmith, download and install Microsoft PowerToys. Once installed, open PowerToys from the Start menu and click the “Enable File Locksmith” toggle button.
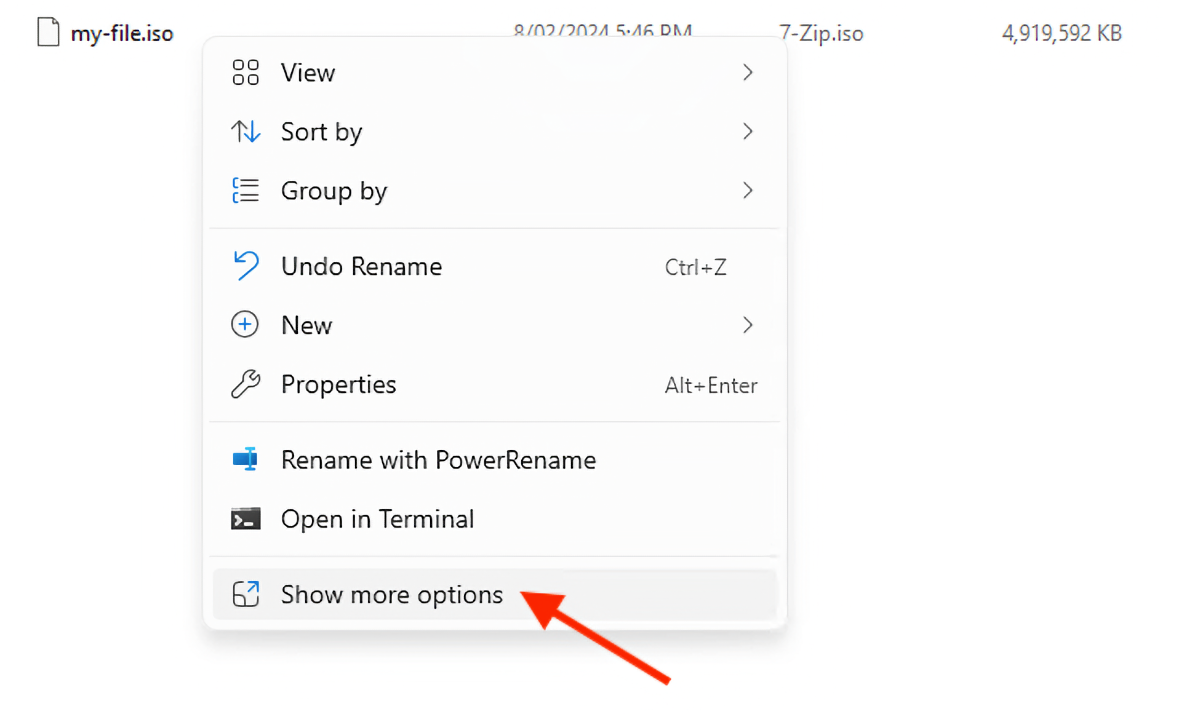
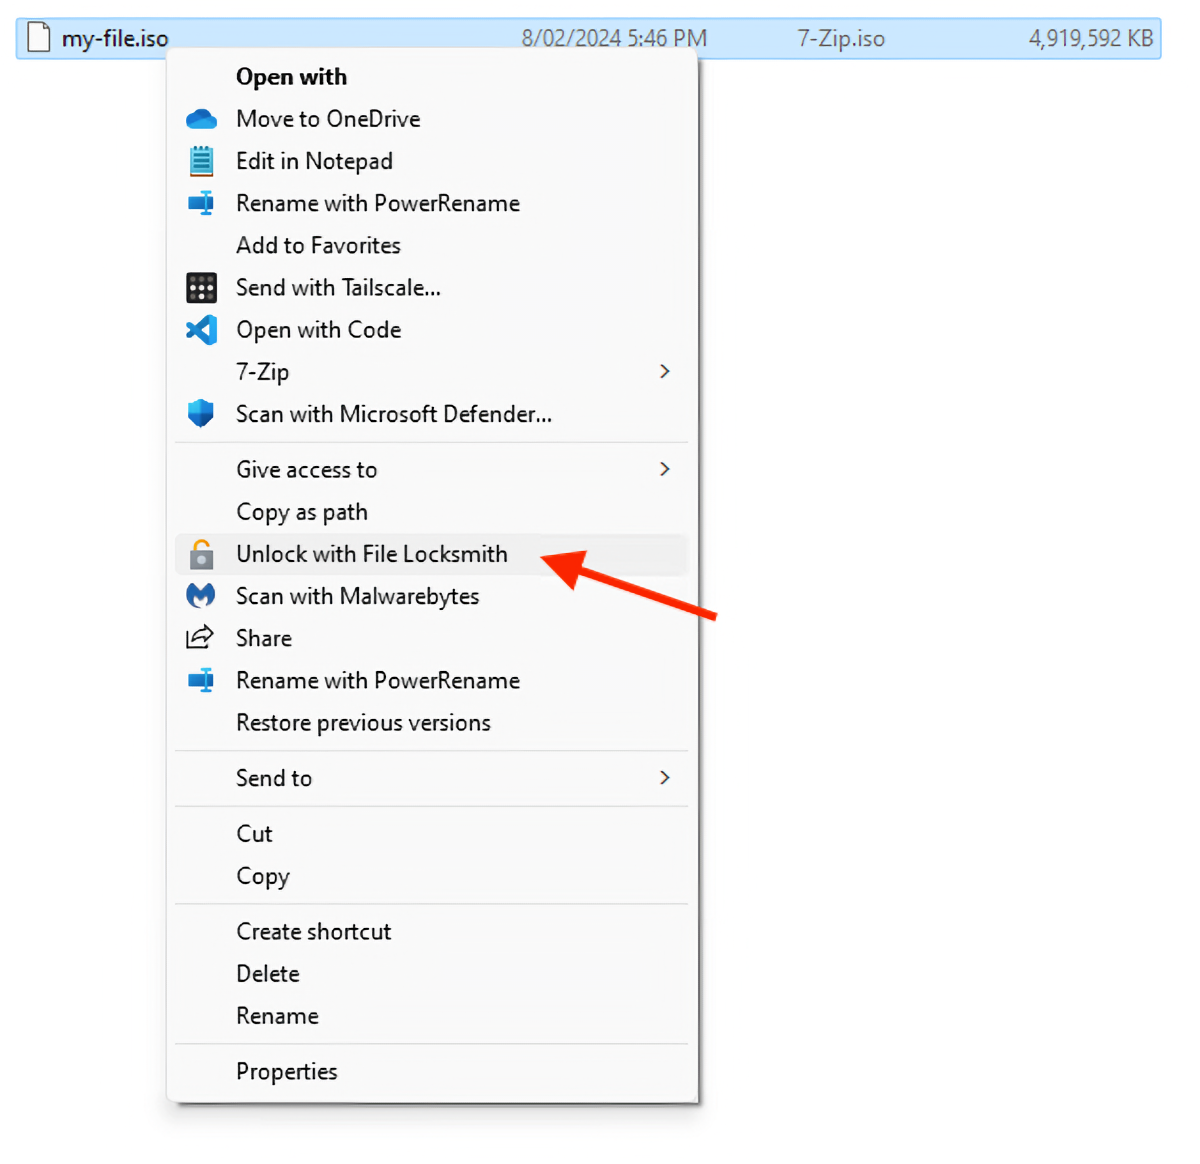
Now, when a file cannot be modified because it is in use, you can right-click on it, click “Show More Options” and then click “Unlock with File Locksmith”. The File LockSmith PowerToy will open and show a list of programs that are using the file.
You can also end the program that is using the file from this screen. Just click on “End task” next to the program you wish to exit, and File Locksmith will attempt to force the program to close so that you can delete, move or rename the file.
Make sure it’s safe to end a program before doing so using any method on this page. Attempting to end a program that is still reading or writing a file can damage the file, preventing it from being opened again. It’s worth having a good backup routine to protect against file loss.
Alternative Method: Using Resource Monitor to Find Out Which Process Is Using a File
The Windows Resource Monitor is similar to the Task Manager, but includes advanced functionality, including showing which processes are using a file.
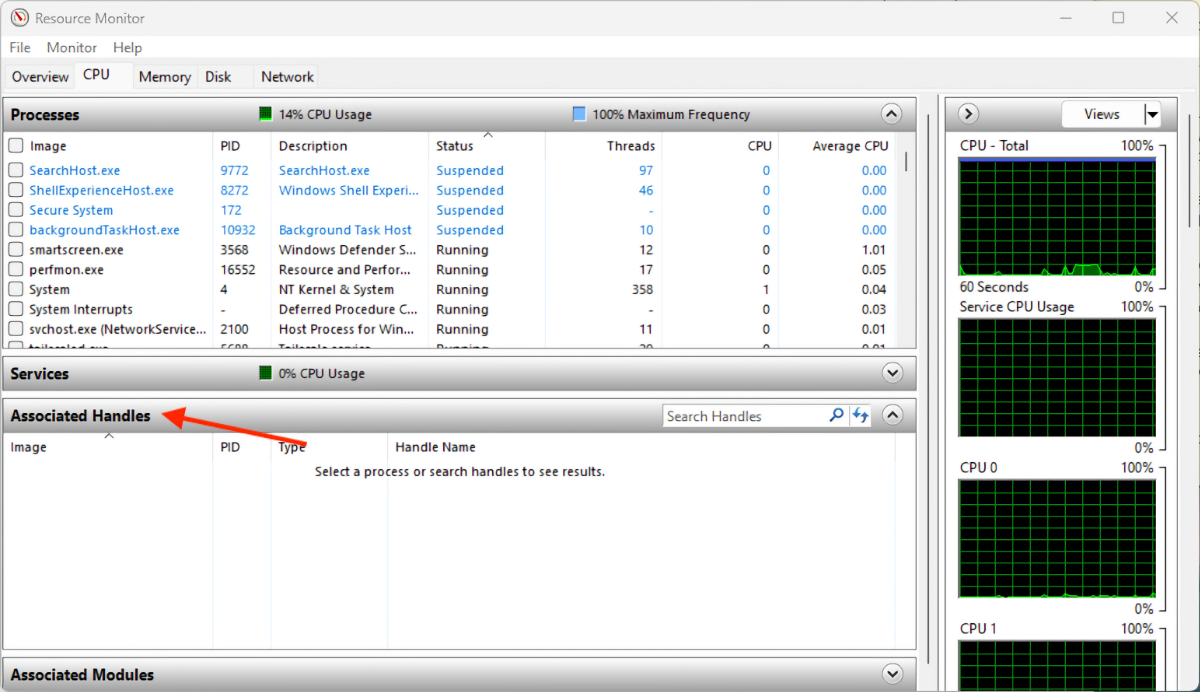
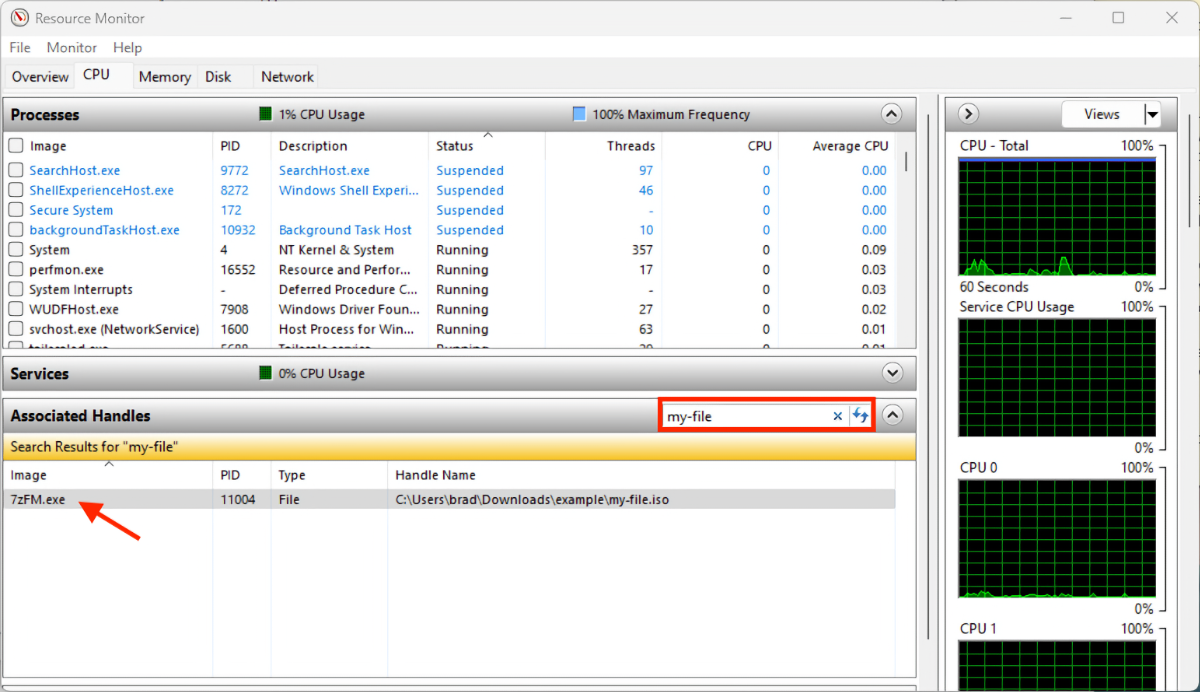
To access it, right-click on the Start menu and select “Run”, type resmon and then press “OK”. Then, navigate to the CPU tab in the Resource Monitor and then click on “Associated Handles” to open its panel.
Finally, type the name of the locked file in the search box, highlighted in red below. You will then see a list of the processes using the file. The name of each process will be in the “Image” column in the results, as shown by the arrow.
To end the process, right click on its entry in the results and select “End process”
Using Powershell and Handle to See What Program Is Locking a File
If you want to check if a file is in use in scripts or from the command line, you can use the handle program. After downloading handle, navigate to its directory in Powershell. Then, run the following command:
./handle.exe -a -u "PATH TO LOCKED FILE"
The -a option tells handle to dump all available information on what is using the file, and the -u option tells it to also show the owners name.
To make it convenient to use handle from scripts, you can copy it to your programs folder and add it to your system path. You can also kill the process from your script.



Leave A Comment?