Situatie
Windows 10 introduces new hardware scheduling feature allowing GPUs to manage their own memory to improve experience, and here’s how to enable the feature.
On Windows 10, there’s a new feature known as Hardware-accelerated GPU scheduling, which is part of the Windows Display Driver and it allows supported graphics cards to manage their own memory to reduce latency and improve performance. However, it doesn’t work right out-of-the-box, as it requires newer drivers from the graphics card manufacturers.
Solutie
Pasi de urmat
Enable hardware-accelerated GPU scheduling using Settings
To turn on hardware scheduling on W10 use these steps:
- Open Settings on Windows 10
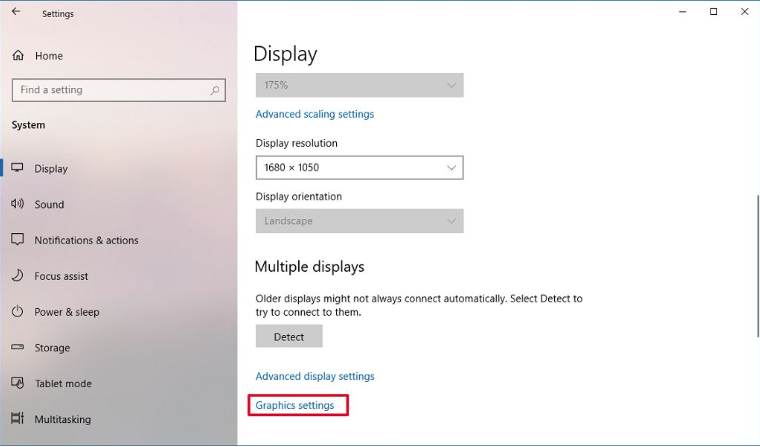
- Click on Display.
- Under the “Multiple displays” section, click the Graphics settings option.
4.Click the Change Default Graphics Settings option.
5. Turn on the Hardware-accelerated GPU scheduling toggle switch to enable the feature on Windows 10.
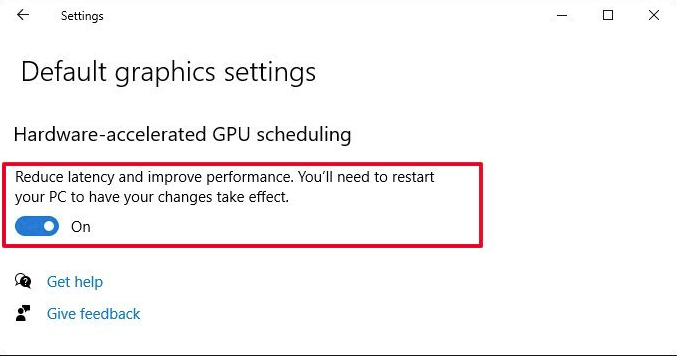
6.Restart your computer.
Once you complete the steps, the new option should apply, and you should be able to see better latency and performance playing PC games.
Enable hardware-accelerated GPU scheduling using Registry
To enable hardware-accelerated GPU scheduling with the Registry, use these steps:
- Open Start.
- Search for regedit, right-click the top result, and select Run as administrator.
- Browse the following path
HKEY_LOCAL_MACHINE\SYSTEM\CurrentControlSet\Control\GraphicsDriver
4.Right-click the GraphicsDrivers (folder) key, select New, and click on DWORD (32-bit) value.

5.Name the key HwSchMode and press Enter.
6.Double-click the newly created key and sets its value from 0 to 2.
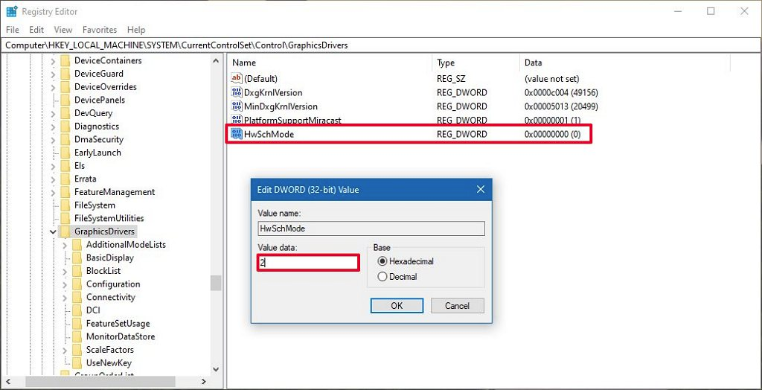
7.Click the OK button.
8. Restart your computer.
After you complete the steps, hardware-accelerated GPU scheduling should now be enabled on your device
Leave A Comment?