Situatie
Typically, Windows 11 will automatically set your PC’s time zone based on your location information, but if you have location services turn off (or Windows is confused), you can manually set your time zone as well.
Solutie
Pasi de urmat
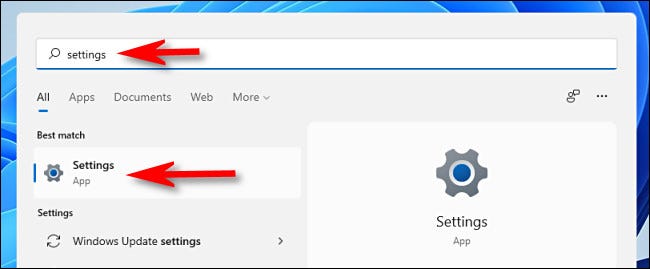
First, open Windows Settings by pressing Windows+i on your keyboard. Or you can open Start and search for “settings,” then click the “Windows Settings” icon.
When Settings opens, select “Time & Language” in the sidebar, then click “Date & Time.”

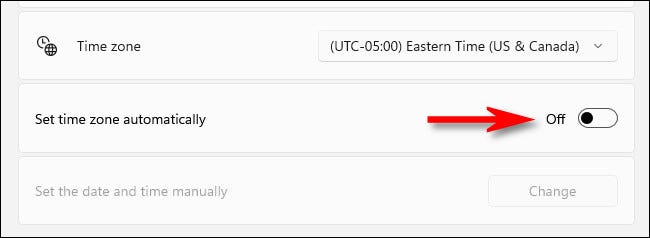
In Date & Time settings, scroll down and flip the switch beside “Set Time Zone Automatically” to “Off.” If the option is greyed out, it’s because your privacy options don’t allow sharing your PC’s location with Microsoft. If that’s the case, then this option is already set to “Off.”
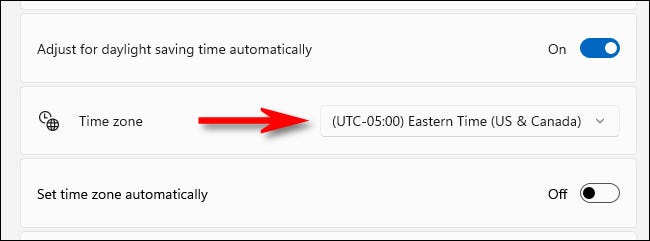
Next, move up one row in Settings until you see the “Time Zone” option. Click the drop-down menu beside it and select the time zone you’d like to use.
After that, close Settings, and you’re ready to go. If you ever need to manually change your time zone again, just open Settings and change it in Time & Language > Date & Time. Or if you’d like to have Windows set your time zone automatically, flip “Set Time Zone Automatically” to the “On” position.
Leave A Comment?