Situatie
Solutie
When working in Microsoft Word, you’ve probably seen two different kinds of text with lines through it (commonly called a “strikethrough”). Red text with a red line through it happens when you delete text while the collaborative Track Changes feature is on. Black text with a black line just has special character formatting applied.
Why Would You Want to Strike Through Text, Anyway?
It’s a good question. Why cross out words when you can just delete them? When you’re tracking changes in Word so that you can collaborate with other people, keeping that deleted text visible, but struck through, lets them know what has changed. They can even review those changes and accept or deny them.
How to Apply Strikethrough Formatting to Text
Applying strikethrough formatting is pretty easy. Start by selecting the text you want to strike through. You can do this by clicking and dragging over the text (or just double-clicking a word), but when you do this, Word likes to select the space after the text, as well. If you don’t want that to happen, click to place your insertion point at the beginning of the text, and then Shift-click at the end of the text for a more precise selection.
If you want to get fancy and select multiple words spread out through the document at the same time, you can do that, too. Select the first bit of text the regular way, and then hold down the Ctrl key while selecting additional text in different places. We suggest only doing this a paragraph at a time because it’s frustrating when you accidentally let go of the Ctrl key and have to start over.
When you have your text selected, look on the “Home” tab of Word’s Ribbon. In the “Font” group, click the Strikethrough button (it’s the three letters with a line drawn through them).
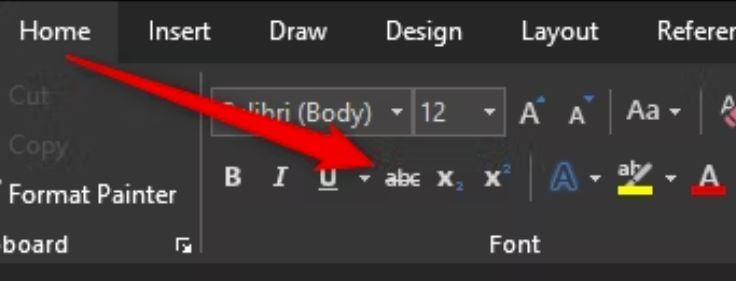
Now, any text you had selected should be struck through.