Situatie
The first step is to ensure that your monitor is G-Sync compatible. You can look for a G-Sync, G-Sync Ultimate, or G-Sync Compatible label on the monitor or its packaging. Nvidia also maintains an updated list of certified monitors on its website. As a side note, it’s also possible to use G-Sync on Nvidia cards on monitors compatible with AMD’s FreeSync or VESA Adaptive-Sync.
Then, you have to enable G-Sync on the monitor itself. Some monitors have a setting in their on-screen display (OSD) menu that you need to enable before you can turn on G-Sync on Windows 11. This setting might be labeled “Adaptive Sync” or “G-Sync”. Once the feature is confirmed and turned on in the monitor, follow these steps to enable G-Sync on Windows 11:
Solutie
1. Open Start on Windows 11
2. Search for Nvidia and click the top result to open the app
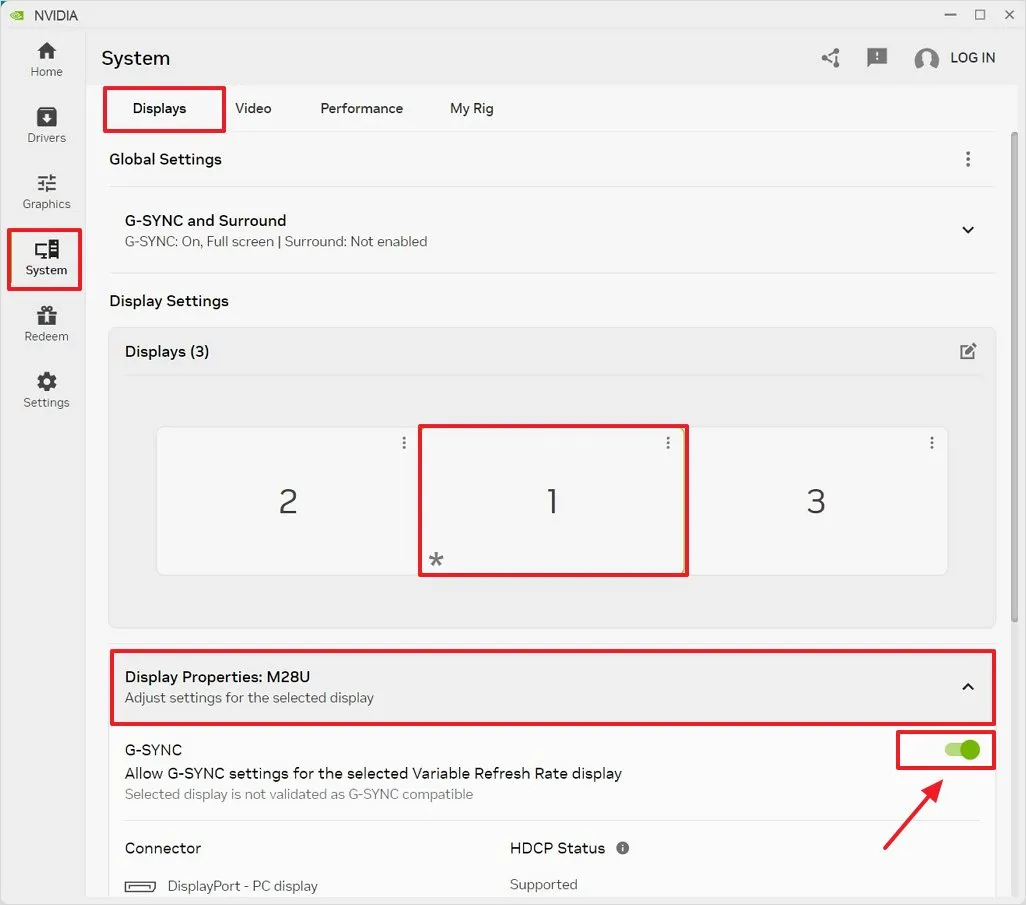
3. Click on System
4. Click the Displays tab
5. Select the display under the “Displays” section
6. Click the “Display Properties” setting
7. Turn on the G-Sync toggle switch.
Once you complete the steps, the G-Sync feature will be enabled on your computer, and this action will also turn on the Variable Refresh Rate feature available on Windows 11, specifically in the “Advanced graphics settings” section under Settings > System > Display > Graphics.
Leave A Comment?