Situatie
- Hardware-Accelerated Scheduling reduces the load on your CPU and can improve your PC’s performance.
- To enable it on Windows 10, head into Settings > System > Display > Graphics Settings and toggle on “Hardware-Accelerated GPU Scheduling.”
- On Windows 11, navigate to Settings > System > Display > Graphics > Change Default Graphics Settings and enable “Hardware-Accelerated GPU Scheduling”
Solutie
Turn On Hardware-Accelerated GPU Scheduling in Windows 10
There are two ways to enable Hardware-Accelerated GPU Scheduling on Windows 10: use the Settings app or the Registry Editor. Both accomplish the same thing, though the Settings app is much easier.
Using Settings
- Start by launching the Settings app on your PC. You can do this by pressing Windows+i.
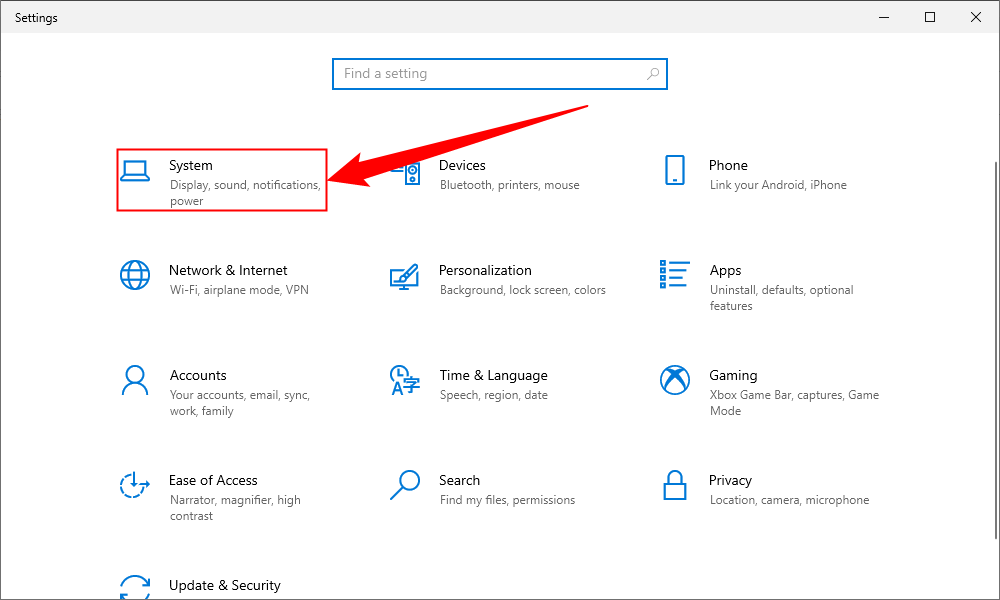
- In Settings, select “System.”
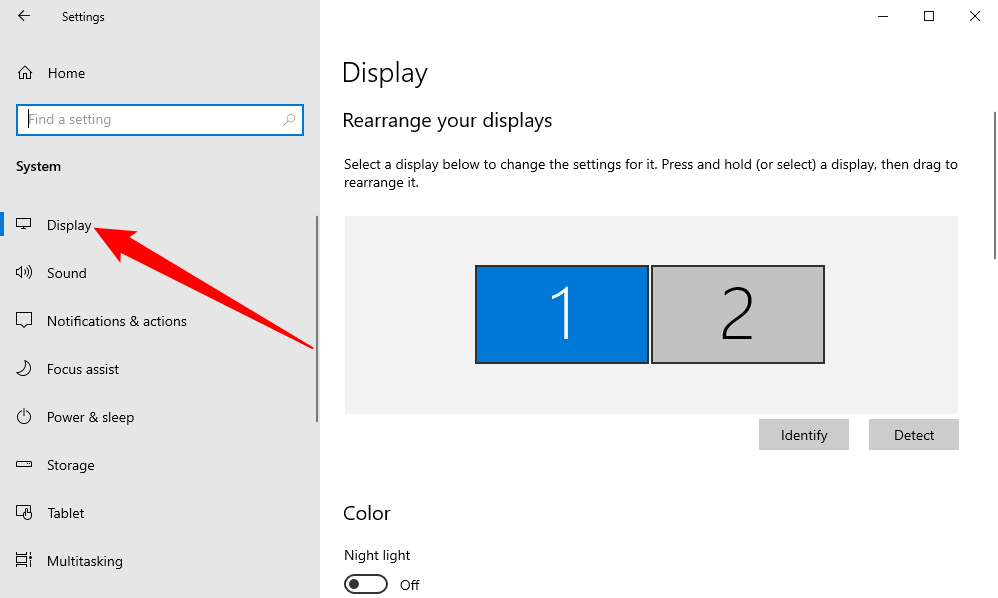
In the sidebar on the left, click “Display.”
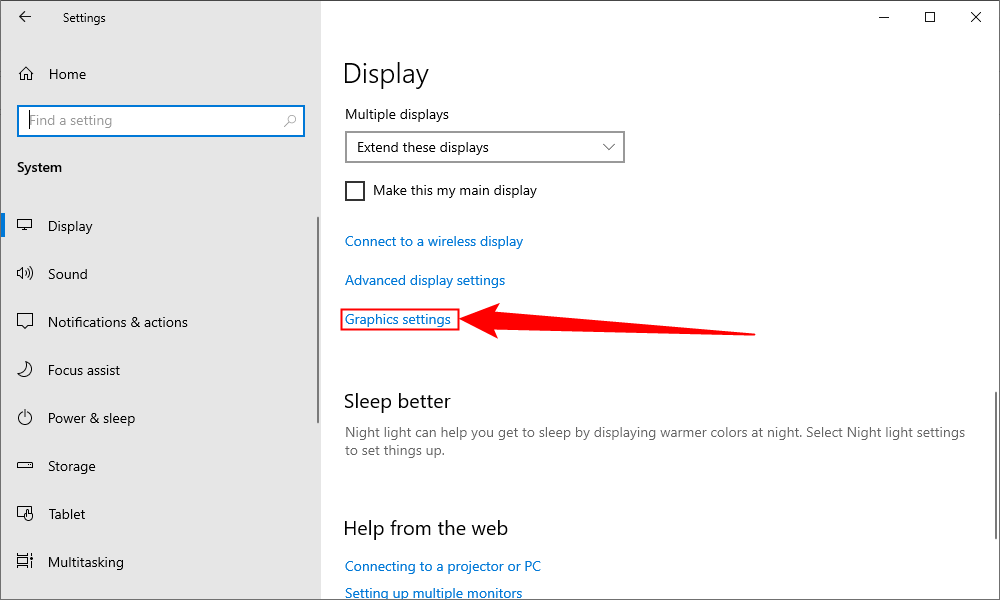
On the right pane, at the bottom, choose “Graphics Settings.”
On the following screen, toggle on the “Hardware-Accelerated GPU Scheduling” option.
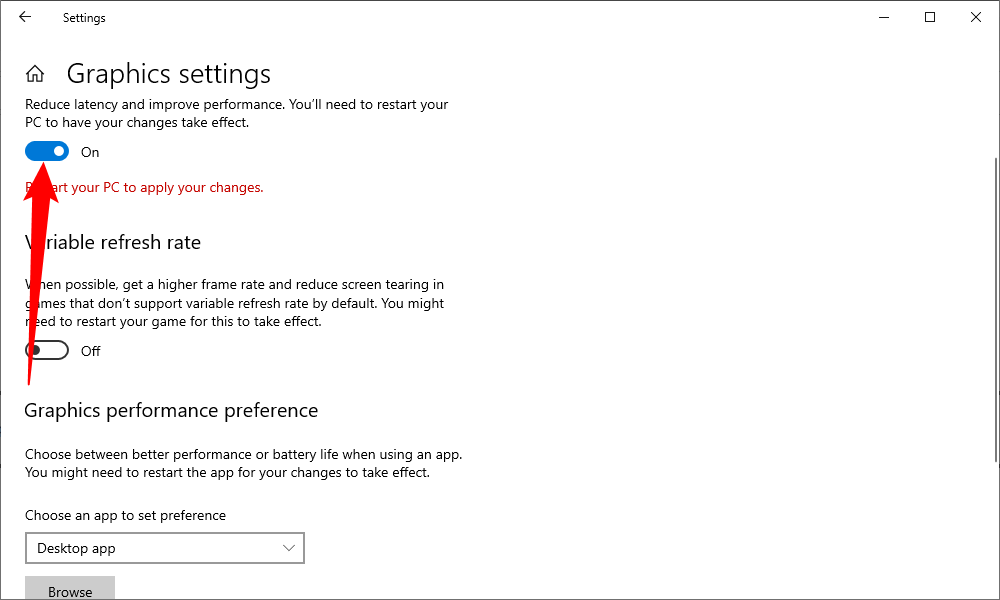
- To disable the feature in the future, simply toggle off the “Hardware-Accelerated GPU Scheduling” option again.
- Close the Settings app and reboot your PC to bring your changes into effect.
Using the Registry Editor
To enable Hardware-Accelerated GPU Scheduling via the Registry Editor, open the Run box by pressing Windows+R, then type the following and press Enter:
regedit
In the User Account Control prompt that opens, select “Yes,” since it’s necessary to make changes to the registry.
When the Registry Editor opens, in the path box at the top, type the following and press Enter:
Computer\HKEY_LOCAL_MACHINE\SYSTEM\CurrentControlSet\Control\GraphicsDrivers
In the pane on the right, double-click “HwSchMode.”
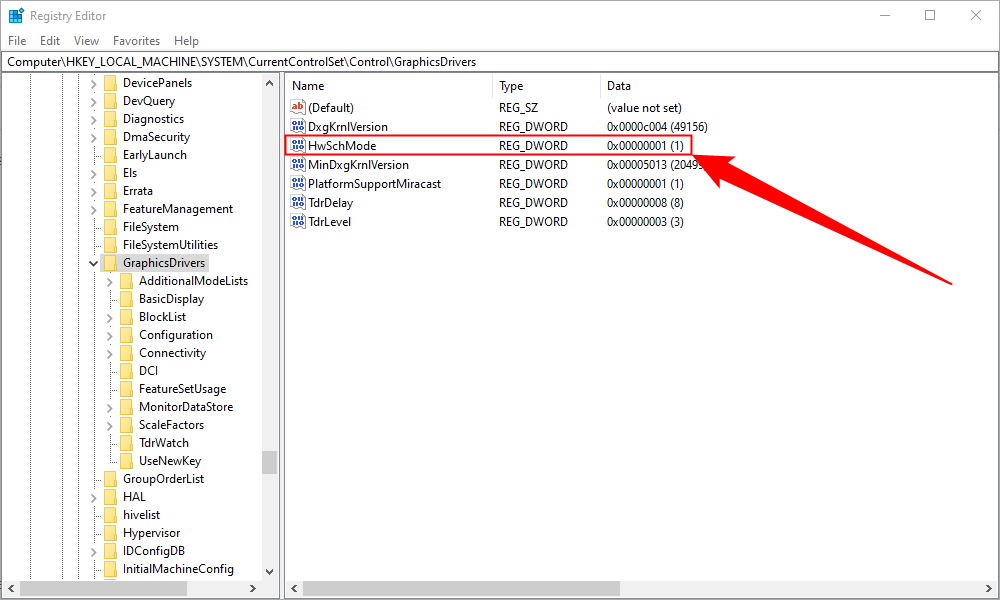
On the entry edit box, select the “Value Data” field and enter 2. In the “Base” section, choose “Hexadecimal.” Then, select “OK.”

- In the future, to disable the feature, enter
1in the “Value Data” field, choose “Hexadecimal,” and select “OK.” - Close Registry Editor, restart your PC, and you have Hardware-Accelerated GPU Scheduling enabled on your computer. Enjoy!
Enable Hardware-Accelerated GPU Scheduling in Windows 11
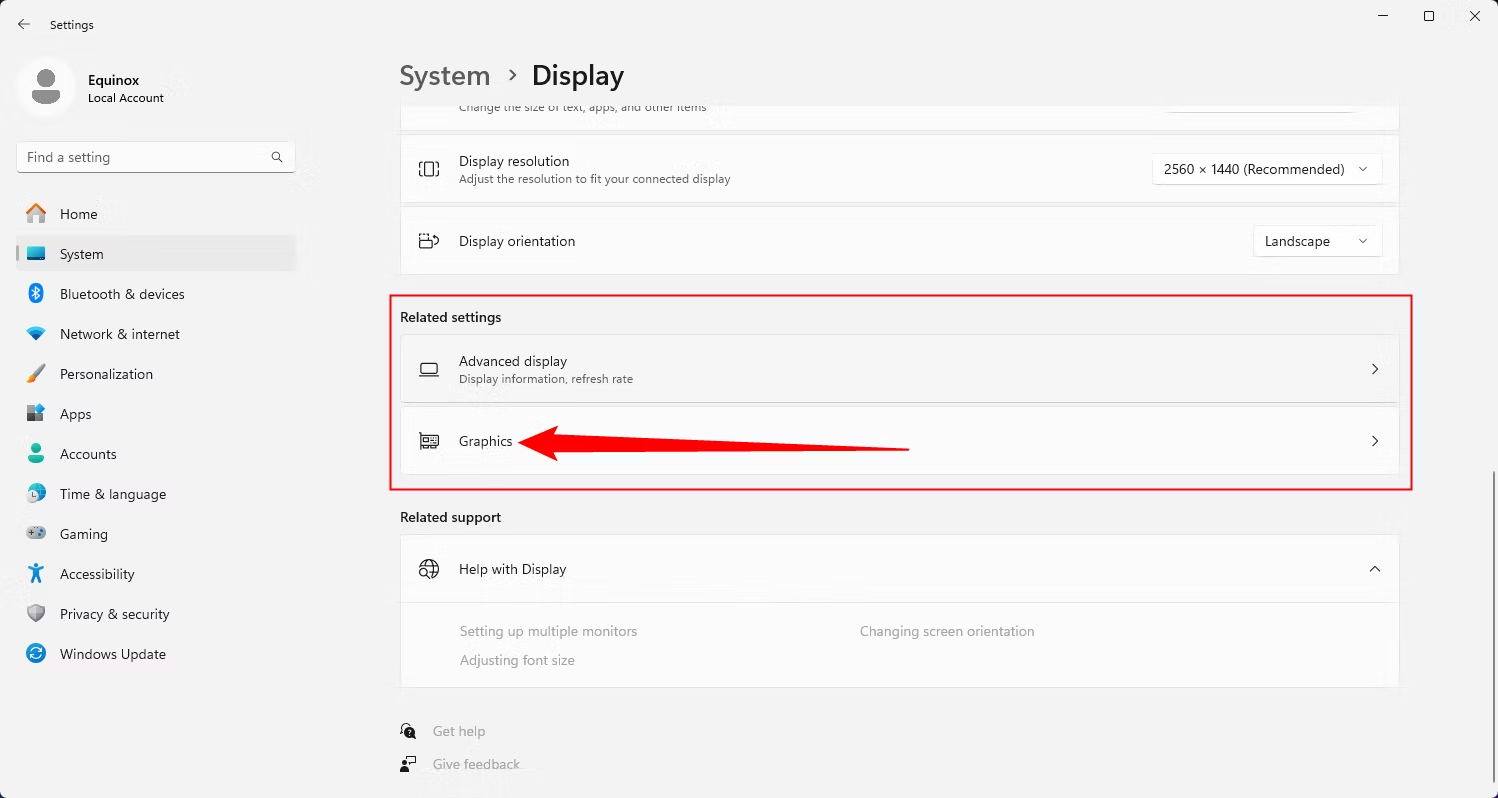
To enable the GPU scheduling in Windows 11, press Windows+i to open the Settings app. Go to the “System” section, then select the “Display” option from the right-hand side.

From the “Related Settings” section, select “Graphics.”
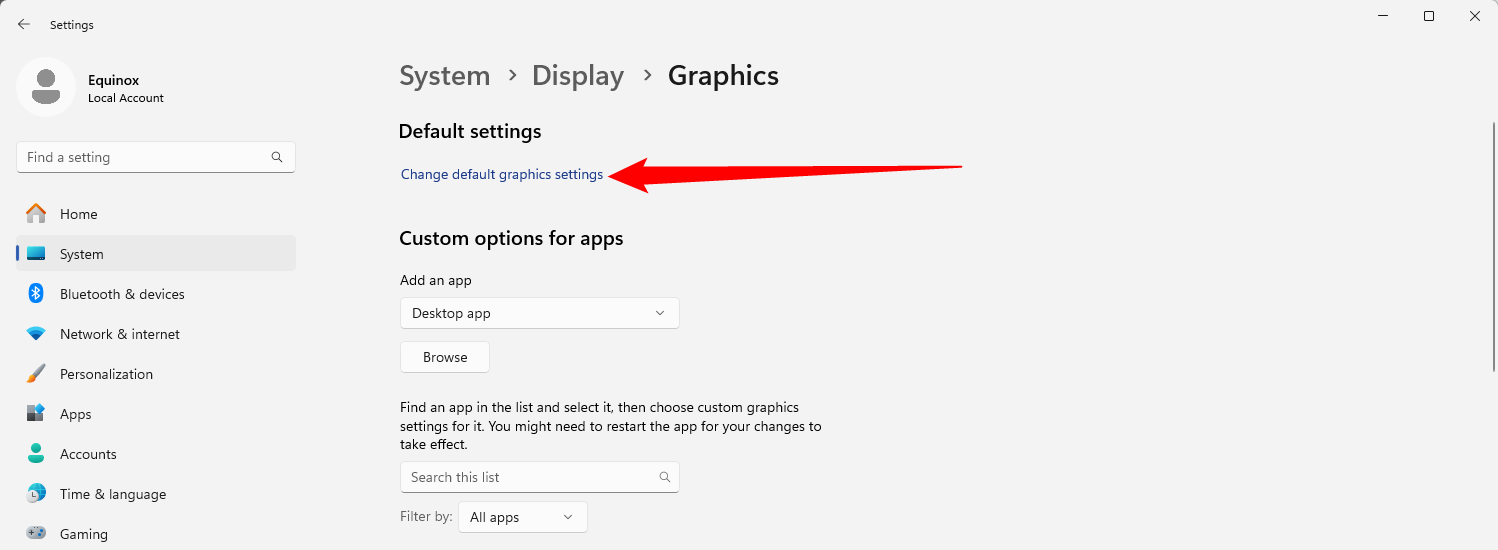
Choose “Change Default Graphics Settings.”
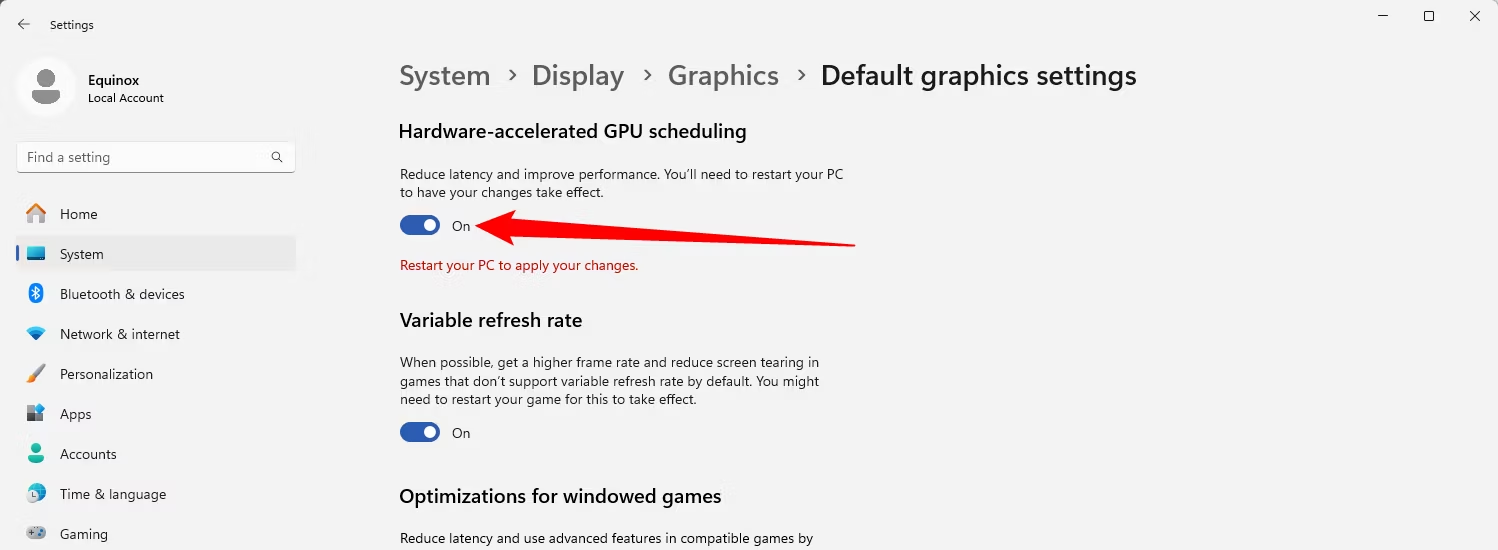
Then, toggle on the switch under “Hardware-Accelerated GPU Scheduling” and select “Yes” from the User Access Control prompt that shows up.
- If you decide you want to disable GPU scheduling later, simply toggle off the “Hardware-Accelerated GPU Scheduling” option.
- After that, you can close the “Settings” app and restart your PC to apply the change.
Microsoft states that you may not witness any significant changes immediately. However, if this feature hinders your PC’s performance instead of improving, you can disable it.
Leave A Comment?