Situatie
Have you encountered the “No Audio Output Device Is Installed” error while unmuting audio via the system tray? If so, your audio output device could be unplugged or disabled, the audio drivers could be outdated, or the audio services could be turned off.
Solutie
1. Perform Some Preliminary Checks
Start the troubleshooting process by applying some basic fixes. First, restart your computer to fix any minor glitches that may be causing the issue. If you use external speakers or headphones as your primary audio output device, check that they are correctly plugged into your computer. Also, unplug and then plug them back in to your system.
Ensure you haven’t mistakenly plugged your audio output device into the microphone jack. If you have multiple audio output devices connected simultaneously, unplug all except your primary device. Also, carefully clean the headphone jack or speaker port and try connecting your audio device to another port to rule out a problem with the port itself.
Additionally, uninstall any audio customization applications you might be using. If none of these basic checks help resolve the issue, apply the remaining fixes.
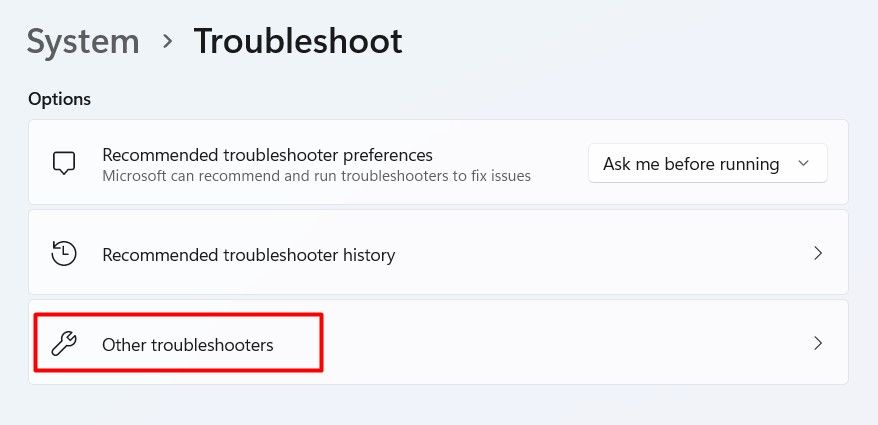
2. Run the Audio Troubleshooter
Windows comes with an audio troubleshooter that can help identify the primary cause of audio issues and help you fix them. If the above basic checks don’t solve the problem, try running the audio troubleshooter. Right-click the Start button, open “Settings,” and go to Troubleshoot > Other Troubleshooters.
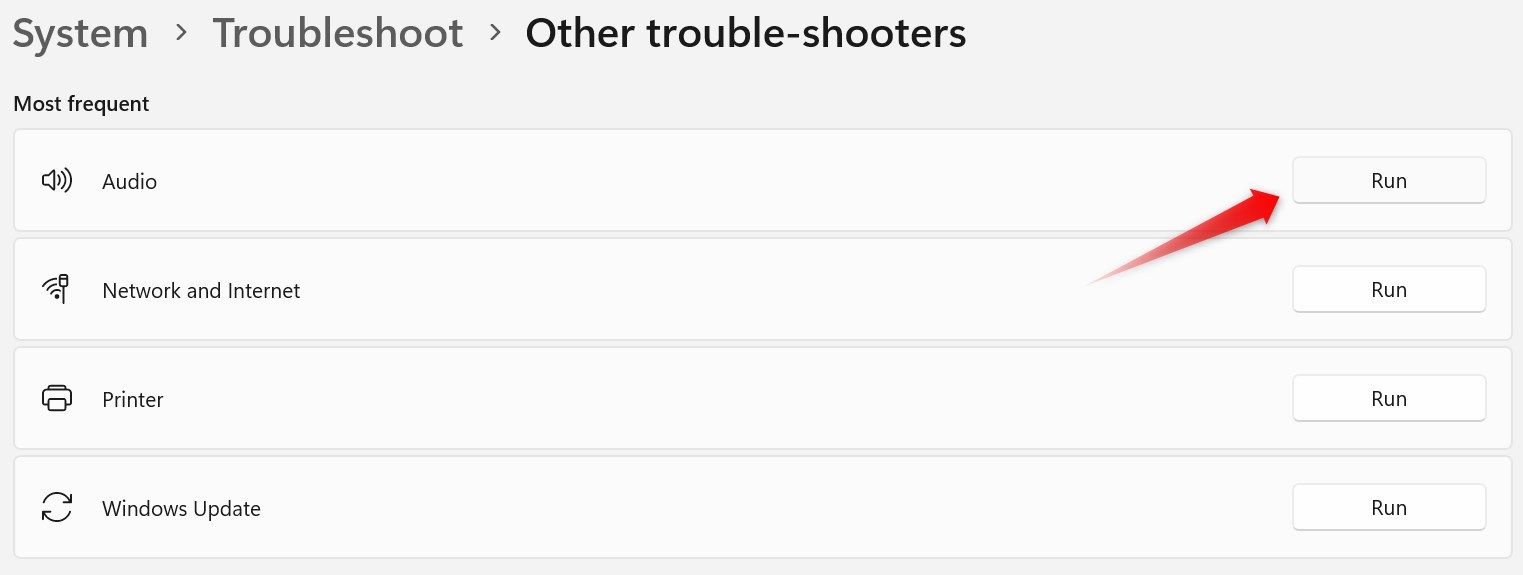
Click on the “Run” button next to Audio, and it will open the Get Help app, where you need to follow the on-screen instructions to help Windows diagnose the problem for you.
If the audio troubleshooter fails to detect the problem, try our remaining fixes to manually fix the problem.
3. Ensure the Audio Output Device Isn’t Disabled
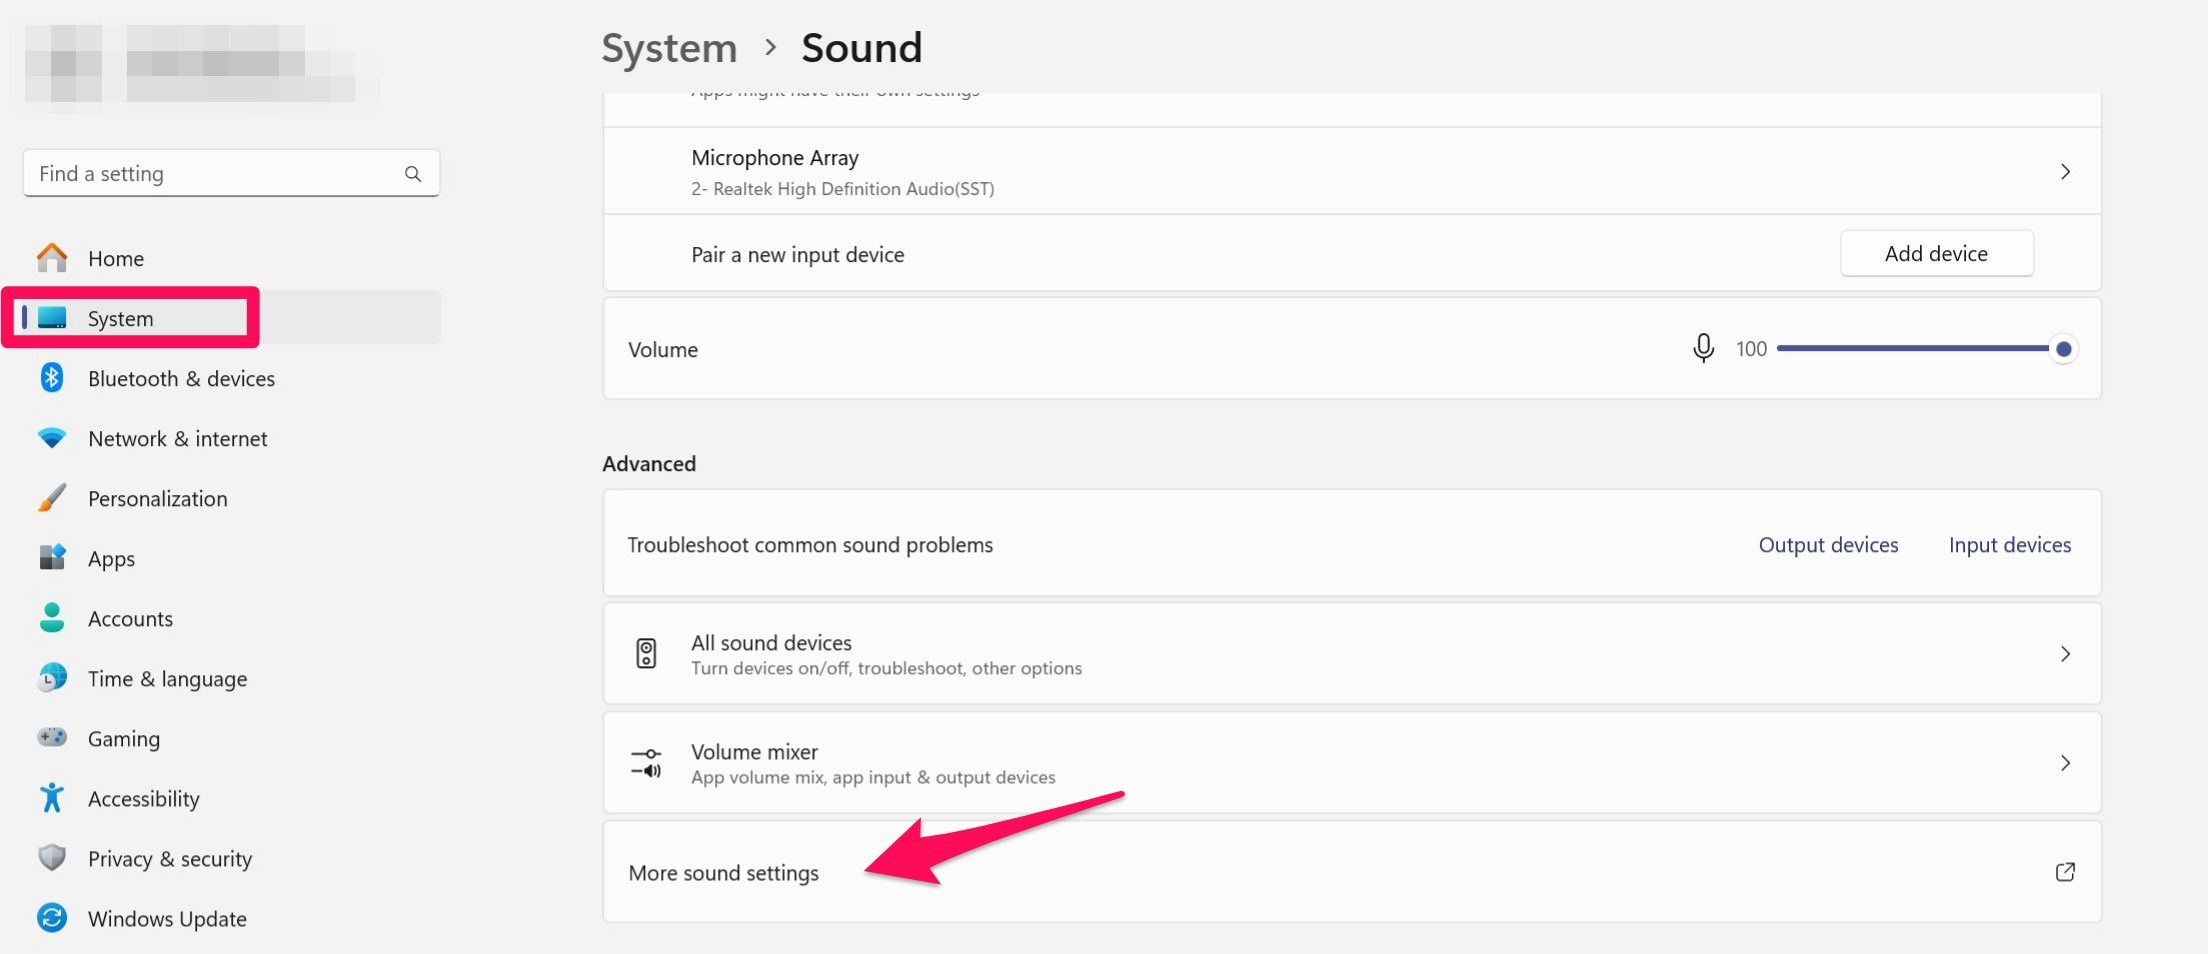
You may encounter the “No Audio Output Device Is Installed” error if the audio output device is disabled in the sound settings. To ensure that’s not the case, right-click the Start button and open “Settings.” Then, navigate to System > Sound, and click “More Sound Settings” under Advanced.
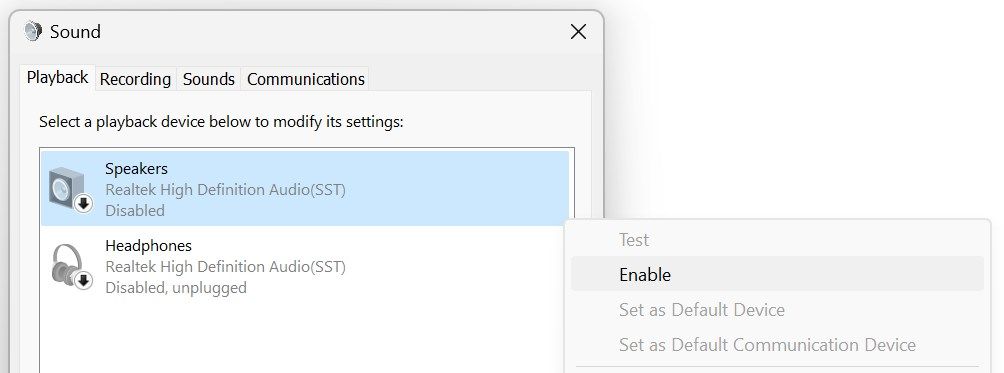
Then, go to the “Playback” tab. If you find all audio output devices disabled here, you should enable the primary playback device. To do so, right-click on it and select “Enable”
4. Enable the Audio Output Device From Device Manager
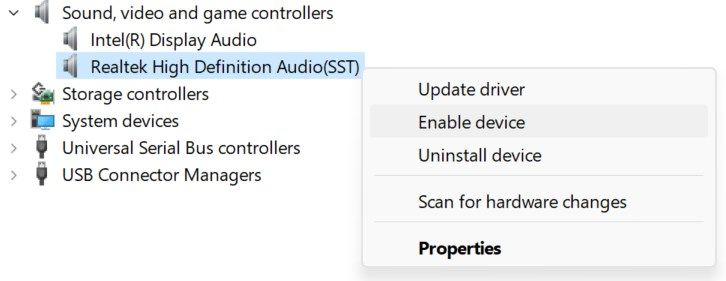
If you don’t see any device listed in the playback tab of sound settings, the audio output devices may be disabled in Device Manager. To ensure that’s not the case, right-click the Start button and open “Device Manager.” Then, expand the “Sound, Video, and Game Controllers” category.
If you see a downward arrow on the audio device, it indicates that it’s disabled. To rectify this, right-click on it and select “Enable Device.”
5. Turn On the Audio Services
If the audio output devices seem enabled in Device Manager but aren’t visible in the playback devices, the audio services could be disabled. To rule out this possibility, type Services in Windows Search and open the “Services” app. Locate the “Windows Audio” and “Windows Audio Endpoint Builder” services.
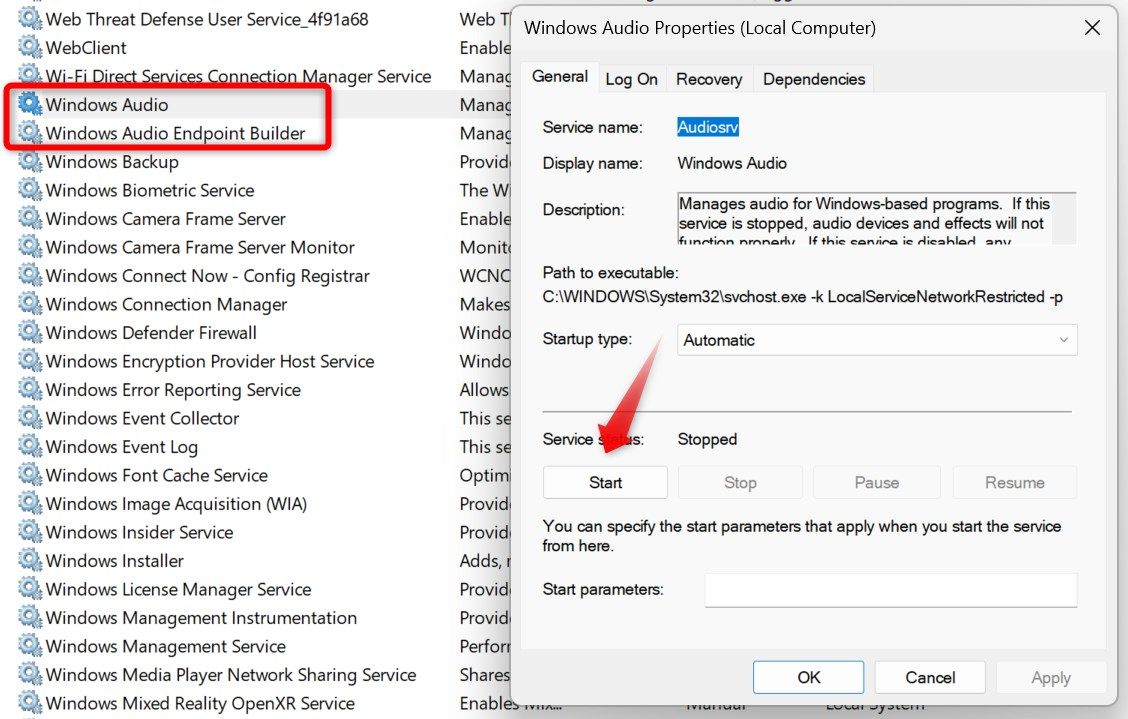
Double-click on each service, one after the other. If you find the Service Status as “Stopped,” click the “Start” button to enable them.
6. Enable or Disable Chipset Audio From BIOS
If you don’t see the entire “Sound, Video, and Game Controllers” category in Device Manager, the chipset audio might be turned off in BIOS. So, you need to enable it in BIOS or UEFI settings. To enter the BIOS, open the Settings app, go to System > Recovery, and click “Restart Now” next to Advanced Startup.
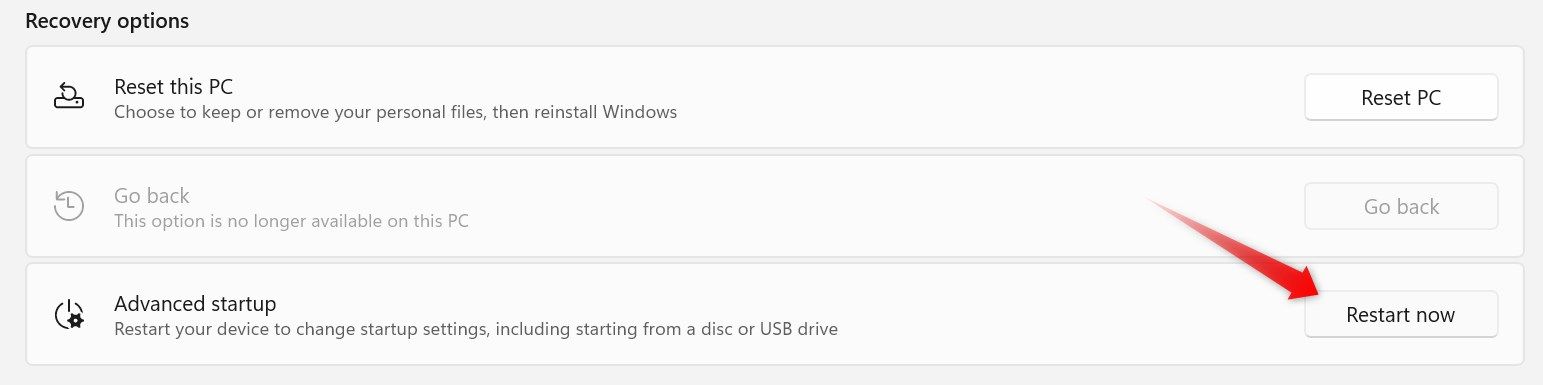
Before restarting your computer, you’ll be prompted to save your work. Save it, then click the “Restart Now” button in the confirmation popup. Your device will boot directly into the “Choose an Option” screen. From here, go to Troubleshoot > Advanced Options > UEFI Firmware Settings, and click “Restart.”
The process to enable or disable onboard audio will vary depending on your laptop or motherboard manufacturer and the model you’re using. If you’re unable to find it, refer to the manufacturer’s documentation. Using that information, locate the onboard audio option; if it’s disabled, turn it back on.
If you’ve installed a new sound card or sound adapter and encountered the error afterward, consider turning off the onboard audio to rule out any conflict between the cards.
7. Reinstall the Default Audio Drivers
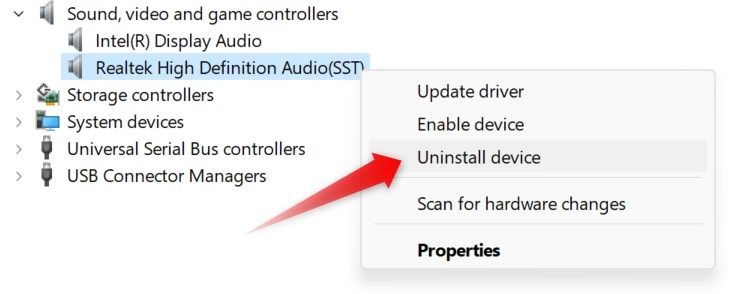
Having corrupted or outdated audio drivers is another common cause of this error. To ensure that’s not the case, you should uninstall and reinstall them. Right-click on the Start button, open “Device Manager,” expand the “Sound, Video, and Game Controllers” category, then right-click on the audio driver, and select “Uninstall Device.”
After uninstalling the drivers, restart your computer. Windows will automatically reinstall them from scratch, which may help resolve the problem.
8. Install Manufacturer-Specific Audio Drivers
If you’re unable to use a specific audio output device on your computer, you may need to install the manufacturer’s drivers. To rule out this possibility, go to the manufacturer’s website and download the latest audio drivers available. Most manufacturer-specific audio drivers come in an executable format, so you may only need to run the driver file to install it.
If installing the manufacturer-specific audio drivers also fails to restore audio on your computer, ensure you don’t have any pending system updates that need to be installed.
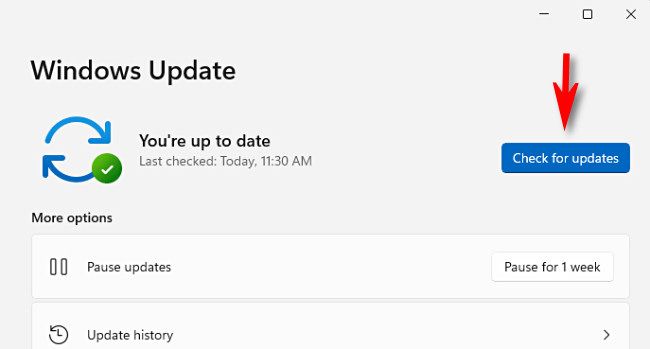
9. Check for System Updates
If none of the above fixes work, ensure your system is fully up-to-date. Right-click on the Start button and open “Settings.” Navigate to the “Windows Update” tab on the left. If your system is fully up-to-date, you’ll see a message stating, “You’re Up to Date.” You can also click the “Check for Updates” button to search for available updates.
Windows will then search for any available updates, download them, and proceed to install them.
Leave A Comment?