Situatie
Solutie
Pasi de urmat
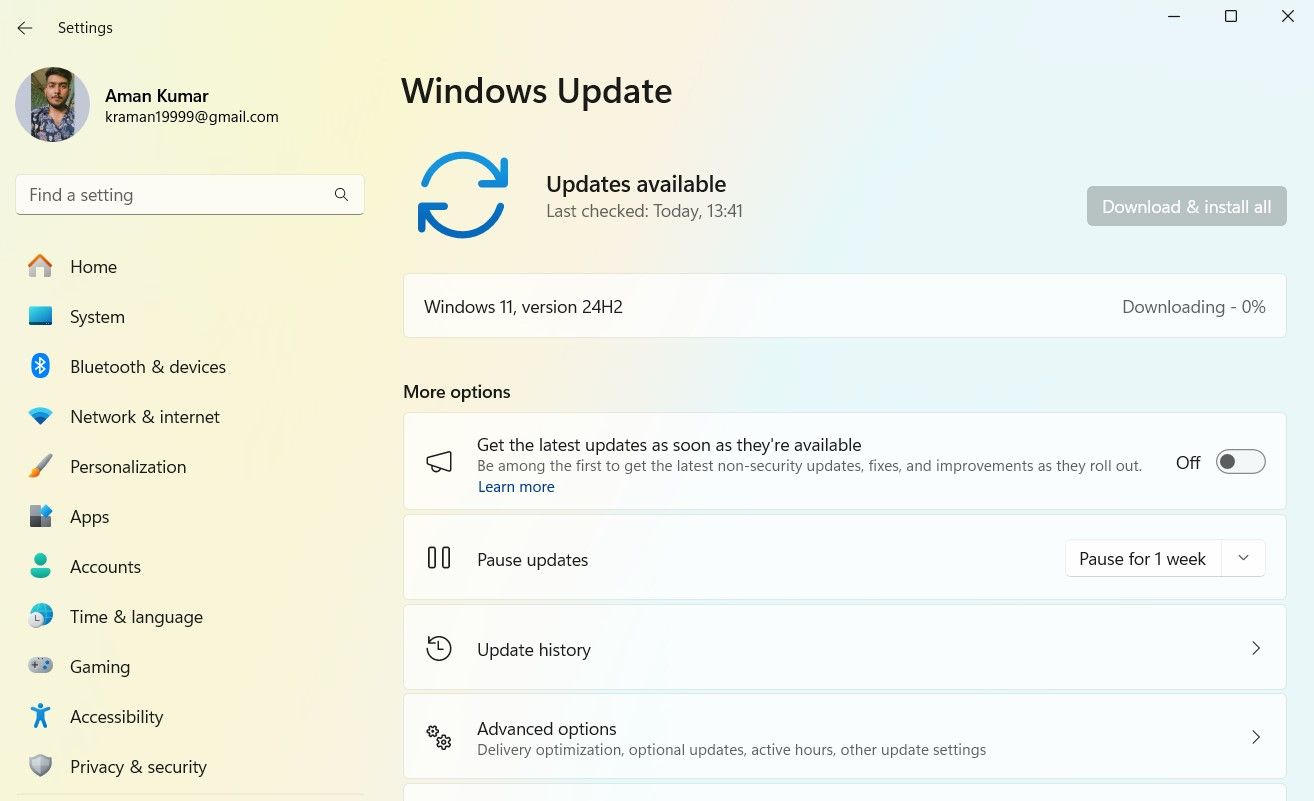
The best way to get the Windows 11 24H2 update is through the standard method used for any other Windows update. First, make sure you’re connected to the internet, then open the Settings app on your computer. Click on the “Windows Update” option in the left sidebar, and select the “Check for Updates” button on the right.
Windows will start searching for any available updates, and if your computer is compatible with the 24H2 update, it will appear. Click the “Download & Install” button next to the update.
Windows will begin the download process, and once it’s complete, the update will be installed automatically. However, since this is a major version update, it will take more time to install compared to a regular update.
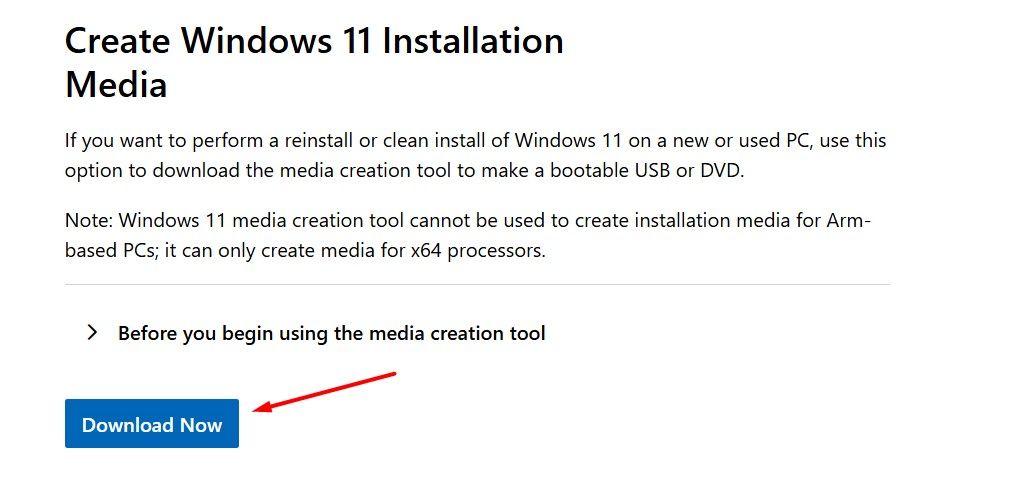
Another way to get the latest version update is by using the Media Creation Tool. This tool lets you create and install installation media using a flash drive, which you can then use to reinstall Windows on a device or upgrade Windows on your system.
To get the 24H2 update using the Media Creation Tool, first, insert a bootable USB drive of at least 8 GB into your computer. Then, visit the official Windows 11 download page and click the “Download Now” button under the Create Windows 11 Installation Media option.
After that, create the bootable USB drive. Once it’s ready, set your computer to boot from the inserted USB drive instead of the hard drive installed on your computer. You can then install the downloaded 24H2 update on your device.
Microsoft is gradually rolling out the 24H2 update, so it might take some time for your computer to receive it. If you want to get the update right away, you’ll need to make a registry edit. You can also modify the registry if you want to receive the update even if your computer isn’t officially compatible. However, this can be risky for your computer, so only proceed if you’re willing to take the risk, as it could potentially damage your system.
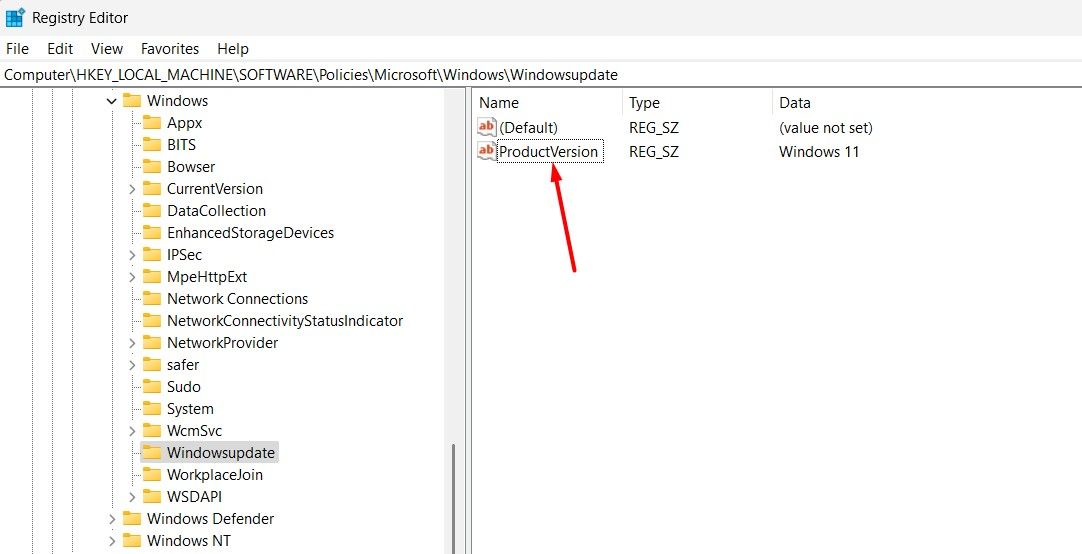
To make the registry edit, open the Registry Editor and navigate to the following location:
Computer\HKEY_LOCAL_MACHINE\SOFTWARE\Policies\Microsoft\Windows\WindowsupdateRight-click on the “WindowsUpdate” key on the left, hover over “New”, and select “String Value.” Name this value ProductVersion.
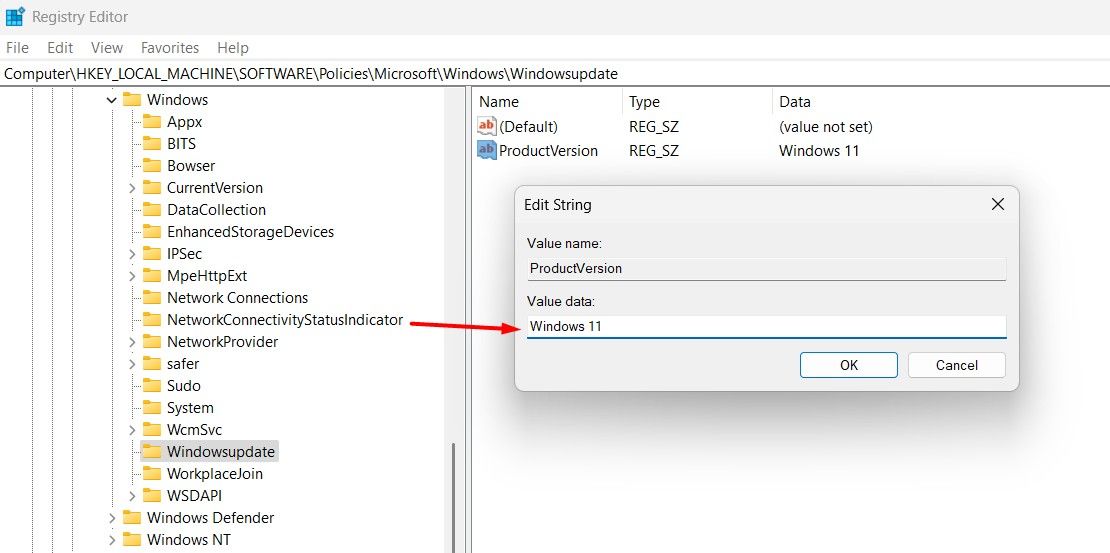
Double-click “ProductVersion,” enter Windows 11 in the Value data field and click “OK.”
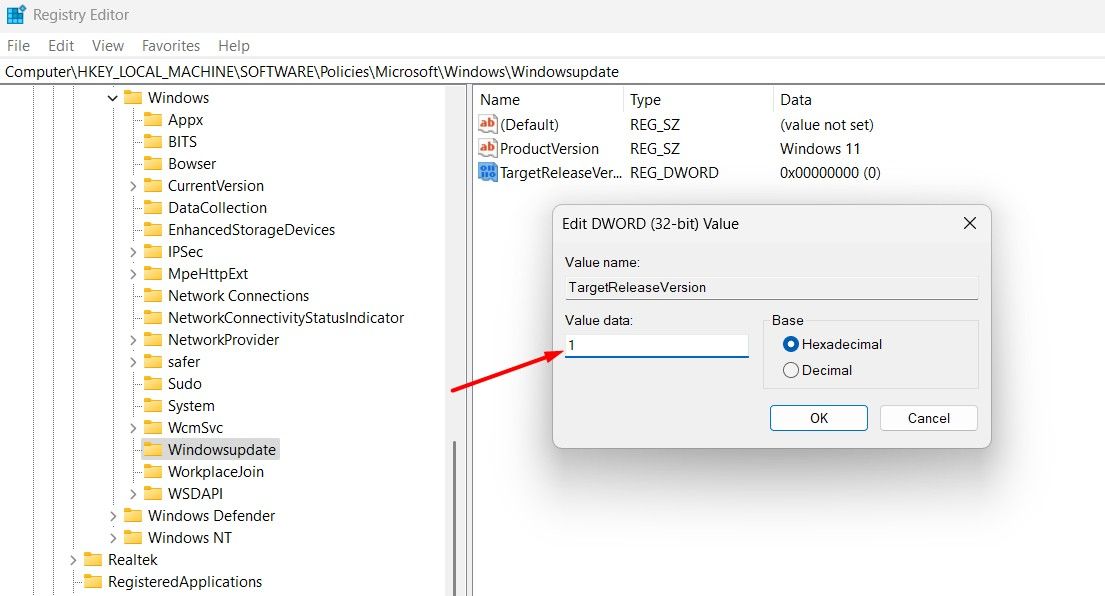
Right-click the “WindowsUpdate” key again, select “New,” and then choose “DWORD (32-bit) Value.” Name this value TargetReleaseVersion.
Double-click “TargetReleaseVersion,” type 1 in the Value data field and click “OK.”
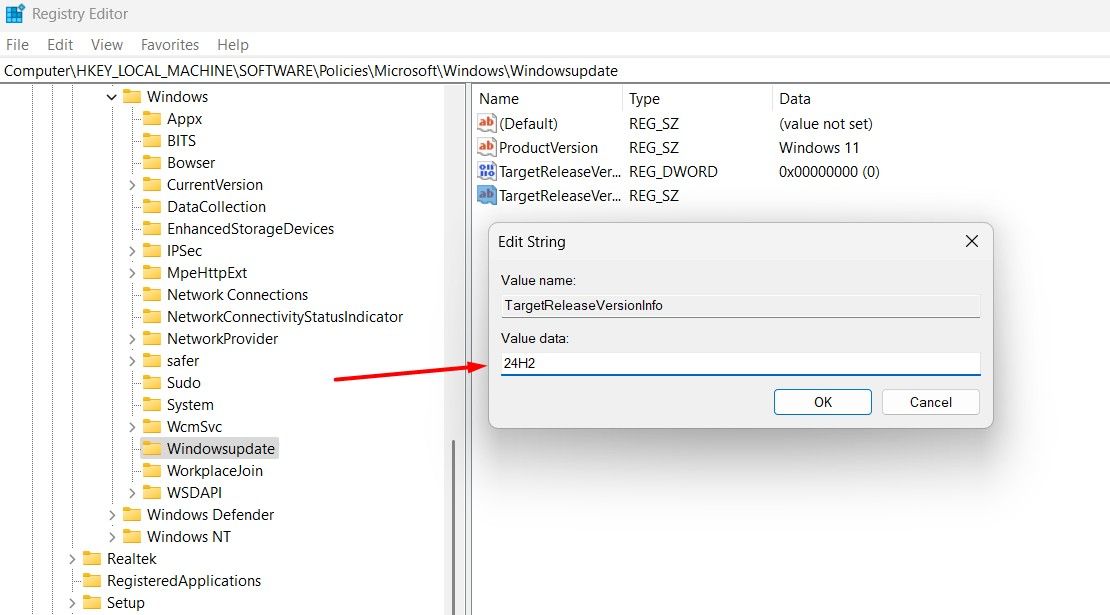
Right-click the “WindowsUpdate” key once more, select “New,” and choose “String Value.” Name this value TargetReleaseVersionInfo.
Double-click “TargetReleaseVersionInfo,” type 24H2 in the Value data field and click “OK.”
After completing these steps, restart your PC and check for updates. You should now receive the 24H2 update on your computer.
If you notice that the update is very buggy and causing issues on your system, you can roll back to the previous build that was installed and wait for Microsoft to officially make the update available for your device. To do this, open the Settings app and go to System > Recovery > Go Back.
These are all the ways you can download and install the Windows 11 24H2 update on your computer. Once the update is installed, you can explore the new features, including support for new archive formats, an upgraded battery saver mode, and many other enhancements. If you’re a Copilot+ PC user, check out the AI-exclusive features like Windows Recall, Studio Effects, and more.

