Situatie
In a galaxy far far away, in a time period before the Unity desktop ever existed it was possible to install Ubuntu using a Windows application called WUBI.
WUBI worked like any other application installer and when you booted your computer you could choose whether to use Windows or Ubuntu.
Installing Ubuntu in this way was much easier than the way we do things now as the common methods used today are to dual boot on separate partitions or run Ubuntu in a virtual machine. (There are many different virtual machine software programs to from which to choose)
Ubuntu dropped support for WUBI a long time ago and it is not part of the ISO image any longer, however, there is still an active WUBI project and in this guide, we’ll show you how to install Ubuntu using WUBI and how to boot from it.
Solutie
How to Get WUBI
You can get WUBI from https://github.com/hakuna-m/wubiuefi/releases.
How to Install Ubuntu Using WUBI
Installing Ubuntu using WUBI is incredibly straightforward.
Double-click on the downloaded WUBI executable and click Yes when asked whether you want it to run via Windows security.
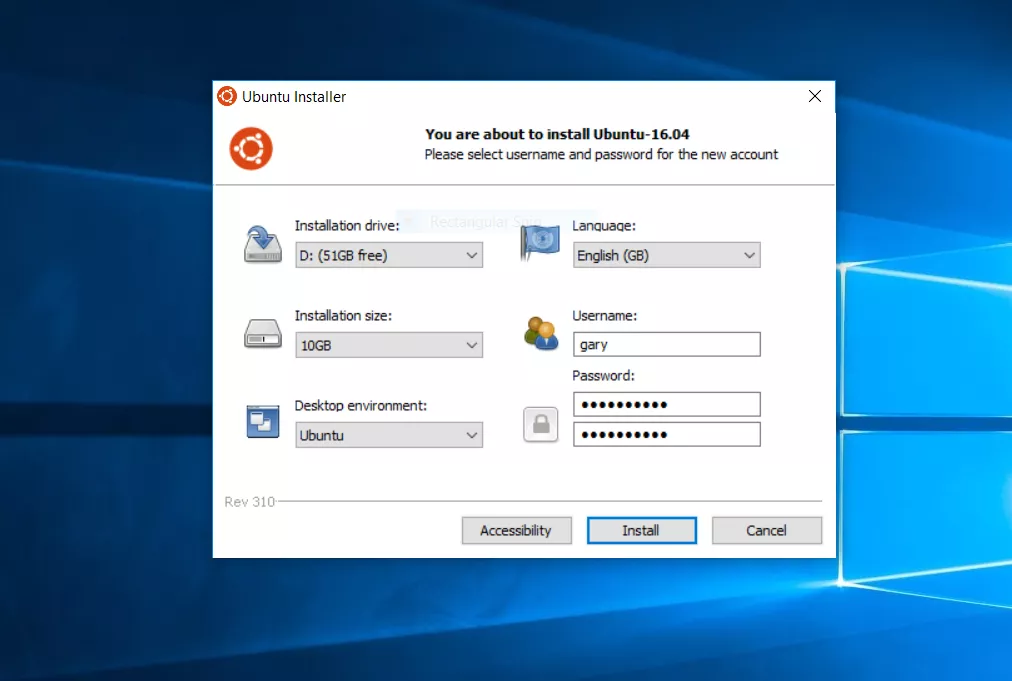
- Choose the drive you wish to install Ubuntu to by selecting the appropriate drive under Installation Drive.
- Choose how much disk space to set aside for Ubuntu by selecting the size under the Installation Size.
- Choose the desktop environment from the drop-down list. This list is slightly misleading. For the default Ubuntu with Unity desktop stick with Ubuntu. Ubuntu GNOME has the GNOME desktop environment which is very similar to Unity. Kubuntu uses the KDE Plasma desktop environment, Xubuntu uses the lightweight and highly customizable XFCE desktop environment, Lubuntu uses the lightweight LXDE desktop environment. There are various other options that are less well known.
- Choose the language to be used for Ubuntu by selecting it from the drop-down.
- Enter the default username for using with Ubuntu.
- Enter the password and repeat it in the box underneath.
- Click Install.
How to Boot Into Ubuntu
The UEFI version of WUBI installs Ubuntu to the UEFI boot menu which means by default you won’t see it when you boot your computer.
- Acer – Esc, F9, F12
- ASUS – Esc, F8
- Compaq – Esc, F9
- Dell – F12
- EMachines – F12
- HP – Esc, F9
- Intel – F10
- Lenovo – F8, F10, F12
- NEC – F5
- Packard Bell – F8
- Samsung – Esc, F12
- Sony – F11, F12
- Toshiba – F12
Leave A Comment?