Situatie
If you don’t use a printer anymore and wish to remove it, or you want to uninstall and reinstall a printer to fix its problems, both Windows 11 and Windows 10 make it super easy to uninstall printers.
Solutie
Uninstall the Printer Using the Settings App
If you’re on a Windows 11 PC, head into Settings > Bluetooth & Devices > Printers & Scanners. On Windows 10, navigate to Settings > Devices > Printers & Scanners.
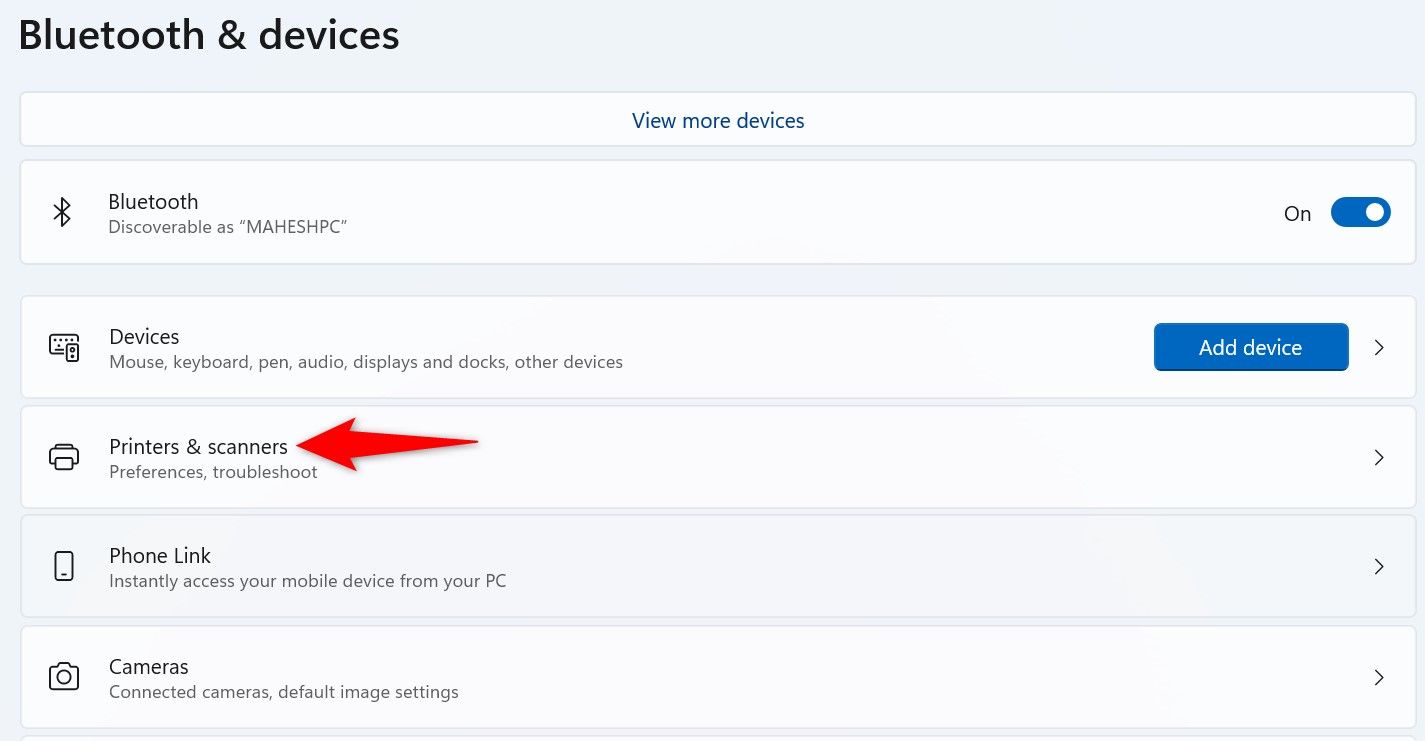
Find and select the printer to remove. On Windows 11, choose “Remove.” On Windows 10, select “Remove Device” and click “Yes.”
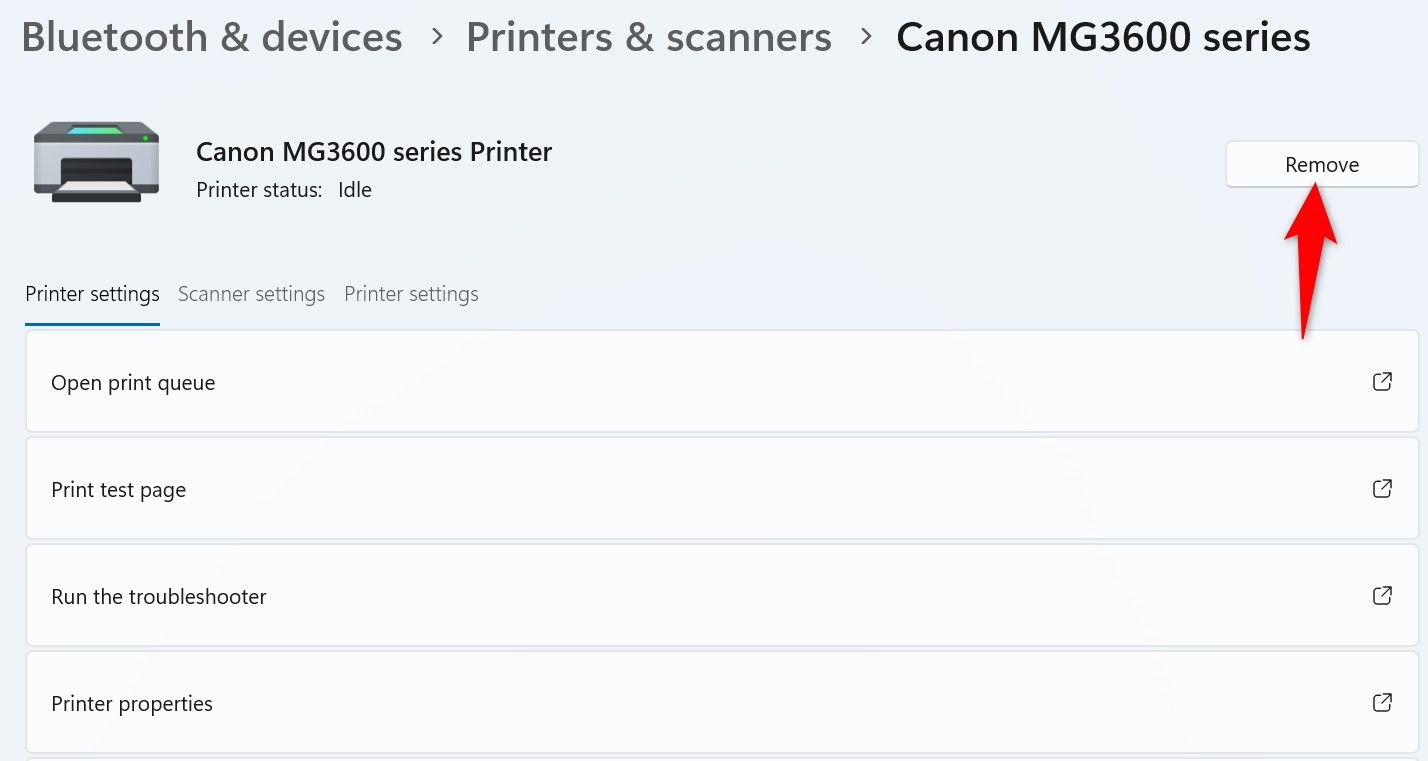
Windows has removed the selected printer.
Uninstall a Printer Using Device Manager
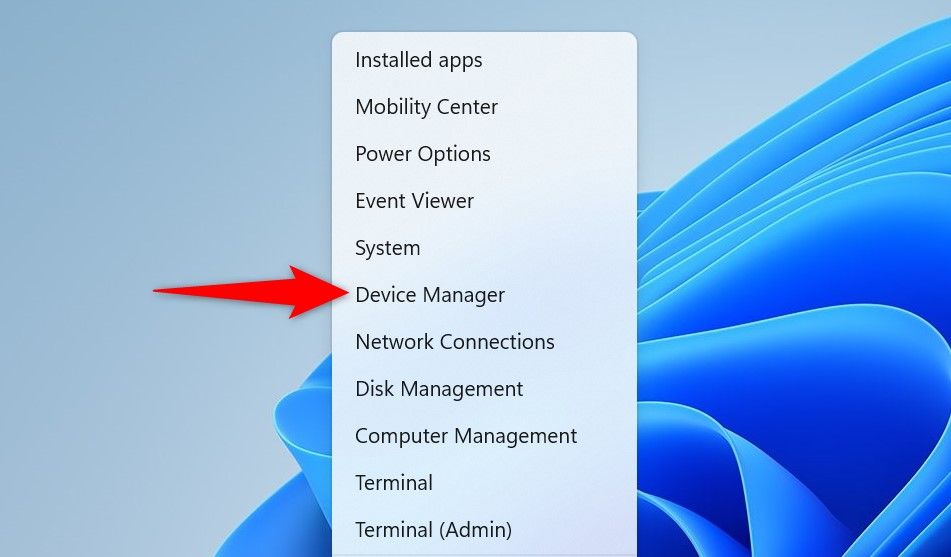
To remove a Printer with Device Manager, first open Device Manager by right-clicking the Start Menu icon and selecting “Device Manager.”
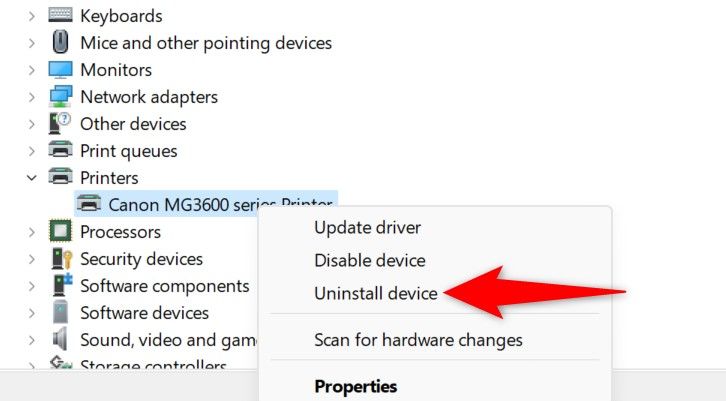
Select “View” in the menu bar, then enable “Show Hidden Devices” to ensure your printer appears even if it’s hidden.

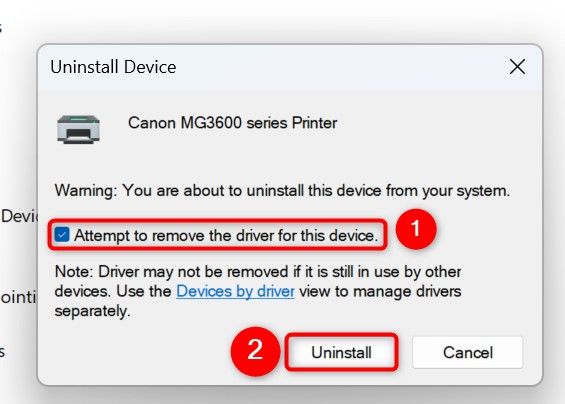
In the same window, expand “Printers” and find your printer. If you can’t find your printer, expand “Print Queues” and look for it there. Once you’ve located it, right-click the printer’s name and select “Uninstall Device.”
In the “Uninstall Device” window, enable the “Attempt to Remove the Driver for This Device” (Windows 11) or “Delete the Driver Software for This Device” (Windows 10) option. Then, click “Uninstall.”
Wait while Device Manager uninstalls the selected printer. Then, bring the changes into effect by restarting your Windows 11 or Windows 10 PC.
Use PowerShell to Remove a Printer
Open the Start Menu, search for PowerShell, and select “Run as Administrator.”
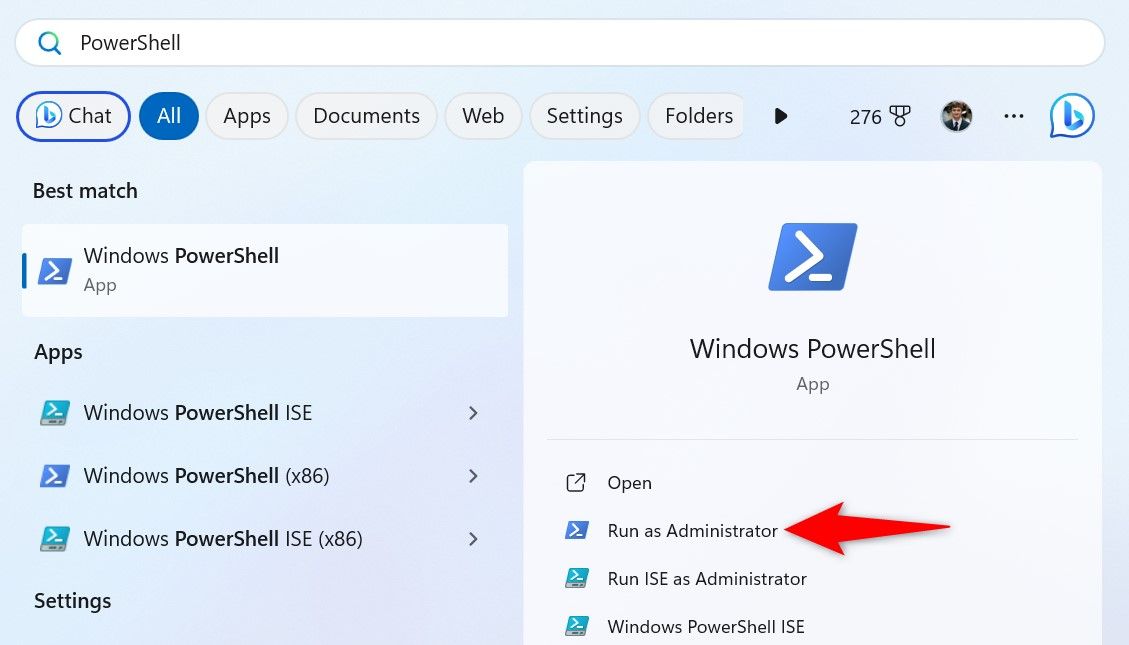
In the User Account Control (UAC) prompt, select “Yes.”
In PowerShell, list the available printers by typing the following command and pressing Enter:
Get-Printer
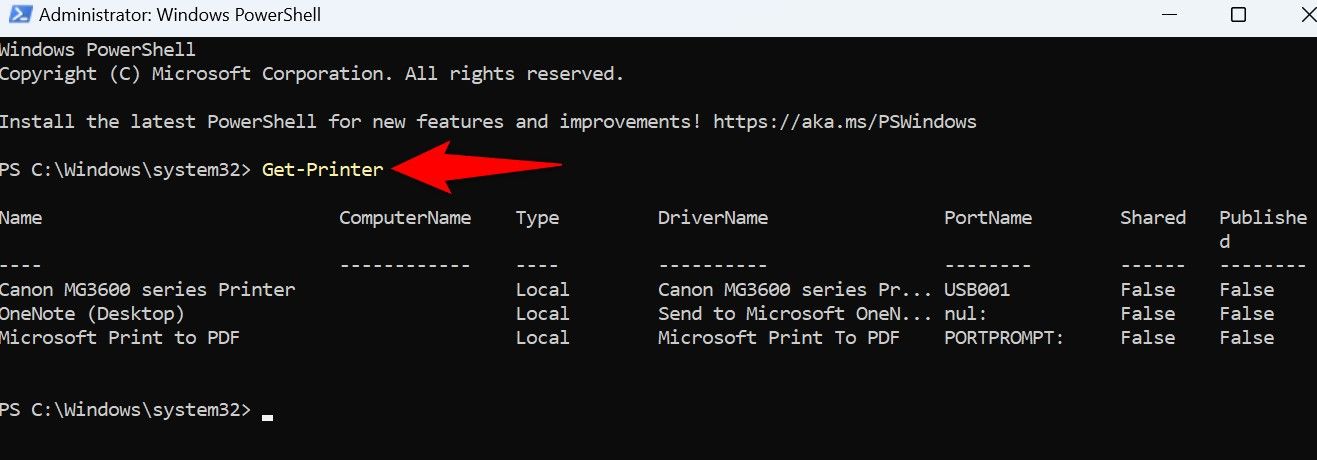
From the listed printers, note the name of the printer you want to remove. Then, type the following command, replacing “PrinterName” with the noted name, and press Enter. Make sure the printer’s name is enclosed in double quotes.
Remove-Printer -Name “PrinterName”
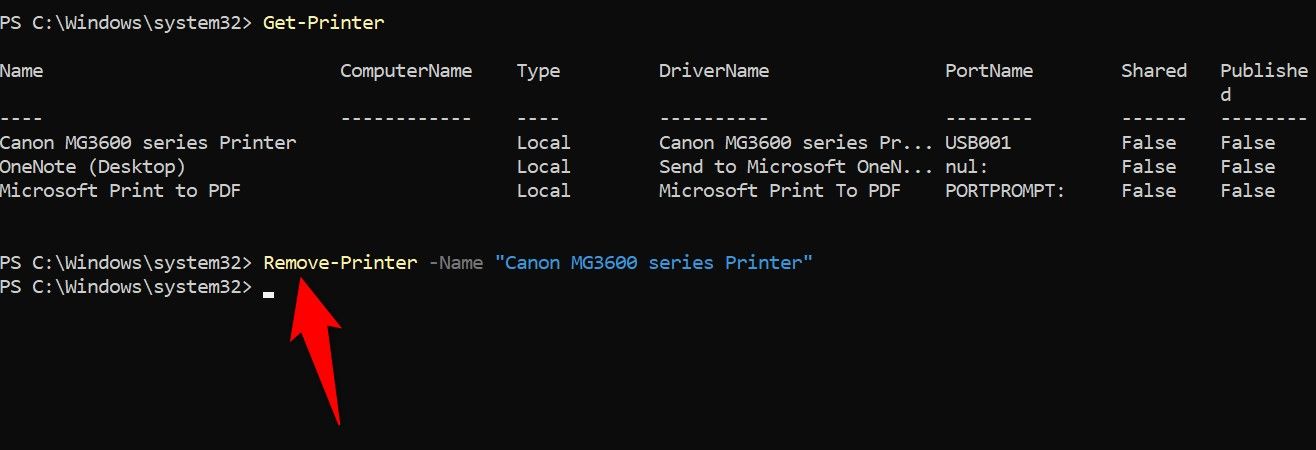
PowerShell has removed the specified printer. You can run Get-Printer again to confirm that it has been removed.
Delete the Printer’s Installed Apps
Most printers (if not all) install their own manufacturer apps when you add a printer to your PC. If you’ve gotten rid of your printer for good, you should remove these installed apps as well. Here’s how to do that.
On Windows 11
Open Settings using Windows+i and navigate to Apps > Installed apps.
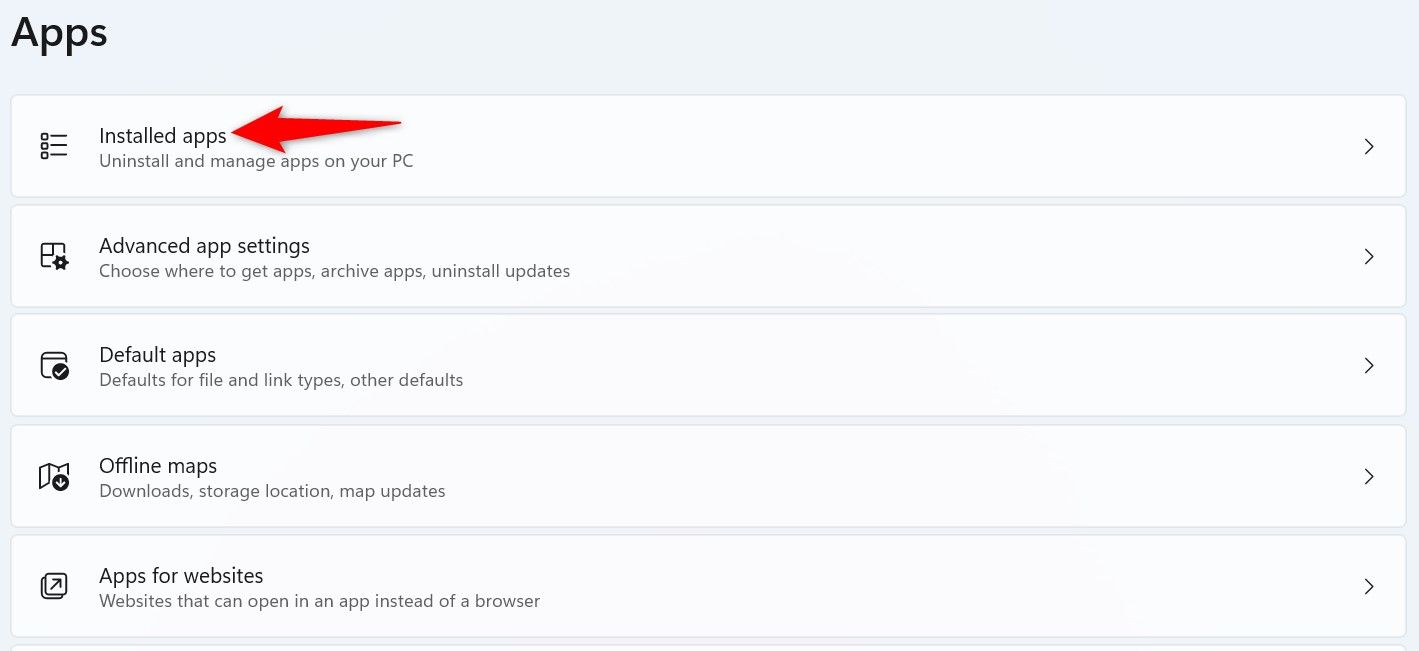
Find your printer’s app on the list. Next to the app, click the three dots and choose “Uninstall.”
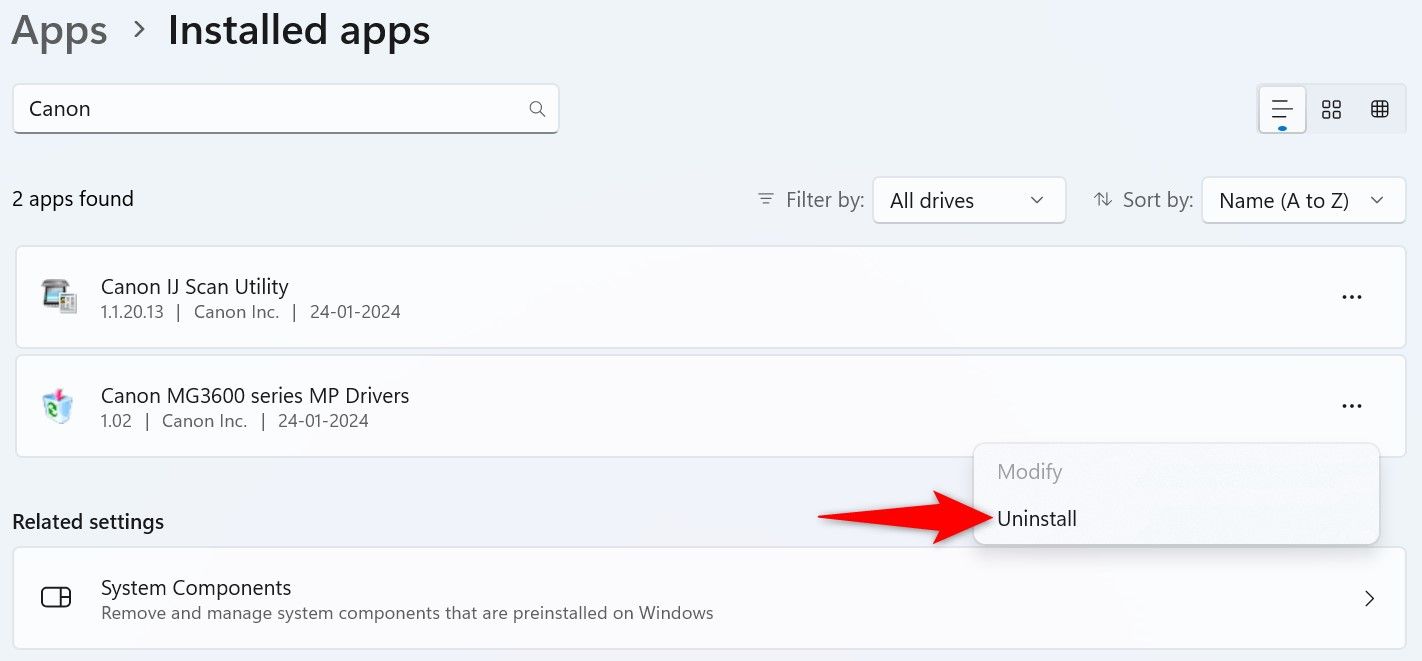
Select “Uninstall” in the prompt.
On Windows 10
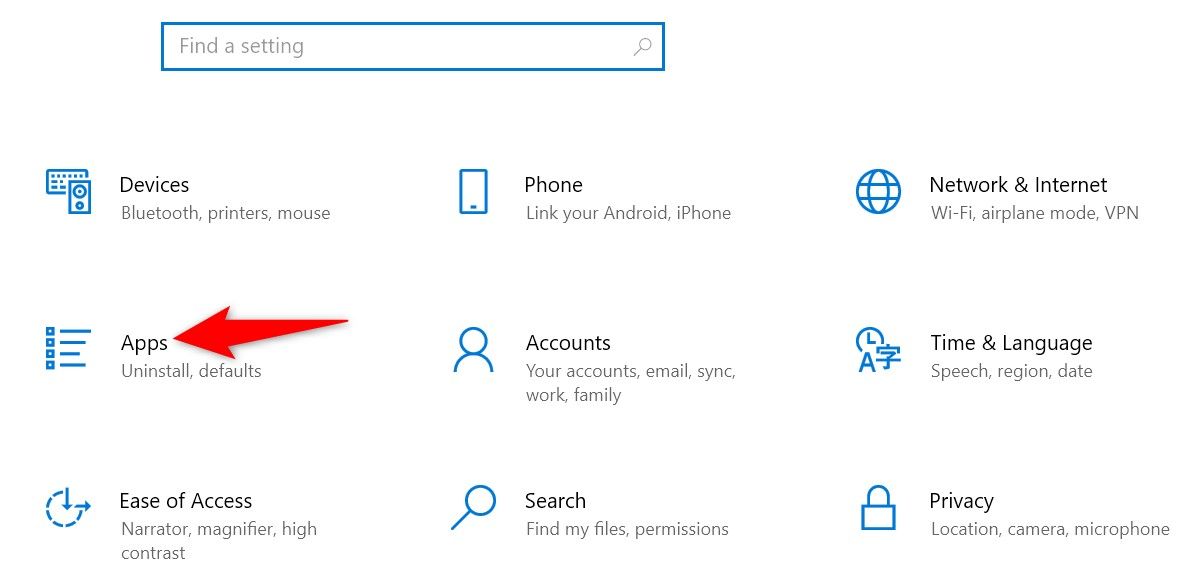
Launch Settings using Windows+i and select “Apps”
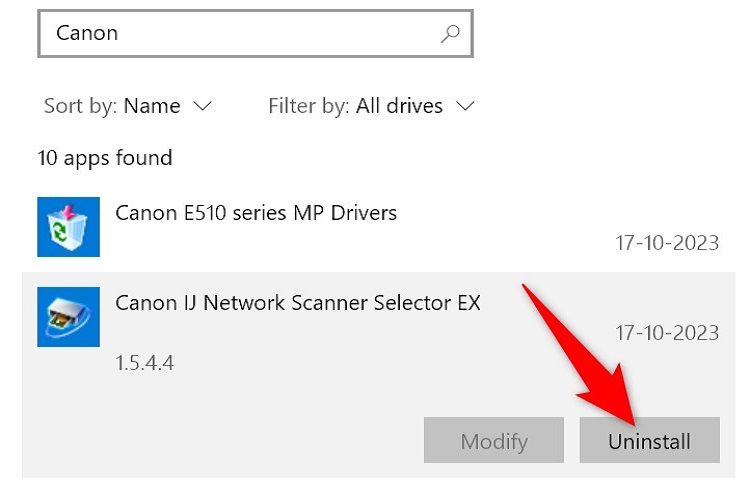
Find and select your printer app on the list. Choose “Uninstall” and select “Uninstall.”
Clean Up the Print Spooler and Leftover Registry Keys
After removing the printer, clean up any pending print jobs and leftover registry keys. This ensures all traces of your printer are gone from your PC.
Clean Up the Print Spooler
Open Run by pressing Windows+R, type the following command, and press Enter:
services.msc
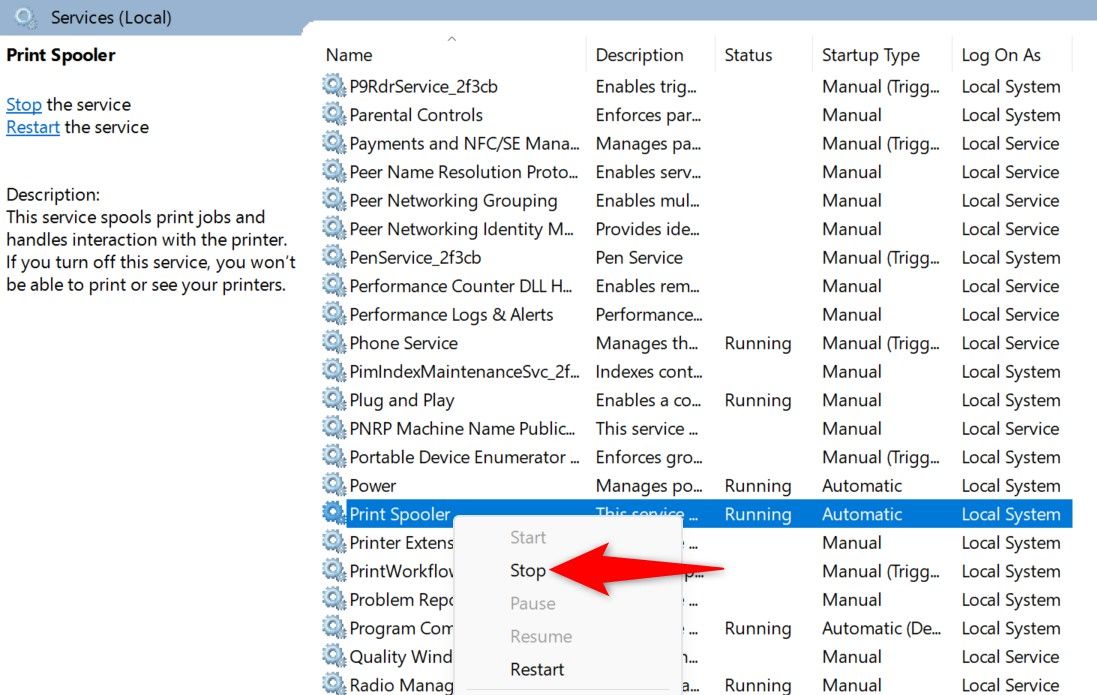
Find the service named Print Spooler. Right-click it and select “Stop.” Keep the Services window open.
Open Run again (using Windows+R), type the following path, and press Enter:
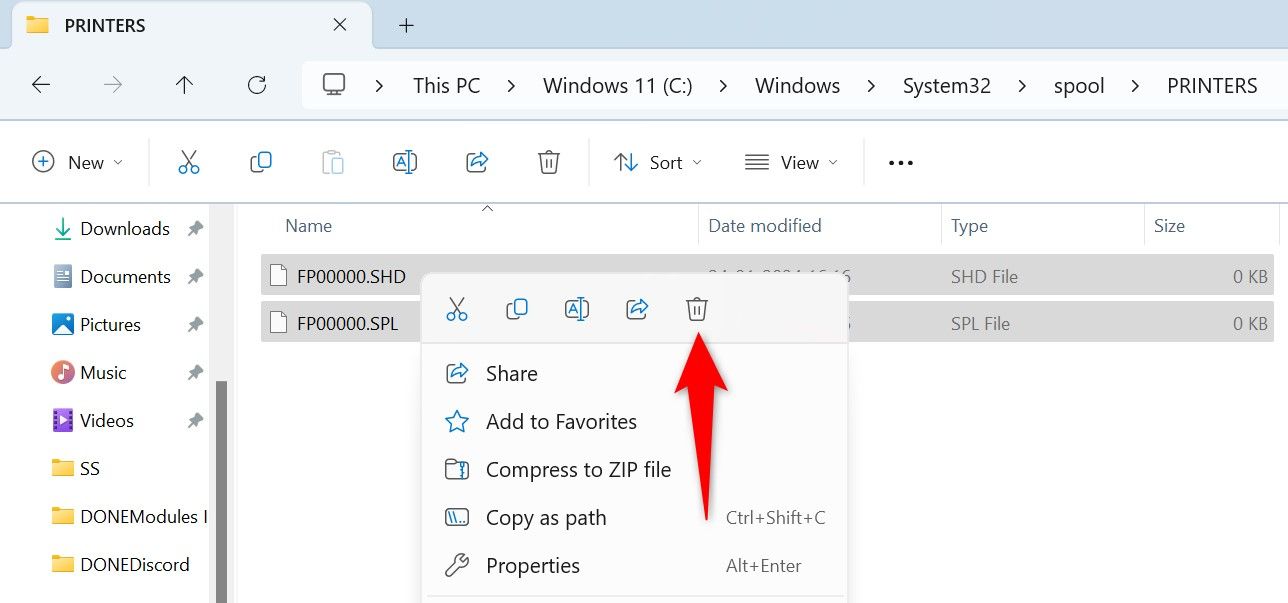
C:\Windows\System32\spool\PRINTERS
Enable hidden items in File Explorer. On Windows 11, from the top bar, select View > Show and click “Hidden Items.” On Windows 10, open the “View” tab and enable “Hidden Items.” Select all files in the folder by pressing Ctrl+A, right-click a selected file, and choose the trash can icon (or “Delete” on Windows 10).
Return to the Services window we opened previously, right-click “Print Spooler” again, and select “Start.”
Remove the Deleted Printer’s Leftover Registry Keys
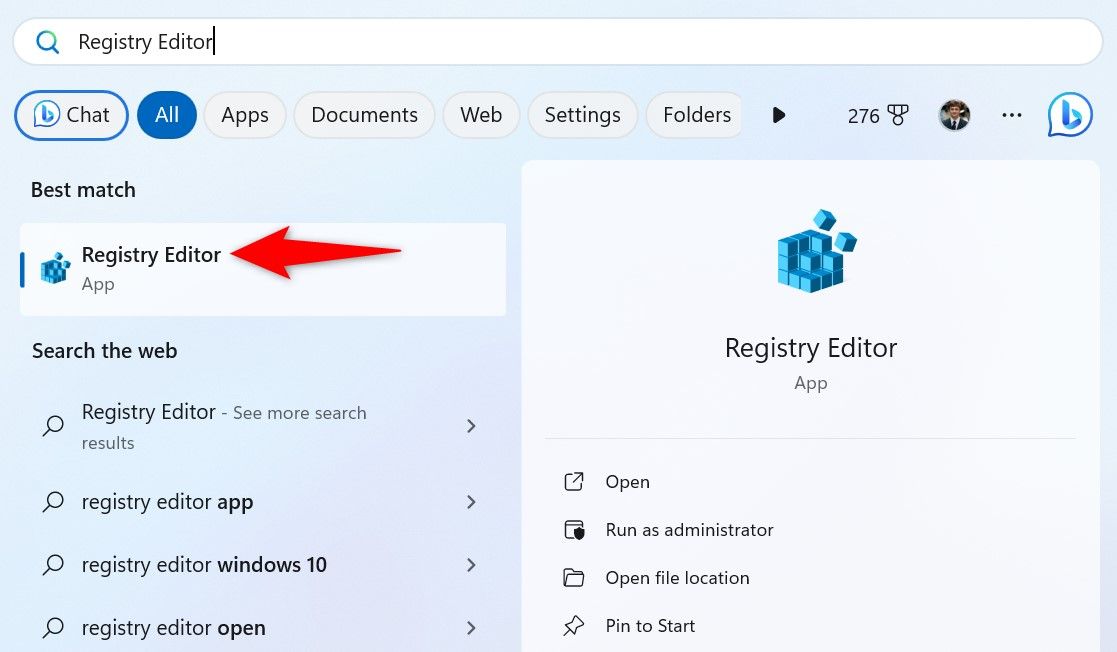
Open the Start Menu, search for Registry Editor, and launch the utility.
In the User Account Control prompt, select “Yes.”
Navigate to the following path in Registry Editor or paste it into the address bar:
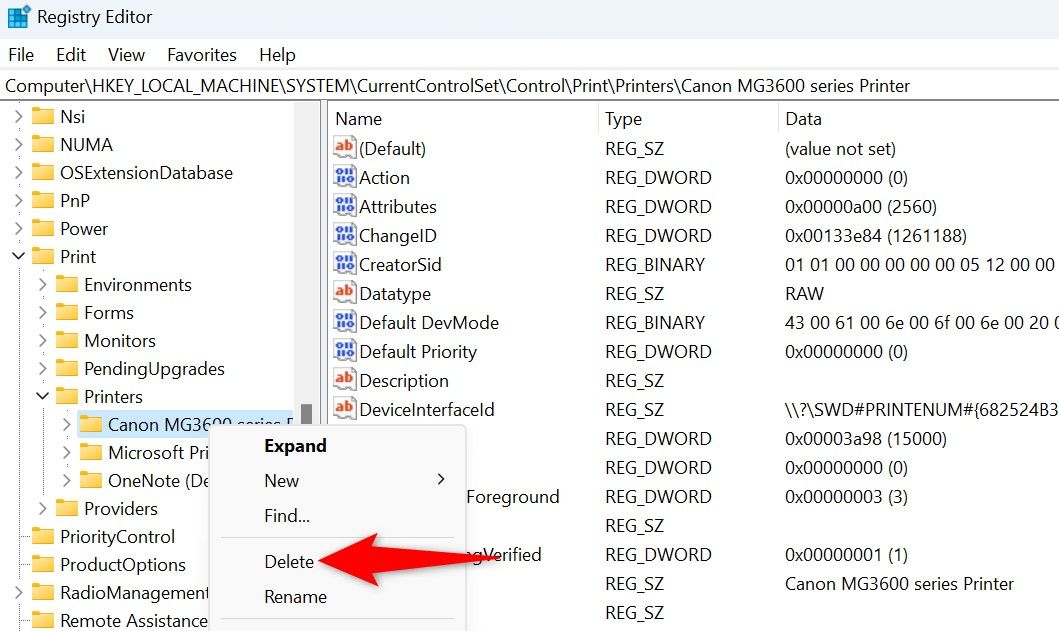
HKEY_LOCAL_MACHINE\SYSTEM\CurrentControlSet\Control\Print\Printers
In the left sidebar, find the folder for your printer. It should have your printer’s name. Right-click the folder and select “Delete.”
Quit Registry Editor and restart your computer. And you’ve successfully removed a printer from your Windows machine.
Leave A Comment?