Situatie
If you’re experiencing internet problems or your PC just won’t connect to Wi-Fi, resetting the network settings can help fix the problem.
Solutie
Pasi de urmat
How to Reset Network Settings
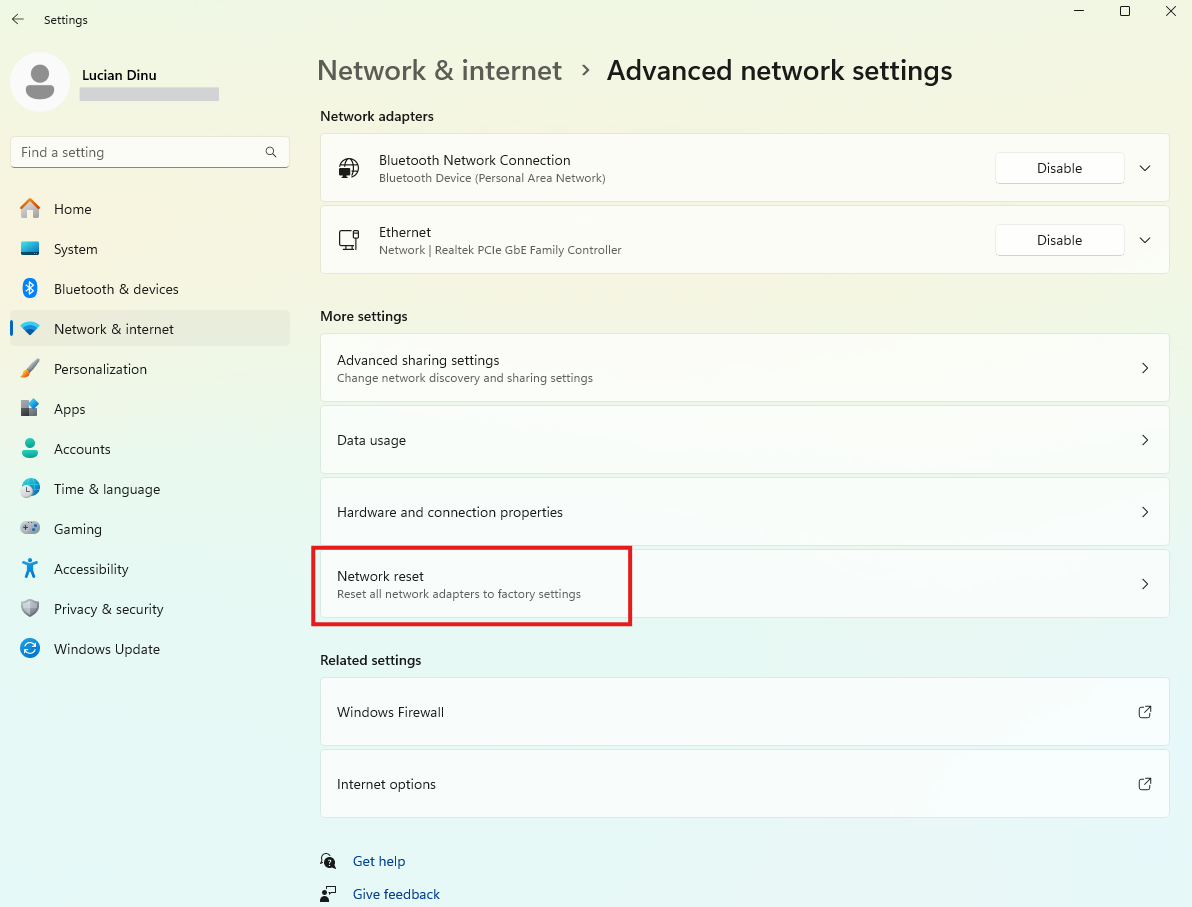
To perform the network reset process on Windows 11, launch Settings by pressing Windows+i. From the left sidebar, choose “Network & Internet”. On the right pane, select “Advanced Network Settings”.

On the following screen, in the More Settings section, choose “Network Reset”
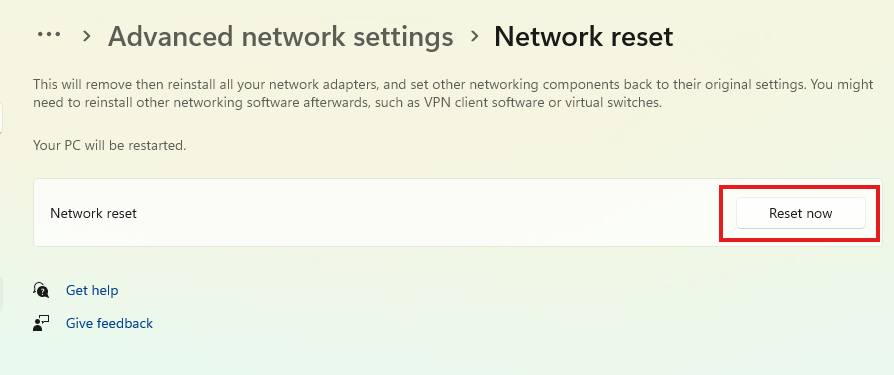
On the following page, next to Network Reset, click “Reset Now”
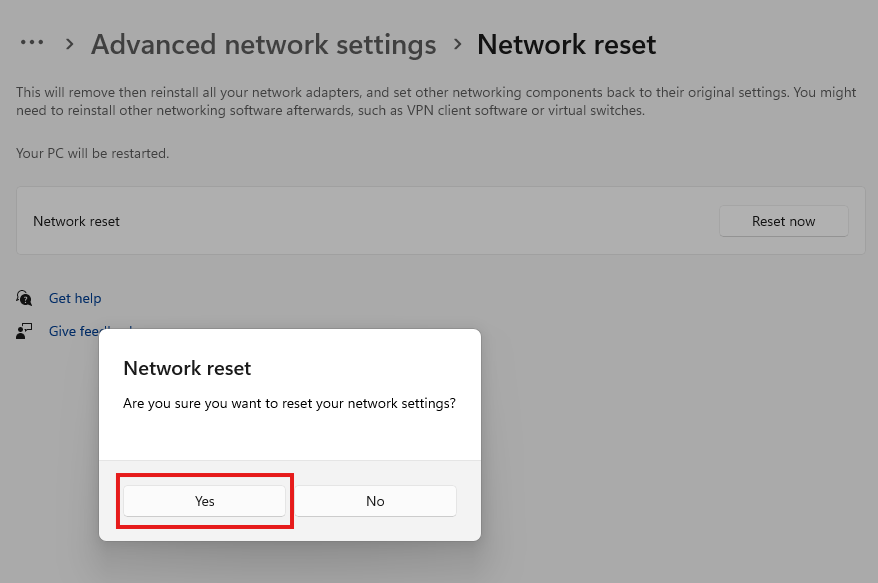
You’ll get a prompt asking if you really want to erase your network settings. Click “Yes” to proceed.
Windows 11 will begin erasing your network settings.
After you’ve reset the network settings, you’ll want to configure a few network options to get connected to the internet. You’ll want to connect to your Wi-Fi networks by selecting them on the Wi-Fi list and entering their passwords. You may also want to install your VPN if you had one before.