Situatie
Solutie
We’ll start with changing your email, as Proton has made it very easy for users of Gmail (or any other email provider) using their “Easy Switch” function. Proton will import all your emails, calendar events, and contacts. All you need to do is do some tweaks to where they will go and what kind of labels they’ll have.
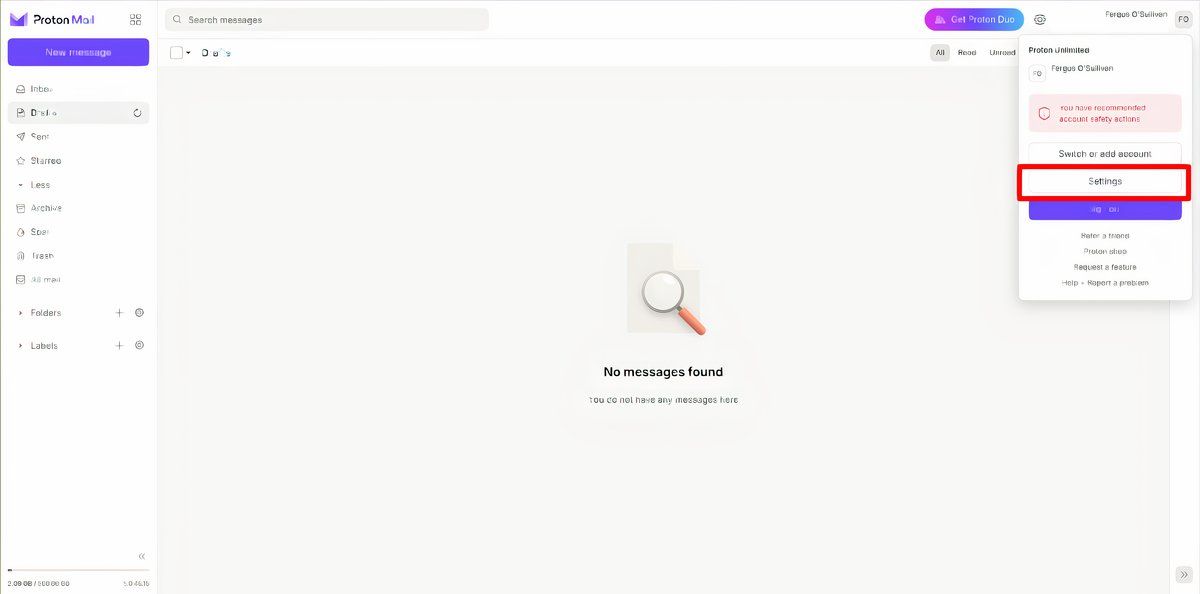
To access Easy Switch, click on your initials at the top right of Proton Mail’s main interface. You’ll get a small menu, click on “Settings.”
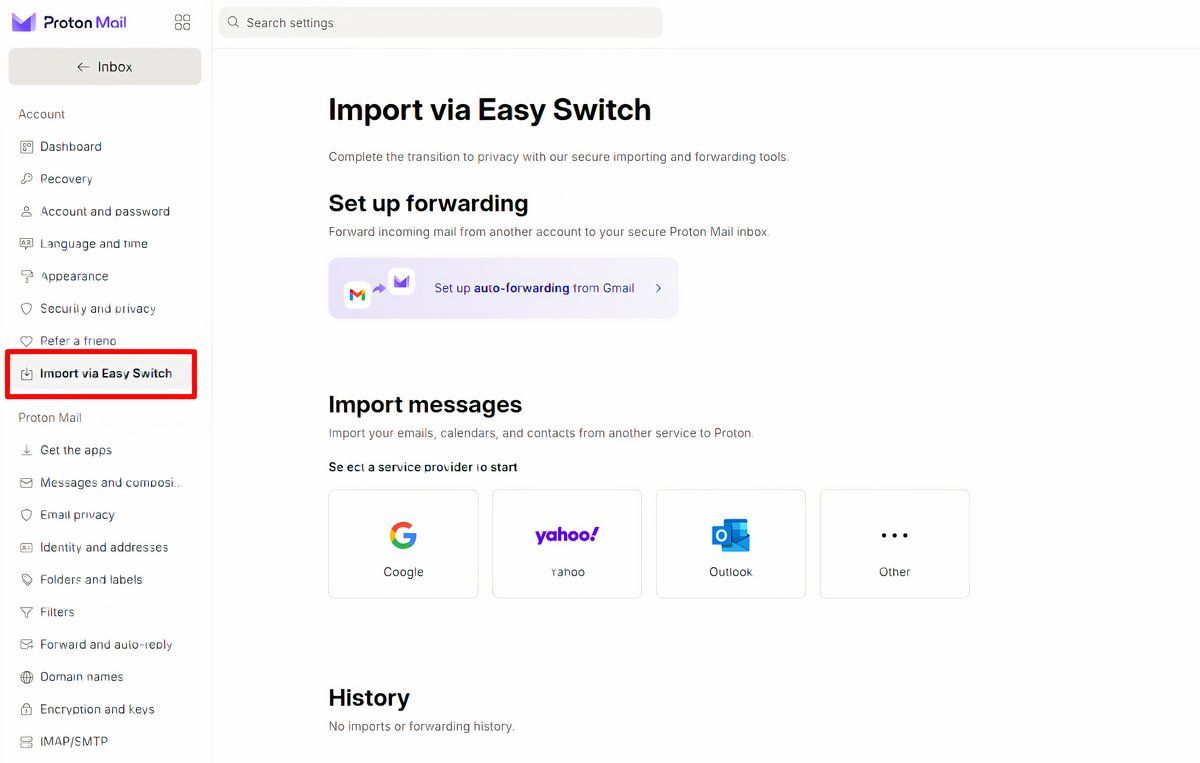
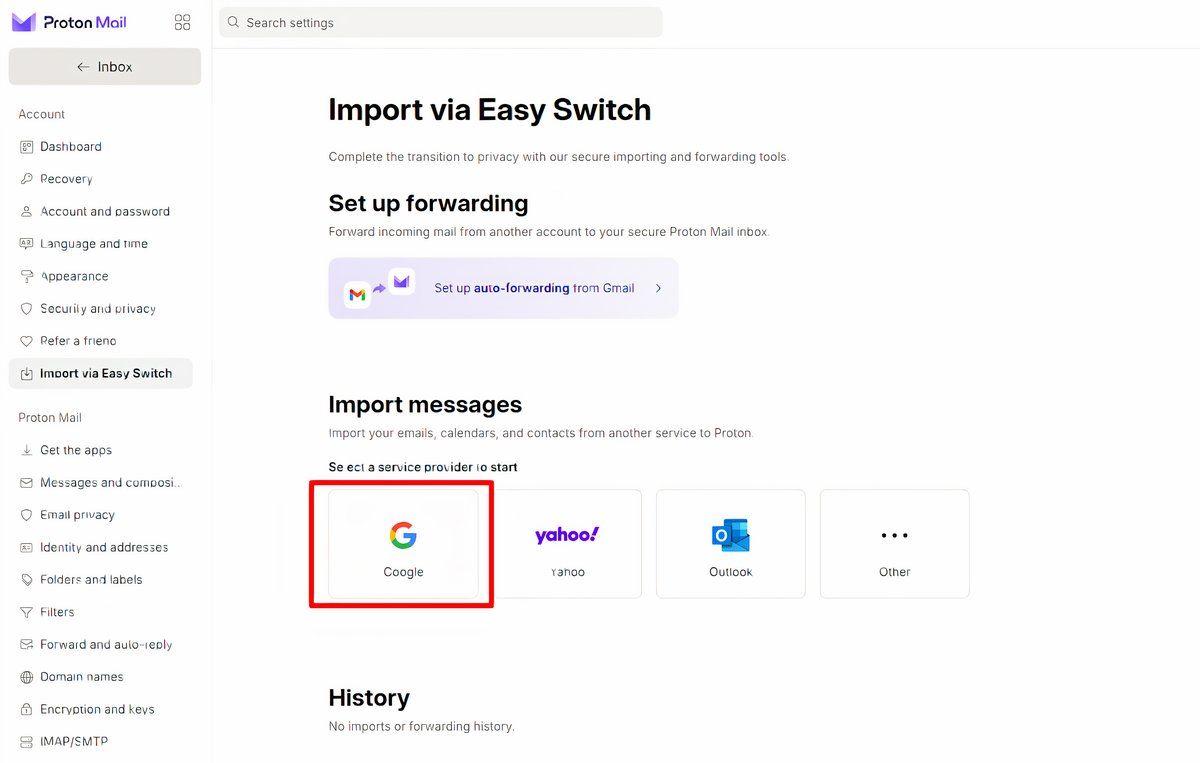
In the new screen, click on “Import via Easy Switch.” There are two things you need to set up here. The first is mail forwarding in case you want any messages sent to your old Gmail address sent to your new Proton address.
Set Up Gmail Forwarding
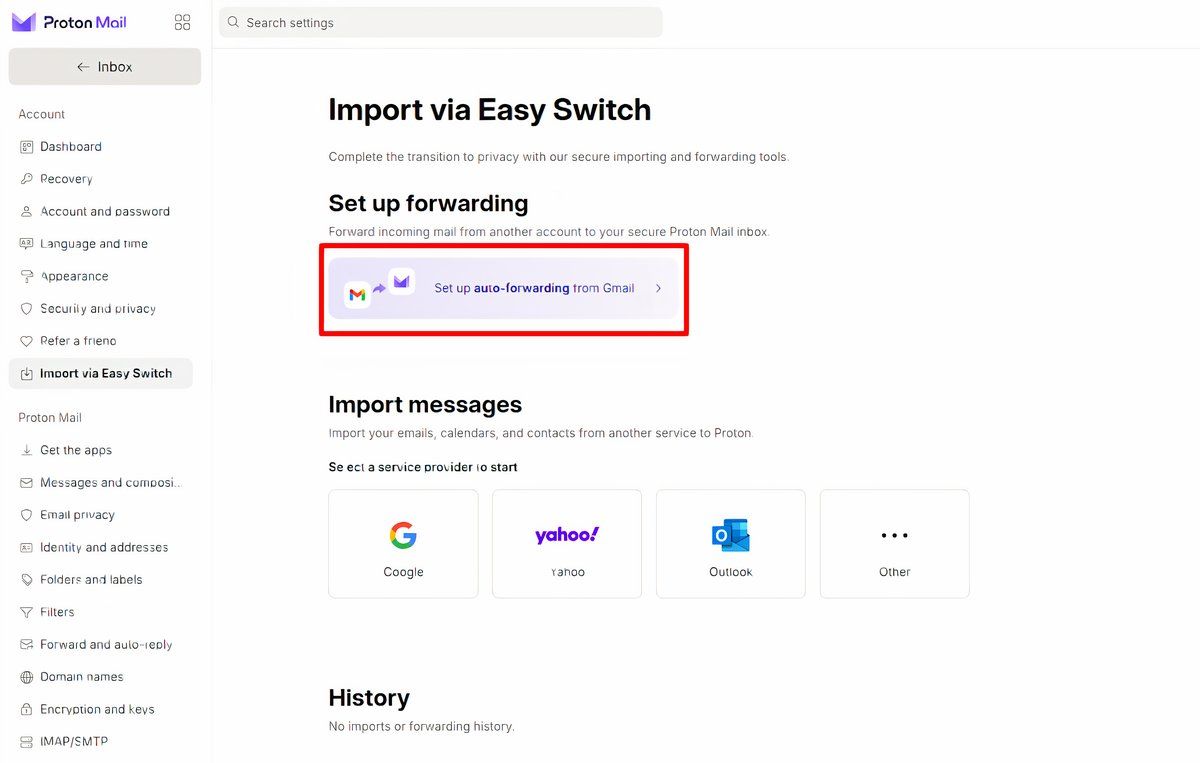
If you plan to keep your old Gmail address around, you can set up mail forwarding. To do so, click on the banner that says “Set up auto-forwarding from Gmail.”
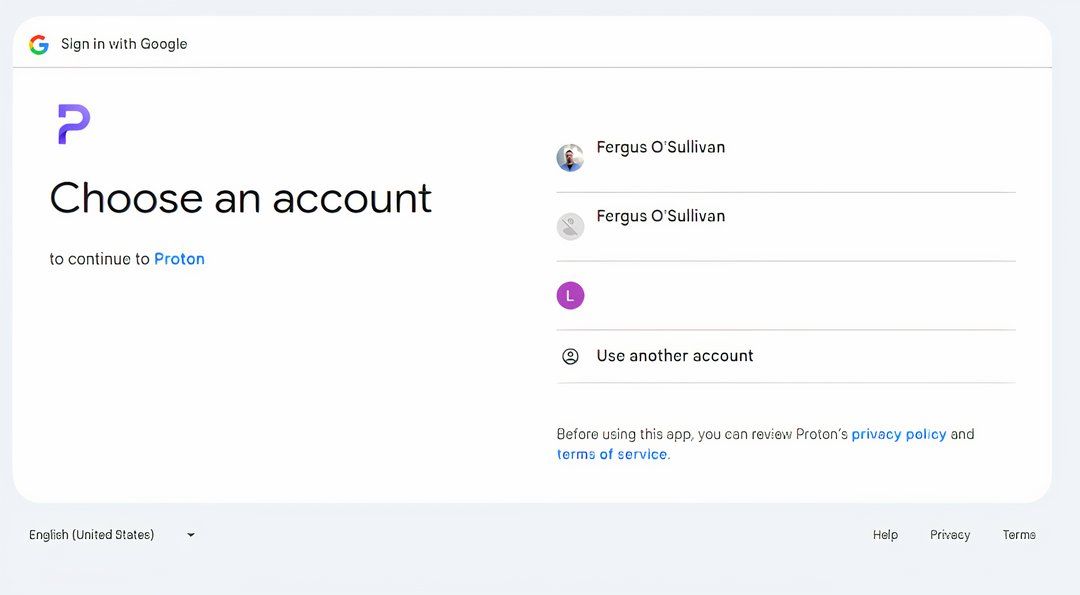
You’ll get a pop-up asking you to sign in to Google, click it, then sign in to the account you want to sign in from.
Next, Gmail will ask you for permission to let Proton access Gmail. Agree, and any email that goes to your Gmail address will also show up in your Proton inbox.
However, that still leaves you with all your emails, not to mention contacts and calendar events, in your old Google account. To transfer these, you need to go to “Import Messages” in the Easy Switch menu and then click on “Gmail.”
You’ll be given a choice of what to transfer. Choose what you want and then click “Start Import.” You’ll be given some instructions, hit “Continue.”
Like with mail forwarding, you can choose which Google account to import from. You can’t choose multiple at the same time, but you can restart the process and do two at the same time (Proton recommends not doing more than that simultaneously).
Log into your account and then choose which services Proton can access. Choose “All,” and you’ll be brought back to Proton. You’ll get an overview of everything you can import.
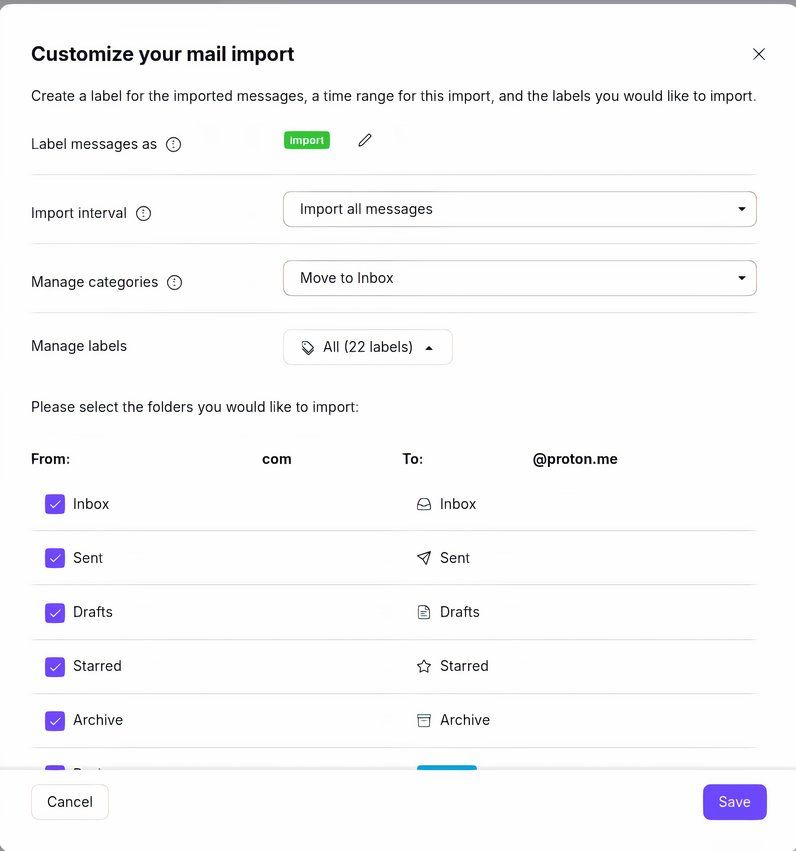
You can customize how all these items are imported. I recommend setting labels very precisely. I set everything to just “import” and had to sort all my emails manually for an hour. Not a huge deal, but be aware.
Once that’s done, start the import. In my case (about 800 emails, give or take) it took roughly 20 minutes for everything to transfer.
Importing your Passwords to Proton Pass
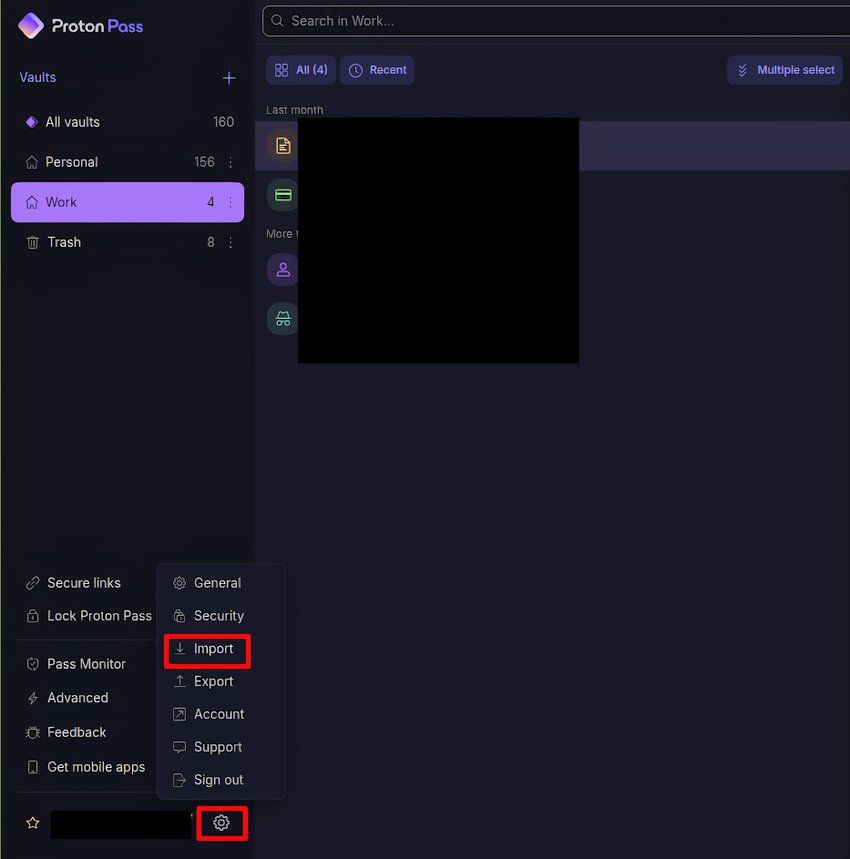
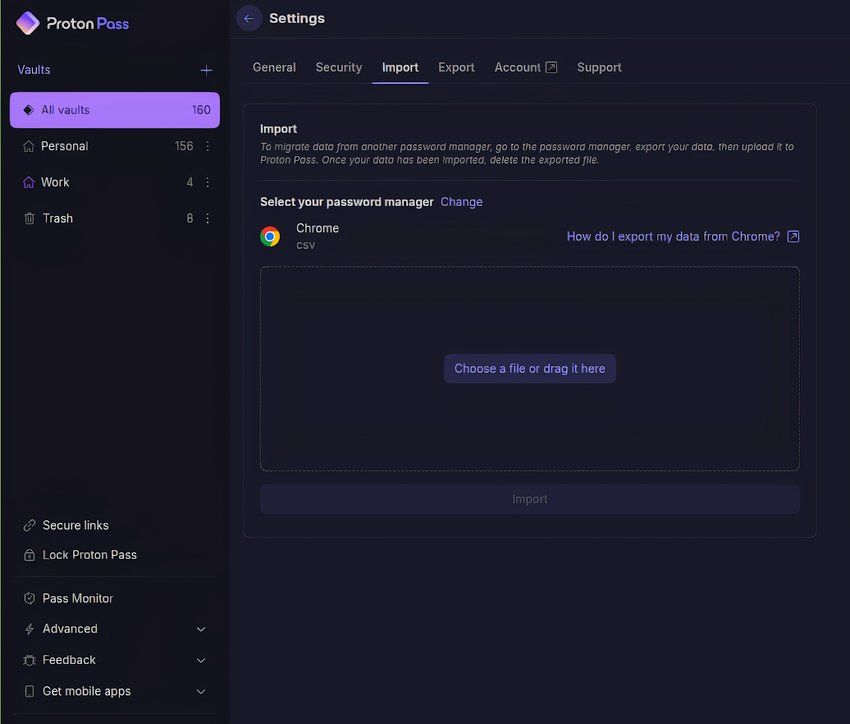
Switching to Proton Pass is even easier than transferring to Proton Mail. First, you should export and delete Chrome passwords. With the CSV file containing your passwords safely on your hard drive, go to Proton Pass, click the gear icon and select “Import.”
I’m using the web interface, but you can find the gear icon also in the Windows app or the browser extension.
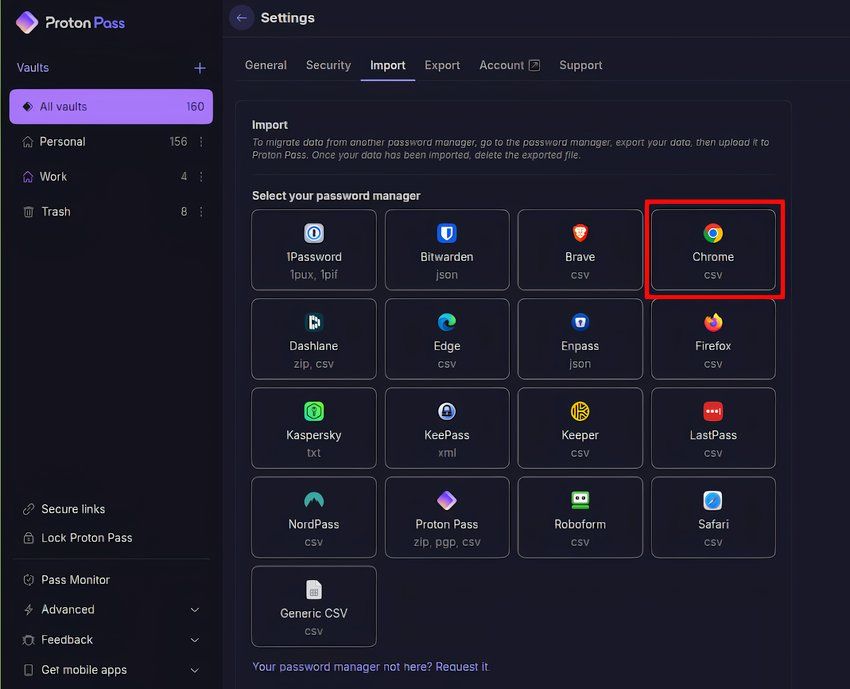
Next, choose Chrome from the list (top right).
Now, drag and drop your CSV file into the dialog box.
Proton Pass will do all the work from here, just make sure to delete the CSV file from your hard drive once you’re done. You do not want a plaintext copy of all of your passwords floating around, it is an enormous security vulnerability.
Switching to Proton Drive
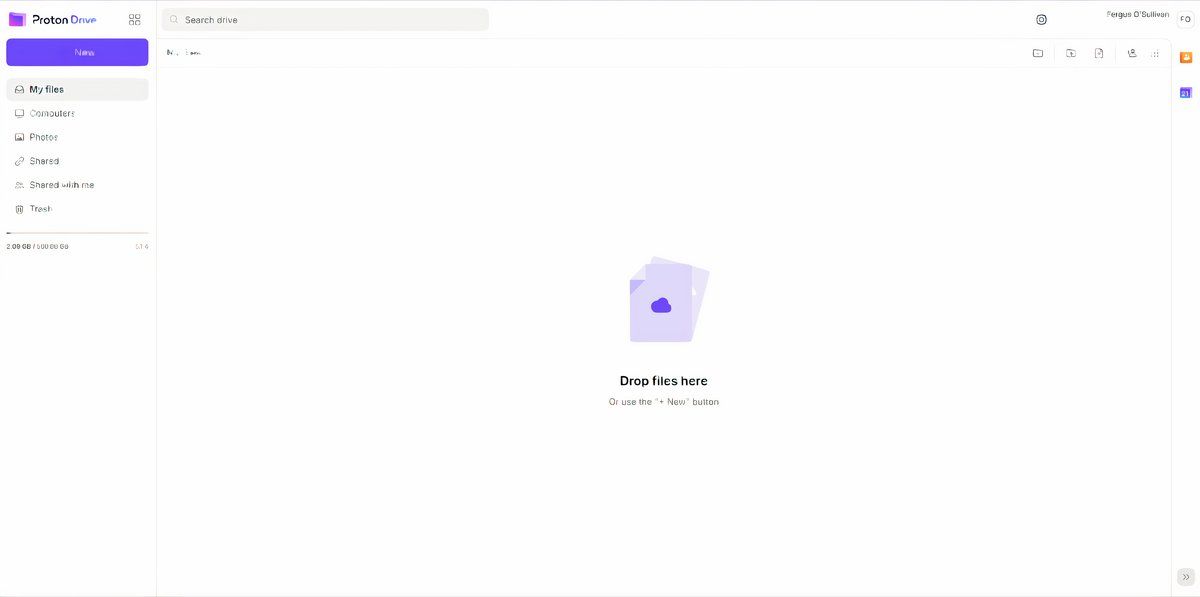
With email and passwords taken care of, let’s take a look at storage. These apps are less streamlined, so you’ll have to do some work here. First, go through all your documents and folders you have in Google Drive and decide what’s worth keeping. Keep in mind that Proton’s document tool is still in its infancy, and you can’t transfer files between the two directly.
Instead, you’ll want to export all your Google Drive files and either upload them into Proton Drive for storage, or keep them on your hard drive so you can work on them still. For the few files that required collaboration, I ended up keeping them in Google Drive, but in a throwaway account. It’s not a great solution, but with the options today, it seems to be the lesser of evils.
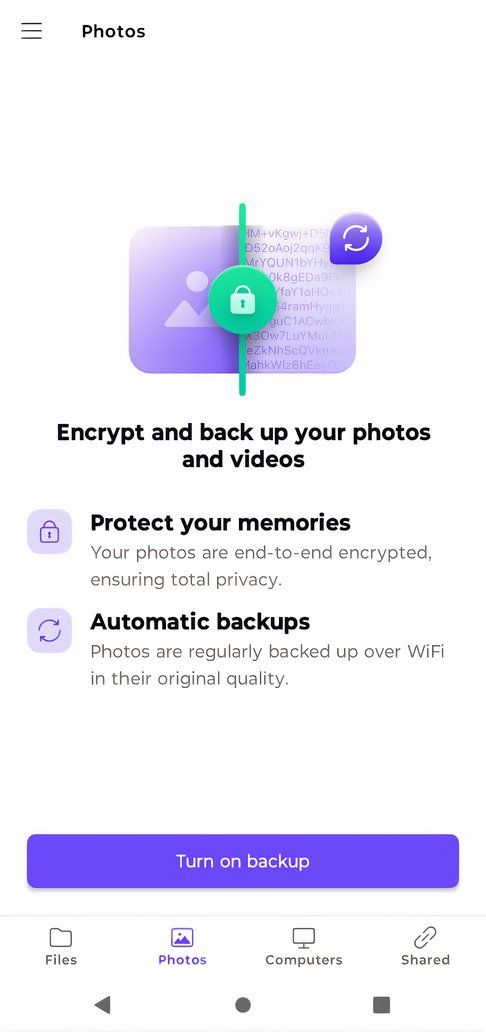
Much the same goes for Google Photos, sadly. After you export your Google Photos library, you will have to upload your picture manually to Proton Drive. However, any pictures stored on your phone, as well as any pictures you may take in the future, can be backed up directly using the Proton Drive mobile app.
Doing so is as simple as starting the app: you’ll immediately be prompted to turn on backup.
Note, though, that Proton Drive’s photo backup feature is a little rudimentary at time of writing. Sharing pictures is tricky, and the app feels a bit sluggish. For now, I recommend using another Google Photos alternative and using Proton Drive purely for long-term storage.
Making the Switch to Proton
Following these steps should have you moved over from Google’s ecosystem to Proton’s in just a few hours. Note that you will still have to download your Google Keep notes or copy them manually. Other than that, though, enjoy your much more private life.

Leave A Comment?