Soluții

What is TronScript and what is good for?

TronScript as the name implies is a script that will get badly-running Windows system back on its feet. You can download it here, but before that, you may need to disable the windows firewall or other anty viruses that you have. Why? Because the downloaded folder contains tools that temper with telemetry data.

Windows telemetry data includes basic system diagnostics information, logs of how frequently you use features and applications, system files, and likely more metrics that have yet to be disclosed. Fortunately, Microsoft allows users to set the amount of data they wish to share, on certain windows operating systems can’t be turned off.

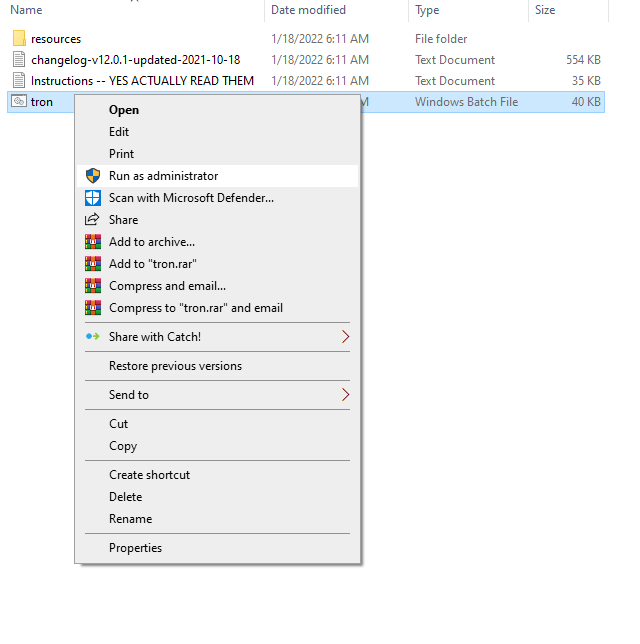
You want to open the downloaded folder and run the tron with admin rights.

Click on More info then on Run anyway.

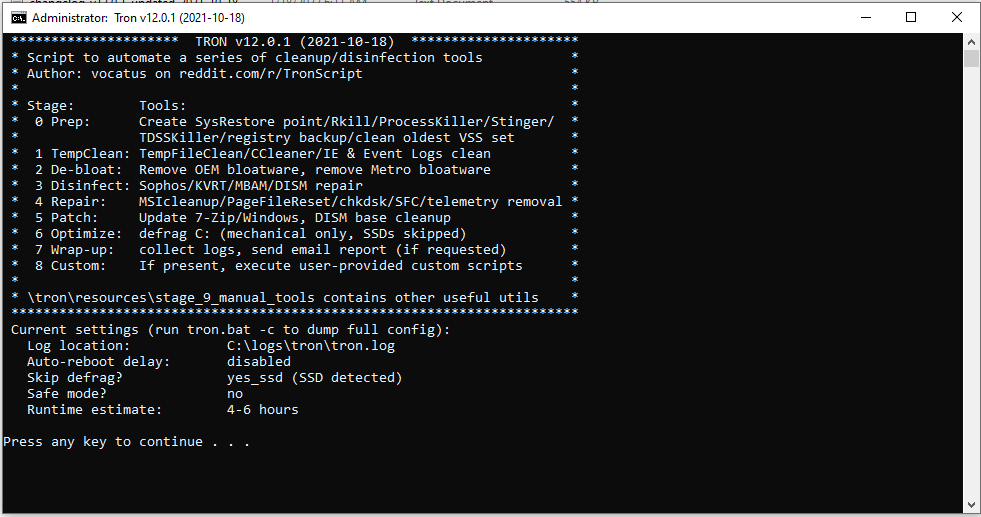
Now you need to type “I AGREE” all caps.

This process can take several hours depending on the computer.

So what does it do?
  • First, it will create a restore point in case the changes are not to your liking.
  • Removes temporary, event logs and the windows update kits. This can take a lot of space on your computer.
  • Removes bloatware, for example, 3d viewer, 3d printing which most people don’t use.
  • It will run several tools for removing viruses, rootkits, malware, spyware, adware, etc.
  • It will clean the windows image of present bugs.
  • It will repair the window image of any tearing that happened in the cleaning process.
  • Defragmenting of hard drive, making for faster access to the file (defragmenting is skipped on SSD, not needed).
  • In the end, it will leave logs with what it has done in the same file as the script.

Pretty nice I would say, but be aware that windows update may revert back some of the changes, such as the removed bloatware, TronScript is mostly recommended to computers that have a hard time with regular tasks.

[mai mult...]

How to Prioritize Wi-Fi Networks on a Mac

By default, your Mac automatically connects to the most-recently-used Wi-Fi network. But if your home has multiple networks, you might want to prioritize one in particular on your Mac. Here’s how to change your default wireless network on Mac.

  • You can reorder the Wi-Fi network priority list from the Network section in System Preferences.
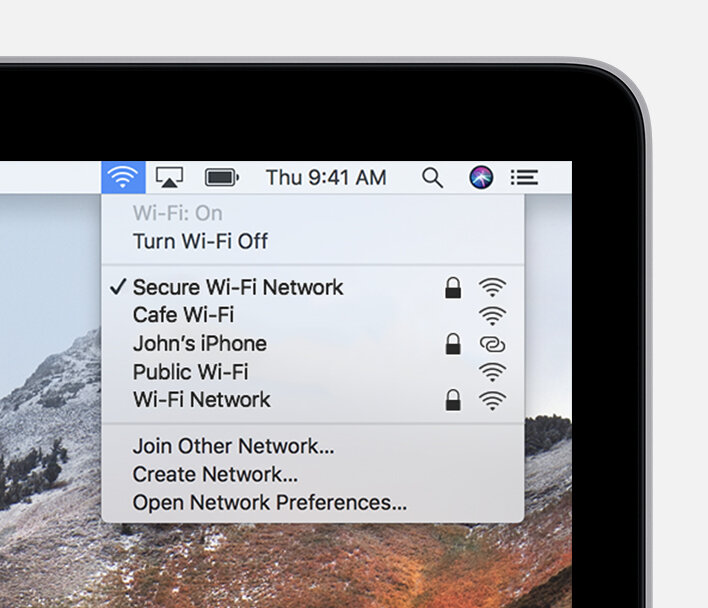
  • The easiest way to get to the Network Preferences is from the Wi-Fi section in the menu bar. Click on the Wi-Fi icon from the menu bar and then select the “Network Preferences” option

ISITZEN — Connect to Wi-Fi (Mac)

  • This opens the Network section from within the System Preferences.
  • Here, from the sidebar, make sure that the “Wi-Fi” option is selected and then click on the “Advanced” button.

Click on Advanced button from the Wi-Fi menu

You’ll see a “Preferred Networks” section in the “Wi-Fi” tab that contains a list of all the networks to which you’ve previously connected. Everything is sorted by preference, meaning that the network on the top of the list gets the first preference. From this list, find the network that you want to be your preferred network (such as your hotspot). Click on the network to select it.

Select a Wi-Fi network from the list

From there, drag the network name to the top of the list and then release it.

Drag the network up to the top spot

  • Once you see the network at the top of the list, it means that it has priority. You can now reorder the rest of the Wi-Fi networks for the second or third priority.
  • Once you’ve prioritized the list of networks, click on the “OK” button from the bottom-right corner.

Click on OK button from the Advanced section

Then, from the Network screen, click on the “Apply” button to update the priority list.

[mai mult...]