

How to set up Google Authenticator for a Gmail account
How to set up Google Authenticator for a Gmail account
Two factor authentication is normally set up with a phone number. When you sign in to an account secured with 2FA, a code is sent to your phone and the code needs to be entered on the sign in page in order to get into the account. The only problem is that if someone really wants to get into your account, a phone number isn’t the best tool to use to secure it. You can use alternative methods for 2FA. If you’re using it for Gmail, you can use the Google Authenticator app. Here’s how to set it up for a Gmail account.
Google Authenticator for Gmail
First, you need to install the Google Authenticator app on your phone. You can get it for iOS from here, and for Android here. In order to set up Google Authenticator for a Gmail account, you must have a phone number set up with your account. If you do not have a phone number set up with your account, click the ‘Add a mobile phone number’ option and set it up. Google will walk you through the process but you must have the phone on-hand.
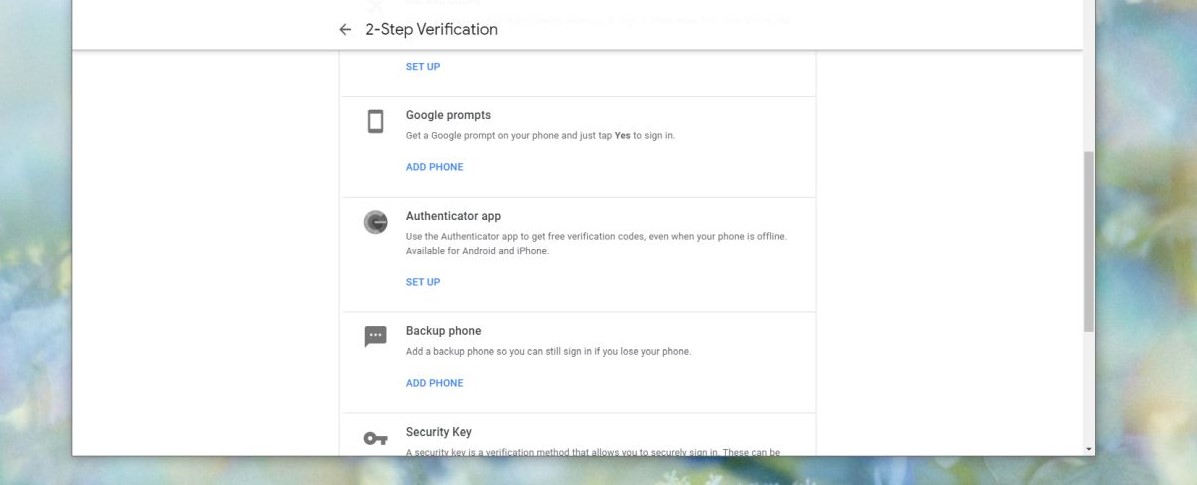
Once you’ve set up Two Factor Authentication, scroll down the Two Factor authentication page and click ‘Set Up’ under Authenticator app.
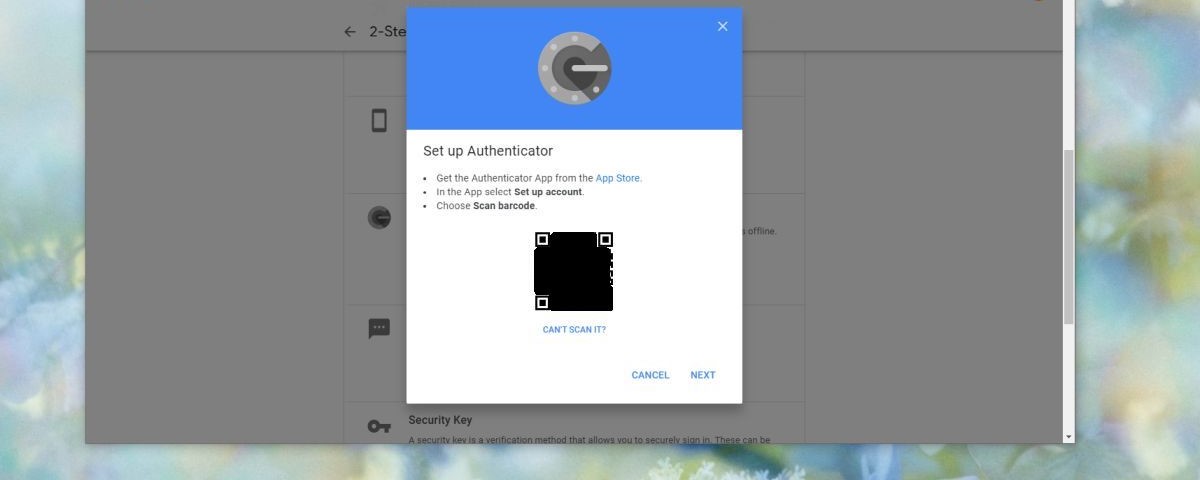
The web page will show you a QR code. Switch over to your phone.
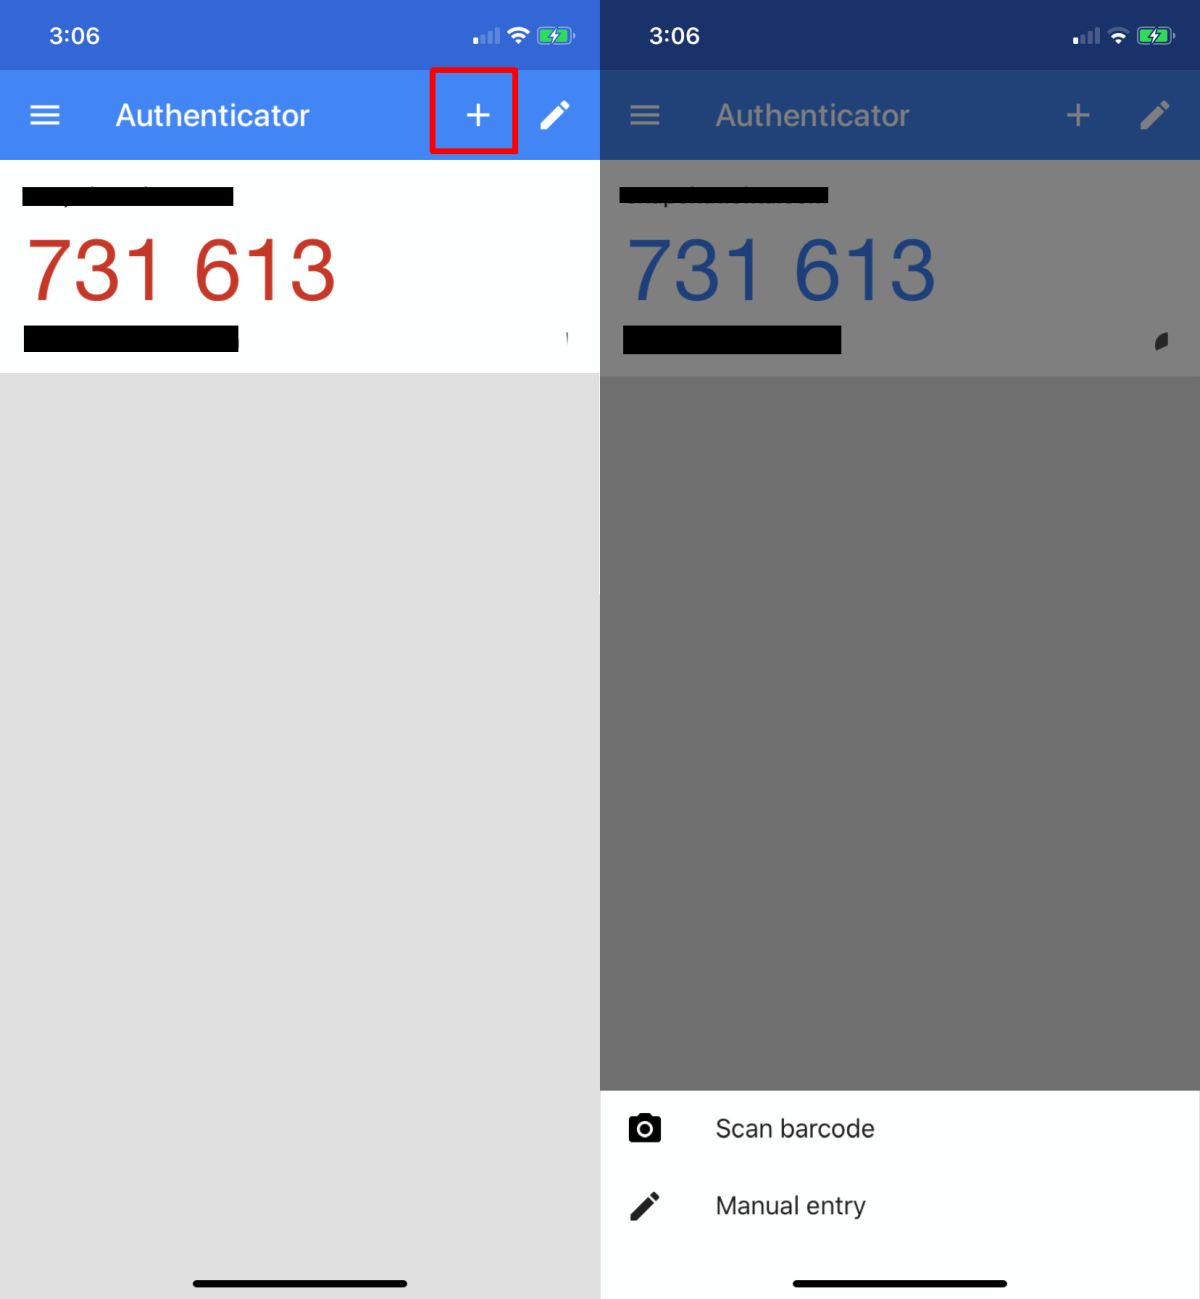
Open the Google Authenticator app and tap the plus button at the top. In the menu that opens, tap the ‘Scan barcode’ option and then scan the code on the web page.
The web page will ask you to enter the code shown in the app. Enter it and the set up will be complete.
How it works
When you sign into your Gmail account, you will have to enter the password for it, and then the code from the Google Authenticator app.

The code expires within a minute so if you see the number turn red, it means it’s about to expire. You must enter it before it expires. If it expires, you will get a new code. The old one won’t work. Use the new one, and then complete signing in.
If you ever need to remove the app, you can return to the Two Factor Authentication page, and click the Remove button under the Google Authenticator app. Your phone number will still be associated with your account and a code will be sent to it when you next sign it. It will have to be removed separately.
[mai mult...]

