Situatie
Solutie
Azure VM cannot connect to the second network adapter of an Azure VM in same virtual network
Step 1: Make sure that the second network adapter is enabled to talk outside the subnet. By default, secondary network adapters (also known as network interface cards, or network adapters) are not configured to have a default gateway. Therefore, the traffic flow on the secondary adapter will be limited to the same subnet.
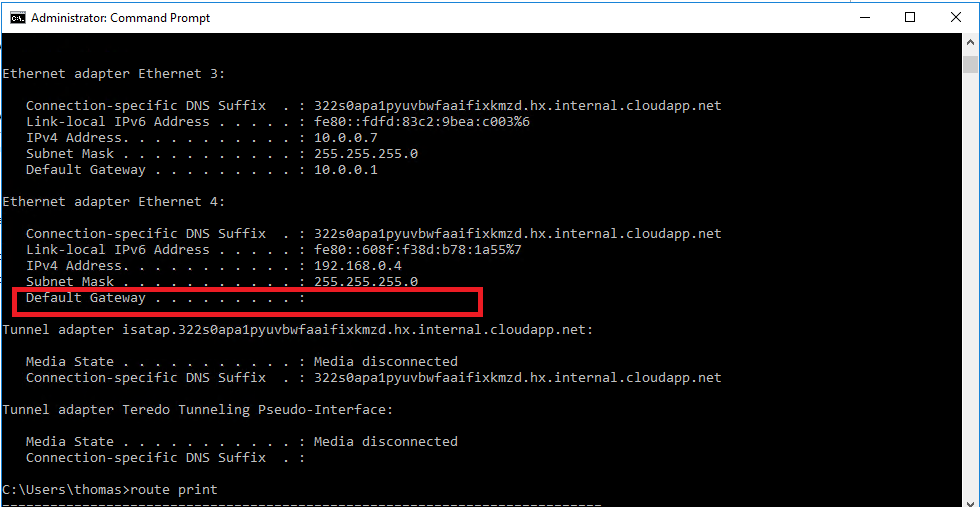
If users want to enable secondary network adapters to talk outside their own subnet, they must add an entry to the routing table to configure the gateway. To do this, follow these steps:
- On the VM that has the second network adapter configured, open a Command Prompt window as an administrator.
- Run the following command to add the entry in routing table:
Windows Command Prompt Copy:
Route add 0.0.0.0 mask 0.0.0.0 -p <Gateway IP>For example, if the second IP address is 192.168.0.4, the gateway IP should be 192.168.0.1. You have to run the following command:
Windows Command Prompt Copy:
Route add 0.0.0.0 mask 0.0.0.0 -p 192.168.0.1 - Run route print. If the entry is added successfully, you will see an entry that resembles the following:
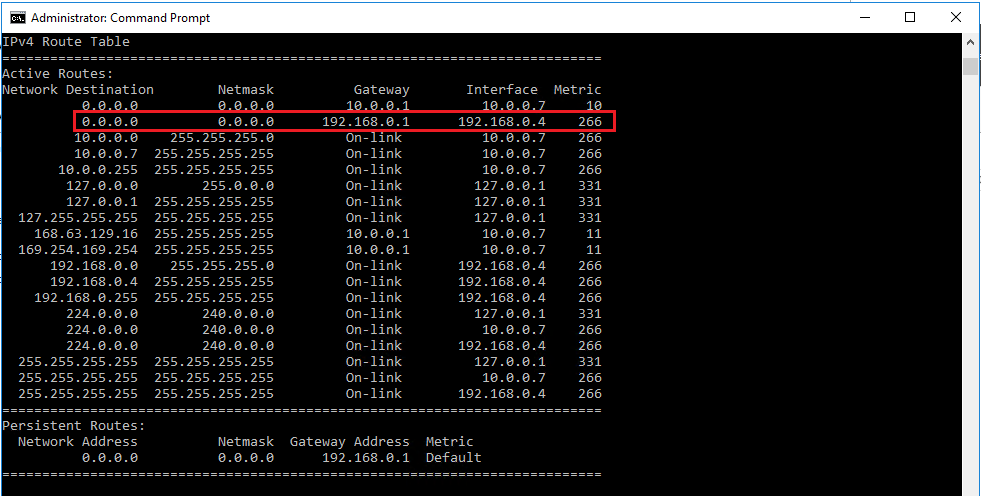
Now, try to connect to secondary network adapter. If the connection is still unsuccessful, go to next step.
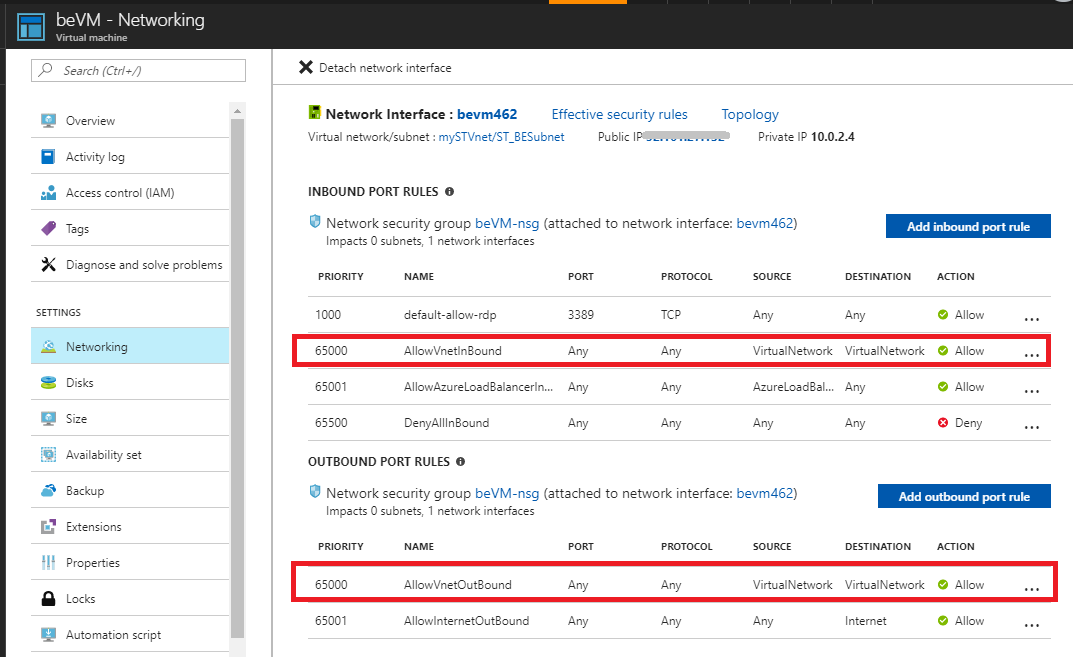
Step 2: Check NSG settings for the network adapters
For both the primary and secondary network adapters, check the default Inbound port rules (Allow VNet Inbound, Allow Load Balancer) to inbound on both network adapters. You should also make sure that there are no matching blocking rules that have a lower-priority rule above them.
Step 3: Run a connectivity check to the secondary network adapter
- Run a connectivity check to the secondary network adapter.
- Run a connectivity check across the environment to make sure that the process works end to end.
The following is an example response:
ConnectionStatus : Unreachable
AvgLatencyInMs   :
MinLatencyInMs   :
MaxLatencyInMs   :
ProbesSent       : 100
ProbesFailed     : 100
Hops             : [
                     {
                       "Type": "Source",
                       "Id": "c5222ea0-3213-4f85-a642-cee63217c2f3",
                       "Address": "10.1.1.4",
                       "ResourceId": "/subscriptions/00000000-0000-0000-0000-000000000000/resourceGrou
                   ps/ContosoRG/providers/Microsoft.Network/networkInterfaces/appNic0/ipConfigurat
                   ions/ipconfig1",
                       "NextHopIds": [
                         "9283a9f0-cc5e-4239-8f5e-ae0f3c19fbaa"
                       ],
                       "Issues": []
                     },
                     {
                       "Type": "VirtualAppliance",
                       "Id": "9283a9f0-cc5e-4239-8f5e-ae0f3c19fbaa",
                       "Address": "10.1.2.4",
                       "ResourceId": "/subscriptions/00000000-0000-0000-0000-000000000000/resourceGrou
                   ps/ContosoRG/providers/Microsoft.Network/networkInterfaces/fwNic/ipConfiguratio
                   ns/ipconfig1",
                       "NextHopIds": [
                         "0f1500cd-c512-4d43-b431-7267e4e67017"
                       ],
                       "Issues": []
                     },
Azure VM cannot connect to the internet
Follow these steps to check the state of the NIC:
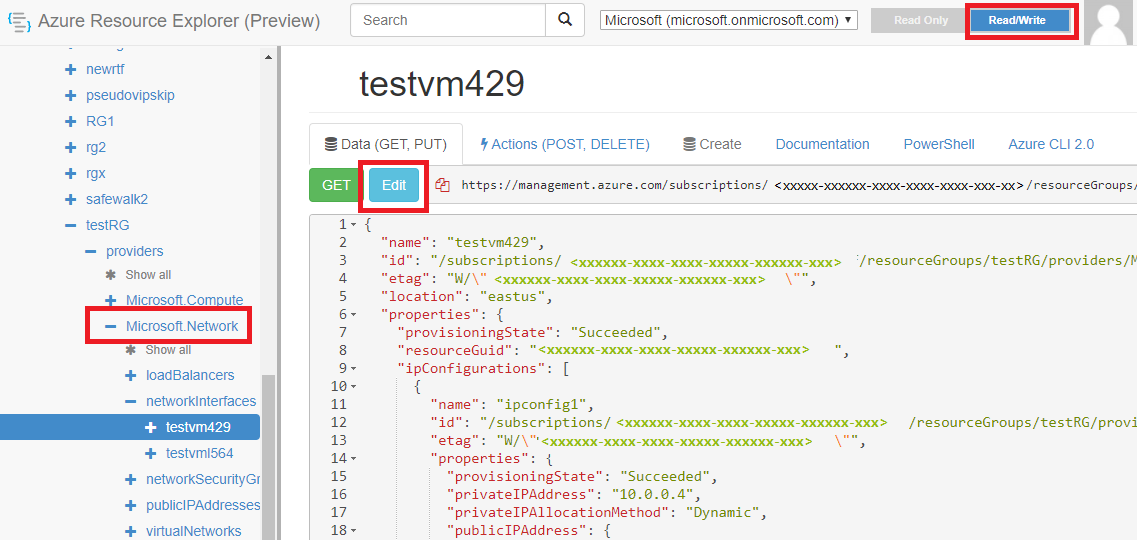
- Log in to the Resource Explorer portal.
- In the left pane, select Subscriptions.
- In the left pane, select the resource group that the affected network adapter or VM belongs to.
- Go to the Microsoft Network.
- Select the Network Interfaces option.
- Select the affected network interface.
- Select the Read/Write option at the top of the portal.
- Select the Edit option.
Note: After you select the Edit option, the “Get” option changes to a Put option.
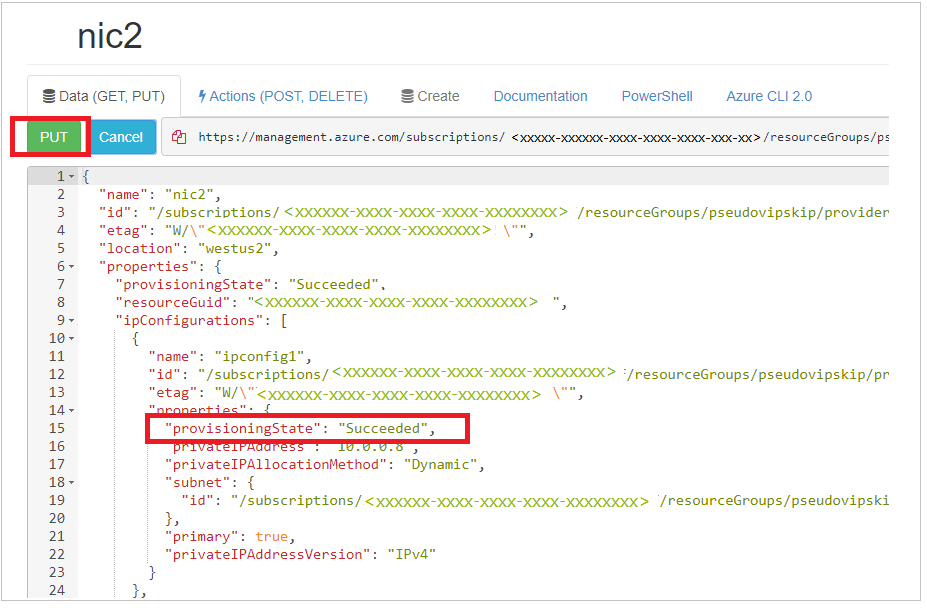
- Select the affected network interface, and then select the Put option.
Note: After you make this selection, the ProvisioningState is displayed as Updating. The same result is shown on the regular Azure Resource Manager portal. If the operation is completed successfully, the ProvisioningState value changes to Succeeded, as shown.
- Refresh your portal. The network adapter should be in a success state.
Leave A Comment?