Situatie
The Recovery HD volume is hidden; it won’t show up on the desktop, or in Disk Utility or other cloning applications. In order to clone the Recovery HD, we must first make it visible, so that our cloning application can work with the volume.
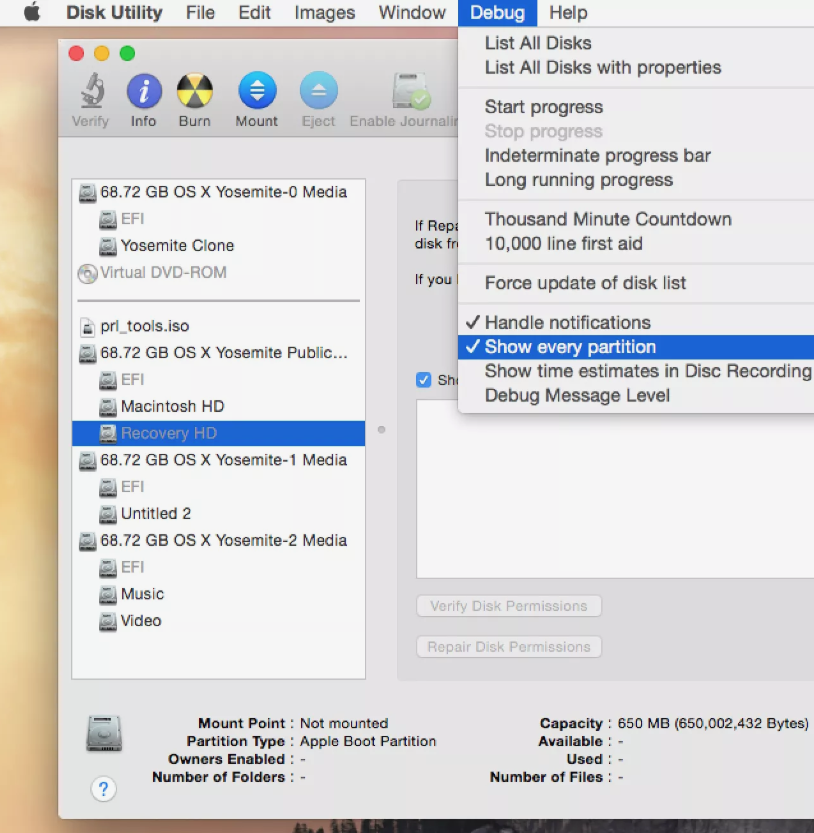
With OS X Lion through OS X Yosemite, we can use a hidden feature of Disk Utility. Disk Utility includes a hidden Debug menu that you can use to force hidden partitions to be visible in Disk Utility. This is exactly what we need, so the first step in the cloning process is to turn on the Debug menu. You can find instructions here:
- Enable Disk Utility’s Debug Menu
Remember, you’ll only find the Disk Utility Debug menu available in OS X Lion through OS X Yosemite. If you’re using a later version of the Mac OS, jump ahead to the next section. Otherwise, follow the guide to make the Debug menu visible, and then come on back and we’ll continue the cloning process.
Solutie
Pasi de urmat
Prepare the Destination Volume
You can create the Recovery HD clone on any volume listed in Disk Utility, but the cloning process will erase any data on the destination volume. For this reason, it’s a good idea to resize and add a partition dedicated to the new Recovery HD volume you are about to create. The Recovery HD partition can be very small; 650 MB is the minimum size, although we suggest making it slightly larger. Disk Utility probably won’t be able to create a partition that small, so just use the smallest size it can create.
Once you have the destination drive partitioned, we can proceed.
- Launch Disk Utility, located in /Applications/Utilities.
- From the Debug menu, select Show Every Partition.
- The Recovery HD volume will now be displayed in the Device list in Disk Utility.
- In Disk Utility, select the original Recovery HD volume, and then click the Restore tab.
- Drag the Recovery HD volume to the Source field.
- Drag the volume you want to use for the new Recovery HD to the Destination field. Double-check to be sure that you’re copying the correct volume to the destination because any volume you drag there will be completely erased by the cloning process.
- When you’re sure that everything is correct, click the Restore button.
- Disk Utility will ask if you really want to erase the destination drive. Click Erase.
- You will need to supply an administrator account password. Enter the requested information, and click OK.
- The cloning process will begin. Disk Utility will provide a status bar to keep you up to date on the process. Once Disk Utility completes the cloning process, you’re ready to use the new Recovery HD (but with any luck, you’ll never need to use it).
A Few Additional Notes
Creating the new Recovery HD volume this way doesn’t set the visibility flag to hidden. As a result, the Recovery HD volume will appear on your desktop. You can use Disk Utility to unmount the Recovery HD volume if you wish. Here’s how.
- Select the new Recovery HD volume from the Device list in Disk Utility.
- At the top of the Disk Utility window, click the Unmount button.
If you have multiple Recovery HD volumes attached to your Mac, you can select the one to use in an emergency by starting your Mac with the option key held down. This will force your Mac to display all available bootable drives. You can then pick the one you want to use for emergencies.
Leave A Comment?