Situatie
If you receive the Adobe Premiere error ‘File Import Failure’ with description “The file has no audio or video steams” may appear while importing a MP4 video file, then continue reading below. The error “The file has no audio or video steams” in Adobe Premiere, may appear although the video plays correctly in any other media players (VLC, Windows Media Player etc.).

Solutie
Pasi de urmat
Install QuickTime
First of all, make sure that you have installed the latest Quick Time version on your PC and then try to import the mp4 file in Adobe Premiere.
Rename the Video file
1. Create a copy of the mp4 video file on another location on your PC. (e.g. on your Desktop)
2. Rename the video file as follows:
a. Give a shorter filename on the video file, and…
b. Remove any special characters from its name. (underscores, parentheses, etc.).
3. Open the video file in Adobe Premiere
Change the Filename Extension from MP4 to MOV
The next method to bypass the Adobe Premiere’s error “File has no audio or video streams”, is to change the extension of the video file, from .mp4 to .mov (or vise versa). To do that:
1. In File Explorer, click View -> Options -> Change folder and search options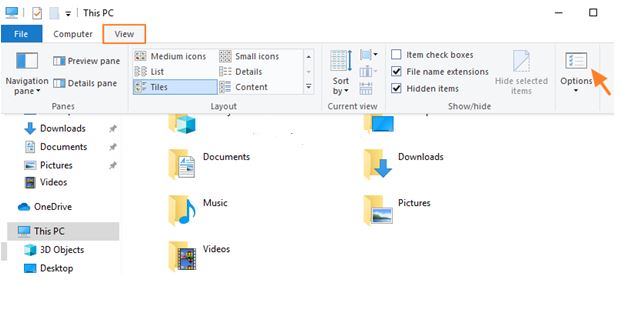
2. At View tab, clear the “Hide extensions for known file types” box and click OK
To make this setting permanent, click ‘Apply to folders’, before clicking OK.

3. Now, proceed and rename/change the extension of the video file, as follows:
- If the video file is in MP4 format (.mp4), change it’s extension to .mov
- If the video file is in MOV format (.mov), change it’s extension to .mp4

Finally, open the video file in Adobe Premiere.
Clear the Media Cache Database and Cache Files
When you import a media file (Video or Audio), and while working with this file in Adobe Premiere, the program creates the media cache files for faster performance. In addition, the program creates links for these cache files in Media Cache Database. During the time, these media cache files and the Media Cache database may become too large or corrupted and need to be cleaned to avoid problems.
So, the next method to resolve the “File has no audio or video streams” in Premiere, is to clean the “Media Cache Database” and to delete the cache files. To do that: *
A. How to Clean the Media Cache Database of Adobe Premiere.
1. Open Adobe Premiere.
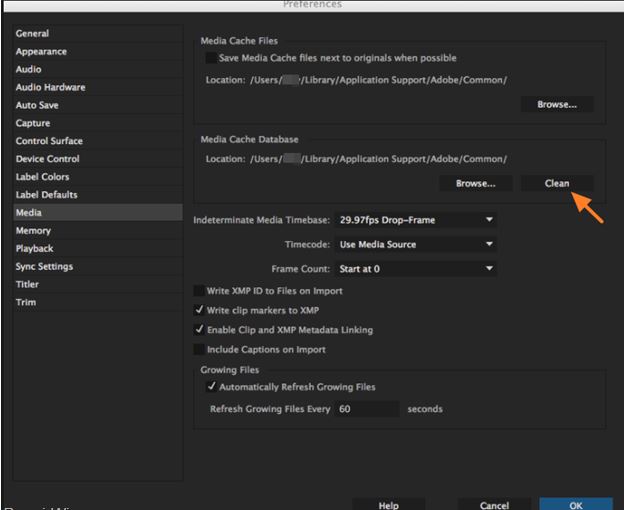
2. From the menu go to Edit -> Preferences -> Media.
3. At Media Cache Database click the Clean button.
Restart Adobe Premiere and try to open the video file. if the error “File has no audio or video streams” persists, then proceed to clean the Adobe Premiere’s cache files by following the instructions below:
How to Clear the Media Cache Files of Adobe Premiere.
1. Open Adobe Premiere.
2. From the menu go to Edit -> Preferences -> Media.
3. At Media Cache Files click the Browse button, or note the location of the media cache files.

4. Close Adobe Premiere.
5. In File Explorer, delete all the contents of the “Media Cache files” folder.
6. Import the video file in Premiere.
Re-encode the Video File
The final method to resolve the “File has no audio or video streams” in Adobe Premiere importing process, is to re-encode the video file. To do that:
1. Download and install Handbrake.
2. Open Handbrake and click File – Open a single video file.

3. Select the video file that you cannot import in Adobe Premiere and click Open.
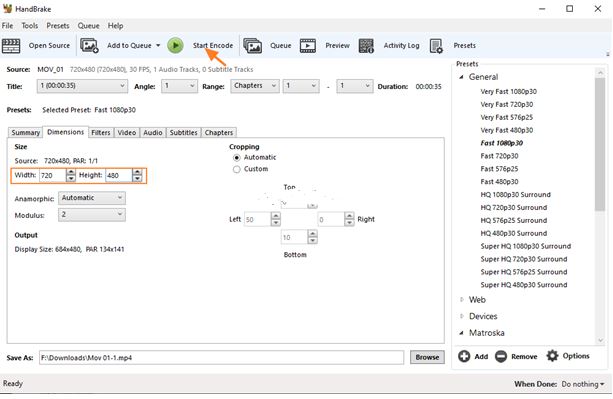
4. Set the output format to MP4, and then click Browse and specify the store location and the filename of the output (re-encoded) video file.

5. At Dimensions tab, set the same dimensions as the source file.
6. When done, click Start Encode.
8. When the encoding process is completed, close Handbrake.
7. Open the re-encoded video file in Adobe Premiere.
Leave A Comment?