Situatie
Are you tired of taking screenshots and pasting it in your Microsoft Paint software and then save them? There’s a much easier way to do it in Windows 10. You can automatically save the screenshots you take with a very simple technique.
The traditional way of taking screenshots is quite tedious. First you press the “Print Screen” key on your Keyboard then you paste the image in a photo editing software. In most cases people use the built-in Paint app to do it.
To take screenshots in Windows 8 or 10 and automatically save them as files, follow these steps:
- Press the Window + PrintScreen key on your keyboard.
- The screen will fade for a second which will indicate that the screen has been captured successfully.
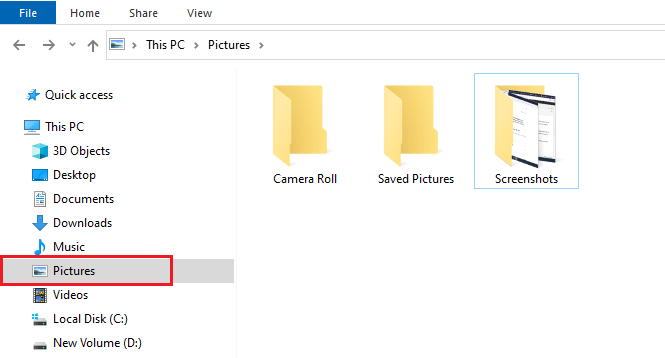
- Browse to the “Pictures” folder in your Windows Explorer window. You will see a folder named “Screenshots” inside.
- All your screen images will be available as image files in that folder.
That’s it. The all you need to do to make that happen. The procedure involves pressing a key combination only, but it makes life much easier. If you want to capture multiple screens, simply keep pressing the key combination and all of the screens will be saved as image files in that folder.
This technique works for both Windows 8 and Windows 10.
Leave A Comment?