Situatie
The steps to convert PNG to PDF on both Windows 10 and 11 are pretty much the same.
Solutie
Pasi de urmat
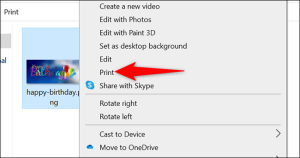
Start by opening the folder where your PNG image is in a File Explorer window. If you are on Windows 10, right-click the image and select “Print.” If you are on Windows 11, right-click the image and choose Show More Options > Print.
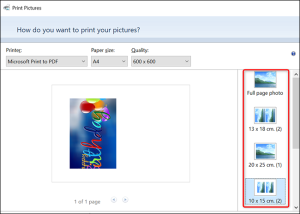
A “Print Pictures” window will open. In this window, select the virtual PDF printer by clicking the “Printer” drop-down menu and choosing “Microsoft Print to PDF.” Specify the paper size by clicking the “Paper Size” drop-down menu and selecting an option.
To change the quality of the output PDF file, click the “Quality” drop-down menu and select an option.
On the “Print Pictures” window’s right sidebar, you have options to change how your PNG image appears in the PDF. Click an option in this sidebar to view its preview on the left.
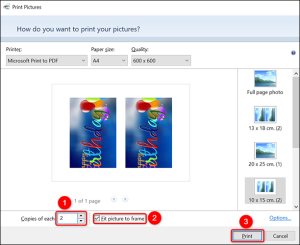
At the bottom of the “Print Pictures” window, specify how many pages you want in your PDF using the “Copies of Each” option. To make your photo fit the PDF, enable the “Fit Picture to Frame” option.
Finally, at the bottom of the window, click “Print” to start making your PDF file.
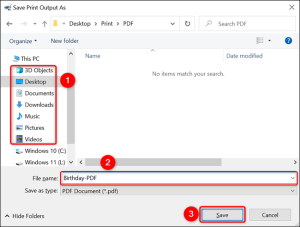
Windows will open a “Save Print Output As” window. Here, select the folder to save your PDF file in. Click the “File Name” field and type a name for your PDF. Then click “Save.”
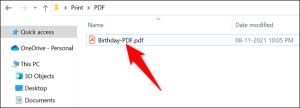
To access your newly created PDF, open the folder where you saved it, and you will see the PDF version of your PNG image there, ending in “.pdf”.


Leave A Comment?