Situatie
Windows 11 users often find Quick Searches to be an infrequently used feature. In fact, many users would be happy to disable this seemingly bothersome function. However, locating a straightforward method to achieve this is not a simple task.
Solutie
Pasi de urmat
Steps to Disable Windows 11 Quick Searches
- Go to the Windows search bar and type regedit
- Double-click on the Registry Editor
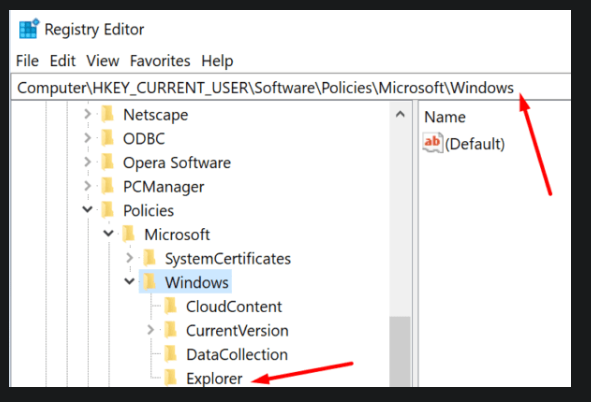
- Then navigate to the following path:
- Computer
- HKEY_CURRENT_USER
- SOFTWARE
- Policies
- Microsoft
- Windows
- Explorer
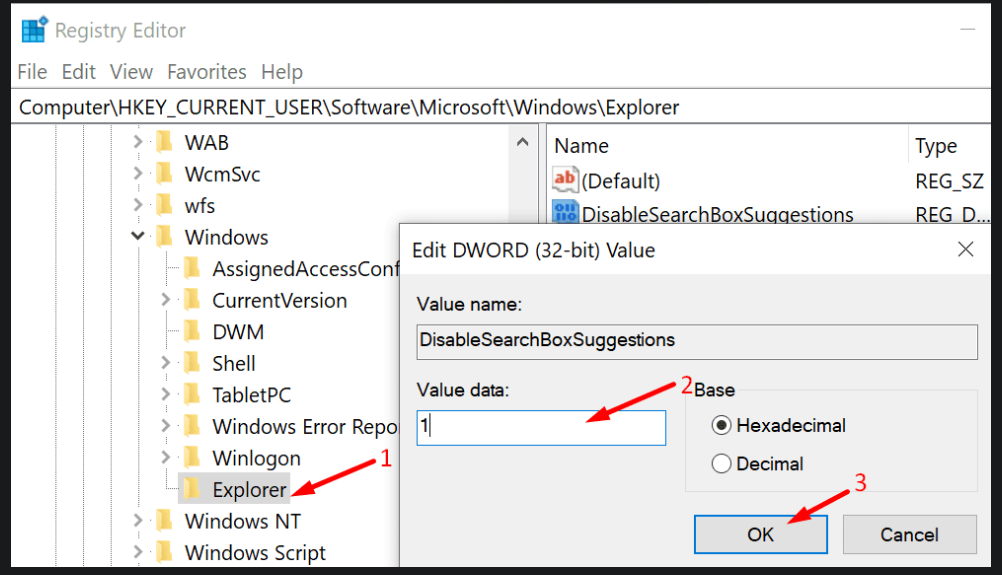
- Right-click in the right pane and select New > DWORD (32-bit) Value
- Name the new value DisableSearchBoxSuggestions
- After you created it, double-click on it
- Edit its value data from zero to 1
- Then restart your computer to apply the changes.
If you can’t find that path on your computer, this indicates you’re running an older Windows version.
Here are the steps to follow for Windows 11:
- Go to the Windows search bar and type regedit
- Double-click on the Registry Editor
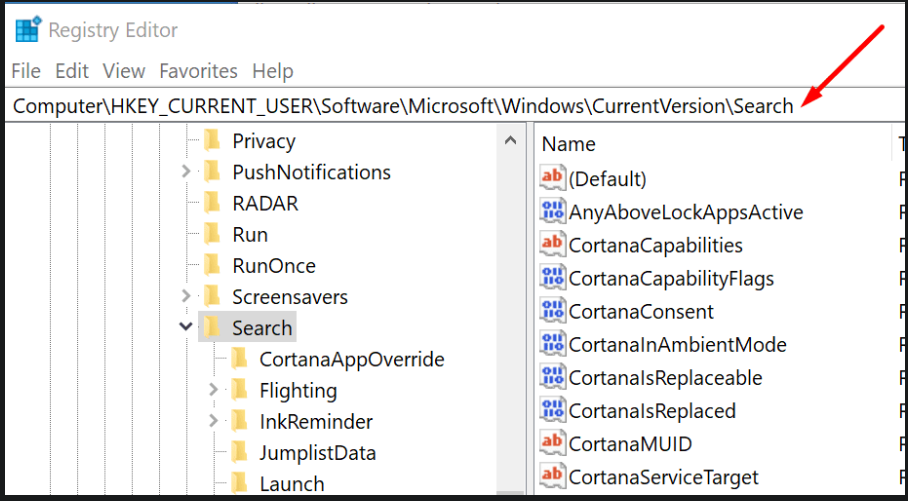
- Now, go to the following path:
- Computer
- HKEY_CURRENT_USER
- Software
- Microsoft
- Windows
- CurrentVersion
- Search
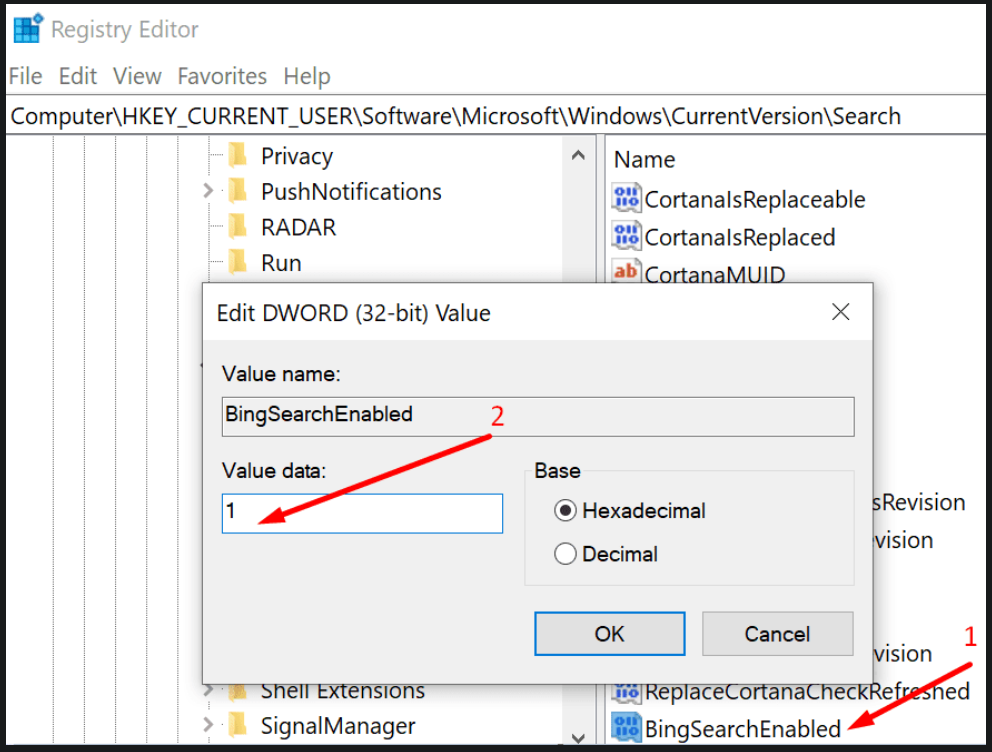
- Right-click on the Search key
- Select New > DWORD (32-bit) Value
- Next, create a new value and name it BingSearchEnabled
- Double-click on BingSearchEnabled and edit its value from zero to 1.
- Locate the CortanaConsent key. It should be visible under BingSearchEnabled
- Double-click on CortanaConsent and edit the value data from 1 to 0 (zero)
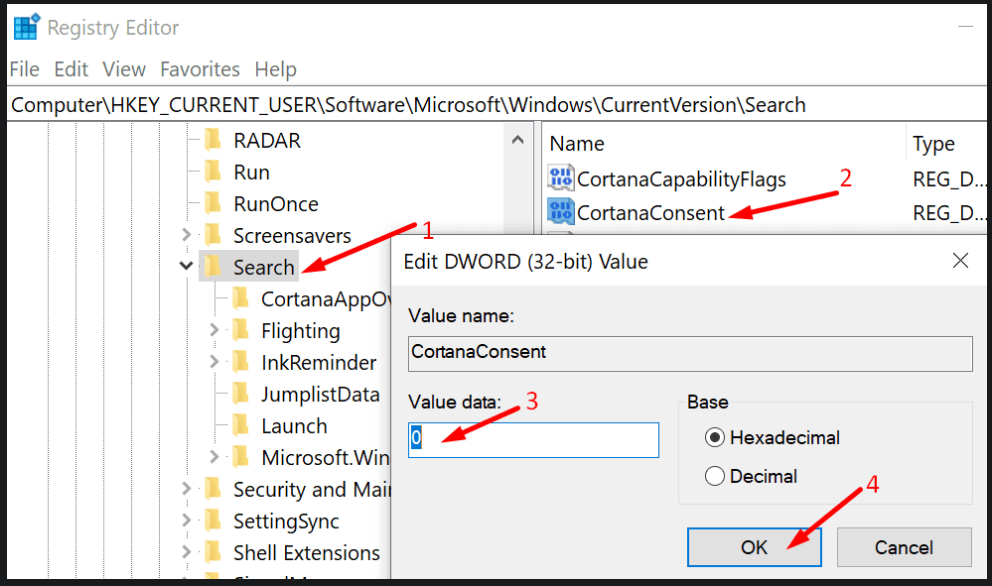
- Note: If the CortanaConsent key is not visible, create it yourself. Right-click on Search and select New > DWORD (32-bit) Value. Then name the new key CortanaConsent and set its value to 0.