Situatie
UEFI, or if you prefer Unified Extensible Firmware Interface, is a protocol that is replacing the popular BIOS with new software that is adding some important advantages such as improved security measures, faster startup times, support for disks larger than 2.2 TB and lot more.
A broken UEFI means that you have a broken bootloader which also means that you won’t be able to reboot or power on your Windows 10 device.
Solutie
Pasi de urmat
Use diskpart and recreate Boot Configuration Data
- Insert the Windows installer disk on your computer.
- Reboot and press any key in order to boot from Windows DVD.
- Wait while the Installer sequence is loading all the files.
- Then, click on Next and Repair your computer

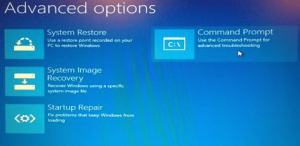
- Furthermore, go to Advanced options and pick Command Prompt.

- Good, now a cmd window will be displayed on your device.
- On the cmd window type diskpart.
- Find out on which disk you have installed Windows by entering list disk.
- Usually, the Windows system is installed on disk 0 – if not change the following command accordingly to the number of your disk.
- In cmd type sel disk 0.
- You have selected your disk; now type list vol in order to show all the partitions.

- The UEFI partition should be a FAT32 file system – let’s say that is volume number 3.
- Select your partition by typing the sel vol 3 command and assign a new letter to your volume by using the command assign letter=b (you can set any letter you want, this is only an example).

- Enter exit and press enter.
- Up next you will need to type cd /d b:\EFI\Microsoft\Boot\ followed by bootrec /fixboot in order to repair boot record.
- Then you have to recreate the Boot Configuration Data (BCD), so in cmd type ren BCD BCD.old followed by bcdboot c:\Windows /l en-us /s b: /f ALL.
- Perfect; all you have to do is to reject the Windows 8/ Windows 8.1 disk and to reboot your device as you are done.
Repair your computer
Another way to fix UEFI boot issues in Windows 10 is to simply repair your computer. This method is somehow similar to the first steps of the solution listed above, yet it’s less complex, so if you’re an average Windows user, you may want to use this solution first. Here are the steps to follow:
- Insert the Windows 10 install disk/ install USB to your computer
- Restart the PC > select boot from the disk/USB
- On the Install now screen > select Repair your computer
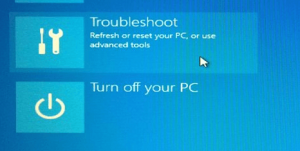
- Go to Troubleshoot > click on Automatic Repair
- Choose the problematic account from the list > confirm your choice and wait for the repair process to complete.


Leave A Comment?