Situatie
Rocky Linux is an open-source Linux distribution developed by Rocky Enterprise Software Foundation. It is an enterprise OS intended to be a downstream, complete binary-compatible release that uses the Red Hat Enterprise Linux OS source code.
Step 1: Download the ISO Image
Using a browser of your choice, browse to https://rockylinux.org/download/ and, depending on your system and use case, select one of the available ISO image downloads:
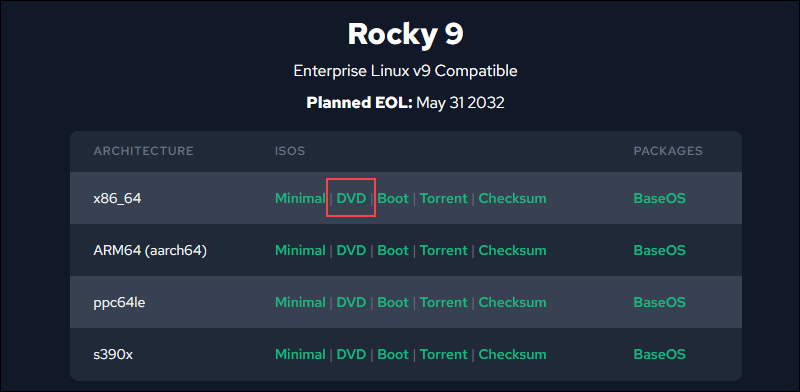
For this tutorial, we will install Rocky Linux on a 64-bit architecture. We have downloaded the DVD ISO image, which contains the BaseOS and AppStream repositories.
The Boot and Minimal versions are used when installing the OS from another source (such as an HTTP repository of the binary files) or to enter Rescue Mode.
Step 2: Create Bootable USB Drive
Depending on which system you will create the bootable USB drive, use one of the following tools:
Rufus on Windows
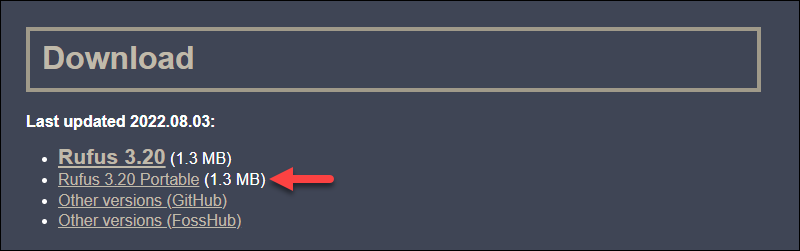
1. Browse to https://rufus.ie/en/# and download the latest Rufus version. For this tutorial, we will use the portable version:
2. Open Rufus and insert a USB stick. The program automatically recognizes and selects it.
3. Click the SELECT button and select the Rocky Linux 9 ISO image you have previously downloaded.
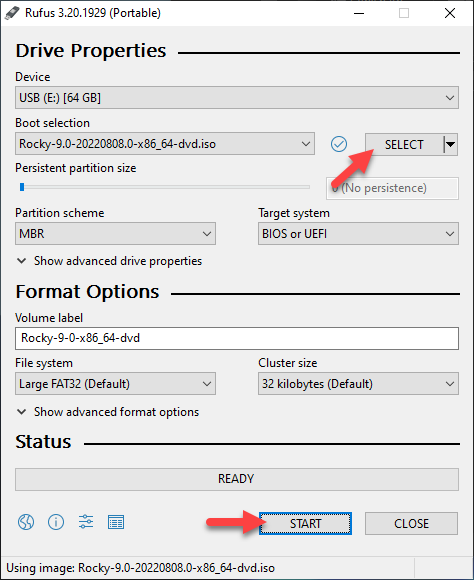
4. Click START to write the ISO image and create a bootable USB drive.
Startup Disk Creator on Ubuntu Linux
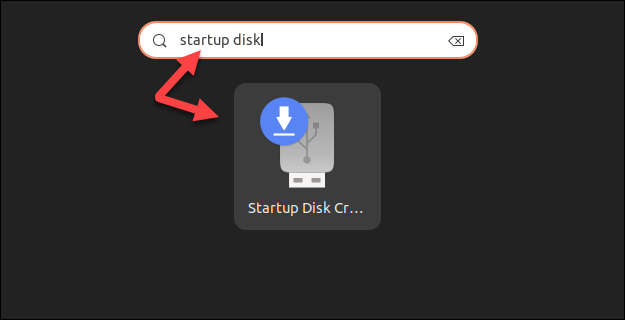
1. Click the Show Applications button, and in the search dialog type Startup Disk Creator.
2. In the Source disc image section, click Other. Select the Rocky Linux ISO image you have previously downloaded.
3. In the Disk to Use section, select your USB drive.
4. Click Make Startup Disk and wait for the process to complete.
Step 3: Boot up Rocky Linux from the USB
To boot up Rocky Linux from the USB, follow the steps below:
1. Insert the Rocky Linux USB drive.
2. Turn on the machine or restart the system. The USB drive should boot automatically. If it does, skip the next step.
If the USB doesn’t boot, manually select the USB boot device in the Boot Menu or BIOS/UEFI.
3. Access the boot menu by tapping the designated boot key for your machine as soon as the computer turns on. The key differs based on the machine vendor, so Google the one for your device.
4. Select the USB boot device using the arrow keys in the boot menu. The system starts loading the Rocky Linux installation menu.
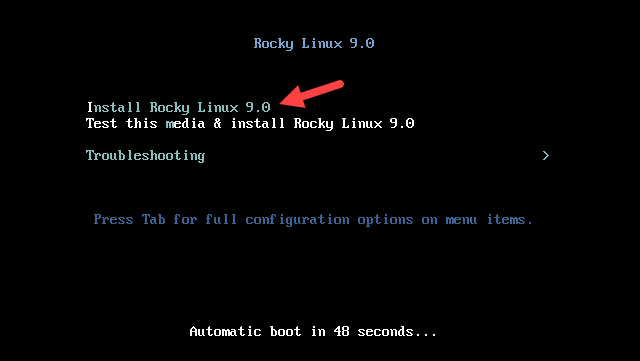
Step 4: Install Rocky Linux
After booting to the installation menu, start the installation by selecting Install Rocky Linux 9.0.
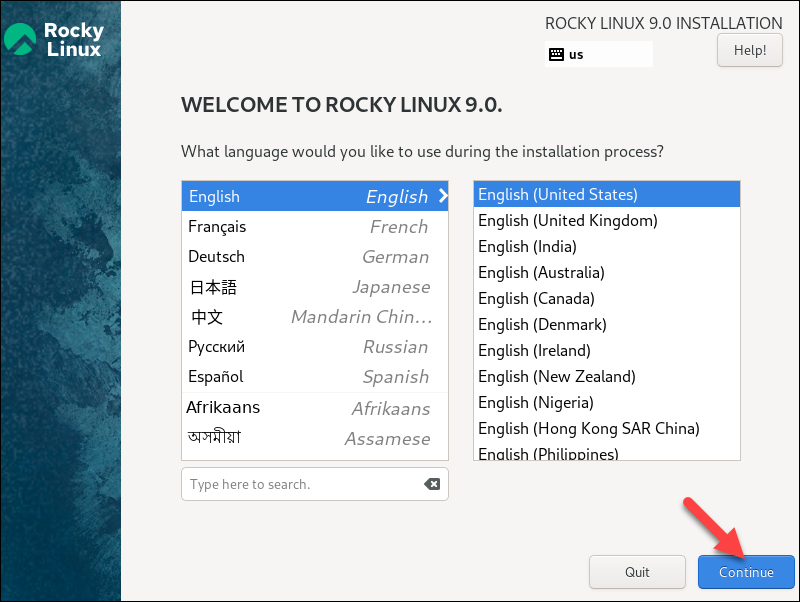
Choose Installation Language
Once the Rocky Linux Anaconda installer loads, the Welcome page prompts you to choose the language for the installation process. After selecting, press Continue.
Installation Menu
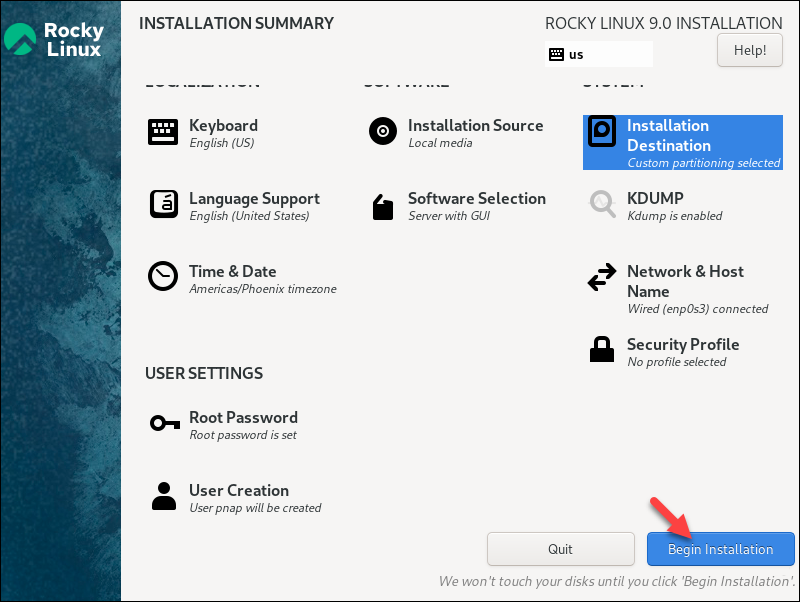
The installation summary menu appears with crucial parameters that need to be configured before the installation.
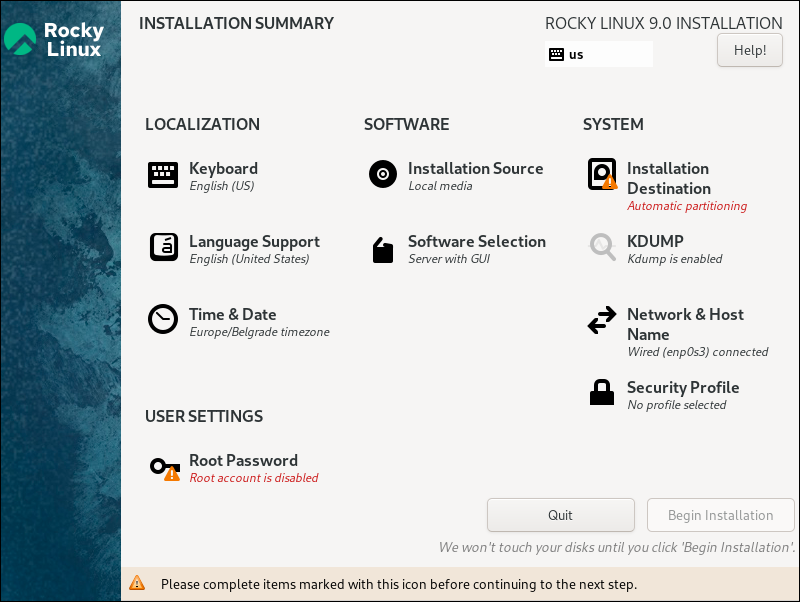
Select each item to configure the specified setting and click Begin Installation when finished. The sections below explain each of the configurable parameters.
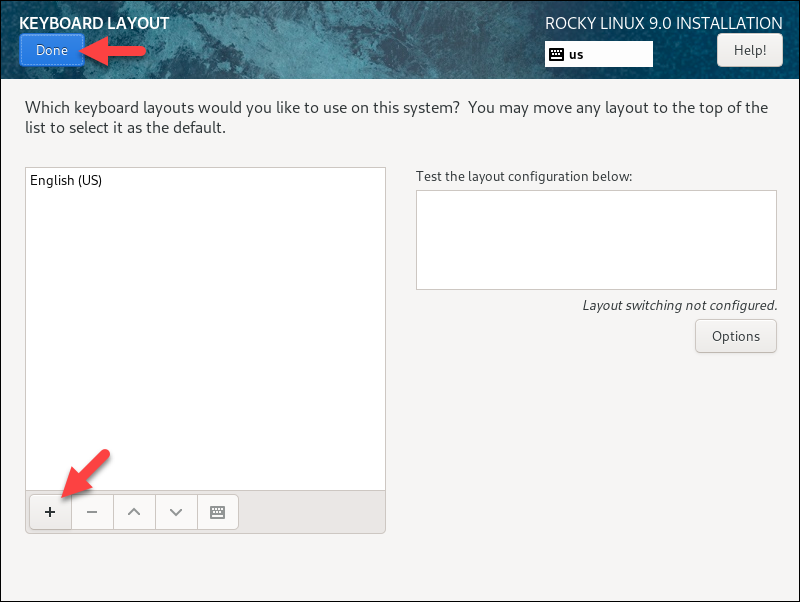
Keyboard Layout Selection
Select the Keyboard option to add keyboard layouts. The default keyboard configuration depends on which language you selected. Click the + button to add a keyboard layout aside from the default one.
- You can also test the keyboard in the textbox on the right to ensure it is the correct layout.
- When finished, click Done to go back to the installation menu.
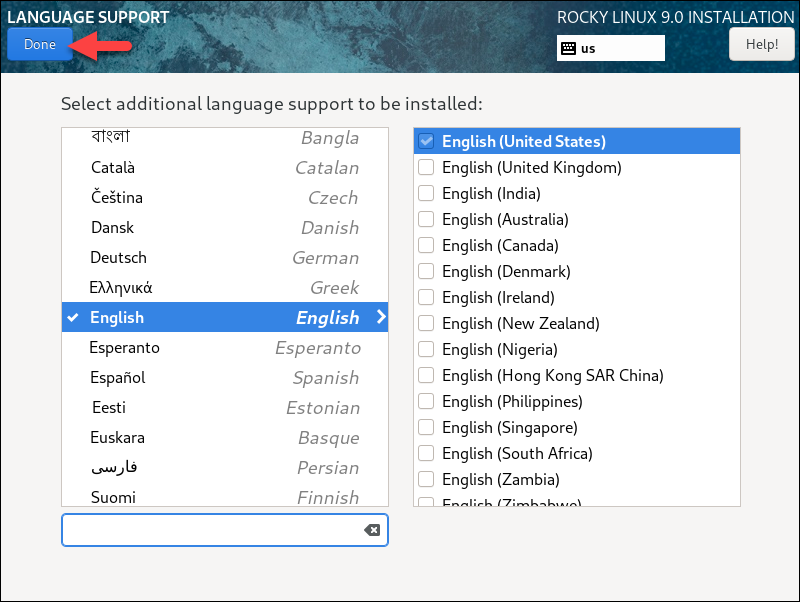
- Language Support
- Select the Language Support menu item to install additional UI languages. When finished, click Done.
- Time and Date
Select the Time & Date option to set up the time and date. The installer automatically detects the region and time zone if you have internet access. Alternatively, set the parameters manually by selecting the region and city from the dropdown menu and set the time and date in the bottom part of the screen.
Turn on the Network Time switch to keep the time and date synchronized with the internet time.
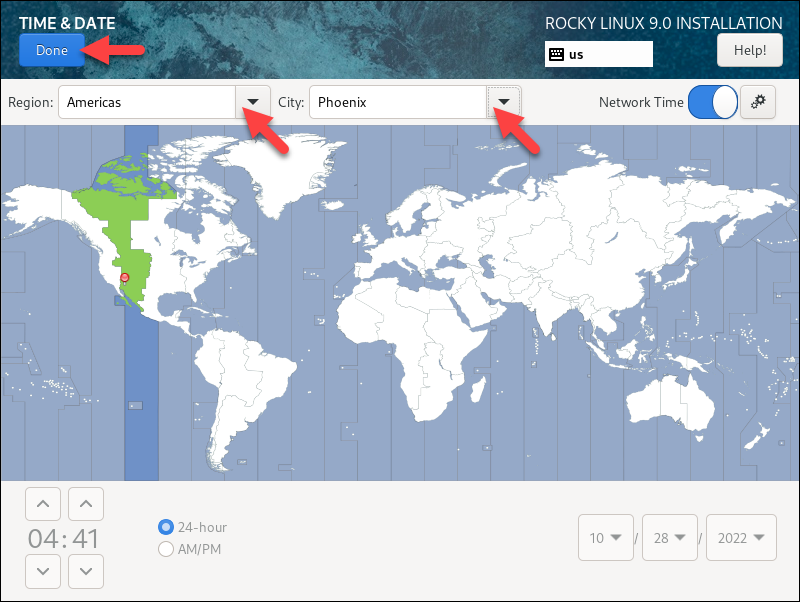
When finished, click Done to save the changes and go back.
Software Selection
- Under the SOFTWARE section, click the Software Selection item to select which base environment and additional software to install.
- Depending on your use case and base environment, choose between debugging tools, the DNS Name Server packages, FTP server tools, etc.
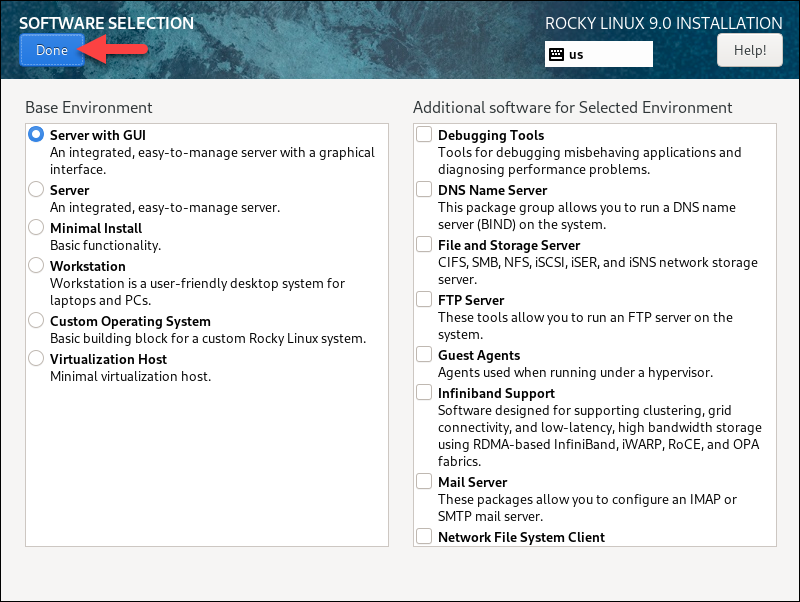
When finished, click Done to return to the installation menu.
Installation Destination
Under the SYSTEM section, click the Installation Destination item to select and partition the hard disk for the installation. Ensure that the disk on which you are installing Rocky Linux has a checkmark.
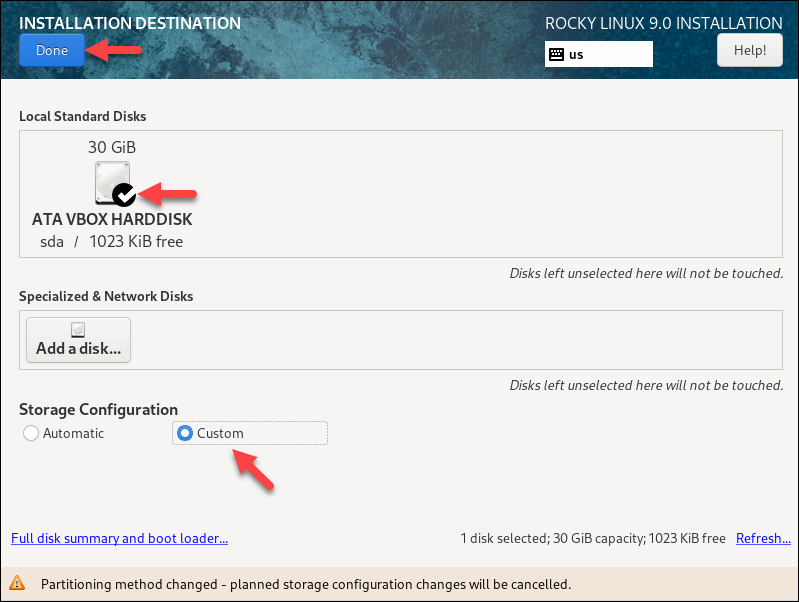
Under Storage Configuration, choose whether to configure the storage automatically or if you want to create custom partitions. If you choose Custom, click Done, and the Manual Partitioning window appears.
Manual Partitioning
In the Manual Partitioning window, create the custom partitions for your OS and select a file system type.
1. In the dropdown menu, select Standard Partition as the partitioning scheme:
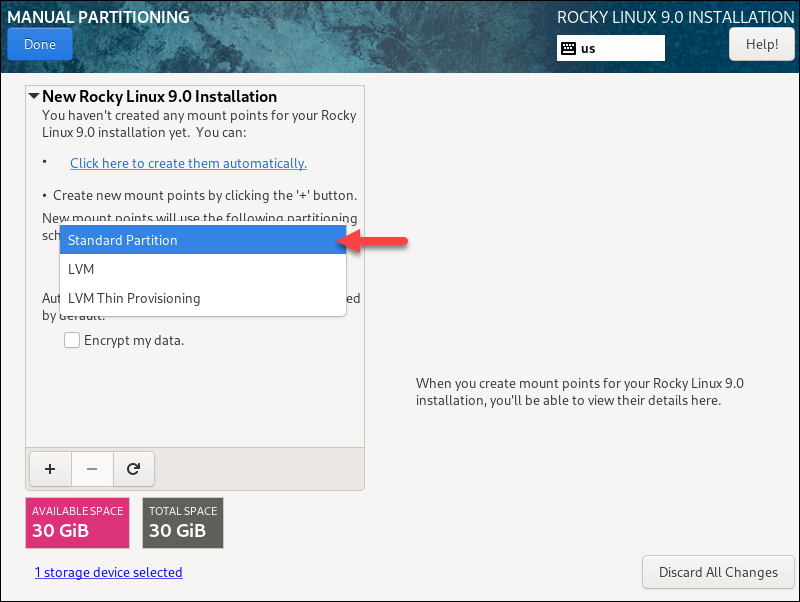
2. Click the + button to add a new partition.
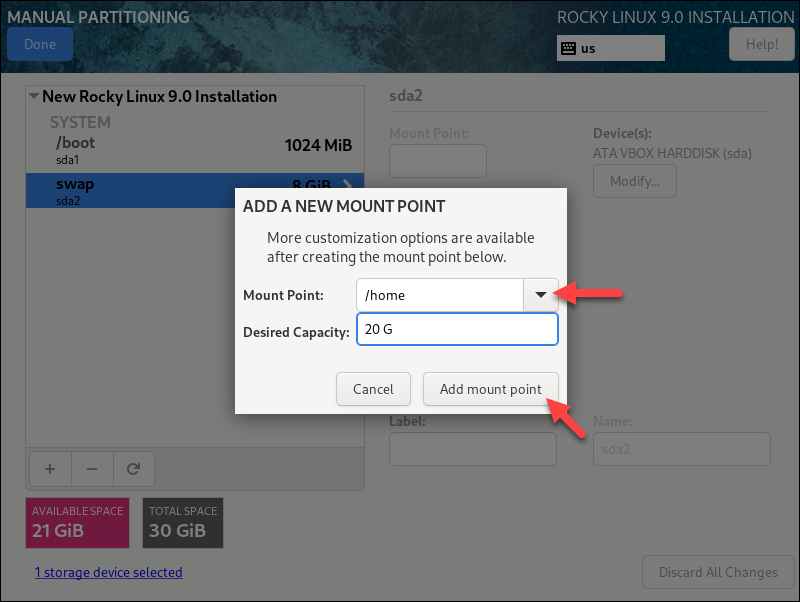
For this installation, we will create the following partitions:
- /home – 20 GiB
- /boot – 1 GiB
- swap – 8 GiB
Add each partition by clicking the + button and specifying the size. Click the Add mount point button to create the partition.
3. When finished, click Done to exit the partition manager.
4. A window appears showing the summary of changes to be written to disk:
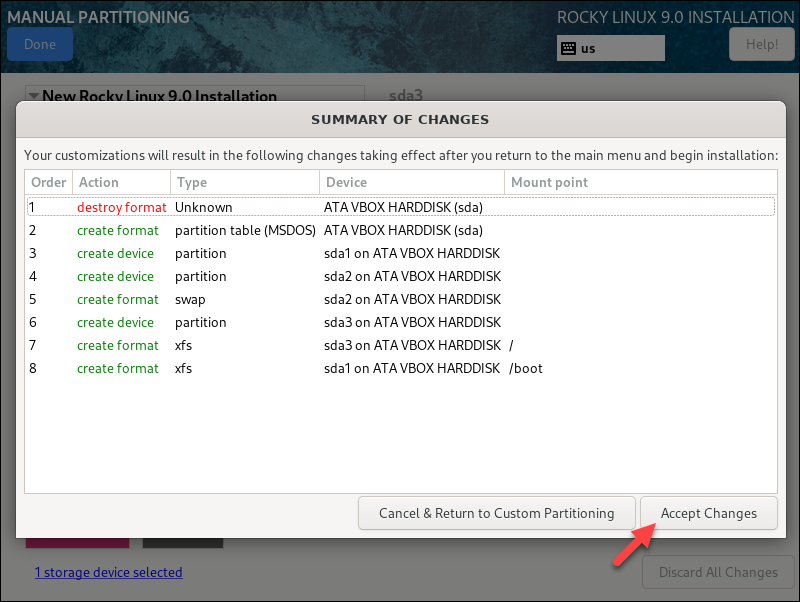
Click Accept Changes to proceed with the partitioning or Cancel to return and make changes to the partitions. When the partitioning finishes, the wizard returns to the installation menu.
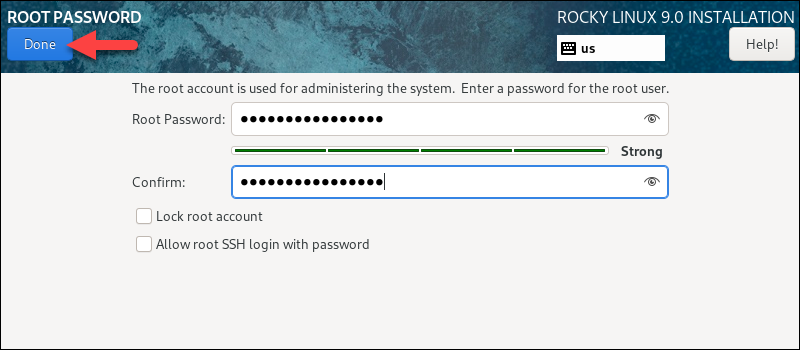
Root Password
Under the USER SETTINGS section, click the Root Password item to set up an administrator password for the system. Enter the password and confirm it. Remote logins via SSH are disabled by default. Check the Allow root SSH login with password option to enable it.
The password strength indicator shows whether the password is strong enough. After setting up the password, click Done to return to the installation menu and begin the installation.
Under USER SETTINGS, click the User Creation item to create a user for the OS. Enter a name, and choose a login username and password. Retype the password and check the password strength indicator.
- To make the user a system administrator, check the Make this user administrator box.
- When finished, click Done to save the changes.
Install Rocky Linux
After configuring all the settings in the installation menu, click the Begin Installation button to start installing Rocky Linux.
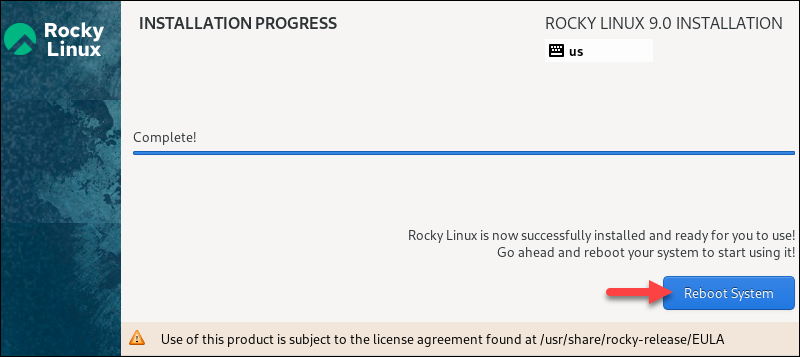
When the installation completes, take out the USB drive and click the Reboot System button to boot into the fresh Rocky Linux 9 installation on your machine:
- After the system boots, a login screen appears with the user account(s) you have created.
- Click the user you want to log in to and provide the password:
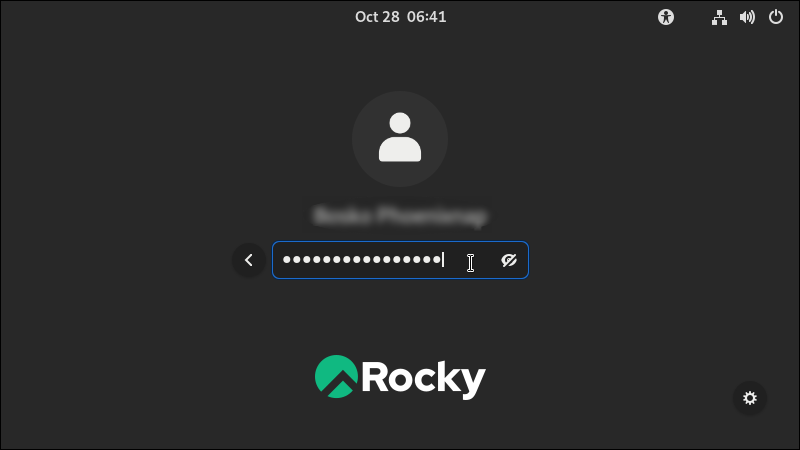
The installation is complete. You can start using Rocky Linux on your machine.
Leave A Comment?