Situatie
Windows 11 normally requires a Microsoft account when you set it up, but you can bypass Microsoft account creation and use a local account instead.
Solutie
Can You Skip Microsoft Account Creation During Windows 11 Setup?
Yes, but they both require some advanced preparation. We’ll cover them below. On a new PC, you’ll be guided through the normal Windows 11 setup process. If you’re installing Windows 11 yourself, then typically, you would use the Windows Media Creation tool to create a bootable DVD or USB drive, then install Windows 11 that way. Unfortunately, you’ll be stuck logging in with a Microsoft account if you follow either of those normal methods.
Windows 10 lets you use a local account if you disconnect from the internet. The latest version of Windows 11, however, will not — if you try the same trick, you’ll just get an error message. Even the Professional version of Windows 11 now requires a Microsoft account.

There are a few tricks to try, but Windows is wise to many of these. The first involves cutting off your internet connection when you’re prompted to add a Microsoft account. This involves either pulling out your Ethernet cable (if you use one) or hitting Shift+F10 and typing ipconfig /release followed by Enter. Hit the “back” arrow to go back one step and create a local username and password then complete the setup as normal.
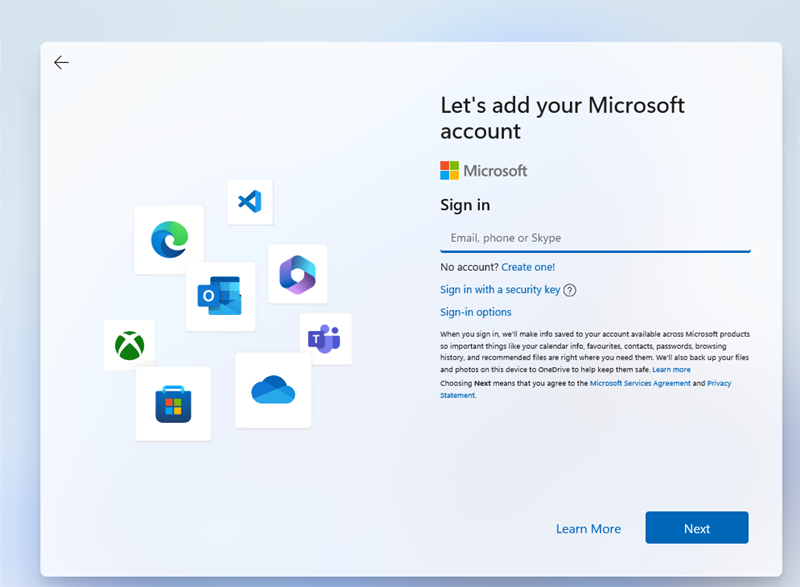
Another involves confusing Windows by inputting an email address that has been used too many times. The go-to email for this method is “no@thankyou.com” which you can add on the “Let’s add your Microsoft account” screen. Type a random password and hit the “Sign in” button. Windows may respond with an “Oops” error and give you a “Next” prompt. From here you can create a local account and proceed as normal.
Of course, there’s no guarantee either of these methods will work every time. A far more reliable method is to install Windows 11 from scratch with custom bootable media or to use a special command. You can also set up Windows 11 with a Microsoft account and then either convert that Microsoft account to a local account or create a new local account and delete the Microsoft account from your system.
How to Bypass Windows 11 Microsoft Account Requirement Using Command Prompt
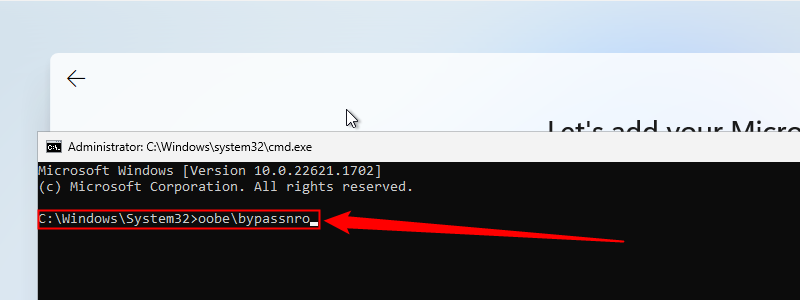
To bypass the Microsoft Account requirement, proceed with the first few steps of the installation process normally until you reach this screen:
Once you’re there, press Shift + F10 to open up a Command Prompt Window and type:
oobe\bypassnro
It isn’t case sensitive, but it is critical that you use the correct slash. Once you type in the command, press Enter and your PC will immediately restart.
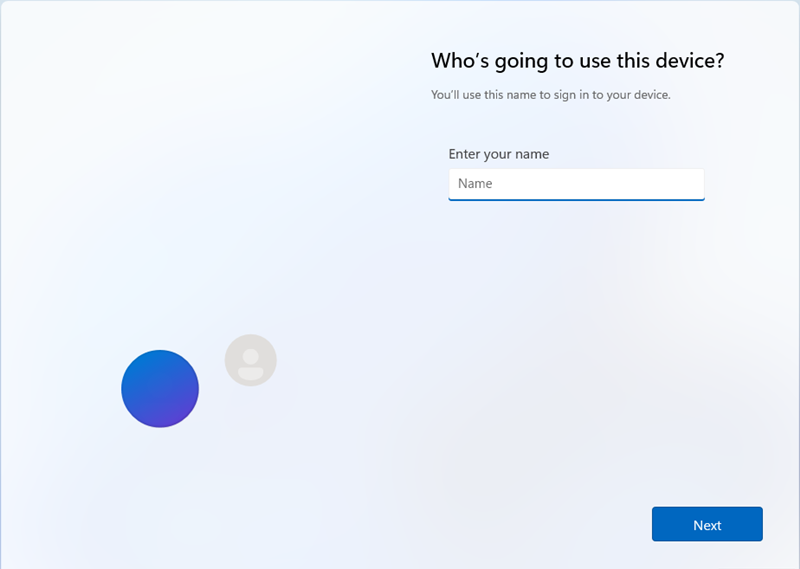
Now, you should completely disconnect your PC from the Internet at this point. If Windows 11 detects an Internet connection it may continue to try and force you to sign in with a Microsoft account. However, if you’re disconnected from the Internet you’ll see an “I Don’t Have Internet” option available now!

Click “Continue with limited setup” on the next page, and then you’ll be able to create a local account with a password and three security questions.
How to Install Windows 11 Without a Microsoft Account Using Rufus
Rufus is a tool that can create bootable media from an ISO. It does everything the Windows Media Creation tool does, except it has additional options and works with almost any operating system out there.
Newer versions of Rufus have a few extra features designed specifically to streamline installing Windows 11: It can disable the TPM, RAM, and Secure Boot requirements, and it can also disable the Microsoft account requirement. You only need a few things to use Rufus:
- A 16 Gigabyte (or bigger) Flash Drive or External SSD
- A Windows 11 ISO
- Rufus
The first thing you need to do is download Rufus and install it.
Then you have two choices: You can manually download a Windows 11 ISO, or you can let Rufus download the latest ISO for you. It is often useful to have ISOs of your operating system on hand, so we’ll download it manually in this example.
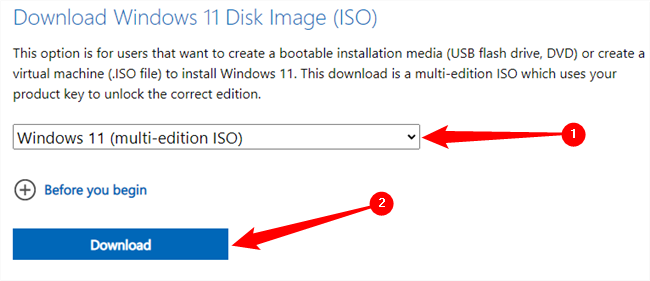
Head over to Microsoft’s Windows 11 download page, select “Windows 11 (multi-edition ISO)” from the dropdown list, then click “Download.” You’ll need to pick your language, then hit “Confirm.” The ISO is about 5 gigabytes, so don’t expect it to be done instantly.
Open Rufus after the Windows 11 ISO has finished downloading, click “Select,” then navigate to wherever you saved it. If you’re using an external SSD as your bootable media, you’ll need to tick “List USB Hard Drives” first.
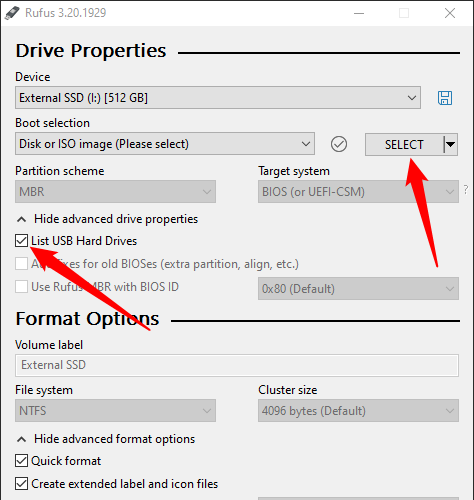
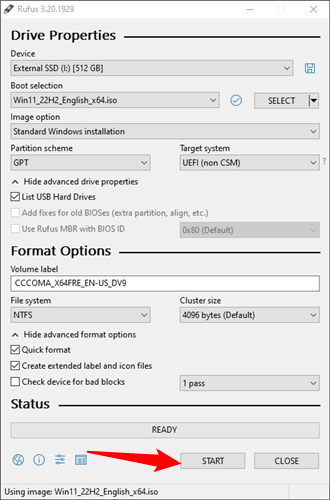
Rufus will handle most of the important options, like the partition scheme and file system, automatically; you don’t need to worry about them. Just click “Start.”
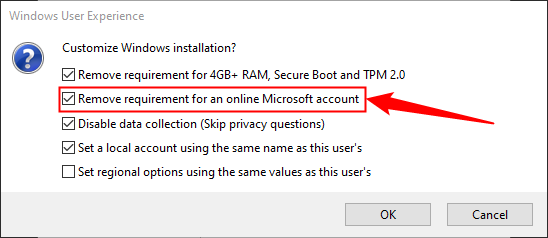
Pick out what Windows 11 requirements you want disabled. The only one you must select is “Remove Requirement For An Online Microsoft Account.” The others are handy too, especially if you’re upgrading an older PC that might not support TPM 2.0.
Click “OK” when you are done choosing what requirements you want disabled.
After that you just need to wait for Rufus to actually make the bootable media. It will take a few minutes at least, especially if you’re using an older flash drive.
Next, you need to restart your computer and change the boot order. Typically, your computer boots from the hard drive or solid-state drive that Windows is installed on.
You need to change it from that drive to the new, bootable USB drive you just created with Rufus. This process varies between computers and motherboard manufacturers. Generally, tapping the F2, Del, or F8 key will bring up a screen that’ll let you pick your boot device, but it could be a different key. If you don’t know what key to press, and you aren’t told which key when your computer is booting up, consult the manual for your computer or motherboard. If you’ve lost your manual, that isn’t a significant problem — you can easily check what motherboard you have and then find the manual on the manufacturer’s website. It is smooth sailing after you change the boot order. Windows 11 will walk you through the rest of the installation process.
How to Create a Local Account on Windows 11
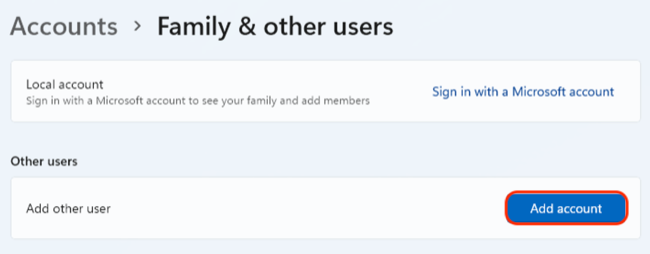
You can create additional Windows accounts that aren’t linked to existing Microsoft Accounts, though it’s easy to miss the cues. To do this, launch the Settings app and then navigate to Accounts > Family & other users. Click on the “Add Account” button to create another user account.
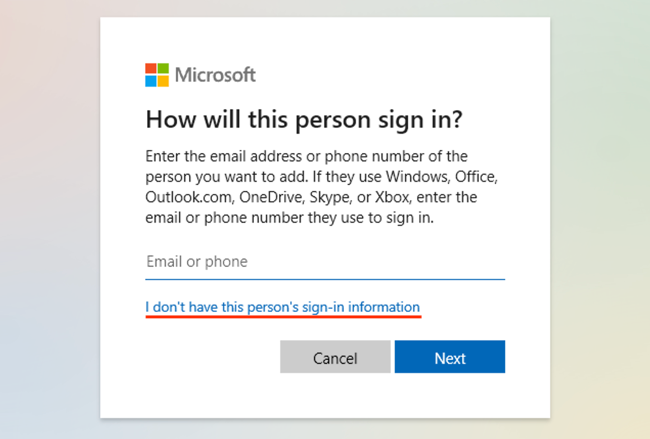
A new window will appear inviting you to type the email address or phone number of the person you wish to add. You can dismiss this using the “I don’t have this person’s sign in information” link just below the text field.
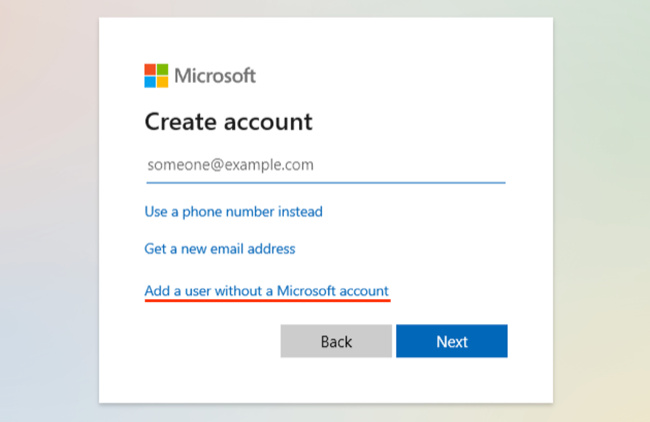
Next, Windows will try to encourage you to create a Microsoft Account instead. You can dismiss this attempt using the “Add user without a Microsoft account” link beneath the text field.
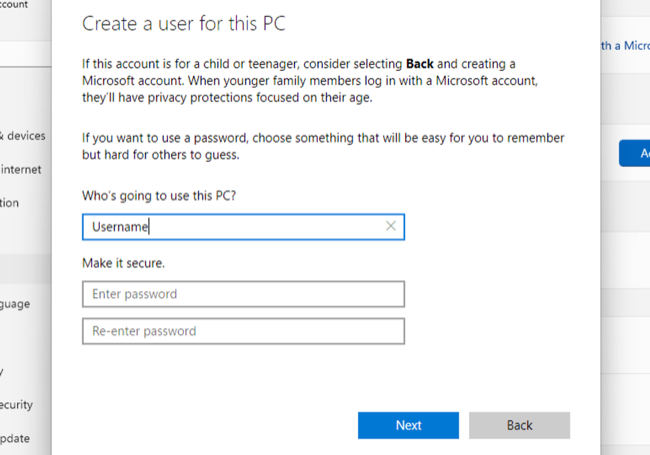
Finally, you’ll be able to start creating a local account. Type in your desired username and provide a password (if you want).
The account will now be added to your computer. Click on Start followed by your username then select “Sign out” to log in to the account.
Leave A Comment?