Situatie
For those who aren’t aware, Disk Utility has been an integral part of macOS since the beginning of Mac OS X. In addition to allowing users to erase and format their Mac’s storage drive before reinstalling macOS, it’s also capable of searching for errors related to the formatting and directory structure of the disk. Be cautious about disk errors though, as they can often lead to unexpected system behavior, and sometimes major errors can even prevent your machine from booting completely. Thus, using the repair function may be useful.
Before you go ahead with the following procedure, make sure you have made a Time Machine backup of your Mac so that you don’t permanently lose files that may be damaged during the process or if Disk Utility detects errors that it can’t repair. You’ll need to boot into recovery mode, a process that is different with ARM Apple Silicon Macs compared to Intel.
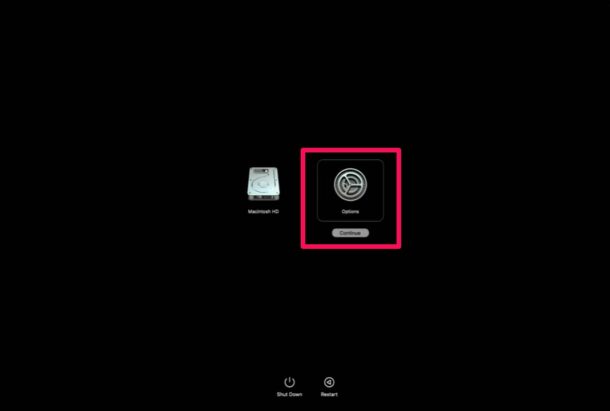
- If your Mac is turned on, you’ll need to shut down your Mac first. Once you’re done, press and hold the Touch ID / power button on your Mac to boot it up. Keep pressing the power button until you see “Loading startup options” right below the Apple logo. This will take you to the Startup Disk and Options screen. Hover the cursor over “Options” and click on “Continue”.
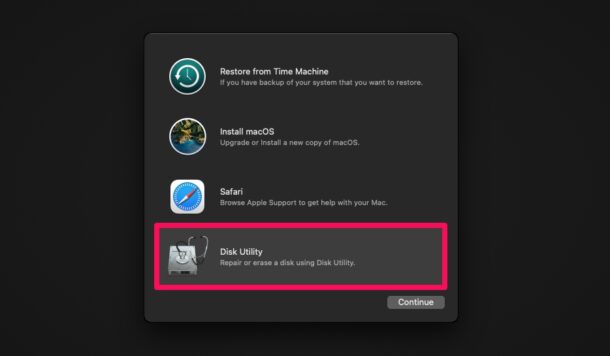
- Now, you’ll be taken to the macOS Utilities screen. Here, select “Disk Utility” and click “Continue” to get started.
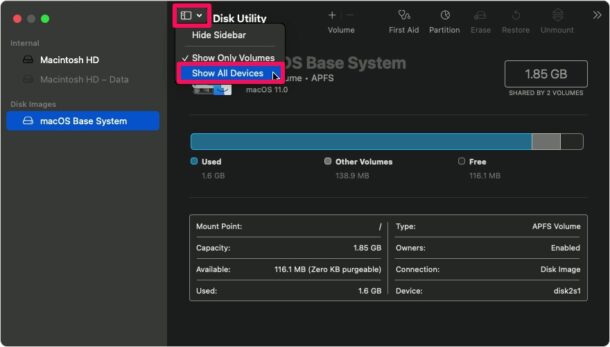
- Here, click on the View icon next to Disk Utility and choose “Show All Devices” as indicated in the screenshot below.
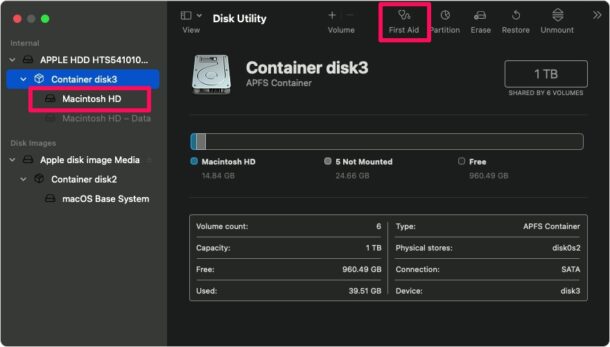
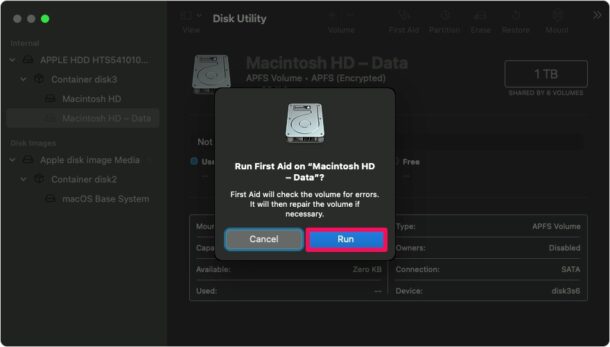
- Now, all the internal and external disks, their volumes and containers will show up on the left pane. The startup disk is located at the top of the sidebar and you’ll need to expand it to access its containers and volumes. Next, you need to select a particular volume as shown below and then click on the “First Aid” option located at the top of the window.
- When you’re prompted to confirm your action, choose “Run” to begin checking the volume for errors and repair if necessary.
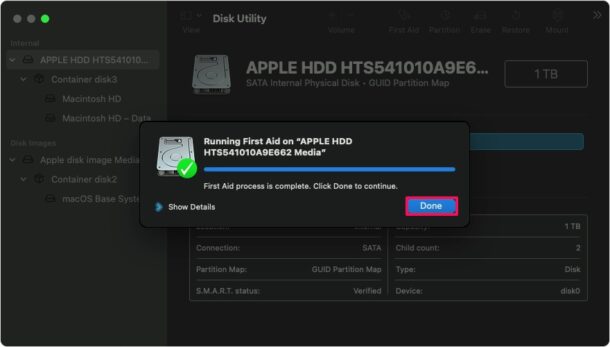
- Once it’s complete, click on “Done” and repeat the above steps to run First Aid on the other volumes, containers, and disks.
Once you’re done repairing your disk, you can exit out of macOS Utilties by clicking on the Apple logo from the menu bar and choosing “Restart” to reboot your Mac normally.
Leave A Comment?