Situatie
OneDrive, the Microsoft proprietary cloud storage service, allows you to save your important/sensitive files, documents, photos, etc., for posterity or just for safekeeping. And with OneDrive personal vault, you can add an additional layer of security. In this blog post, we share how you can transfer photos from your mobile smartphone to your Windows 10 PC without using a cable – instead of using OneDrive – Camera Upload.
It can be challenging to combine all your photos in one place without duplicating or losing any of them. Also remember all the necessary steps to take to transfer them from your phone to your computer, and locating the right cable, can make it a time-consuming chore. But with OneDrive app’s Camera Upload feature, you can seamlessly gather your photographic memories in one place.
Solutie
Pasi de urmat
Setting up OneDrive on your PC and phone
The first thing you’ll need, and if you don’t have one, you can sign up for one, is a Microsoft account.
Next, you’ll want to make sure that you’re signed in to OneDrive on your Windows 10 PC with that account. Type OneDrive into Windows Search in the taskbar, select the result and you’ll be presented with a display to sign in (see screenshot below).
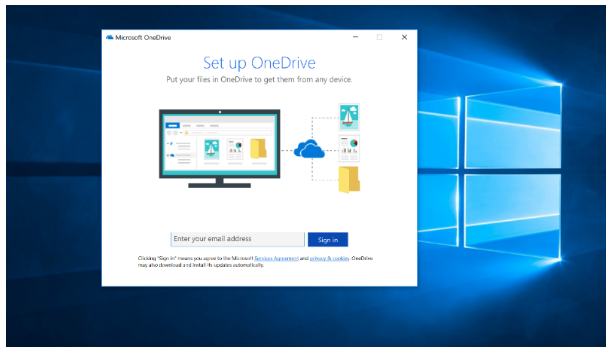
From this point forward, anything you put inside of it will be accessible from other devices.
Now that your Windows 10 PC is set up do the same with OneDrive on your phone.
iPhone or Android Phone
OneDrive Camera Upload works with both. Just follow the links for each below, to download and install.
- If you’re using iPhone, head to the Apple Store Page
- If you’re using Android, head to the Play Store App
Now launch the app and sign in with the same Microsoft Account used on your Windows 10 PC. The app will ask for permission to access your photos and videos.
You can now proceed to enable the camera to automatically back up all photos and videos taken with your phone.
Enable OneDrive Camera Upload on iPhone or Android
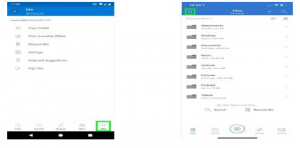
- Android: You’ll see five items on your screen: Files, Recent, Shared, Photos, and Me. Select Me on the bottom of the app (see screenshot below left).
- iPhone: Select the person icon at the top of the app (see screenshot below right).

Now continue, as follows:
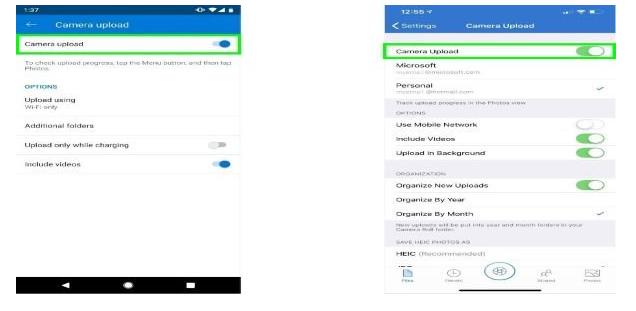
- Android: Select Settings and choose Camera Upload and toggle the button (see screenshot below left).
- iPhone: Tap the toggle on the right-hand side to enable Camera Upload (see screenshot below right).
By default, Camera Upload will only work when connected to WiFi. However, you can sync anywhere by doing the following:
- Android: Settings > Camera Upload > Upload using WiFi and mobile network
- iPhone: Settings > Camera Upload > Use Mobile Network
The pictures from your phone will automatically upload (the time this takes may vary and depends on the number of pictures you’re uploading as well as the speed of your internet) into the OneDrive folder that is set up on your Windows 10 PC. By default, these pictures will be stored under Pictures > Camera Roll.
Leave A Comment?