Situatie
By default, if you take a screenshot by pressing Windows + Print Screen key combination, Windows will save your screenshot to the Screenshots folder automatically. The specific location is C:\Users\username\Pictures\Screenshots.
Solutie
Before we show you how to change the default location of your screenshots, ensure that you have administrative privileges. Although it is not fully needed, some methods below might still require it to access some tools. All methods here are also available in all Windows 11 editions (Home, Pro, Enterprise, and Education).
Method 1: Using File Explorer to move the screenshots folder
Changing the default Windows 11 screenshot location takes just around a minute with File Explorer—no technical skills needed.
- Open File Explorer.
- Press Win + E or click the folder icon in your taskbar to open File Explorer.

- Press Win + E or click the folder icon in your taskbar to open File Explorer.
- Navigate to Pictures.
- Go to C:\Users\<YourUsername>\Pictures (replace <YourUsername> with your actual profile name).
- Or, click the Pictures folder in the Navigation pane on the side.
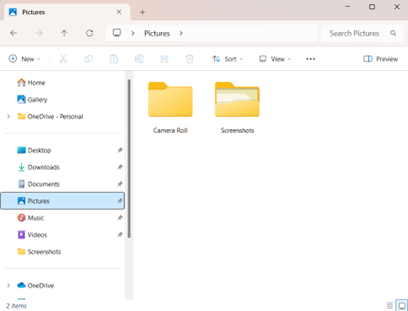
- Open folder properties.
- Right-click the Screenshots folder, then select Properties.
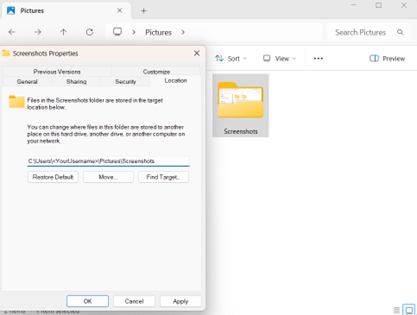
- Access Location settings.
- Switch to the Location tab, then click Move….
- Select a new destination.
- Choose any folder (e.g., D:\Screenshots, OneDrive\Screenshots, or a network path), then click Select Folder.
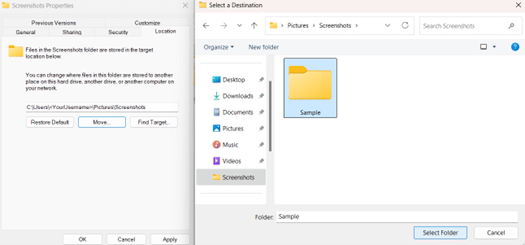
NOTE: Make sure that your target folder allows file creation or Write permissions.
- Apply changes.
- Click Apply (when prompted), then choose Yes to move existing screenshots.
- Confirm the new path.
- All future screen captures via Win + PrtScn will now be saved to your selected location.
NOTE: Windows will also move your old screenshots to the new location if you confirm during relocation. However, if prompted, select Yes to move existing screenshots back to the original location.
Method 2: Using File Explorer to restore the default location
If you need to undo your changes, resetting the default screenshot location only takes a moment.
- Reopen the folder properties.
- Open File Explorer > Go to the screenshot folder location.
- Right-click Screenshots > Properties > Location tab.
- Restore the original path.
- Click Restore Default, then confirm Apply.
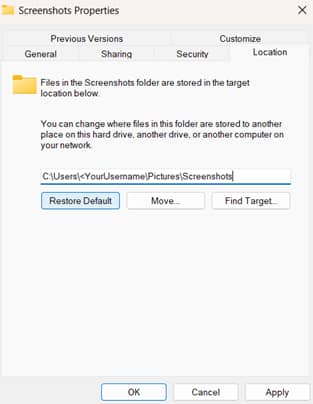
- Finalize.
- Click OK. All future screen captures via Win + PrtScn will now be saved to your selected location.
NOTE: Windows will also move your old screenshots to the new location if you confirm during relocation. This is optional, but if prompted, select Yes to move existing screenshots back to their original location.
Method 3: Using Registry Editor to manage the screenshots folder location
Use this method only if File Explorer fails, like when group policies lock folder settings, paths break after OS updates, or you need to enforce standardized screenshot locations across enterprise devices.
Warning: Making incorrect changes in the registry can cause system instability. Ensure to back it up before making changes. Watch How to Back Up and Restore Windows Registry for more details.
- Open Registry Editor.
- Press Win + R to open Run.
- Type regedit, then press Enter to open the Registry Editor.
- Navigate to the key.
- Paste or go to this address key: HKEY_CURRENT_USER\SOFTWARE\Microsoft\Windows\CurrentVersion\Explorer\User Shell Folders
- Modify the path (if needed).
- Double-click the GUID (e.g., {B7BEDE81-DF94-4682-A7D8-57A52620B86F}). If you can’t find it here, right-click on empty space, select New, then Expandable String Value.
- Replace its Value data with:
- If default: %USERPROFILE%\Pictures\Screenshots
- If custom: e.g., D:\Screenshots or \\Network\Path
- Apply changes.
- Click OK.
- Changes should take effect immediately. If not, restart File Explorer via Task Manager.
Method 4: Using PowerShell to set a new screenshots location
Automate screenshot folder relocation across multiple devices with this Windows 11 PowerShell script.
- Open PowerShell as Administrator.
- Press Win + X, then select Terminal (Admin).
- Run the following scripts.
- Set your custom screenshot path (modify this line): $ScreenshotsPath = “D:\<Input folder location here>“
- Create folder (if missing): New-Item -Path $ScreenshotsPath -ItemType Directory -Force
- Update registry path:
Set-ItemProperty -Path “HKCU:\Software\Microsoft\Windows\CurrentVersion\Explorer\User Shell Folders” `
-Name “{B7BEDE81-DF94-4682-A7D8-57A52620B86F}” -Value $ScreenshotsPath - Apply changes: Stop-Process -Name explorer -Force # Restarts File Explorer
- Verify.
- New Win + PrtScn screenshots will be saved to the new custom path.
Key considerations when changing the location of screenshots
Use these tips to ensure that you can change the location of your screenshots without issues.
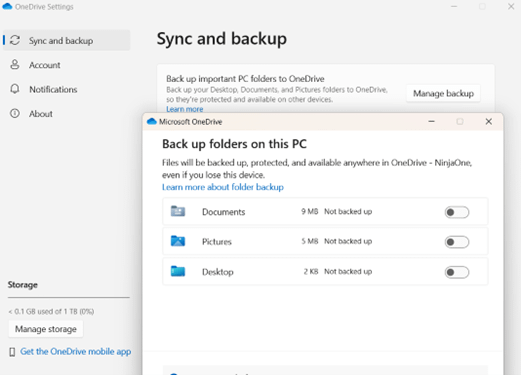
OneDrive may auto-redirect your Pictures or Screenshots folder. To fix this, adjust the backup settings in this app.
- Open File Explorer, then right-click your OneDrive folder in the side pane.
- In the submenu, hover over OneDrive, then select Settings.
- In the new window, select Sync & Backup > Manage backup > Toggle off “Pictures”.
Leave A Comment?