Situatie
Solutie
Sharpened filters: In OBS, sharpened filters are primarily used to enhance the detail and clarity of your video source, most commonly your webcam feed.
Here’s a breakdown of how they work:
- Sharpening effect: Sharpening filters increase the contrast between light and dark pixels in your image, making edges appear crisper and details more defined. This can be helpful for webcams that might capture footage with a slightly soft or blurry look.
Here’s how to use a sharpen filter in OBS:
- Right-click on the source you want to sharpen (usually your webcam) in the Sources section of OBS.
- Select Filters.
- Click the “+” button and choose Effect Filters.
- Select Sharpen from the dropdown list.
- Give your filter a descriptive name (e.g., “Sharpen Webcam”).
- Adjust the Sharpness slider to your liking. Higher values will increase sharpening but be careful not to overdo it, as it can introduce artifacts (unwanted noise) in the image.
Below you can see the best setting that does improve the quality.
![]()
Chroma Key filter: The chroma key filter in OBS is used to remove a specific color from a video source, most commonly used for green screen setups. This allows you to replace the removed color with another image or video, effectively creating a virtual background.
Here’s a breakdown of how it works:
- Green Screen: You use a green backdrop behind your subject (webcam).
- Chroma Key Filter: This filter in OBS identifies and removes pixels with the chosen color (usually green).
- Virtual Background: With the green removed, another image or video placed behind the webcam source fills the “empty space,” creating the illusion of a different background.
How to use the chroma key filter in OBS:
- Right-click on your webcam source in the Sources section.
- Select Filters.
- Click the “+” button and choose Effect Filters.
- Select Chroma Key from the dropdown list.
- You’ll see settings like “Color Picker” to choose the exact green shade to remove.
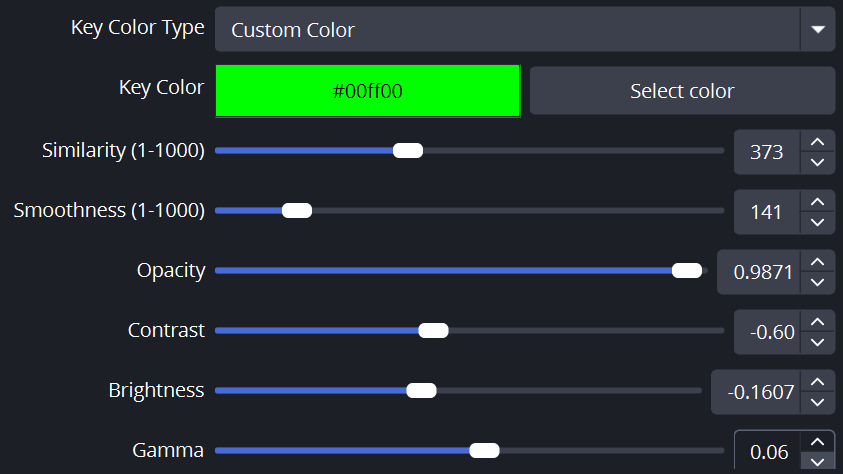
- Adjust sliders like “Similarity” and “Spill Reduction” to fine-tune the chroma key effect. Higher similarity removes more similar shades of green, while spill reduction helps minimize color bleeding from your subject onto the background.
Below you can see the best setting that does improve the quality.
Color Correction filter: The color correction filter in OBS is a versatile tool used to adjust the overall color balance, vibrancy, and style of your video source. It’s helpful for a variety of purposes, including:
- Improving webcam quality: Webcams can often produce footage that’s too bright, too dark, or lacking in color vibrancy. Color correction allows you to fine-tune these aspects for a more natural or stylized look.
- Matching colors: If you’re combining multiple video sources (e.g., webcam + game capture), you can use color correction to ensure they have a consistent color tone, creating a more cohesive visual experience.
- Color grading: For a more creative approach, you can use color correction to apply specific color styles or moods to your stream. This can be anything from a warm, vintage look to a cool, cinematic aesthetic.
Here’s a closer look at the functionalities of the color correction filter:
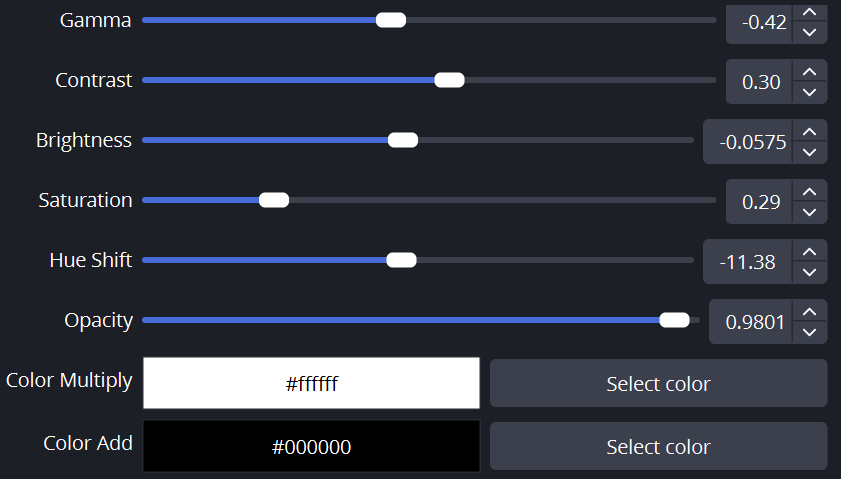
- Lift, Gamma, Gain: These sliders adjust the overall brightness (lift), contrast (gamma), and highlights (gain) of your image.
- Temperature & Tint: These sliders adjust the white balance, allowing you to make your image appear warmer or cooler.
- Saturation: This slider controls the intensity of colors. Higher saturation makes colors more vibrant, while lower saturation creates a desaturated, muted look.
- Color Wheels: You can adjust individual color channels (red, green, blue) or use the color wheels to fine-tune specific hues and shadows.
How to use the color correction filter in OBS:
- Right-click on the source you want to color correct (webcam, game capture, etc.)
- Select Filters.
- Click the “+” button and choose Effect Filters.
- Select Color Correction from the dropdown list.
- Experiment with the different sliders and color wheels to achieve the desired look.
Additional Tips:
- Start with subtle adjustments and gradually increase them until you achieve the desired effect.
- You can use reference images or online tutorials to learn color grading techniques.
- Consider using multiple color correction filters on different sources for more granular control.
- Be mindful of overdoing color correction, as it can create an unnatural look.
Remember, color correction is a powerful tool for enhancing your OBS streams. With practice and experimentation, you can unlock its full potential to create a visually appealing and engaging presentation.
Leave A Comment?