How to set up VoiceOver Portable Preferences
You can set your preferences for VoiceOver and then take them with you wherever you go using a removable drive.
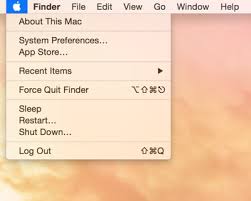
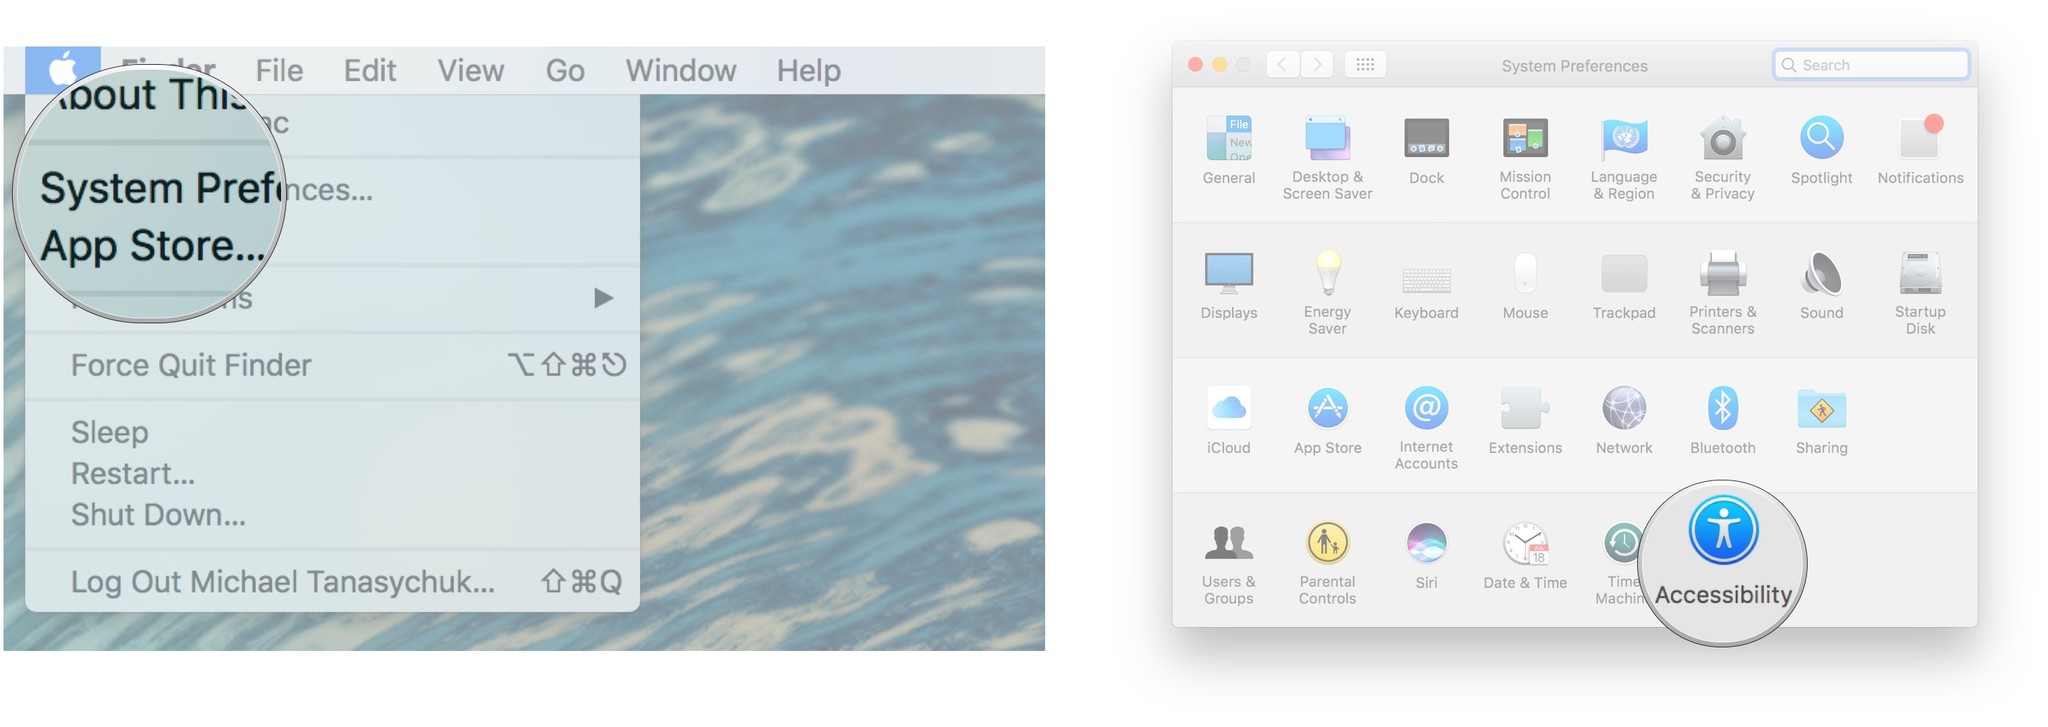
- Click the Apple menu button in the top left corner of your screen.
- Click System Preferences.
- Click Accessibility. It’s on the very bottom right of the System Preferences pane.
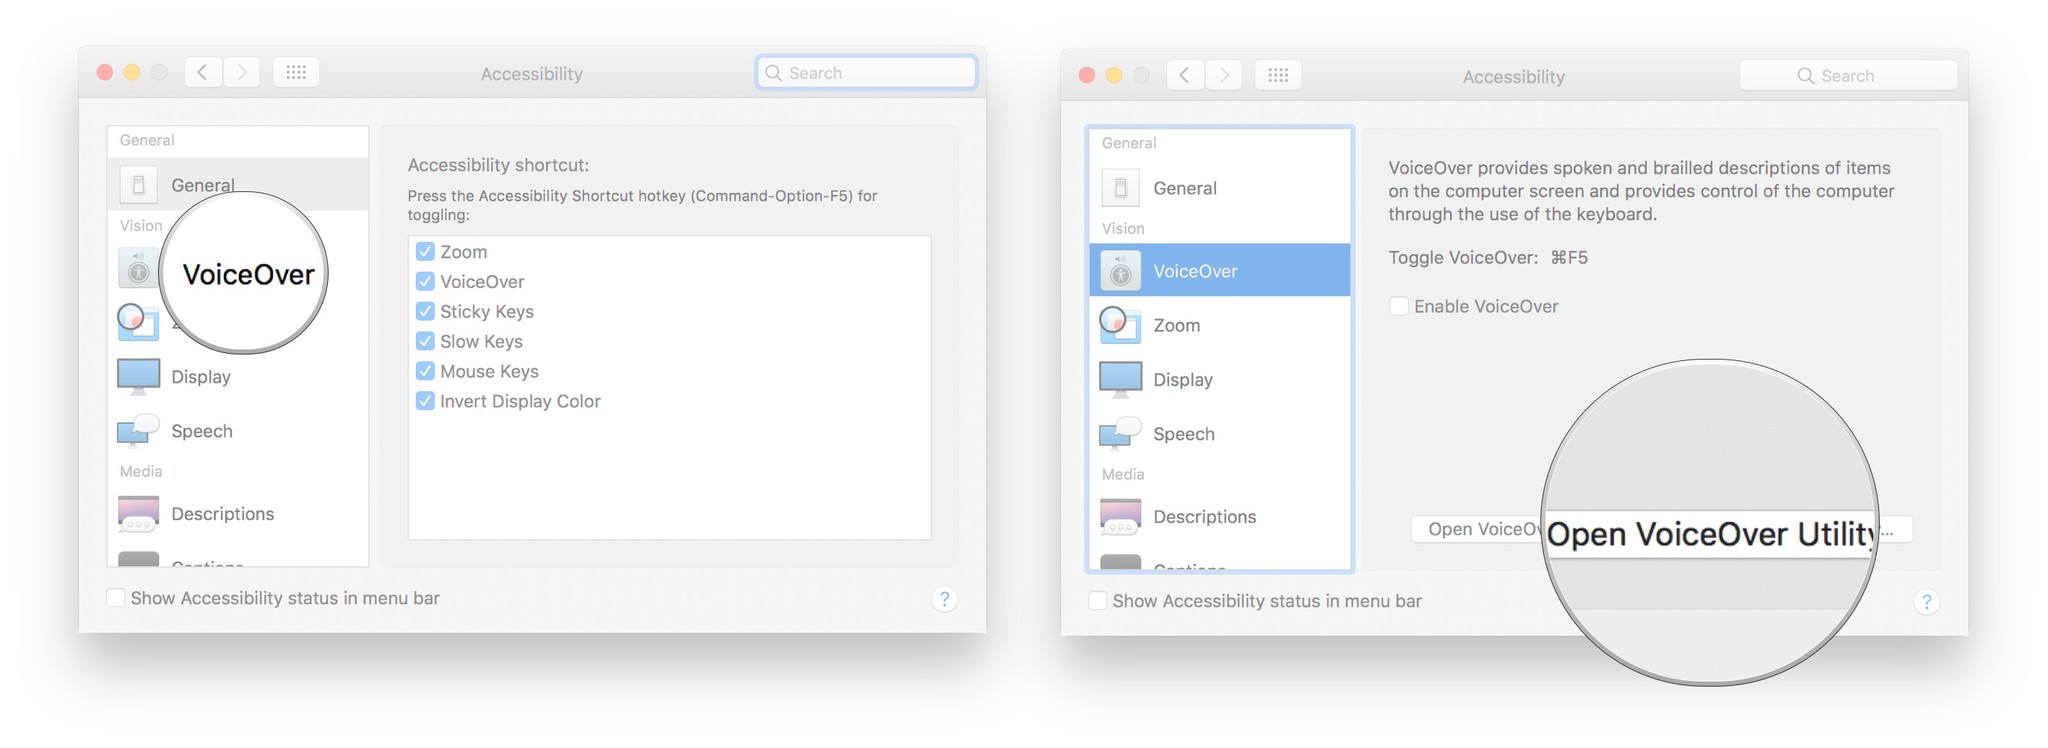
- Click VoiceOver.
- Click Open VoiceOver Utility…

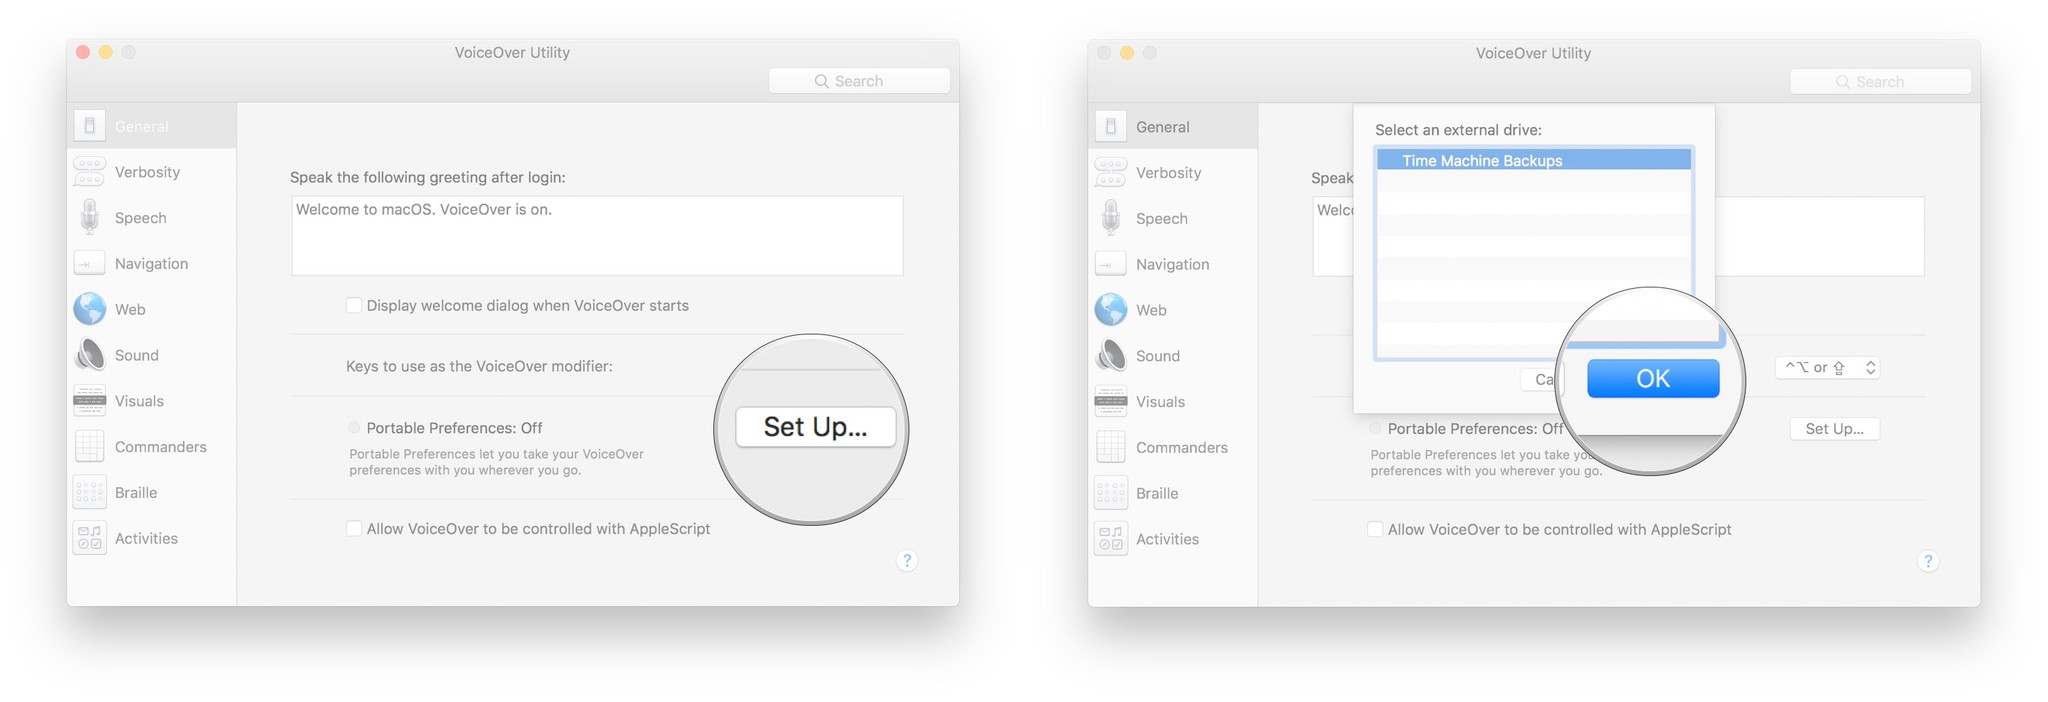
- Click Set Up… next to Portable Preferences.
- Click your portable drive in the list.
- Click OK.


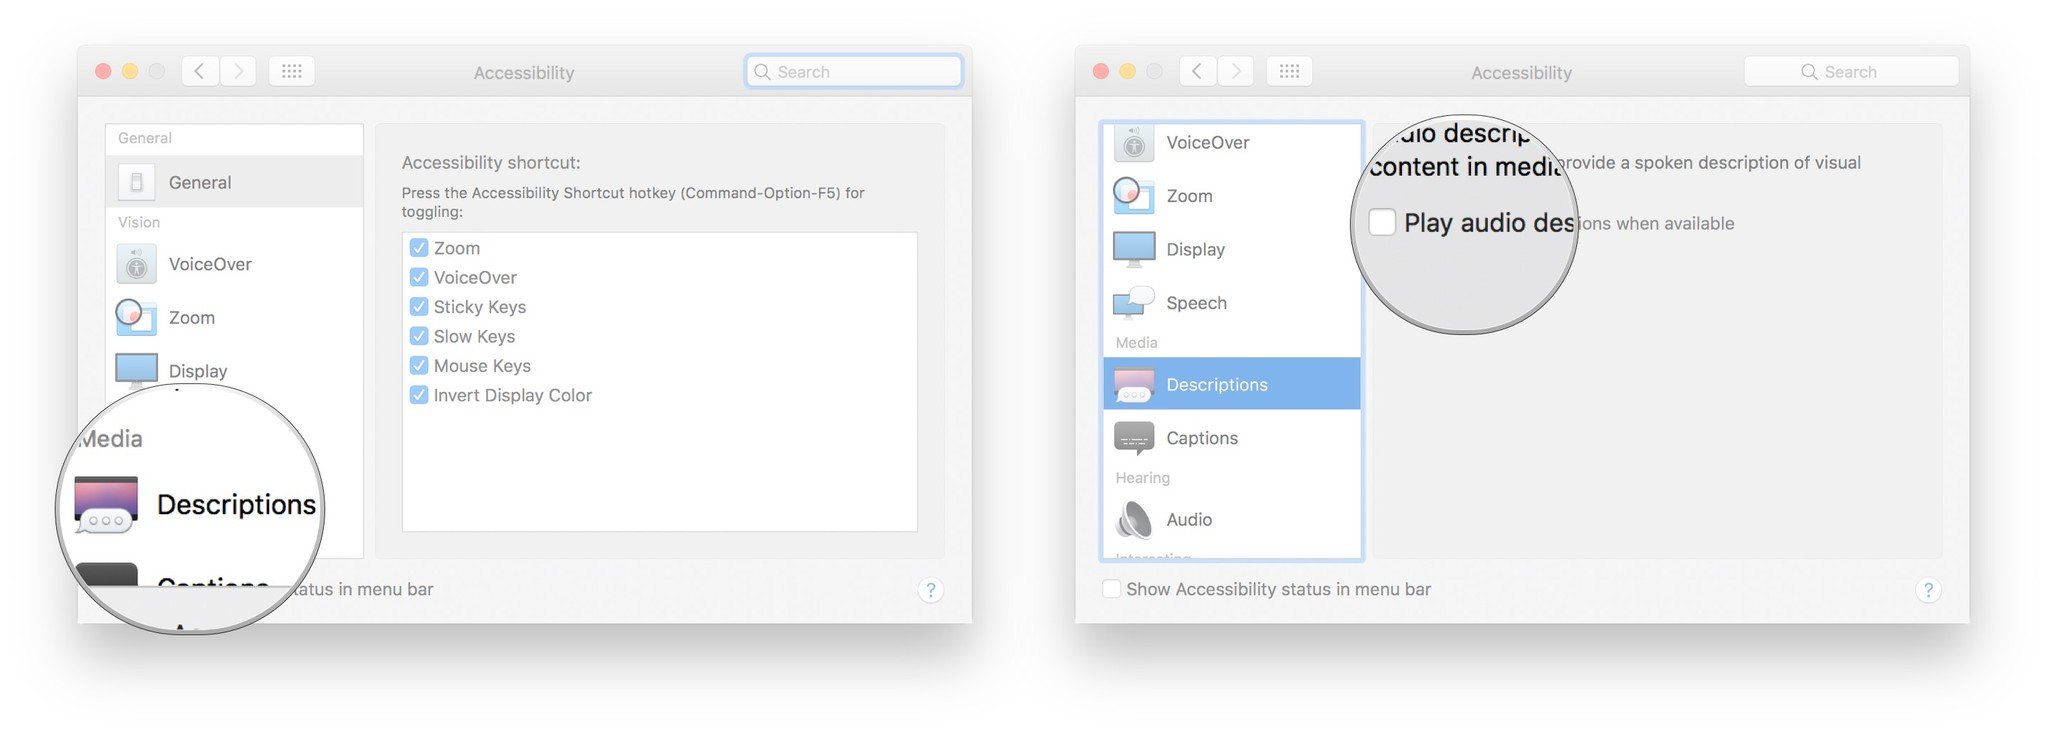
How to enable Descriptions
You can enable voice description of visual content so that, when available, you’ll hear descriptions of the video you’re watching.
- Click the Apple menu button in the top left corner of your screen.
- Click System Preferences.
- Click Accessibility. It’s on the very bottom right of the System Preferences pane.
- Click Descriptions in the menu on the left.
- Click the checkbox next to Play audio descriptions when available to enable descriptions by default. They’ll always play if they’re available.