Situatie
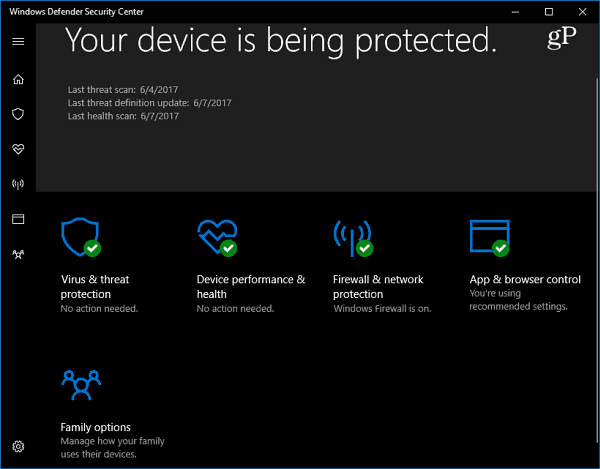
Windows Defender is the default antimalware security software that comes built into Windows 10. It protects your system in real-time against all sorts of security threats such as viruses, worms, rootkits, spyware, and even ransomware.
Windows Defender continues to improve with each major update of Windows 10.
While Windows Defender does a pretty good job with the default settings, nothing is 100 percent effective, and it doesn’t hurt to amp it up when it comes to changing cloud-level protections. Selecting a higher level of protection makes Windows Defender more proactive in scanning and detecting suspicious files.
Join Microsoft MAPS via Group Policy
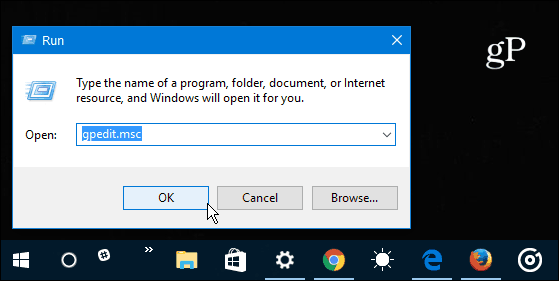
These initial steps require using Group Policy which isn’t available in the Home versions of Windows 10. Use the Windows Key + R to bring up the Run dialog and type: gpedit.msc and hit Enter or click OK.
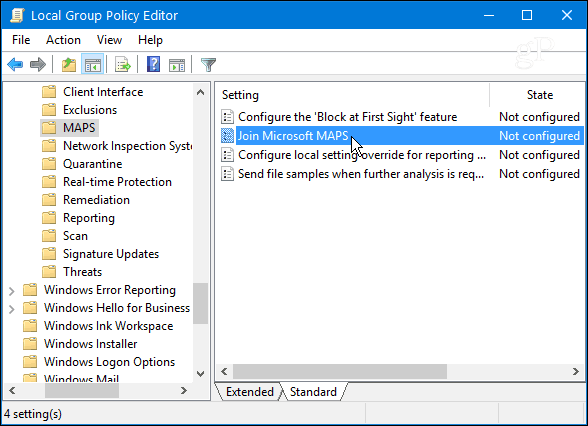
Next, navigate to the following location:
Computer Configuration > Administrative Templates > Windows Components > Windows Defender Antivirus > MAPS
Double-click Join Microsoft MAPS located in the right-panel.
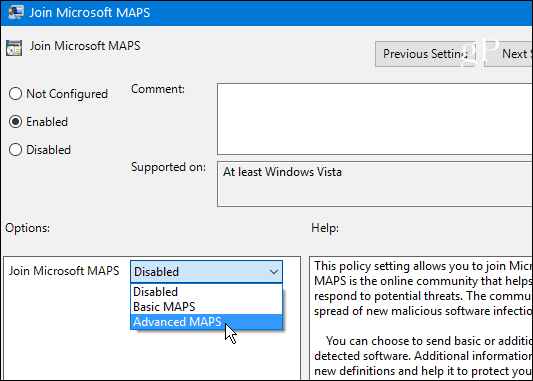
Select Enabled and under Options select Advanced MAPS from the drop-down and click OK.
Increase the Cloud Protection Level
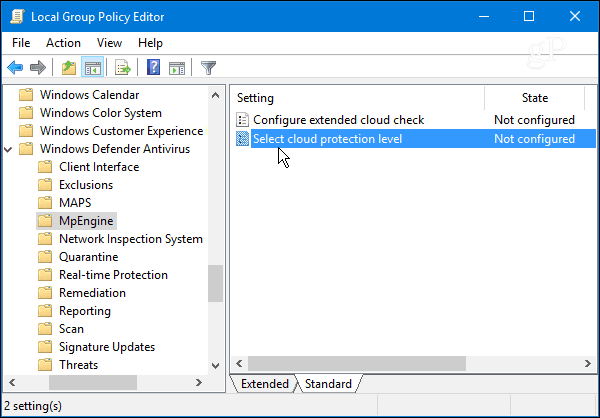
Now that you have enrolled your Windows 10 device in the MAPS program you can change the cloud protection level of Windows Defender. Continuing in Group Policy head to the following path:
Computer Configuration > Administrative Templates > Windows Components > Windows Defender Antivirus > MpEngine
Then double-click Select cloud protection level in the right panel.
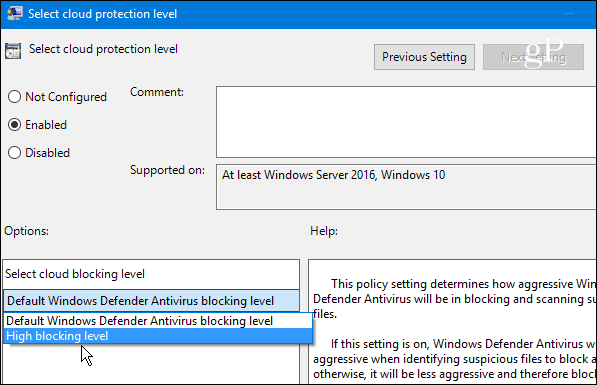
Select Enabled and under the Options section select High blocking level from the drop-down menu and click OK to close out of Group Policy.
Leave A Comment?