How to reclaim space after upgrading to Windows 11

After upgrading to Windows 11 from Windows 10 or another version, you will probably notice a spike in storage usage. Use these steps to get the storage back.

When you upgrade to Windows 11 from Windows 10 or another version, the setup makes a copy of the previous installation as part of the process, in case something wrong happens during the installation, and the system needs to roll back to the original setup, or Windows 11 is having compatibility issues, and you need to revert to a previous version manually. Although the safeguard feature provides a way to restore the original changes, the copy of the files will be kept even after the upgrade completes successfully, taking a lot of storage (inside the “Windows.old” folder) that can be an issue for devices with limited capacity.

If you notice that your laptop or desktop computer is running out of space after the upgrade, Windows 11 includes an option to delete the previous files that can reclaim 12GB or more, depending on the previous configuration.

In this Windows 11 guide, we will walk you through the steps to delete the previous installation files wasting space after upgrading to the new version of the OS.

  • How to free up space after Windows 11 using Settings
  • How to free up space after Windows 11 using Disk Cleanup  
How to free up space after Windows 11 using Settings

To reclaim space after installing Windows 11, use these steps:

  1. Open Settings.
  2. Click on System.
  3. Click on Storage.
  4. Click the Temporary files page on the right-side.
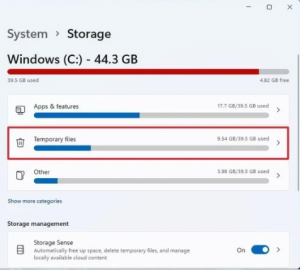
  5. Clear all the preselected items (if applicable).
  6. Check the Previous Windows installation(s) option.
  7. Click the Remove files button.

Once you complete the steps, the previous installation files will be removed alongside any other temporary files you may have selected on the settings page.

In previous versions, the option was also available through the Storage settings, but it’s no longer the case with Windows 11.

How to free up space after Windows 11 using Disk Cleanup

In addition to using the Settings app, you can also use the legacy Disk Cleanup tool to delete the folder with the previous installation of Windows 11.

To free up space after the installation of Windows 11 with Disk Cleanup, use these steps:

  1. Open Start.
  2. Search for Disk Cleanup, click the top result to open the settings.
  3. Click the Clean up system files button.
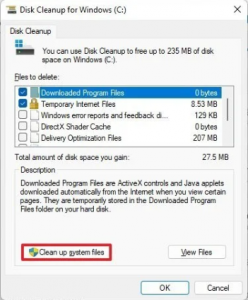
  4. Check the Previous Windows installation(s) option.

Quick tip: You can also select other temporary files (such as Delivery Optimization Files and Windows update log files) to recover even more space.

  1. Clear the Downloads option to avoid deleting downloaded files inside the “Downloads” folder.
  2. Click the OK button.

After you complete the steps, the folder with the previous installation files will be deleted from your computer, freeing up storage on the main drive.

The system will only keep the copy of the earlier setup for the first ten days after the upgrade. After this period, Windows 11 will automatically delete these files. Also, after removing the files, the option to roll back will no longer be available in the Settings app. In the future, if you want to downgrade, you will have to do a clean installation using the version of Windows you want to use.

[mai mult...]

How to connect to Wi-Fi network using Command Prompt

You can also use the netsh command-line tool in Command Prompt to connect to a Wi-Fi network on Windows 11. To connect to a Wi-Fi network with commands on Windows 11, use these steps:

  • Open Start.
  • Search for Command Prompt, right-click the top result, and select the Run as administrator option.
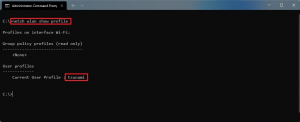
  • Type the following command to view the available network profiles and press Enter:netsh wlan show profile
  • Confirm the wireless profile.

  •  Type the following command to connect to the wireless network on Windows 11 and press Enter:

netsh wlan connect ssid=YOUR-WIFI-SSID name=PROFILE-NAME

In the command, update the name (SSID) of the network and profile name with your network information. For example, this command connects to the “tsunami” network using the “tsunami” profile:

netsh wlan connect ssid=tsunami name=tsunami

Quick Tip: On a computer with multiple adapters, you also have to specify the adapter name in the command. For example,: netsh wlan connect ssid=YOUR-WIFI-SSID name=PROFILE-NAME interface=Wi-Fi.

After you complete the steps, the laptop will connect to the Wi-Fi network.

Create network connection

The netsh command tool also allows you to manage Wi-Fi adapters and networks. The only issue is that you can only manage existing profiles. You cannot create new network profiles with this tool. If you have to use Command Prompt to connect one or multiple computers to the same wireless network, you can export the profile created automatically during the first connection. Then you can import it using netsh to connect using commands.

Export Wi-Fi profile

To export a Wi-Fi profile with commands on Windows 11, use these steps:

  1. Open Start.
  2. Search for Command Prompt, right-click the top result, and select the Run as administrator option.
  3. Type the following command to view the available network profiles and press Enter:netsh wlan show profile
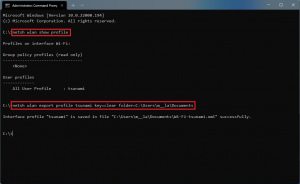
  4. Type the following command to export a profile and press Enter:netsh wlan export profile PROFILE-NAME key=clear folder=PATH\TO\EXPORT\FOLDER

    For example, this command exports the tsunami profile to the “Documents” folder.

    netsh wlan export profile tsunami key=clear folder=C:\Users\m\Documents

Once you complete the steps, you can import the same XML file to connect other computers to the wireless network.

Import Wi-Fi profile

To import a Wi-Fi profile on Windows 11, use these steps:

  1. Open Start.
  2. Search for Command Prompt, right-click the top result, and select the Run as administrator option.
  3. Type the following command to determine the name of the network adapter and press Enter:netsh wlan show interfaces
  4. Confirm the name of the adapter that will connect to the network.
  5. Type the following command to import the wireless profile and press Enter:netsh wlan add profile filename="PATH\TO\PROFILE.XML" Interface="YOUR-WIFI-ADAPTER-NAME" user=current

    In the command, you must specify the location of the XML file and network interface name.

    For example, this command imports the XML profile located in the “Documents” folder to the Wi-Fi adapter:

    netsh wlan add profile filename="C:\Users\m\Documents\wi-fi-tsunami.xml" Interface="WI-FI" user=current

  6. Type the following command to connect to the wireless network and press Enter:netsh wlan connect ssid=YOUR-WIFI-SSID name=PROFILE-NAME

    In the command, you must specify the SSID and profile name that corresponds to your network.

    For example, this command connects to an access point using the “tsunami” SSID and “tsunami” profile name:

    netsh wlan connect ssid=tsunami name=tsunami

  1. Quick tip: If you have multiple wireless interfaces, you must also specify which adapter you want to use in the command. For example, netsh wlan connect ssid=YOUR-WIFI-SSID name=PROFILE-NAME interface=Wi-Fi.

After you complete the steps, the computer should connect to the wireless network automatically.

[mai mult...]
Best Patch Management Software To Keep Your Devices Up To Date

The IT infrastructure and applications in large enterprises require dedicated staff for their management, maintenance, and security. It’s a complex job, which can overwhelm any team with tickets and issues, and that’s why IT teams are always looking out for trustworthy ways to automate, centralize, and simplify their work. One of the typical ways to do that is through using a dedicated patch management software to apply updates automatically and in bulk, ensuring all software gets updated as soon as possible.

  • N-able N-central

The N-able (formerly SolarWinds® MSP) N-central® product offers patch management as one of its many capabilities for remote monitoring and management. It uses rules, caching, multiple maintenance windows and automated approval methods to enable you to automate the patching of devices under your management. Updates can be applied either globally or on a per-device level when needed. In addition, applying smart keywords makes it possible to ignore some updates depending on the circumstances. For comprehensive visibility, N-central gives you an overview of all update statuses in your environment to act on any issues as soon as they arise.

Of course, N-central is a lot more than just patch management. The many features this all-in-one remote monitoring platform provides also include centrally managed antivirus, endpoint detection and response, network mapping, backup management, and a lot more. There are plenty of integrations for N-central including support for Microsoft Intune which many readers may find useful.

  • N-able RMM

Patch management is also offered as part of another all-in-one tool from N-able, called RMM. It’ll help organizations meet their needs for applying updates quickly and efficiently to ensure the highest security standards for all users.

RMM provides access to a single web console to manage all updates. You can apply updates manually or create auto-approve rules depending on security policies and the current needs. Scheduling makes it possible to update software without disrupting employees during critical productive times. For visibility, you get access to clear reports to quickly fix any issues as soon as they arise. For troubleshooting any issues around software updates, the remote background management feature can be extremely helpful. It lets you provide remote support and perform system administration tasks without establishing a full remote desktop connection.

Regarding OS support, it’s important to mention that with the automated tools included in N-able RMM, you can approve, schedule, and deploy patches using the same set of workflows for both Windows and macOS devices. This means that all devices get the same level of security.

There are some differences between N-able RMM and N-central which we explained in another article. Be sure to check out our guide on N-able RMM vs N-central.

  • ManageEngine Patch Manager Plus

Patch Manager Plus by ManageEngine is an end-to-end solution, which supports Windows, macOS, and Linux systems along with many third-party applications and updates. It allows you to choose between both on-premises and cloud-based deployment models. You can run a scan to detect vulnerable endpoints and automate patches across a wide range of desktops, servers, virtual machines, and mobile devices. Further, you can also run audits and get scheduled reports for better visibility and control across your network. ManageEngine offers three editions of Patch Manager Plus with one free edition supporting up to 20 computers and 5 servers.

  • SysAid Patch Management

SysAid Patch Management is a capable solution that supports Windows-based systems, Microsoft Applications, and some third-party applications including Java, Chrome, Skype, Mozilla Firefox, Thunderbird, and more. It also supports both cloud and on-premises environments and offers easy setup and automated capabilities. IT administrators can monitor the progress of patch deployments with an overview of all due and completed patches via a unified interface. The solution easily integrates with all SysAid products for network management. While the solution offers all required features for seamless patch management, it lacks support for Linux and macOS systems—which is its major drawback.

  • ITarian Patch Management

ITarian also offers powerful software for Windows Patch Management, which provides an agent-based approach to scanning and updating automated patches across enterprise networks. ITarian also offers third-party patches on request, which can help you extend its capabilities to systems, applications, and servers outside of the Microsoft ecosystem. The solution also supports notifications and provides reports to help you stay on top of your IT environment.

  • Avast Business Patch Management

The patch management software by Avast supports Windows-based computers and servers along with various third-party applications. The solution provides automated patching across all supported devices in your network, with minimal impact on network performance and speed. You can also apply updates remotely and get centralized visibility and control with its cloud-based platform. Its unified dashboard provides you a birds-eye view of all software patches helping you easily track progress, identify failures, and rollback patches that create issues. You can also schedule automated patch scans and get comprehensive reports to assess the health and security of devices in your network.

  • Rapid7 InsightVM

Rapid7 InsightVM is essentially a vulnerability management solution that supports automation-assisted patching and containment. The solution relies on Rapid7’s threat and vulnerability research data to support live vulnerability and endpoint analytics. You can also monitor and update cloud, containerized, and virtual infrastructure with InsightVM and make use of its RESTful API for integrations with Splunk, ServiceNow, and other tools. The company also offers managed vulnerability management services. Check out its training and certifications to get the most of InsightVM.

Conclusion

Organizations need scalable patch management solutions to meet the requirements of their growing IT infrastructure. The tools discussed in this article offer easy implementation and effective patching. However, we find N-central and RMM from N-able scoring high on key features, such as cross-platform support, automation, rollbacks, end-to-end visibility, and reports. You can evaluate their free trials to get started and choose higher plans as you need.

[mai mult...]
Best Spam Filters To Block Unwanted Emails

Email security has become a major concern for organizations due to the increasing number of advanced threats, phishing, and ransomware attacks. Taking email security lightly can be especially devastating to IT services providers due to the large scale of their operations with sometimes thousands of devices managed. According to McKinsey and Company, threats from inside the company accounts for around 43% of data breaches. Here is where powerful, enterprise-grade email filters play a critical role.

The first line of defense

Email or spam filter tools are physical servers installed at the organization’s network as the first line of defense to target threats before they land into a recipient’s inbox. These tools filter all incoming messages before they enter the end user’s account. Email filtering is a process that monitors inbound and outbound emails for spam, malware, or any suspicious content before reaching a mail server. Employing filtering tools helps MSPs and organization’s IT teams to improve regulatory compliance, business continuity, and employee security.

Depending on the use case, spam filters vary greatly in terms of the level of security they provide, scalability, ease of deployment, and additional features to meet the customer’s needs. Outlined below are some the best spam filter tools to give you an idea of what’s possible today and help you make an informed choice.

N-able Mail Assure

N-able™ (formerly SolarWinds® MSP) Mail Assure is an email security solution that helps keep an organization’s network safe and secure from malware, phishing, and spam. It enables managed services providers (MSPs) and enterprises to block the emails that threaten an organization’s assets and critical information. The tool provides email security through advanced analytical features such as an intelligent protection and filtering engine, robust encryption, archiving, and more. To finetune filtering capabilities, Mail Assure has a proprietary engine that is fed continuous data from 23 million inboxes to recognize new threat patterns. Other aspects worth mentioning include:

  • A multitenant web interface for end-users
  • Built-in 24/7 email continuity to improve business productivity
  • Quarantine reports providing clear visibility of the email flow
  • Seamless integration with Microsoft 365
  • Long-term email archiving and storage options
SpamExperts

SpamExperts is a powerful security solution for ISPs and web hosts to strengthen email protection. The tool provides advanced inbound and outbound email filtering options to eliminate and block emerging threats. It not only protects the organization’s network but also saves resources and costs.

The tool offers a first-level incoming filter defense that runs at the frontline of the email infrastructure. With its clear and multilevel view of email flow, end users can track or block unwanted messages, as well as store useful emails to ensure business continuity even during outages and downtime. Users can choose various deployment methods to discover its advanced analytical features.

Barracuda Essentials

Barracuda is a spam filtering solution that protects your business from email-borne cyber threats. It is one of the most comprehensive security platforms for organizations to block threats and protect businesses from volumetric malware, spam, targeted spear-phishing attacks, and ransomware. The tool blocks advanced threats with the help of its inbound filtering features. It quickly filters every message before it gets delivered into end users’ dashboards. It uses spam scoring, URL link protection, virus scanning, reputation checks, and more to provide high-level protection.

Barracuda Advanced Threat Protection uses multiple layered analytic engines that perform functions like static analysis, behavioral analytics, CPU-emulation sandboxing, and more. It also offers outbound filtering, cloud-to-cloud backup, tamper-proof archiving, and automatic incident response. With its advanced layers of protection, encryption, and data loss protection features, the tool eliminates issues like data leaks—thereby helping organizations to stay compliant and productive.

Proofpoint Essentials

Proofpoint® offers a service to filter an organization’s inbound and outbound email traffic. Methods are used to scan messages and block content that includes malware, spam, viruses, suspicious links, and others. The tool can also be used for appliance-based email filtering that allows organizations to secure their critical data.

Another way to utilize this tool is when organizations move their applications and services to cloud deployment. Cloud deployment of this tool is more effective than appliance-based filtering as it requires less management and offers real time automatic updates. Additionally, it also defends an organization’s network against spam risks and other email-borne cyber threats.

Mimecast Email Security with Threat Protection

Mimecast’s secure email gateway is a cloud-based solution that protects organizations from inbound malware, spam, spear-phishing, and zero-day attacks. It combines with multiple policies, applications, and detection engines to secure business-critical emails. It can also perform outbound scanning of all emails. This technique detects malicious content to block threats and prevent the loss of sensitive or confidential information.

The tool includes end-to-end encryption, DLP, and content control for scanning full emails with attachments. An advanced feature of the tool is BYO threat intelligence that automatically ingests existing security data to Mimecast® tenants to streamline response processes, increase threat detection efficacy, maximize ROI, and more.

Trend Micro Email Security

Trend Micro is an email threat detection tool that tracks and blocks advanced threats faster and better. It offers layered protection against ransomware, malware, and others using dynamic sandbox analysis for files and URLs, and machine learning to help filter unknown malware. The advanced services of Trend Micro Email Security give continuous and updated protection against advanced targeted attacks with enterprise-grade security features such as:

  • Longer mail tracking search window
  • Sandbox analysis
  • Email continuity
  • URL time-of-click
  • Artificial intelligence (AI)-based fraud/BEC detection
  • DLP and encryption
  • File-password extraction
  • End-user quarantine
  • Connected Threat Defense
  • Sender analysis and authentication by SPF, DKIM, and DMARC
Conclusion

Choosing the best solution for real-time protection against email-borne threats can be difficult with so many options available on the market. The tools highlighted above are the best cloud-based spam or email filtering tools that offer advanced capabilities to fight malware, ransomware, and other emerging threats. It is best to discover their features and evaluate the functionality using their free trials.

[mai mult...]

5 Tips to back up your Microsoft 365 assets

The Microsoft 365 suite provides a valuable set of business tools and assets that millions of people around the world rely on to accomplish their day-to-day tasks. These include popular services like Word, PowerPoint, and Excel, as well as the Exchange Online email messaging platform, OneDrive® cloud-based file storage, and SharePoint cloud collaboration tool.

Microsoft 365 (formerly known as Office 365) combines the accessibility and ease of use of the company’s tried-and-true programs with the benefits of cloud-based computing. This enables users to share and access files when working at the office, at home, or from different devices. However, because cloud-based computing inherently increases the surface area of a networked environment, the ease-of-access these solutions provide can also expose to an increased number of security risks.

One primary point of concern for many managed services providers (MSPs) is ensuring that data and assets are securely backed up. While Microsoft services and infrastructure have a strong reputation for high availability and reliability, the native security features of aren’t always enough to demonstrate compliance with data security standards. For instance, Microsoft 365 does not include backup solutions or self-service options for data recovery, nor is the company responsible in situations when hard deletes, deprovisioned accounts, or other site-specific recovery errors lead to potentially permanent data loss.

The limited options for reliably backing up data within the platform create a significant lack of IT oversight—which should be cause for alarm for MSPs. With end users looking to you to shore up their data security, keeping customer systems protected to prevent data loss requires a third-party backup solution. However, not all Microsoft 365 data tools are created equal. In this piece, we’ll touch on a few key criteria to look out for when selecting your software, as well as a few of our favorite tools that pass the test.

1. Focus on what you can control

When it comes down to it, the Microsoft data centers are ultimately outside the jurisdiction of your MSP. Instead of worrying about how you can’t control customers’ data, focus on the variables youcan control. In practical terms, this means providing backup services and data protection to customers to augment and expand upon the built-in features.

By providing your own services to customers, you can develop security strategies and define security policies for your customers to keep them safeguarded against a wide range of sources of data loss. Whether you’re dealing with an employee who accidentally deletes a file or a bad actor who launches a sophisticated malware attack, offering these additional services can protect your customers while they use third-party platforms.

2. Configure retention periods

While Office 365 does offer some retention options for deleted items, the platform is fairly limited when it comes to enterprise data backups and archiving. Exchange, for instance, retains items in the Deleted Items folder for 30 days before purging the files or messages permanently—but there is no data restoration feature in place. Once a file is gone, it’s gone for good.

That said, the Exchange admin center does allow MSPs to adjust these retention periods to match the specific needs of your customers’ security policies, whether that is a few days or a few years. Outlook® emails by default have 14-day backup periods, which can also be adjusted with administrative authorization.

There are a few limits to this functionality, though. While you can apply it to all Outlook email accounts, global administrator accounts with eDiscovery permissions are the only ones with the ability to restore deleted items. Recovered emails can be held for a specified duration or according to certain search filters (with a feature called Litigation Hold). This is a useful capability for MSPs to have in their toolbox, but the process of restoring items quickly becomes time-consuming, and therefore should not be relied on as the primary means of data recovery.

3. Adjust the OneDrive recycle bin to match

The collaborative element involved with OneDrive introduces an element of complexity, which can increase the likelihood of data loss if not properly accounted for. This is because OneDrive, in the process of tracking and managing edits from multiple users across multiple files, only retains the latest version of each file.

OneDrive does include a recycle bin feature, which stores the outdated file versions for 90 days by default and allows for previous file versions to be quickly restored as needed. Similar to Deleted Items folder in Exchange, you can configure the OneDrive recycle bin to hold onto older file versions for longer periods to better align with data security policies.

4. Deprovision strategically

When end users (employees) move on from your customer companies, a few things need to happen—one of the most important being that their user accounts need to be stripped of privileges to prevent them from potentially impacting business operations. This is especially important if the parting is not amicable or voluntary, or if the employee was involved in unauthorized access of restricted or sensitive resources. Depending on the specifics of your customers’ data security strategies and policies, you may retain these deactivated accounts for some time before deleting them to help ensure you don’t lose anything critical in the process.

This carries over to the employee’s various accounts as well, including Microsoft 365 subscriptions. You can choose to close a subscription for a former employee, but neither you nor your customers have any say over when it ultimately purges the account. The limited access window you have for these accounts is crucial to keep in mind—if a deactivated Microsoft 365 subscription leads to data loss, it has the potential of putting you at risk of violating retention policies.

5. Implement additional backup services to support your customers

While these tips are largely geared toward getting the most out of the native features and making them work for you, the more permanent and sustainable option is to find a software solution that provides comprehensive backup and archiving capabilities. The software you choose should help you support all services your customers utilize. The good news is that many third-party vendors provide multi-tenant software-as-a-service (SaaS) solutions that can seamlessly integrate with Microsoft 365.

How to select an email protection and backup tool

There are quite a few options out there built specifically for MSPs, so here are a few considerations to keep in mind while you are weighing your options:

  • Is the software straightforward to use? Make sure whatever tools you employ are solutions you can use effectively. Ideally, this means finding a software solution that provides backup protection for all customer workloads, rather than just Microsoft 365 data. Streamlined configuration and maintenance are two other elements to keep an eye out for in your search.
  • Does it make your job easier? The goal for MSPs is not to need a different security or solution for each of your customers’ services. Finding an all-in-one tool that enables you to consolidate your customer backup and recovery needs into a single management system will help you save on time and costs, while also reducing the complexity of strengthening data security.
  • Does it keep data secure? Look for tools that prioritize security, especially those that keep data encrypted both in transit and at rest. Software that incorporates artificial intelligence or machine learning to provide increased protection against new and emerging ransomware threats is also integral to preventing your customer data from becoming compromised.
  • Does it allow you to search for individual files? While full restores are an important feature, the reality is that most backup-related activities are simply focused on recovering one file. Rather than having to restore a complete image backup of a workstation to access one deleted item, the ability to search and restore emails and files is a key feature that MSPs should prioritize.

Regardless of which of these considerations you take into account, the point is that there are quite a few options on the market for you to explore. Knowing the specific features and capabilities you are looking for going into your search will help you find the right tool (or set of tools) that allow you to properly support your customers.

If you’re still not sure, we recommend going with the trusted products offered by N-able. Their cloud-based tools N-able Backup, Mail Assure, and RMM are designed specifically to meet the needs of MSPs, and can integrate with each other to offer a seamless technician experience. N-able Mail Assure offers comprehensive email security, archiving, and business continuity solutions, while N-able Backup offers consolidated backup and recovery management for user, workstation, and server data—including Microsoft 365 assets. Both of these tools can be integrated with N-able RMM for one powerful dashboard that technicians can use to gain full visibility into their customers’ environments.

Products from N-able (formerly SolarWinds MSP) are known not only for seamlessly integrating with each other for greater visibility in system operations, but also for offering a high degree of customization. This allows MSPs to tailor the backup and recovery solutions you provide customers to specifically meet their needs and policies—while also helping prevent data loss from Microsoft 365 accounts and files.

[mai mult...]

How To Organize Your Messy Windows Desktop

The desktop is a convenient place to store files and program shortcuts, but it can get messy fast. Here’s how to tidy your desktop up so you can quickly find everything you’re looking for—and make sure it stays nice and organized.

Hide All Your Desktop Icons

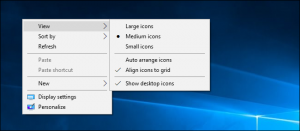
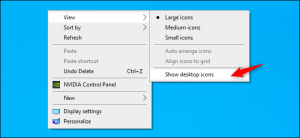
If you don’t use your desktop much, but programs keep dropping shortcuts on it, here’s a quick solution: Hide everything to get a perfectly clean desktop. To toggle desktop icons on or off, right-click your desktop and select View > Show Desktop Icons. Your desktop will appear empty.

To see your desktop icons again, click the “Show Desktop Icons” option again. Or, you can open a File Explorer or Windows Explorer window and click the “Desktop” folder to view the contents of your desktop in a standard file browser window. That’s the nuclear option, of course. If you like storing files and program shortcuts on your desktop, you won’t want to hide them all.

Quickly Sort Your Desktop Icons

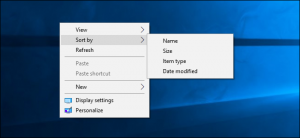
For a quick organization, you can right-click your desktop and select an option in the “Sort By” menu. For example, select “Name” to sort files alphabetically or “Date Modified” to sort them chronologically. This makes it easier to find what you’re looking for if your desktop is very messy.

You can also use the options under the “View” menu to choose the size of your desktop icons and decide whether they’re aligned to a grid. If you uncheck “Auto Arrange Icons,” you can drag and drop icons anywhere you want. If this option is enabled, icons will always be grouped, one after the other.

These options can be helpful, but they’re no substitute for truly taming the clutter.

Organize Your Files and Shortcuts Into Folders

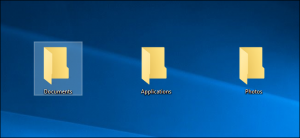
Consider using folders to keep your desktop organized. To create a folder, right-click the desktop, select New > Folder, and give the folder a name. Drag and drop items from your desktop into the folder. You can double-click a folder on your desktop to open it, so it takes a few more clicks to open your files—but they’re still easy to find.

For example, you could have separate folders for your photos and documents, or keep files related to a single project in their own folder. And yes, you can drag and drop program shortcuts into folders, too. If you’d like to clean up your desktop quickly, you can select everything on your desktop and then drag and drop them into a folder. You can then move items back onto your desktop as you need them.

Use the Desktop as a Temporary Working Area

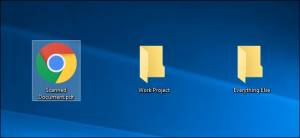
The desktop works well as a workspace, giving you a convenient place to store files with which you’re working currently. For example, you might store spreadsheets you’re working on, documents you’ve scanned, photos you’ve just taken, or things you’ve just downloaded on your desktop.

To keep the desktop useful for this task and prevent it from getting too cluttered, try only storing files on your desktop for as long as you need them. When you’re finished with a project or task, move the associated files to another folder like your main Documents or Photos folder—or even dump them in a folder on your desktop. In other words, treat the desktop like you should treat a physical desktop or counter—place things on it while you’re using it, and clear them away afterward rather than letting them pile up.

Put Shortcuts in Your Start Menu and Taskbar

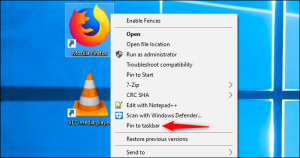
Programs often add shortcuts to your desktop when you install them, which makes your desktop get more and more cluttered over time. Try placing program shortcuts elsewhere, such as on your taskbar or in your Start menu. To pin a program shortcut to your taskbar, right-click it and select “Pin to Taskbar.” It will always appear as an icon on your taskbar, and you can drag the icon to the left or right to position it.

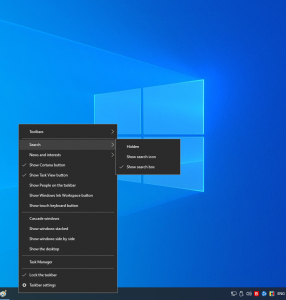
To get more space for icons on your taskbar, you can remove some things to free up space. For example, to hide the Cortana search box on Windows 10, right-click your taskbar and select Cortana > Hidden. You can also click Cortana > Show Cortana Icon, which will make Cortana be a standard taskbar icon instead of a large search box.

You can also place shortcuts in your Start menu. To do so, right-click a shortcut and select “Pin to Start.” On Windows 10, it will appear as a tile at the right side of your Start menu. On Windows 7, it will appear as a shortcut at the left side of your start menu. You can also pin apps right from the Start menu—either right-click a shortcut in the all apps list in the Start menu and select “Pin to Start,” or drag the icon to the pinned apps area.

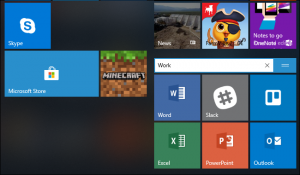
On Windows 10, you can drag and drop pinned application shortcuts in your Start menu to organize them into groups, and click the header at the top of the group to give it a name. For example, you could create a “Work” group with shortcuts to applications you use for work or a “Games” group that contains shortcuts for your games.

Also, if you’re using Windows 10, you can unpin all those pinned apps Microsoft put there to make the Start menu your own. Feel free to unpin any shortcuts you don’t use.

After you’ve moved all the shortcuts you want to your taskbar and Start menu, you can delete them from your desktop like you’d delete any file—or move them to a folder. If you accidentally delete a shortcut and want it back on your desktop, open your Start menu and find the shortcut in the list of all your installed applications. Drag and drop the shortcut to your desktop.

[mai mult...]
How to Create a Shortcut to an Application

To do this the easy way, open Windows 10’s Start menu. Look for the application you want to use by scrolling through the Apps list at the left side of the menu. If it’s in the tiles list at the right side of the menu, you can also drag it from there.

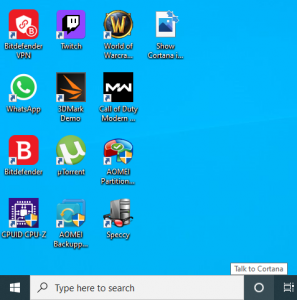
Once you’ve found it, drag and drop the application’s shortcut from your Start menu to your desktop. You’ll see the word “Link” appear when you’re hovering over the desktop. Release the mouse button to create a link to the program, also known as a desktop shortcut.

Note that you can’t search for the application by name in the Start menu. Windows 10 won’t let you drag and drop anything from the search results. It should, but it doesn’t.

How to Create a Shortcut to a File or Folder

To create a desktop shortcut to a file, first, locate the file somewhere in File Explorer. Hold down the Alt key on your keyboard and then drag and drop the file or folder to your desktop. The words “Create Link in Desktop” will appear. Release the mouse button to create the link.

Holding down Alt is necessary. If you don’t hold down Alt, Windows will show the words “Move to Desktop,” and it will move the folder or file to your desktop rather than simply creating a link.

How to Create a Shortcut to a Website

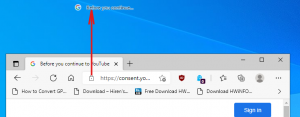
In Google Chrome or Mozilla Firefox and Microsoft Edge, you can quickly create desktop shortcuts to websites. With a web page open, drag and drop the icon to the left of the address bar—it’s generally a padlock or an “i” in a circle—to the desktop.

Working With Your Shortcuts

Whatever type of shortcut you create, you can right-click it afterward, select “Rename,” and change the name to whatever you like. You can use all the above methods to create shortcuts in other folders, too. Want to create a shortcut to a website or application in your Downloads folder? Go right ahead! Just drag and drop it to your desired location instead of the desktop.

ADVERTISEMENT

If you don’t see any shortcuts on your desktop, they may be hidden. Right-click the desktop and select View > Show Desktop Icons to unhide them.

You can also choose the size of your desktop icons from here—large, medium, or small. For more size options, position your mouse cursor over the desktop, hold down the Ctrl key, and scroll up and down with your mouse wheel.

[mai mult...]

How to Freely Move Pictures in Microsoft Word

By default, you can’t freely move pictures (by drag-and-drop) to any position in a Microsoft Word document without also placing them somewhere in the text. But with a small change, you can drag images anywhere.

Make a Picture Freely Move in a Word Document

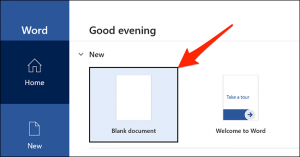
Using the method below, you can move a picture anywhere you want in your Word document—outside of the normal flow of text. You can even place the picture on top of an existing block of text if you want. We’ll use a blank document to do this. Start by opening Microsoft Word on your Windows or Mac computer. On Word’s first screen, select “Blank Document” to create a new document.

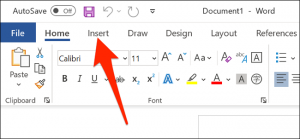
In Word’s editing window that opens, click the “Insert” tab at the top.

In the “Insert” tab under the “Illustrations” section, click Pictures > This Device. This lets you add a picture from your computer.

Use the “File Explorer” window that opens to navigate to the folder containing your picture. Double-click the picture to add it to your Word document.

Back on Word’s editing screen, right-click the image that you just added and select Wrap Text > In Front of Text from the menu.

Your picture is now freely movable. Drag and drop it anywhere you want in your document.

Make All Future Pictures Freely Move in a Word Document

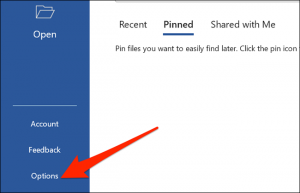
If you’d like to make all of your future pictures freely move in your Word documents, you can modify an option in Word’s settings menu. To do so, first, open Microsoft Word on your Windows or Mac computer. On Word’s main screen in the lower-left corner, click “Options.”

Note: If you’re on Word’s document editing screen instead, click “File” at the top to see the “Options” option.

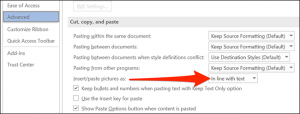
In the “Word Options” window, select “Advanced” in the sidebar on the left.

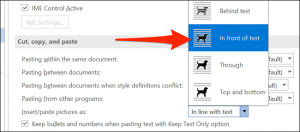
Scroll down the right pane to the “Cut, Copy, and Paste” section. In this section, find the “Insert/Paste Pictures As” option and click the drop-down menu next to it.

Select “In Front of Text” in the drop-down menu.

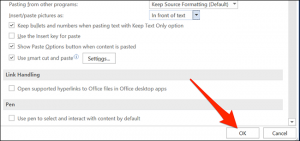
Click “OK” at the bottom of the “Word Options” window to close the window.

And that’s it. From now on, Word will allow you to freely move pictures on top of text in your documents.

[mai mult...]