How to factory reset your iPhone, iPad, or iPod touch
Make sure to back up your device so that you can restore your data later.
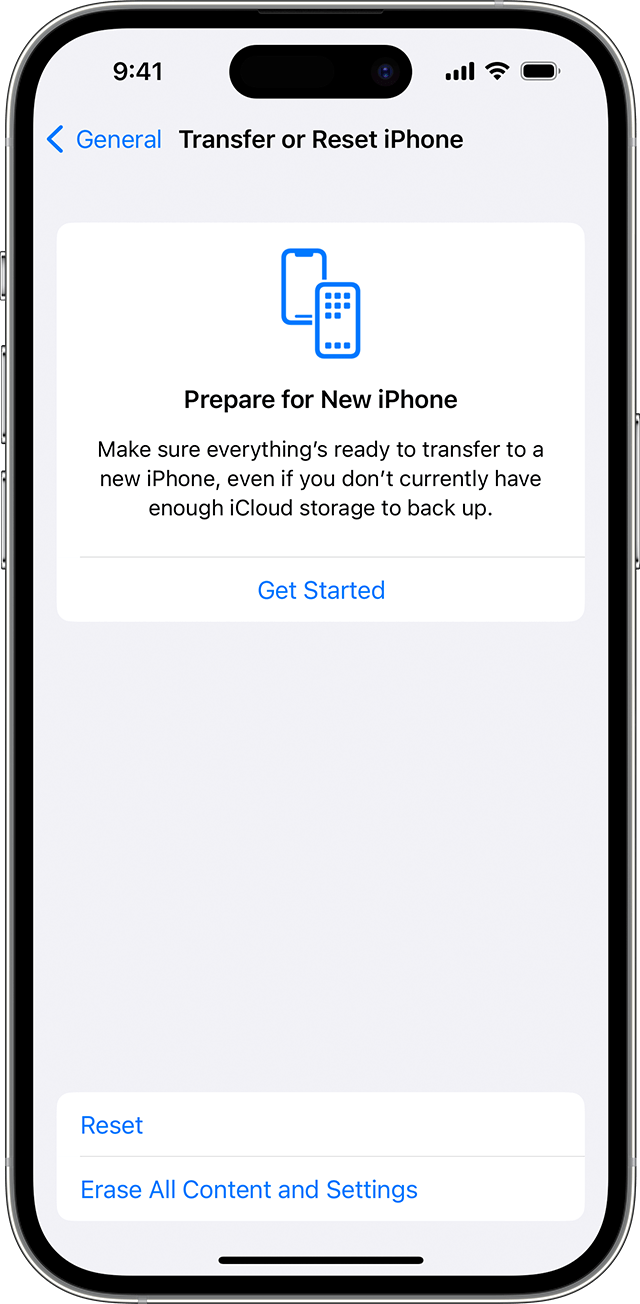
- Tap Settings > General > Transfer or Reset [Device]
- Tap Erase All Content and Settings.
If asked, enter your passcode or Apple Account password. Forgot your passcode or Apple Account password?
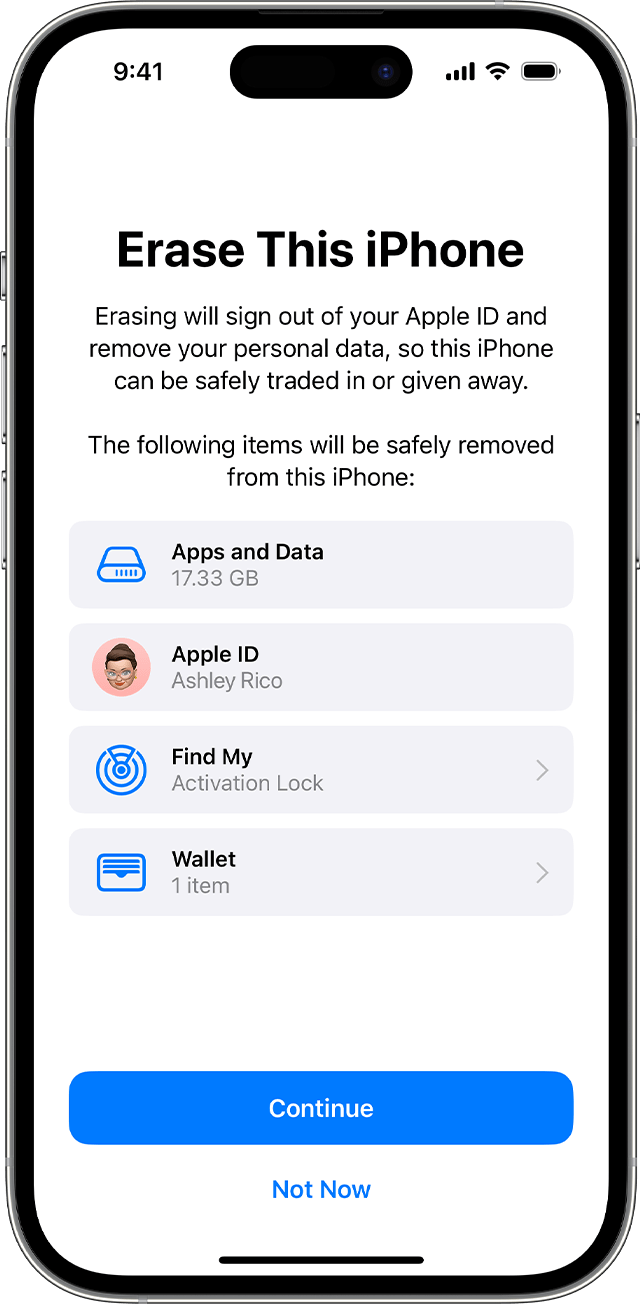
Confirm that you want to erase your device
If you have an eSIM, you can choose to erase your eSIM or keep it. If you erase your eSIM, you need to contact your carrier to reactivate your cellular plan.
Wait for your device to erase
It might take a few minutes to completely erase your data.
If you can’t erase your iPhone, iPad, or iPod touch
-
Learn what to do if you don’t remember your passcode for your iPhone, iPad, or iPod touch, or your device is disabled.
-
If you forget your Screen Time passcode, you can reset it. Restoring your device using a backup won’t remove the Screen Time passcode.